Use this procedure to manually grant Full Disk Access to macOS sensors.

Procedure


    • For macOS versions prior to macOS Ventura:
      1. In System Preferences, open the Security & Privacy pane and scroll down to Full Disk Access. Click the Lock icon to edit the settings.
      2. In the Full Disk Access window, locate com.vmware.carbonblack.cloud.se-agent.extension.systemextension and select its check box.
    • For macOS Ventura:
      1. In System Settings, open the Privacy & Security pane and scroll down to Full Disk Access.
      2. In the Full Disk Access window, locate com.vmware.carbonblack.cloud.se-agent.extension.systemextension and switch on its toggle to enable it. Enter your macOS username and password and then click Unlock to allow changes.
  1. Open a Finder window and go to /Applications/VMware Carbon Black Cloud/.
  2. Drag only the following folder items into the Full Disk Access list:
    • LiveQuery bundle
    • repmgr bundle
    • uninstall bundle
    • VMware CBCloud
      Figure 1. For macOS versions prior to macOS Ventura
      Folders in the Full Disk Access List For macOS versions prior to macOS Ventura
      Figure 2. For macOS Ventura
      Folders in the Full Disk Access List For macOS Ventura
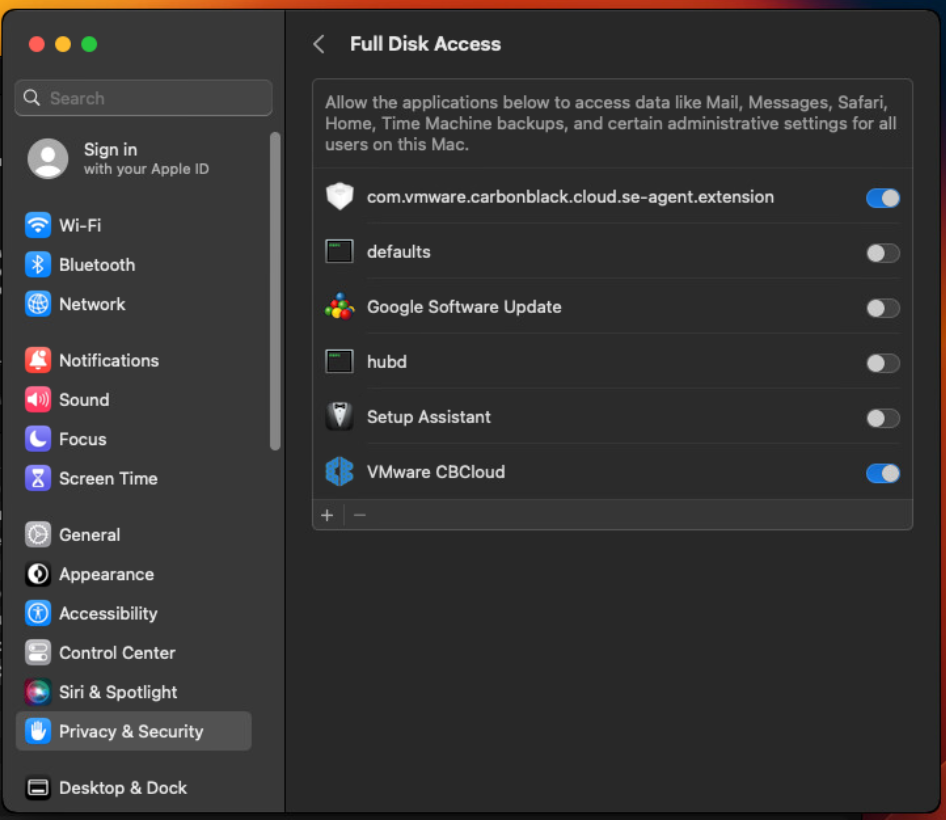
    Important: An Apple-acknowledged bug in the Full Disk Access pane prevents bundles from displaying in the window. It will appear as if the drag was not successful. This is not the case.
  3. Verify that Full Disk Access is successfully enabled. It takes approximately one hour for RepCLI to successfully report Full Disk Access changes. To verify the change immediately, restart the endpoint.
  4. Open a Terminal window and run one of the following commands (requires admin password):
    cd /Applications/VMware\ Carbon\ Black\ Cloud/repcli.bundle/Contents/MacOS/
    sudo ./repcli status
    or
    sudo /Applications/VMware\ Carbon\ Black\ Cloud/repcli.bundle/Contents/MacOS/repcli status
    RepCLI displays a sensor information report, including Full Disk Access status:
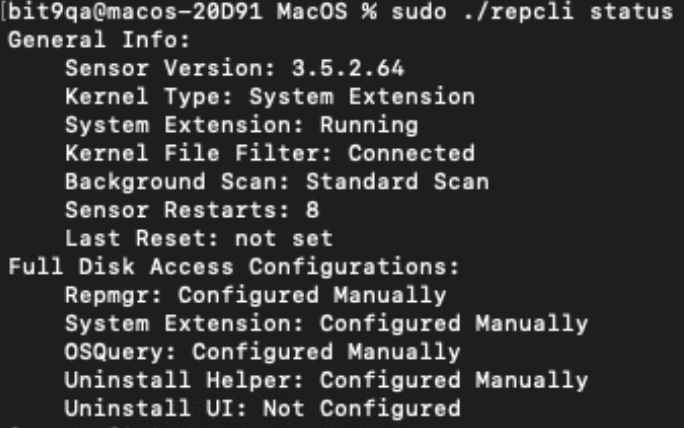
    RepCLI status output example

What to do next

Note: For information about mobile device management (MDM), see: