


Using the VMware Cloud Director Tenant Portal, you can create and manage named disks, review the organization virtual data center (VDC) storage policies and migrate storage entities from one storage policy to another.
Creating and Using Named Disks in the VMware Cloud Director Tenant Portal
Named disks are standalone virtual disks that you create in organization virtual data centers (VDCs). Organization administrators and users who have the necessary rights can create, remove, and update named disks, and connect them to virtual machines.
When you create a named disk, it is associated with an organization VDC but not with a VM. After you create the disk in a VDC, the disk owner or an administrator can attach it to any VM deployed in the VDC. If you have the Organization VDC Shared Named Disk: Create right in the VMware Cloud Director API or Create a Shared Disk right in the UI, you can create a shared named disk that you can attach to multiple VMs. The disk owner can also modify the disk properties, detach it from a VM, and remove it from the VDC. System administrators and organization administrators have the same rights to use and modify the disk as the disk owner.
- The disk sharing type creates an underlying independent persistent disk in vSphere with multi-writer mode enabled. The multi-writer option shares the named disk at the disk level so that multiple VMs across up to eight hosts can lock it at the same time. You cannot use Windows Server Failover Cluster (WSFC) configurations with disk level sharing.
- The controller sharing type creates a shared disk through physical SCSI bus sharing and supports configurations like WSFC. With the controller level sharing, up to eight VMs can access the same virtual disk simultaneously. A Windows cluster can have up to five VMs. To avoid simultaneous writes, the guest OS functionality chooses the node that can write on the shared disk.
If you attach a named disk, you cannot take VM snapshots. If a shared disk is attached to a VM, you cannot edit its hard disk setting from the VM details view. Also, due to a vCenter limitation, you cannot encrypt shared disks.
If the organization VDC has a storage policy with enabled VM encryption, you can encrypt VMs and disks by associating them with storage policies that have the VM Encryption capability. See Virtual Machine Encryption in VMware Cloud Director.
Create a Named Disk in VMware Cloud Director
In the VMware Cloud Director Tenant Portal, you can create a named disk and attach it to one or more virtual machines at a later stage.
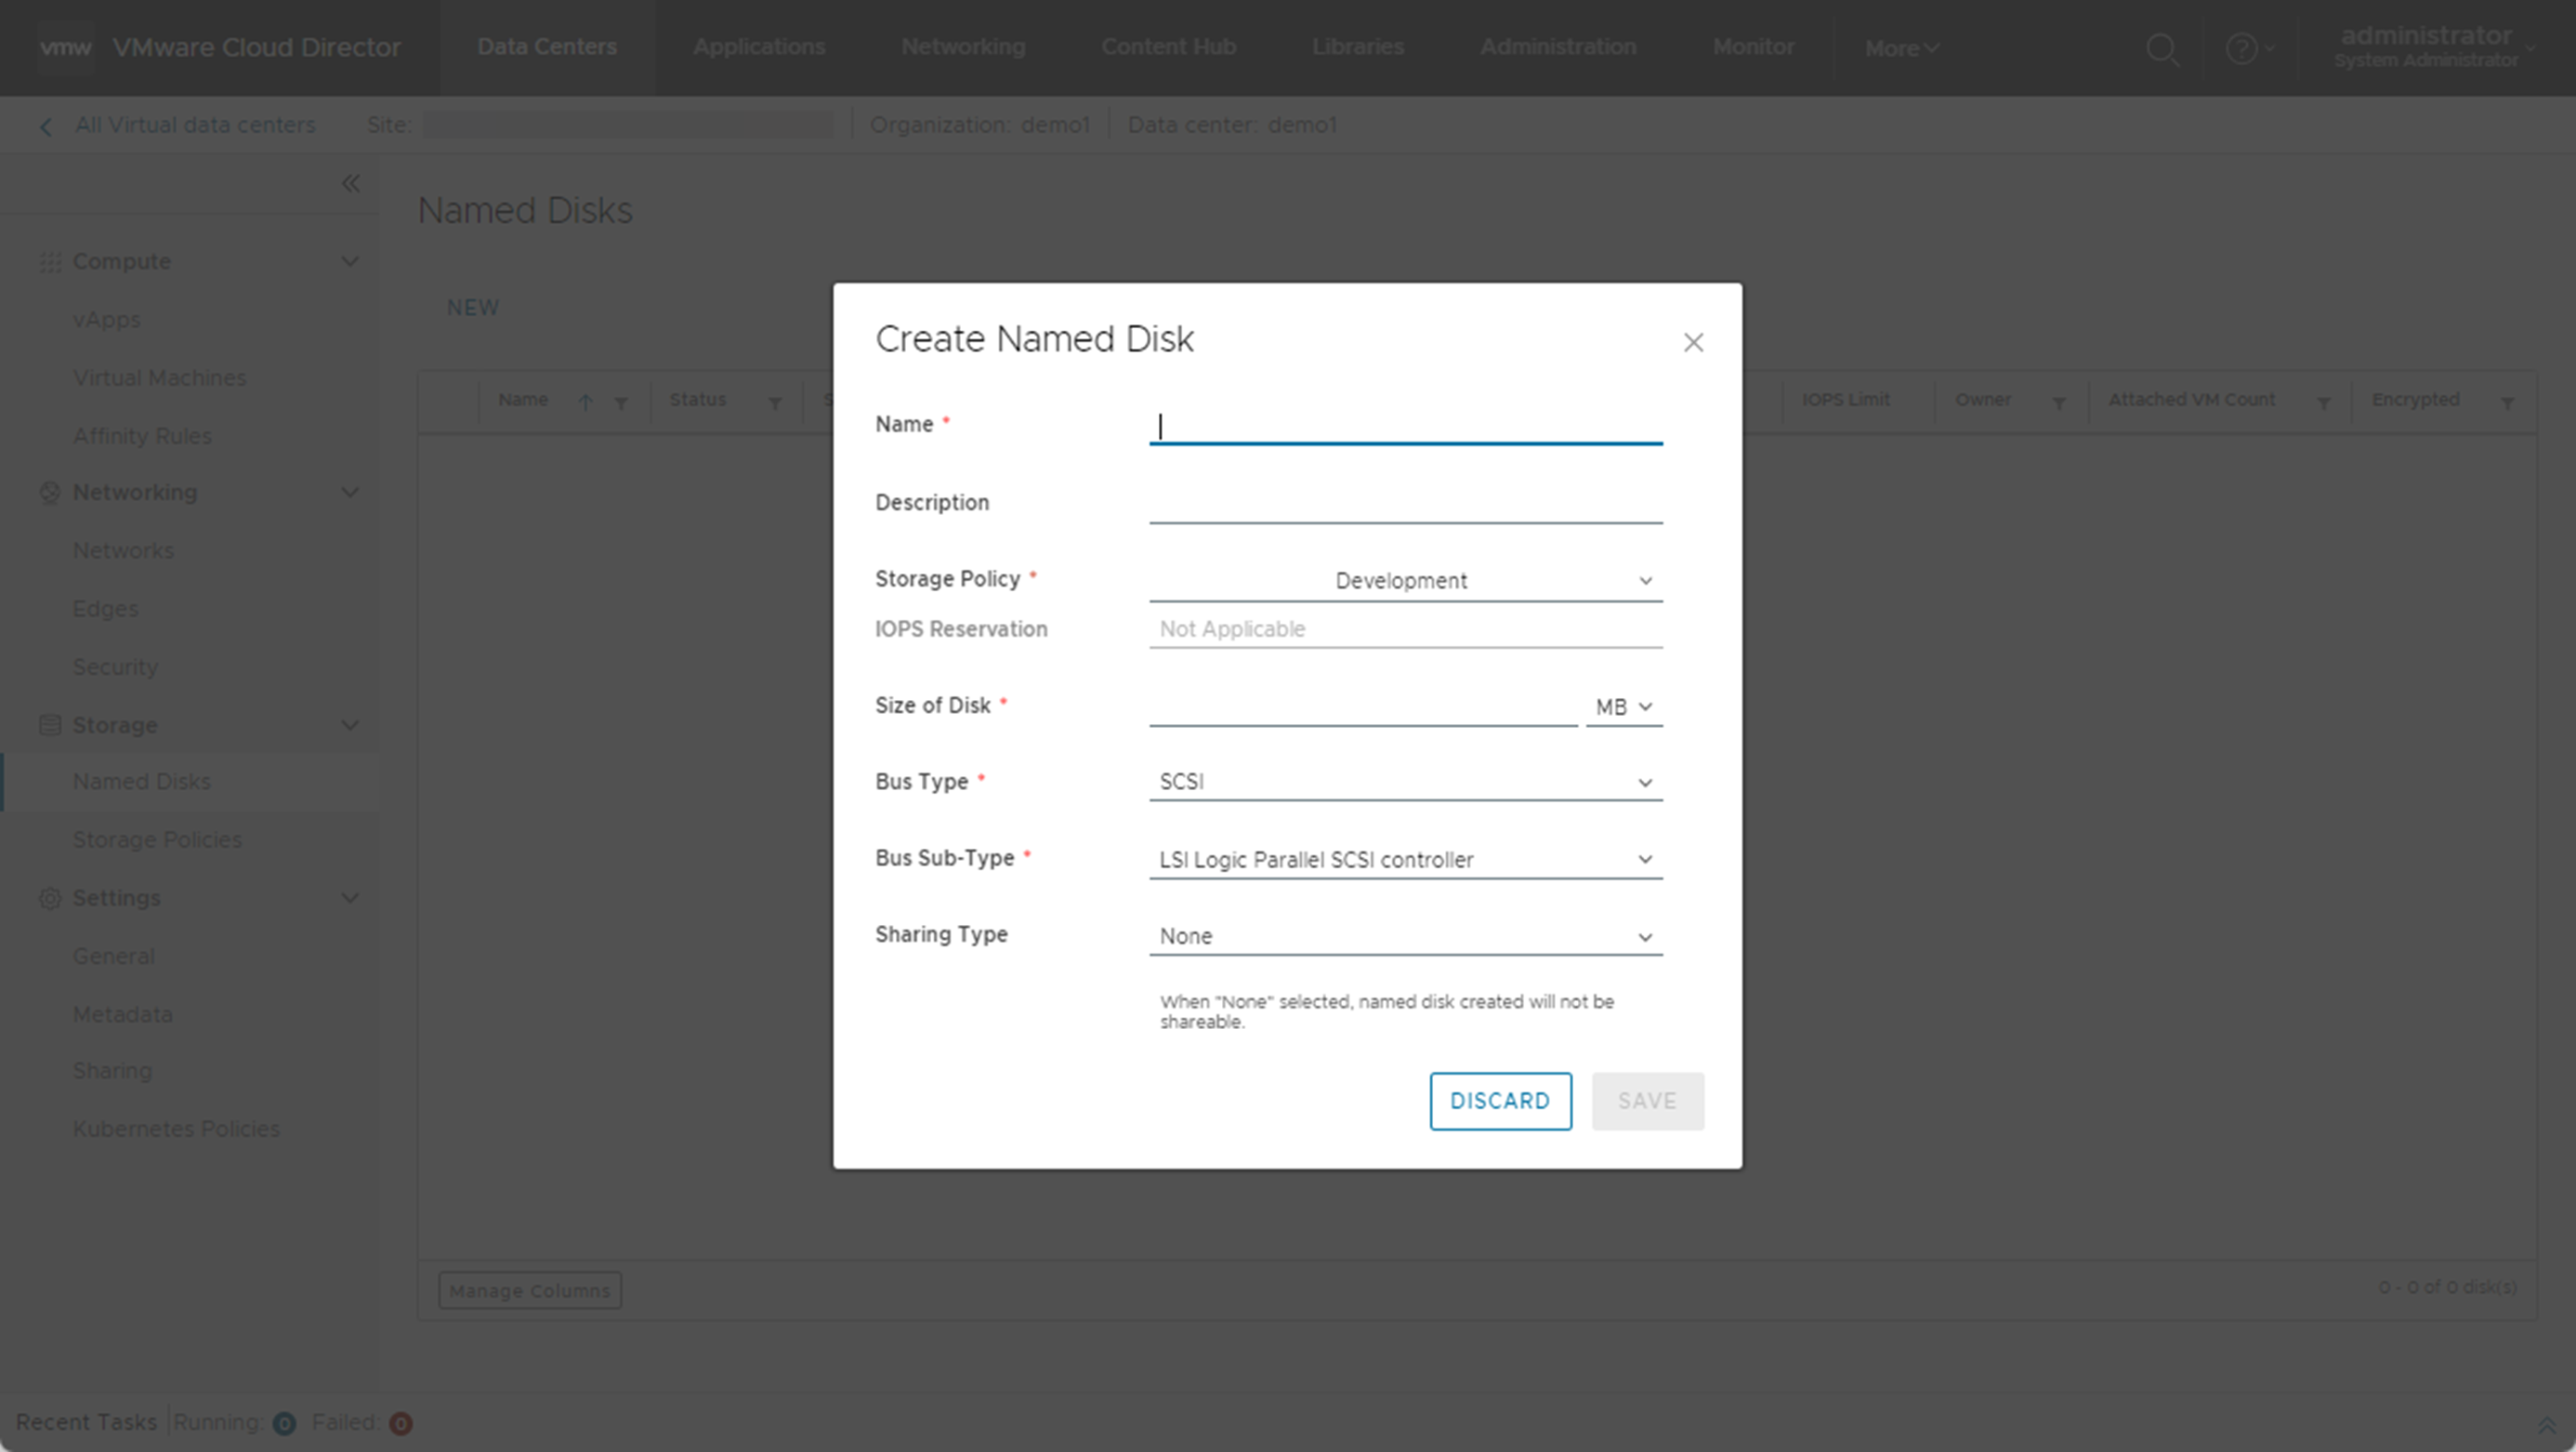
To create a named disk, you must specify its name and size. You can optionally include a description and select a storage profile to be used by the disk. You can create a shared disk that you can attach to multiple VMs.
If your underlying vSphere virtual infrastructure is version 6.7 or later, you can create a shared disk through physical SCSI bus sharing. However, vSphere 6.7 supports only vSphere Virtual Volumes storage. To use clustered VMDK support for Windows Server Failover Cluster (WSFC), your underlying vSphere virtual infrastructure must be version 7.0 or later. For more information, see Setup for Windows Server Failover Clustering in the VMware vSphere Product Documentation.
Prerequisites
- Verify that you are logged in as an organization administrator or a role with disk owner rights.
- If you want to create a shared disk, you must have the Create a Shared Disk right.
Procedure
Edit a Named Disk
After you create a named disk in the VMware Cloud Director Tenant Portal, you can modify its name, description, storage policy, and size.
Prerequisites
- You must have an organization administrator role or disk owner rights.
Procedure
- On the Virtual Data Center dashboard screen, click the card of the VDC you want to explore and under Storage, from the secondary left panel, select Named Disks.
- Select the disk you want to modify, and detach all VMs from it.
- Click Edit, and modify the settings of the named disk.
- Click Save.
What to do next
Attach or Detach a VMware Cloud Director Named Disk to a Virtual Machine
After you create a named disk in a VDC in the VMware Cloud Director Tenant Portal, you can attach it to any virtual machine that is deployed in the VDC. You can attach a shared named disk to multiple VMs. You can also detach a named disk.
Prerequisites
You must have an organization administrator role or disk owner rights.
Procedure
Delete a Named Disk
If you don't need a named disk in the VMware Cloud Director Tenant Portal, you can delete it.
Prerequisites
You must have an organization administrator role or disk owner rights.
Procedure
- On the Virtual Data Center dashboard screen, click the card of the VDC you want to explore and under Storage, from the secondary left panel, select Named Disks.
- Select the disk you want to delete, and click Delete.
- Click OK.
Review Storage Policy Properties in the VMware Cloud Director Tenant Portal
You can review the storage policies and storage policy details.
Prerequisites
Verify that you are logged in as an organization administrator or a role with equivalent set of rights.
Procedure
Migrate Storage Policy Entities Using the VMware Cloud Director Tenant Portal
Starting with VMware Cloud Director 10.5.1, if you want to merge two storage policies or to reassign storage entities in bulk before removing a storage policy, you can migrate one or more storage policy entities from one policy to another.
Prerequisites
- Verify that your organization has the Migrate Storage right.
Publishing the Migrate Storage right requires the following steps.
- The service provider must add the Migrate Storage right to the default rights bundle for your organization.
- The service provider must republish the rights bundle to the organization.
- You must log out and log in as an organization administrator or a role with equivalent set of rights.
-
Verify that you are logged in as an organization administrator or a role with equivalent set of rights.
- Verify that there are at least two storage policies in the organization VDC.
