The management domain in your environment must be upgraded before you upgrade VI workload domains. In order to upgrade to VMware Cloud Foundation 4.5.x, all VI workload domains in your environment must be at VMware Cloud Foundation 4.2.1 or higher. If your environment is at a version lower than 4.2.1, you must upgrade the workload domains to 4.2.1 and then upgrade to 4.5.x.

Within a VI workload domain, components must be upgraded in the following order.
  1. NSX-T.
  2. vCenter Server.
  3. If you have stretched clusters in your environment, upgrade the vSAN witness host. See Upgrade vSAN Witness Host for VMware Cloud Foundation.
  4. ESXi.
  5. Workload Management on clusters that have vSphere with Tanzu. Workload Management can be upgraded through vCenter Server. See Updating the vSphere with Tanzu Environment.
  6. If you suppressed the Enter Maintenance Mode prechecks for ESXi or NSX, delete the following lines from the /opt/vmware/vcf/lcm/lcm-app/conf/application-prod.properties file and restart the LCM service:

    lcm.nsxt.suppress.dry.run.emm.check=true

    lcm.esx.suppress.dry.run.emm.check.failures=true

  7. For NFS-based workload domains, add a static route for hosts to access NFS storage over the NFS gateway. See Post Upgrade Steps for NFS-Based VI Workload Domains.
After all upgrades have completed successfully:
  1. Remove the VM snapshots you took before starting the update.
  2. Take a backup of the newly installed components.

VMware Cloud Foundation Upgrade Prerequisites

Before you upgrade VMware Cloud Foundation, make sure that the following prerequisites are met.

  • Take a backup of the SDDC Manager appliance using an external SFTP server. See the "Backup and Restore of VMware Cloud Foundation" section in the VMware Cloud Foundation Administration Guide.
  • Before you upgrade a vCenter Server, take a file-based backup. See Manually Back Up vCenter Server.
  • No domain operations are in progress. Domain operations include creating VI workload domains, expanding a workload domain (adding a cluster or host), and shrinking a workload domain (removing a cluster or host).
  • Download the relevant bundles. See Downloading VMware Cloud Foundation Upgrade Bundles.
    Note: If you downloaded the bundles manually, you must download all bundles for the target release and upload them to the SDDC Manager appliance before starting the upgrade.
  • If you applied an async patch to your current VMware Cloud Foundation instance you must use the Async Patch Tool to enable an upgrade to a later version of VMware Cloud Foundation. For example, if you applied an async vCenter Server patch to a VMware Cloud Foundation 4.3.1 instance, you must use the Async Patch Tool to enable upgrade to VMware Cloud Foundation 4.5.x. See Async Patch Tool.
  • Make sure that there are no failed workflows in your system and none of the VMware Cloud Foundation resources are in activating or error state.
    Caution: If any of these conditions are true, contact VMware Support before starting the upgrade.
  • Ensure that passwords for all VMware Cloud Foundation components are valid.
  • Review the Release Notes for known issues related to upgrades.

Perform Update Precheck

You must perform a precheck before applying an update or upgrade bundle to ensure that your environment is ready for the update.

If you silence a vSAN Skyline Health alert in the vSphere Client, SDDC Manager skips the related precheck and indicates which precheck it skipped. Click Restore Precheck to include the silenced precheck. For example:
An example of an alert that was silenced in vSAN Skyline Health.
You can also silence failed vSAN prechecks in the SDDC Manager UI by clicking Silence Precheck. Silenced prechecks do not trigger warnings or block upgrades.
Important: You should only silence alerts if you know that they are incorrect. Do not silence alerts for real issues that require remediation.

Procedure

  1. In the navigation pane, click Inventory > Workload Domains.
  2. On the Workload Domains page, click the workload domain where you want to run the precheck.
  3. On the domain summary page, click the Updates/Patches tab. The image below is a sample screenshot and may not reflect the correct product versions.
    This screenshot is of domian summary page, click the Updates/Patches tab.
  4. Click Precheck to validate that the environment is ready to be upgraded.

    Once the precheck begins, a message appears indicating the time at which the precheck was started.Once the precheck begins, a message appears indicating the time at which the precheck was started on the Precheck page.

  5. Click View Status to see detailed tasks and their status. The image below is a sample screenshot and may not reflect the correct versions.
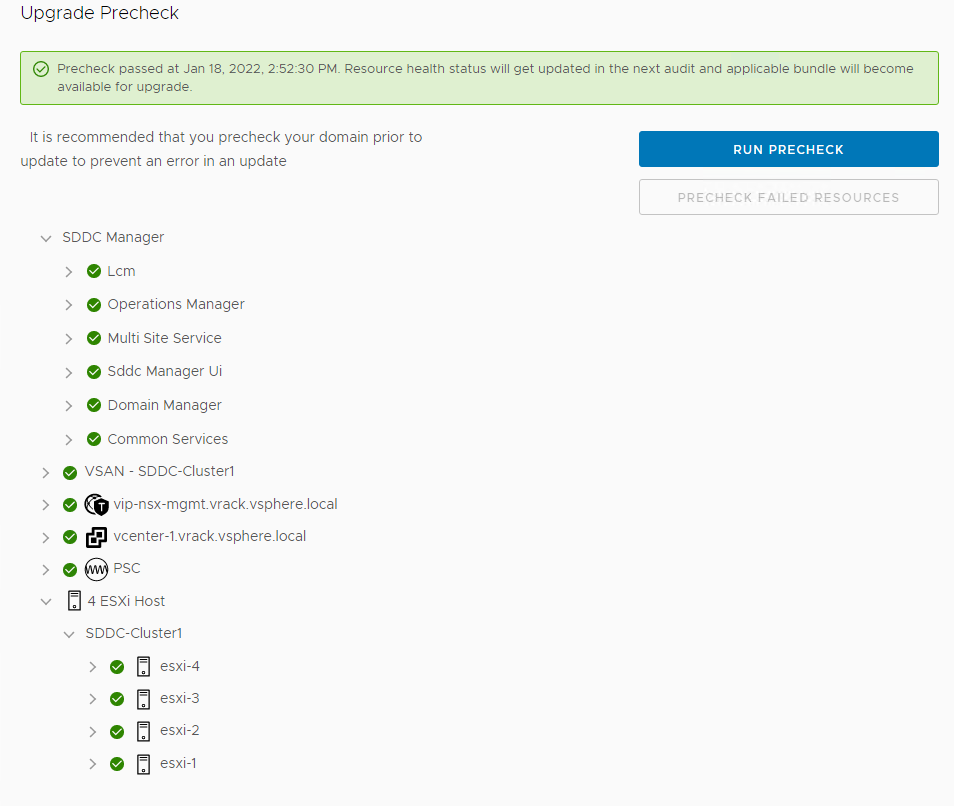
    This screenshot is of Upgrade Precheck page. Click View Status to see the detailed tasks and their status.
  6. To see details for a task, click the Expand arrow.
    If a precheck task failed, fix the issue, and click Retry Precheck to run the task again. You can also click Precheck Failed Resources to retry all failed tasks.
  7. If the workload domain contains a host that includes pinned VMs, the precheck fails at the Enter Maintenance Mode step. If the host can enter maintenance mode through vCenter Server UI, you can suppress this check for NSX-T Data Center and ESXi in VMware Cloud Foundation by following the steps below.
    1. Log in to SDDC Manager by using a Secure Shell (SSH) client with the user name vcf and password you specified in the deployment parameter workbook.
    2. Open the /opt/vmware/vcf/lcm/lcm-app/conf/application-prod.properties file.
    3. Add the following line to the end of the file:

      lcm.nsxt.suppress.dry.run.emm.check=true

      lcm.esx.suppress.dry.run.emm.check.failures=true

    4. Restart Lifecycle Management by typing the following command in the console window.

      systemctl restart lcm

    5. After Lifecycle Management is restarted, run the precheck again.

Results

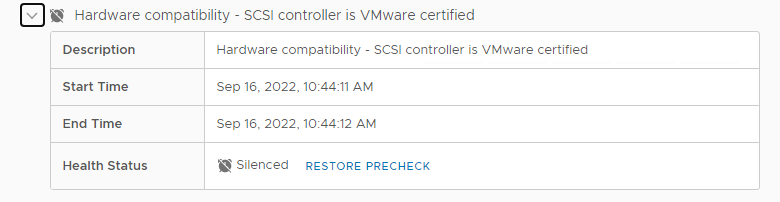
The precheck result is displayed at the top of the Upgrade Precheck Details window. If you click Exit Details, the precheck result is displayed at the top of the Precheck section in the Updates/Patches tab.

Ensure that the precheck results are green before proceeding. A failed precheck may cause the update to fail.

Upgrade NSX-T Data Center for VMware Cloud Foundation

Upgrade NSX-T Data Center in the management domain before you upgrade VI workload domains.

Upgrading NSX-T Data Center involves the following components:
  • Upgrade Coordinator
  • NSX Edge clusters (if deployed)
  • NSX Edge
  • Host clusters
  • NSX Manager cluster

VI workload domains can share the same NSX Manager cluster and NSX Edge clusters. When you upgrade these components for one VI workload domain, they are upgraded for all VI workload domains that share the same NSX Manager or NSX Edge cluster. You cannot perform any operations on the VI workload domains while NSX-T is being upgraded.

The upgrade wizard provides some flexibility when upgrading NSX-T Data Center for workload domains. By default, the process upgrades all NSX Edge clusters in parallel, and then all host clusters in parallel. Parallel upgrades reduce the overall time required to upgrade your environment. You can also choose to upgrade NSX Edge clusters and host clusters sequentially. The ability to select clusters allows for multiple upgrade windows and does not require all clusters to be available at a given time.
Note: The NSX Manager cluster is upgraded only if the Upgrade all host clusters setting is enabled on the Host Clusters tab. NSX Manager is upgraded after all host clusters in the workload domain are upgraded. New features introduced in the upgrade are not configurable until the NSX Manager cluster is upgraded.

Prerequisites

All applicable NSX-T Data Center updates must have been applied to all workload domains for the NSX-T Data Center upgrade bundle to be available for download. Otherwise, the status of the NSX-T Data Center bundle is displayed as Pending instead of Available for all workload domains.
  • Validate that the NSX Manager password is valid.
  • Download the upgrade bundle for NSX-T Data Center. See Downloading VMware Cloud Foundation Upgrade Bundles.
  • Back up the NSX-T Data Center configuration and download the technical support logs.
  • Ensure that the appropriate communication ports are open between the NSX Edge nodes and NSX Manager. For more information on ports, see https://ports.esp.vmware.com/home/NSX.
  • Review Operational Impacts of NSX-T Data Center Upgrade in NSX Upgrade Guide to understand the impact that each component upgrade might have on your environment.
  • Ensure there are no active alarms on hosts or vSphere clusters using the vSphere Client.
  • Customers upgrading to NSX-T 3.2.1.2 are strongly encouraged to run the NSX Upgrade Evaluation Tool before starting the upgrade process. The tool is designed to ensure success by checking the health and readiness of your NSX Managers prior to upgrading.

Procedure

  1. In the navigation pane, click Inventory > Workload Domains.
  2. On the Workload Domains page, click the domain you are upgrading and then click the Updates/Patches tab.
    When you upgrade NSX-T components for a selected VI workload domain, those components are upgraded for all VI workload domains that share the NSX Manager cluster.
  3. Click Precheck to run the upgrade precheck.
    Resolve any issues before proceeding with the upgrade.
    Note: The NSX-T precheck runs on all VI workload domains in your environment that share the NSX Manager cluster.
  4. In the Available Updates section, select the target release.
  5. Click Update Now or Schedule Update next to the VMware Software NSX-T bundle.
  6. On the NSX-T Edge Cluster page, select the NSX Edge clusters you want to upgrade and click Next.
    By default, all NSX Edge clusters are upgraded. To select specific NSX Edge clusters, select the Upgrade NSX-T edge clusters only checkbox and select the Enable edge selection option. Then select the NSX Edges you want to upgrade.
  7. Click Next.
  8. By default, all vSphere clusters across all workload domains are upgraded. If you want to select specific vSphere clusters to be upgraded, turn off the Upgrade all host clusters setting. Host clusters are upgraded after all Edge clusters have been upgraded.
    Note: The NSX-T Manager cluster is upgraded only if the Upgrade all host clusters setting is enabled.
    • If you have a single cluster in your environment, enable the Upgrade all host clusters setting.
    • If you have multiple host clusters and choose to upgrade only some of them, you must go through the NSX-T upgrade wizard again until all host clusters have been upgraded. When selecting the final set of clusters to be upgraded, you must enable the Upgrade all host clusters setting so that NSX-T Manager is upgraded.
    • If you have upgraded all host clusters without enabling the Upgrade all host clusters setting, run through the NSX-T upgrade wizard again and schedule the upgrade to upgrade NSX-T Manager.
  9. Click Next.
  10. On the Upgrade Options dialog, select the upgrade optimizations and click Next.
    By default, Edge clusters and host clusters are upgraded in parallel. You can enable sequential upgrade by selecting the relevant checkbox.
  11. If you selected the Schedule Upgrade option, specify the date and time for the NSX-T Data Center bundle to be applied.
  12. Click Next.
  13. On the Review page, review your settings and click Finish.

    The NSX-T Data Center upgrade begins and the upgrade components are displayed. The upgrade view displayed here pertains to the workload domain where you applied the bundle. Click the link to the associated workload domains to see the components pertaining to those workload domains.

  14. Monitor the upgrade progress. See Monitor VMware Cloud Foundation Updates.
    If a component upgrade fails, the failure is displayed across all associated workload domains. Resolve the issue and retry the failed task.

Results

When all NSX-T Data Center workload components are upgraded successfully, a message with a green background and check mark is displayed.

Upgrade NSX-T Data Center for VMware Cloud Foundation in a Federated Environment

When NSX Federation is configured between two VMware Cloud Foundation instances, SDDC Manager does not manage the lifecycle of the NSX Global Managers. To upgrade the NSX Global Managers, you must first follow the standard lifecycle of each VMware Cloud Foundation instance using SDDC Manager, and then manually upgrade the NSX Global Managers for each instance.

Download NSX Global Manager Upgrade Bundle

SDDC Manager does not manage the lifecycle of the NSX Global Managers. You must download the NSX-T Data Center upgrade bundle manually to upgrade the NSX Global Managers.

Procedure

  1. In a web browser, go to VMware Customer Connect and browse to the download page for the version of NSX-T Data Center listed in the VMware Cloud Foundation Release Notes BOM.
  2. Locate the NSX version Upgrade Bundle and click Read More.
  3. Verify that the upgrade bundle filename extension ends with .mub.
    The upgrade bundle filename has the following format VMware-NSX-upgrade-bundle-versionnumber.buildnumber.mub.
  4. Click Download Now to download the upgrade bundle to the system where you access the NSX Global Manager UI.

Upgrade the Upgrade Coordinator for NSX Federation

The upgrade coordinator runs in the NSX Manager. It is a self-contained web application that orchestrates the upgrade process of hosts, NSX Edge cluster, NSX Controller cluster, and the management plane.

The upgrade coordinator guides you through the upgrade sequence. You can track the upgrade process and, if necessary, you can pause and resume the upgrade process from the UI.

Procedure

  1. In a web browser, log in to Global Manager for the domain at https://nsxt_gm_vip_fqdn/).
  2. Select System > Upgrade from the navigation panel.
  3. Click Proceed to Upgrade.
  4. Navigate to the upgrade bundle .mub file you downloaded or paste the download URL link.
    • Click Browse to navigate to the location you downloaded the upgrade bundle file.
    • Paste the VMware download portal URL where the upgrade bundle .mub file is located.
  5. Click Upload.
    When the file is uploaded, the Begin Upgrade button appears.
  6. Click Begin Upgrade to upgrade the upgrade coordinator.
    Note:

    Upgrade one upgrade coordinator at a time.

  7. Read and accept the EULA terms and accept the notification to upgrade the upgrade coordinator..
  8. Click Run Pre-Checks to verify that all NSX-T Data Center components are ready for upgrade.
    The pre-check checks for component connectivity, version compatibility, and component status.
  9. Resolve any warning notifications to avoid problems during the upgrade.

Upgrade NSX Global Managers for VMware Cloud Foundation

Manually upgrade the NSX Global Managers when NSX Federation is configured between two VMware Cloud Foundation instances.

Prerequisites

Before you can upgrade NSX Global Managers, you must upgrade all VMware Cloud Foundation instances in the NSX Federation, including NSX Local Managers, using SDDC Manager.

Procedure

  1. In a web browser, log in to Global Manager for the domain at https://nsxt_gm_vip_fqdn/).
  2. Select System > Upgrade from the navigation panel.
  3. Click Start to upgrade the management plane and then click Accept.
  4. On the Select Upgrade Plan page, select Plan Your Upgrade and click Next.
    The NSX Manager UI, API, and CLI are not accessible until the upgrade finishes and the management plane is restarted.

Upgrade vCenter Server for VMware Cloud Foundation

The upgrade bundle for VMware vCenter Server is used to upgrade the vCenter Servers managed by SDDC Manager. Upgrade vCenter Server in the management domain before upgrading vCenter Server in VI workload domains.

Note: Parallel upgrades of vCenter Server are not supported. The vCenter Server instance for each workload domain must be upgraded separately.

Prerequisites

  • Download the VMware vCenter Server upgrade bundle. See Downloading VMware Cloud Foundation Upgrade Bundles.
  • Take a file-based backup of the vCenter Server appliance before starting the upgrade. See Manually Back Up vCenter Server.
    Note: After taking a backup, do not make any changes to the vCenter Server inventory or settings until the upgrade completes successfully.
  • If your workload domain contains Workload Management (vSphere with Tanzu) enabled clusters, the supported target release depends on the version of Kubernetes (K8s) currently running in the cluster. Older versions of K8s may require a specific upgrade sequence. See KB 88962 for more information.

Procedure

  1. In the navigation pane, click Inventory > Workload Domains.
  2. On the Workload Domains page, click the domain you are upgrading and then click the Updates/Patches tab.
  3. Click Precheck to run the upgrade precheck.
    Resolve any issues before proceeding with the upgrade.
  4. In the Available Updates section, select the target release.
  5. Click Update Now or Schedule Update next to the vCenter upgrade bundle.
  6. If you selected Schedule Update, click the date and time for the bundle to be applied and click Schedule.
  7. Monitor the upgrade progress. See Monitor VMware Cloud Foundation Updates.
    If the upgrade fails, resolve the issue and retry the failed task. If you cannot resolve the issue, restore vCenter Server using the file-based backup. See Restore vCenter Server.

What to do next

Once the upgrade successfully completes, use the vSphere Client to change the vSphere DRS Automation Level setting back to the original value (before you took a file-based backup) for each vSphere cluster that is managed by the vCenter Server. See KB 87631 for information about using VMware PowerCLI to change the vSphere DRS Automation Level.

Upgrade vSAN Witness Host for VMware Cloud Foundation

If your VMware Cloud Foundation environment contains stretched clusters, update and remediate the vSAN witness host.

Prerequisites

Download the ESXi ISO that matches the version listed in the the Bill of Materials (BOM) section of the VMware Cloud Foundation Release Notes.

Procedure

  1. In a web browser, log in to vCenter Server at https://vcenter_server_fqdn/ui.
  2. Upload the ESXi ISO image file to vSphere Lifecycle Manager.
    1. Click Menu > Lifecycle Manager.
    2. Click the Imported ISOs tab.
    3. Click Import ISO and then click Browse.
    4. Navigate to the ESXi ISO file you downloaded and click Open.
    5. After the file is imported, click Close.
  3. Create a baseline for the ESXi image.
    1. On the Imported ISOs tab, select the ISO file that you imported, and click New baseline.
    2. Enter a name for the baseline and specify the Content Type as Upgrade.
    3. Click Next.
    4. Select the ISO file you had imported and click Next.
    5. Review the details and click Finish.
  4. Attach the baseline to the vSAN witness host.
    1. Click Menu > Hosts and Clusters.
    2. In the Inventory panel, click vCenter > Datacenter.
    3. Select the vSAN witness host and click the Updates tab.
    4. Under Attached Baselines, click Attach > Attach Baseline or Baseline Group.
    5. Select the baseline that you had created in step 3 and click Attach.
    6. Click Check Compliance.
      After the compliance check is completed, the Status column for the baseline is displayed as Non-Compliant.
  5. Remediate the vSAN witness host and update the ESXi hosts that it contains.
    1. Right-click the vSAN witness and click Maintenance Mode > Enter Maintenance Mode.
    2. Click OK.
    3. Click the Updates tab.
    4. Select the baseline that you had created in step 3 and click Remediate.
    5. In the End user license agreement dialog box, select the check box and click OK.
    6. In the Remediate dialog box, select the vSAN witness host, and click Remediate.
      The remediation process might take several minutes. After the remediation is completed, the Status column for the baseline is displayed as Compliant.
    7. Right-click the vSAN witness host and click Maintenance Mode > Exit Maintenance Mode.
    8. Click OK.

Upgrade VxRail Manager and ESXi Hosts for VMware Cloud Foundation

Use the VxRail upgrade bundle to upgrade VxRail Manager and the ESXi hosts in the workload domain. Upgrade the management domain first and then VI workload domains.

By default, the upgrade process upgrades the ESXi hosts in all clusters in a workload domain in parallel. If you have multiple clusters in the management domain or in a VI workload domain, you can select the clusters to upgrade. You can also choose to upgrade the clusters in parallel or sequentially.

If you are using external (non-vSAN) storage, the following procedure updates the ESXi hosts attached to the external storage. However, updating and patching the storage software and drivers is a manual task and falls outside of SDDC Manager lifecycle management. To ensure supportability after an ESXi upgrade, consult the vSphere HCL and your storage vendor.

Prerequisites

  • Validate that the ESXi passwords are valid.
  • Download the VxRail upgrade bundle. See Downloading VMware Cloud Foundation Upgrade Bundles.
  • Ensure that the domain for which you want to perform cluster-level upgrade does not have any hosts or clusters in an error state. Resolve the error state or remove the hosts and clusters with errors before proceeding.

Procedure

  1. Navigate to the Updates/Patches tab of the workload domain.
  2. Click Precheck to run the upgrade precheck.
    Resolve any issues before proceeding with the upgrade.
  3. In the Available Updates section, select the target release.
  4. Click Upgrade Now or Schedule Update.
    If you selected Schedule Update, specify the date and time for the bundle to be applied.
  5. Select the clusters to upgrade and click Next.
    The default setting is to upgrade all clusters. To upgrade specific clusters, click Enable cluster-level selection and select the clusters to upgrade.
  6. Click Next.
  7. Select the upgrade options and click Finish.
    By default, the selected clusters are upgraded in parallel. If you selected more than five clusters to be upgraded, the first five are upgraded in parallel and the remaining clusters are upgraded sequentially. To upgrade all selected clusters sequentially, select Enable sequential cluster upgrade.
    Click Enable Quick Boot if desired. Quick Boot for ESXi hosts is an option that allows Update Manager to reduce the upgrade time by skipping the physical reboot of the host.
  8. Monitor the upgrade progress. See Monitor VMware Cloud Foundation Updates.

Post Upgrade Steps for NFS-Based VI Workload Domains

After upgrading VI workload domains that use NFS storage, you must add a static route for hosts to access NFS storage over the NFS gateway. This process must be completed before expanding the workload domain.

Procedure

  1. Identify the IP address of the NFS server for the VI workload domain.
  2. Identify the network pool associated with the hosts in the cluster and the NFS gateway for the network pool.
    1. Log in to SDDC Manager.
    2. Click Inventory > Workload Domains and then click the VI workload domain.
    3. Click the Clusters tab and then click an NFS-based cluster.
    4. Click the Hosts tab and note down the network pool for the hosts.
    5. Click the Info icon next to the network pool name and note down the NFS gateway.
  3. Ensure that the NFS server is reachable from the NFS gateway. If a gateway does not exist, create it.
  4. Identify the vmknic on each host in the cluster that is configured for NFS traffic.
  5. Configure a static route on each host to reach the NFS server from the NFS gateway.
    esxcli network ip route ipv4 add -g NFS-gateway-IP -n NFS-gateway
  6. Verify that the new route is added to the host using the NFS vmknic.
    esxcli network ip route ipv4 list
  7. Ensure that the hosts in the NFS cluster can reach the NFS gateway through the NFS vmkernel.
    For example:
    vmkping -4 -I vmk2 -s 1470 -d -W 5 10.0.22.250
  8. Repeat steps 2 through 7 for each cluster using NFS storage.