


Describes in detail how to configure a Data Loss Prevention (DLP) rule for a selected Security Policy.
Before you begin
To configure a Security Policy, users must have first created a Security Policy. For specific instructions on how to create a Security Policy, see Creating a Security Policy.
Configuration Steps
- Navigate to .
- Select a security policy to configure DLP rule and then click the DLP tab.
- In the DLP tab of the Security Policies screen, click + ADD RULE.
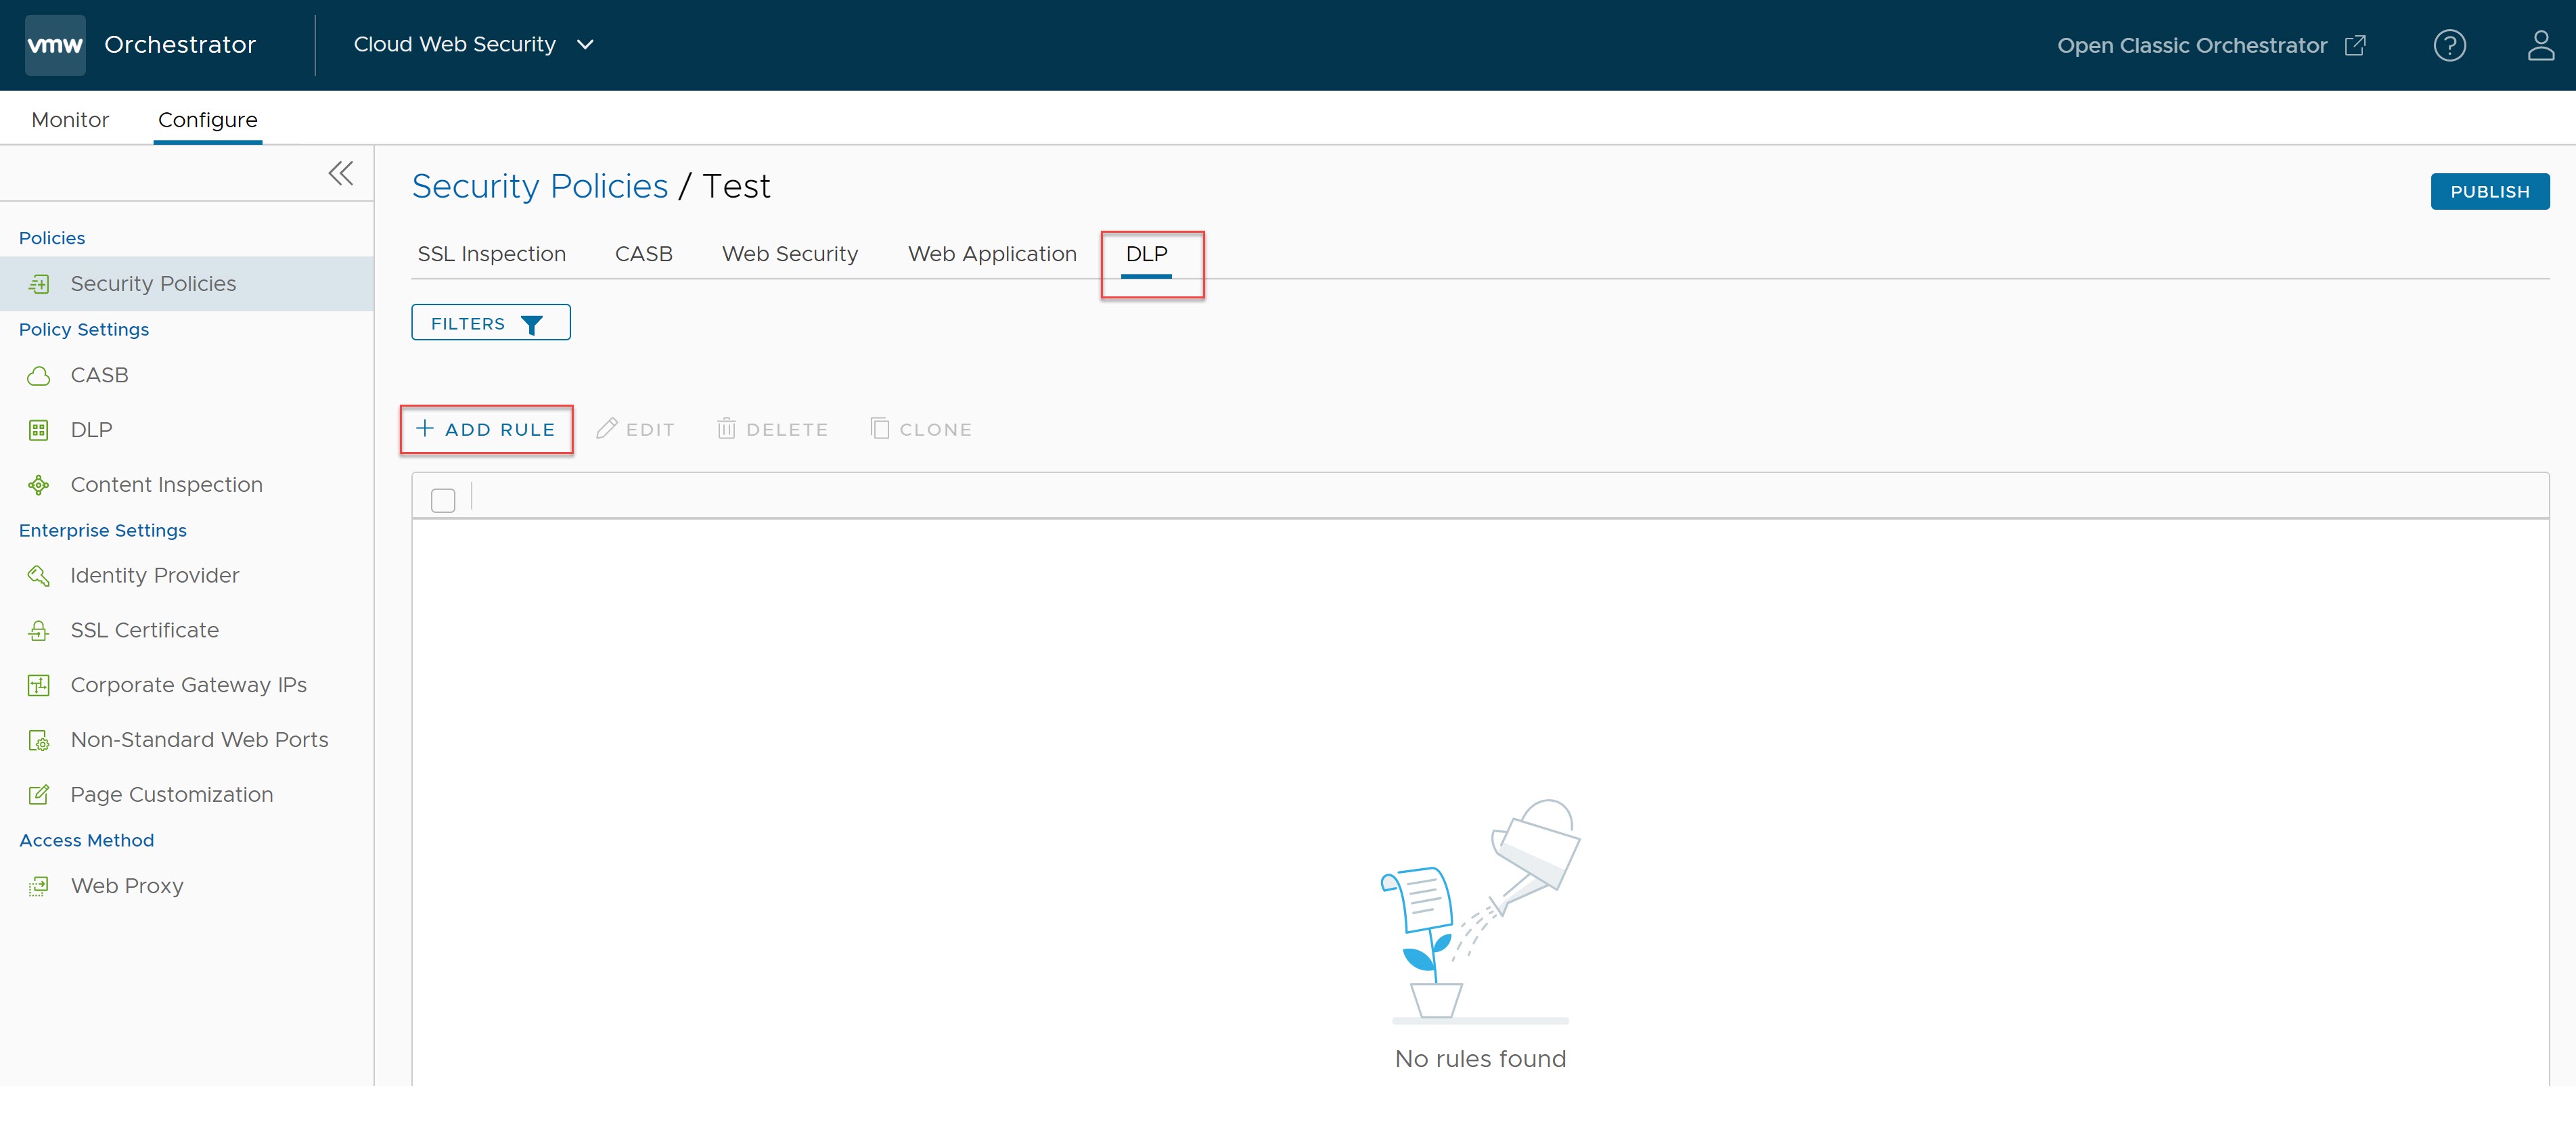
The Select Source screen appears.
- In the Select Source screen, select the All Users Groups check box to apply the rule to all users and groups, or deselect that check box to specify Users and Groups. By default, All Users Groups is selected for the Source.
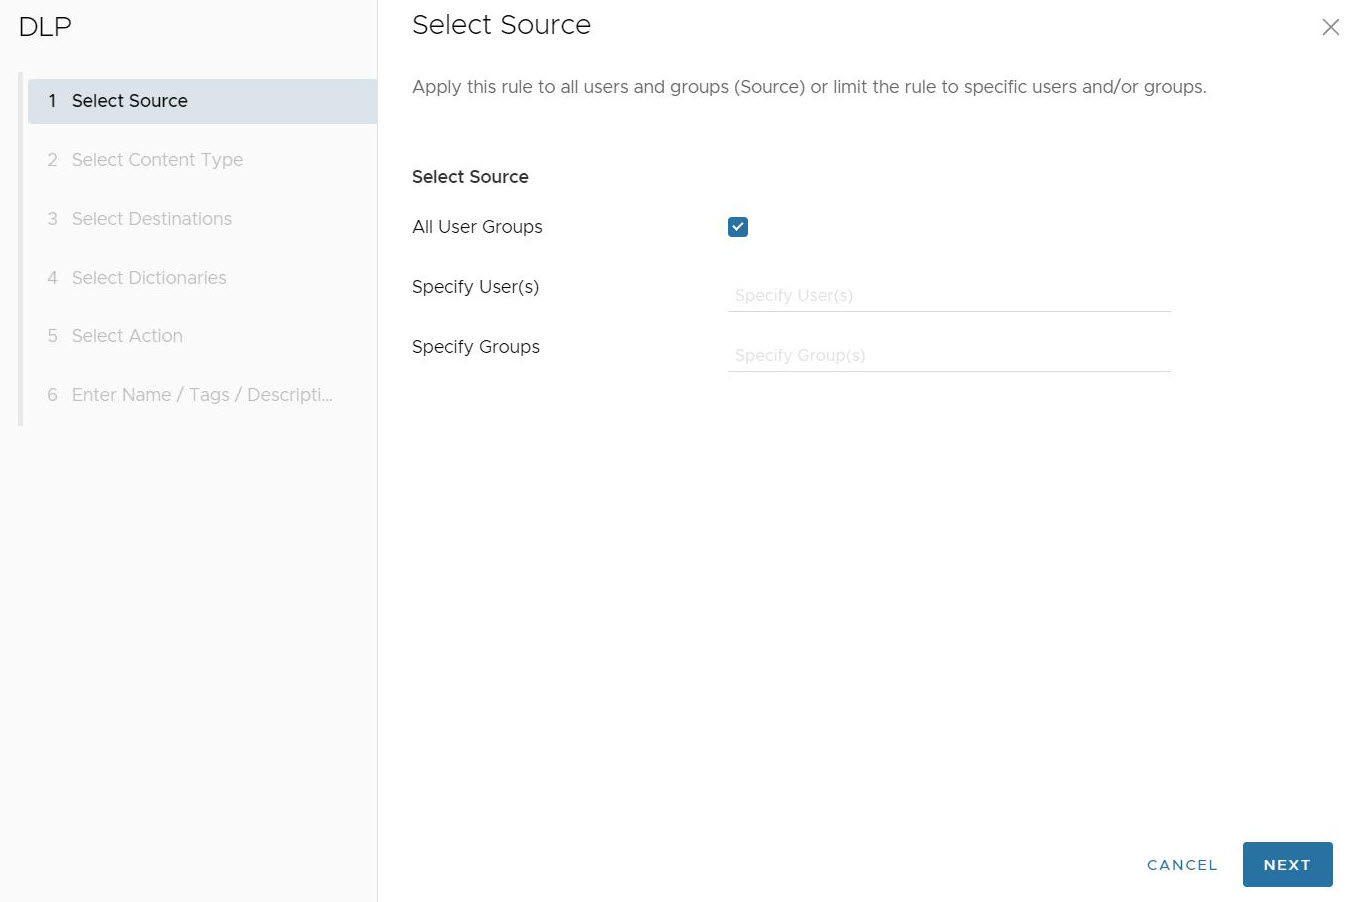 Note: All Users Groups is the only option for customers that do not have an Identity Provider (IdP) like Workspace ONE or Azure Active Directory (AD) configured for Cloud Web Security.Note: Cloud Web Security must be configured with an Identity Provider (IdP) like Workspace ONE or Azure Active Directory (AD) for specific Users and Groups to work.
Click Next, the Select Content Type screen appears.
- In the Select Content Type screen, users can configure the types of content that are triggered by the DLP inspection feature. There are three parameters that can be configured for content type:
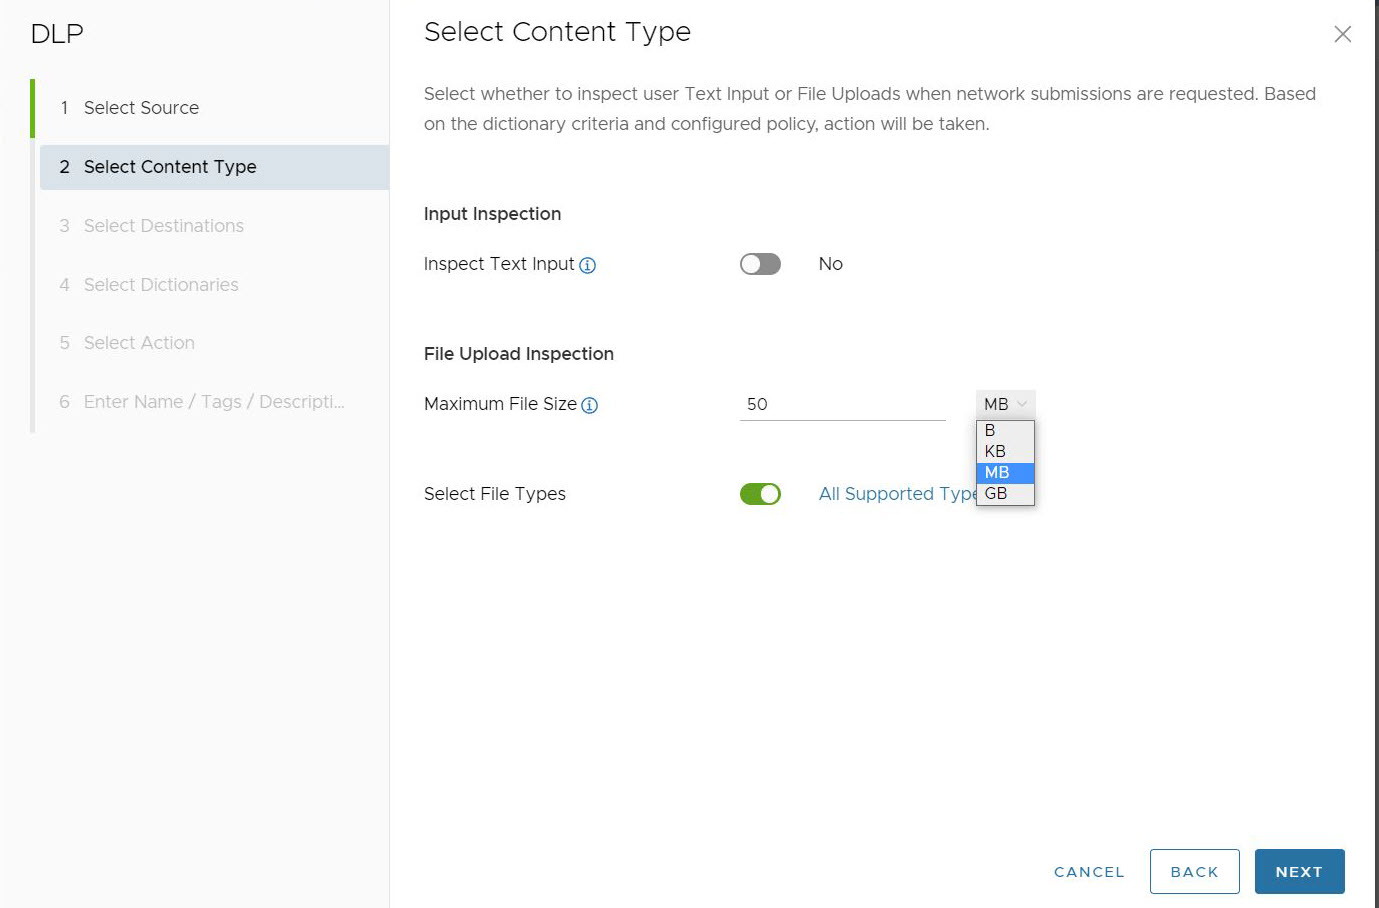
- Choose whether the DLP rule should Inspect Text Input or not. The default for this option is Off. When toggled to On, user Text Input will pass through DLP inspection when network submissions are requested.
Note: Text Input is like a form post or text message. Text Input is different from a Text File, which is an actual .txt attached to an upload.
- Maximum File Size allows users to choose whether to inspect file uploads by defining a maximum file size to be inspected. The default setting for this option is 50 Megabytes (MB), and users can configure a Maximum File Size value both numerically, and by units of storage: Byte (B), Kilobyte (KB), Megabyte (MB), or Gigabyte (GB). If the uploaded file size is greater than the configured Maximum File Size value, the file is not inspected by DLP and is allowed through.
Note: The Maximum File Size numerical value can be configured as a number between 1 and 1000 on the Orchestrator. The number 0 is not valid for this field.Important: While it is possible to configure extremely small and large values, DLP has a maximum file size limit of 5 GB. Even if users configure a larger value, that value will not be honored beyond 5 GB. DLP also has minimum supported content sizes as follows:
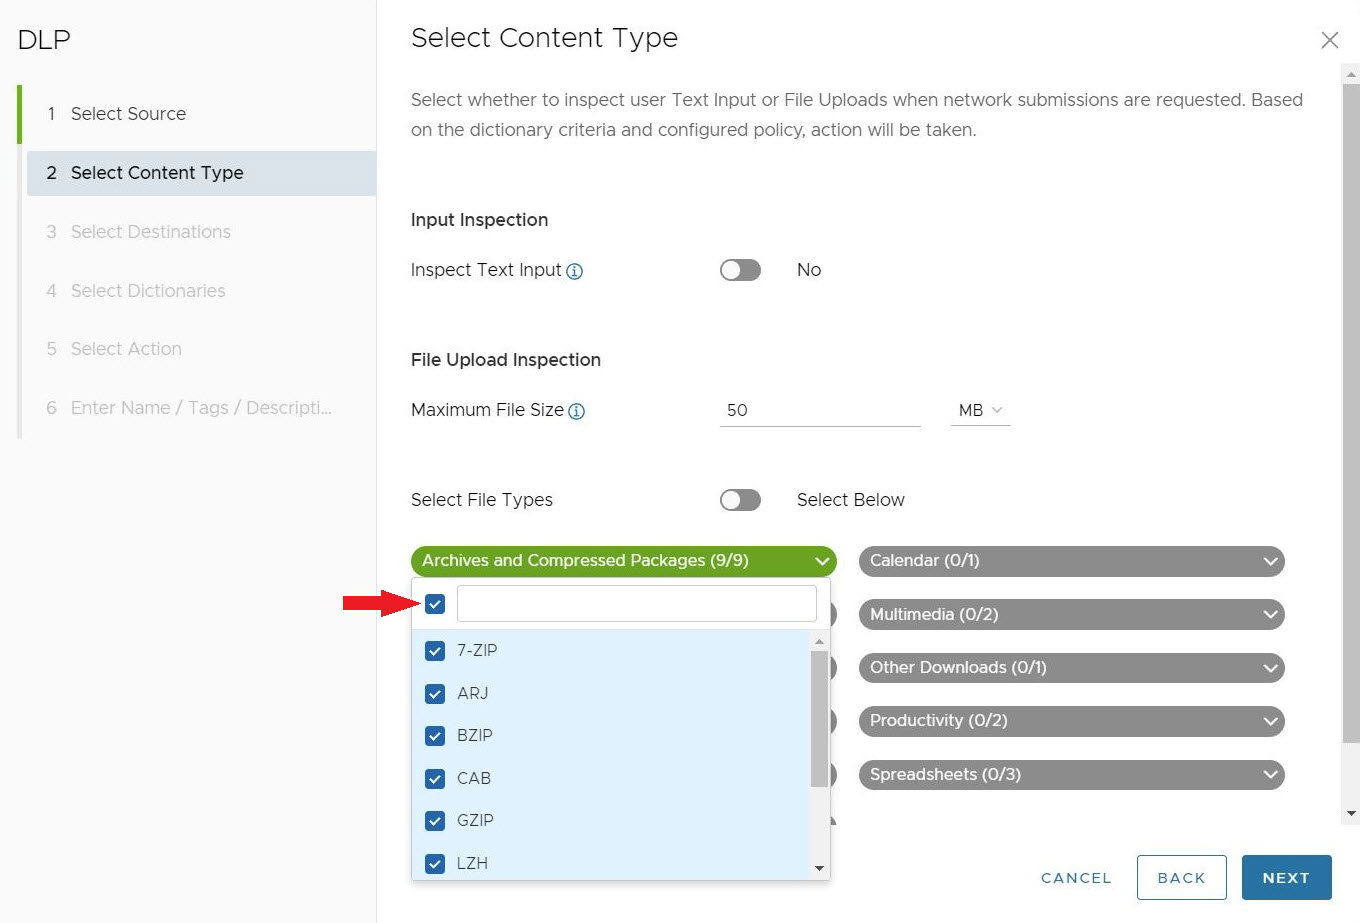
Table 1. Minimum Supported Content Sizes User Input File Input 1024 Bytes 5120 Bytes - Select File Types allows user to choose specific file types to inspect. The default setting is to inspect All Supported Types, 36 file types in total. If users toggle off All Supported File Types, they will see a complete menu of all 36 file types sorted by 11 categories:
- Archives and Compressed Packages (9): 7-Zip, ARJ, BZIP, CAB, GZIP, LZH, RAR, TAR, ZIP
- Calendar (1): ICS Meeting Invitation
- Engineering Applications (2): AutoCAD, Visio
- Multimedia (2): Audio Files, Video Files
- Miscellaneous Documents (1): RTF
- Other Files and Documents (1): Other Files and Documents of unknown types
- Presentation Tools (2): OpenOffice Presentation, PowerPoint
- Productivity (2): Microsoft One Note, Microsoft Project
- Scripts and Executables (6): Android Executable, JAR, Linux Executable, Mac Executable, Text-based script files
- Spreadsheets (3): CSV, Excel, OpenOffice Spreadsheet
- Word Processors (7): Hangul, Ichitaro, OpenOffice Text, PDF, Word, Word Perfect, XPS
Users can select several, or all the File Types under a file category. If the number of File Types selected is less than all the File Types available for that category, the file category name will show as blue and display how many File Types are selected out of the total available.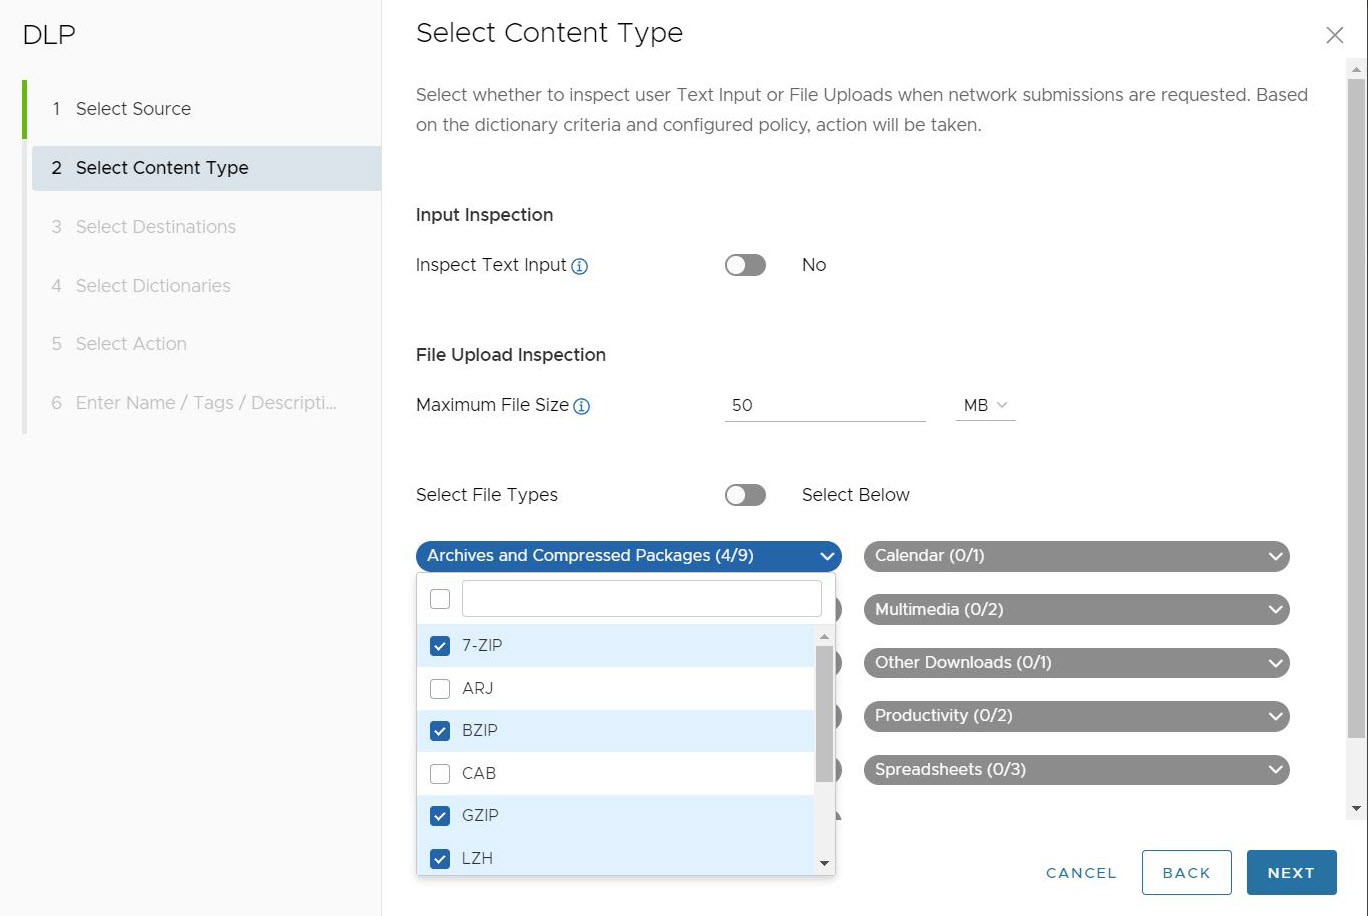
If users wish to select all the File Types for that category, they can click on the top selection box and all the File Types are selected. When this is done, the category header becomes green and shows all File Types have been selected for that category.
After selecting the DLP Content types settings for the rule, click Next. The Select Destinations screen appears.
- Choose whether the DLP rule should Inspect Text Input or not. The default for this option is Off. When toggled to On, user Text Input will pass through DLP inspection when network submissions are requested.
- In the Select Destinations screen, users can specify the domains and/or categories for which DLP inspection should take place. The default setting is All Domains and Categories, which means that DLP inspects all Domains and all 84 Categories.

If users uncheck the box for All Domains and Categories, users are required to configure customized Domains and/or Categories.
For the Domains field, users can specify Fully Qualified Domain Names (FQDN), IP Addresses, or IP Ranges that would trigger an Auditor Alert. Users can enter a combination of FQDNs, IP Addresses, and IP Ranges.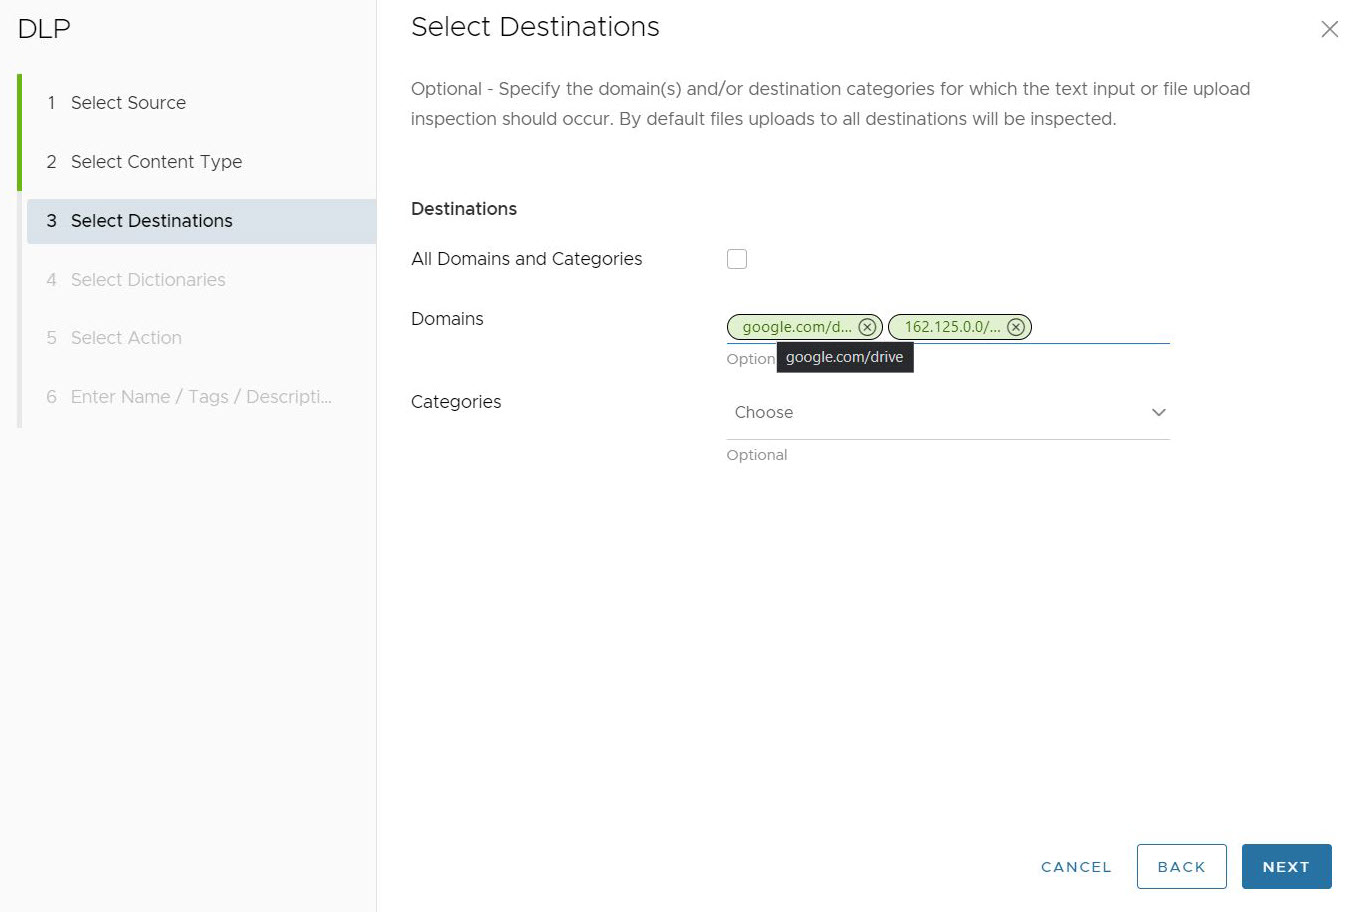
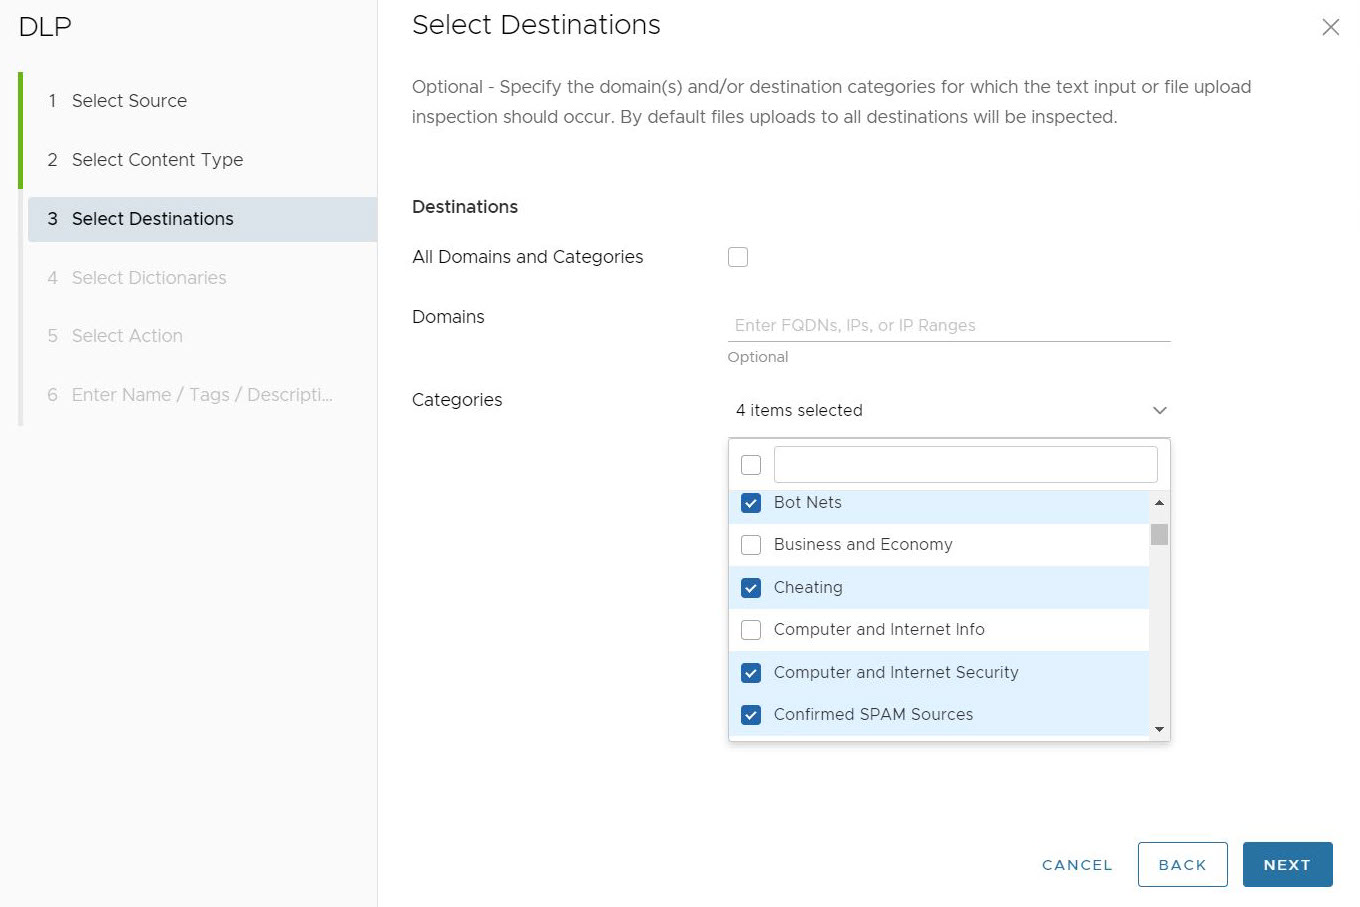
In the Categories field, users can choose from up to 84 distinct categories for which a file can match and require a DLP inspection. Users can also select all categories at once by clicking the top left check box.
After selecting the DLP destination for the rule, click Next. The Select Dictionaries screen appears.
- In the Select Dictionaries section, users must choose at least one or more Dictionaries to associate with the rule. The Dictionaries can be Custom, Predefined, or a combination of Custom and Predefined. All selected Dictionaries are evaluated, and action is taken based on the criteria specified in the respective dictionaries.

There are more than 340 Predefined Dictionaries to choose from in addition to the Custom Dictionaries user may create, users should narrow their Dictionary options using one or more filters located at the top of each column. In this example, the user is filtering for dictionaries that match the Category term "HIPAA" to link up with the Custom Dictionary they already created.

After selecting the DLP Dictionaries to apply to the rule, click Next. The Select Action screen appears.
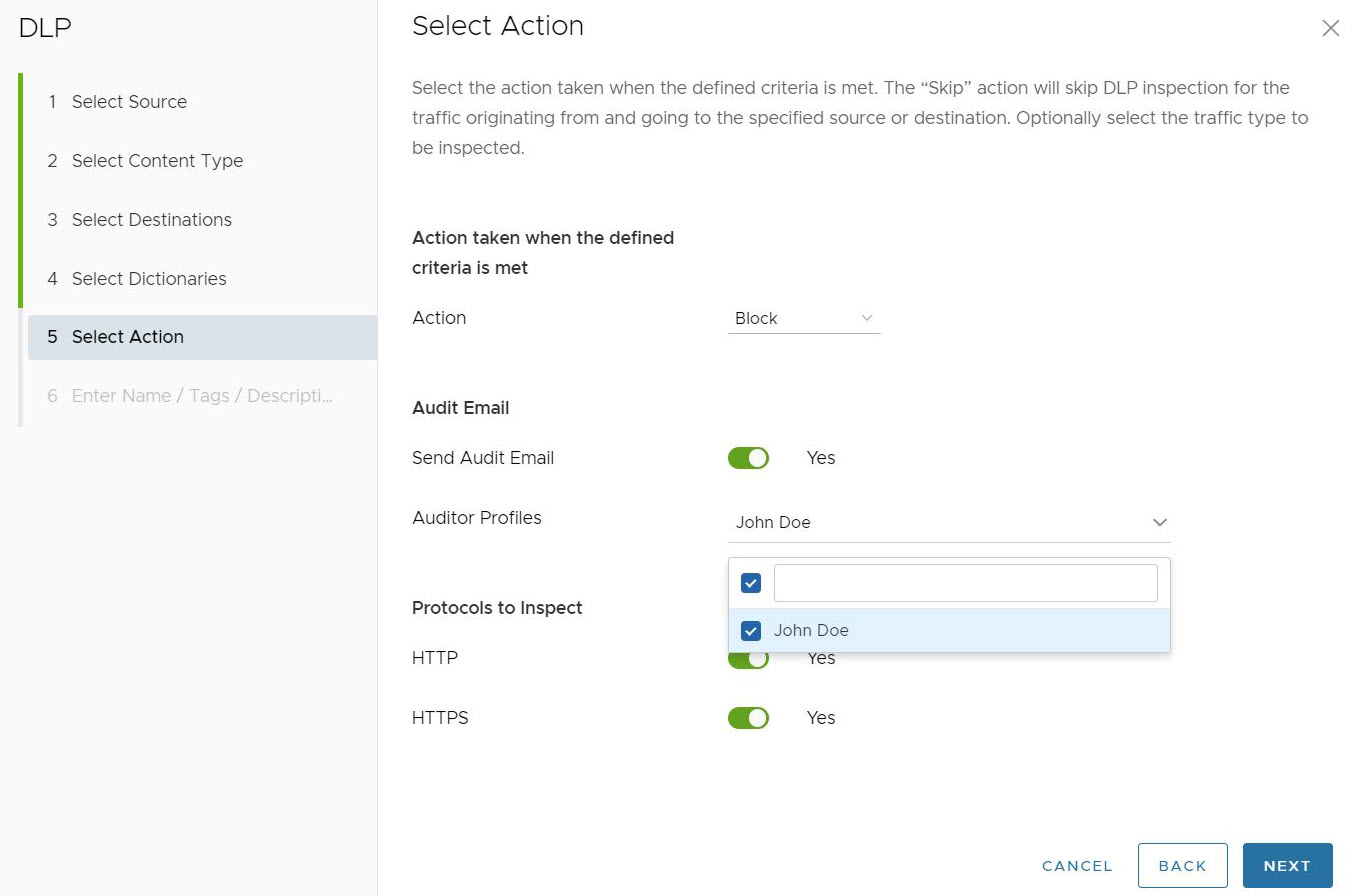
- In the Select Action screen, user can decide what action is taken when the defined criteria are met. The action can be set to Block, Log, or Skip Inspection. The default settings for Select Action are Block, with no Audit Email sent and both HTTP and HTTPS toggled on as Protocols to Inspect.
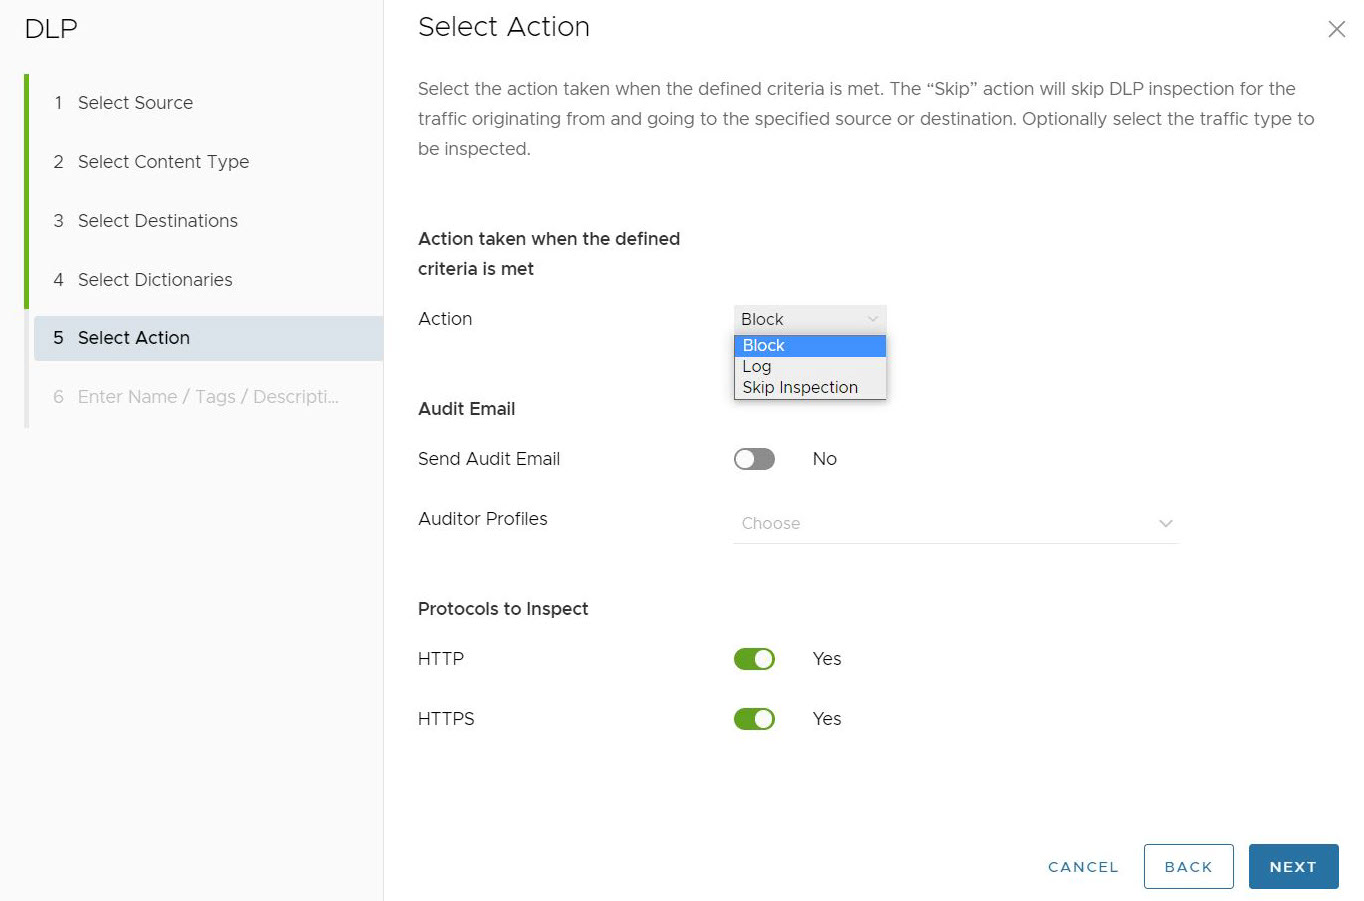
If users toggle the Send Audit Email to Yes, users will also need to select an Auditor Profile(s) who will receive the Audit Email. In this case, the user chooses the Auditor Profile configured earlier in the Auditors section.
After configuring the Action to be taken for the rule, click Next.
- In the Enter Name /Tags / Description screen, user must configure a unique Name for the DLP Rule. User can also configure Tags, Notification, and Reason for the rule.
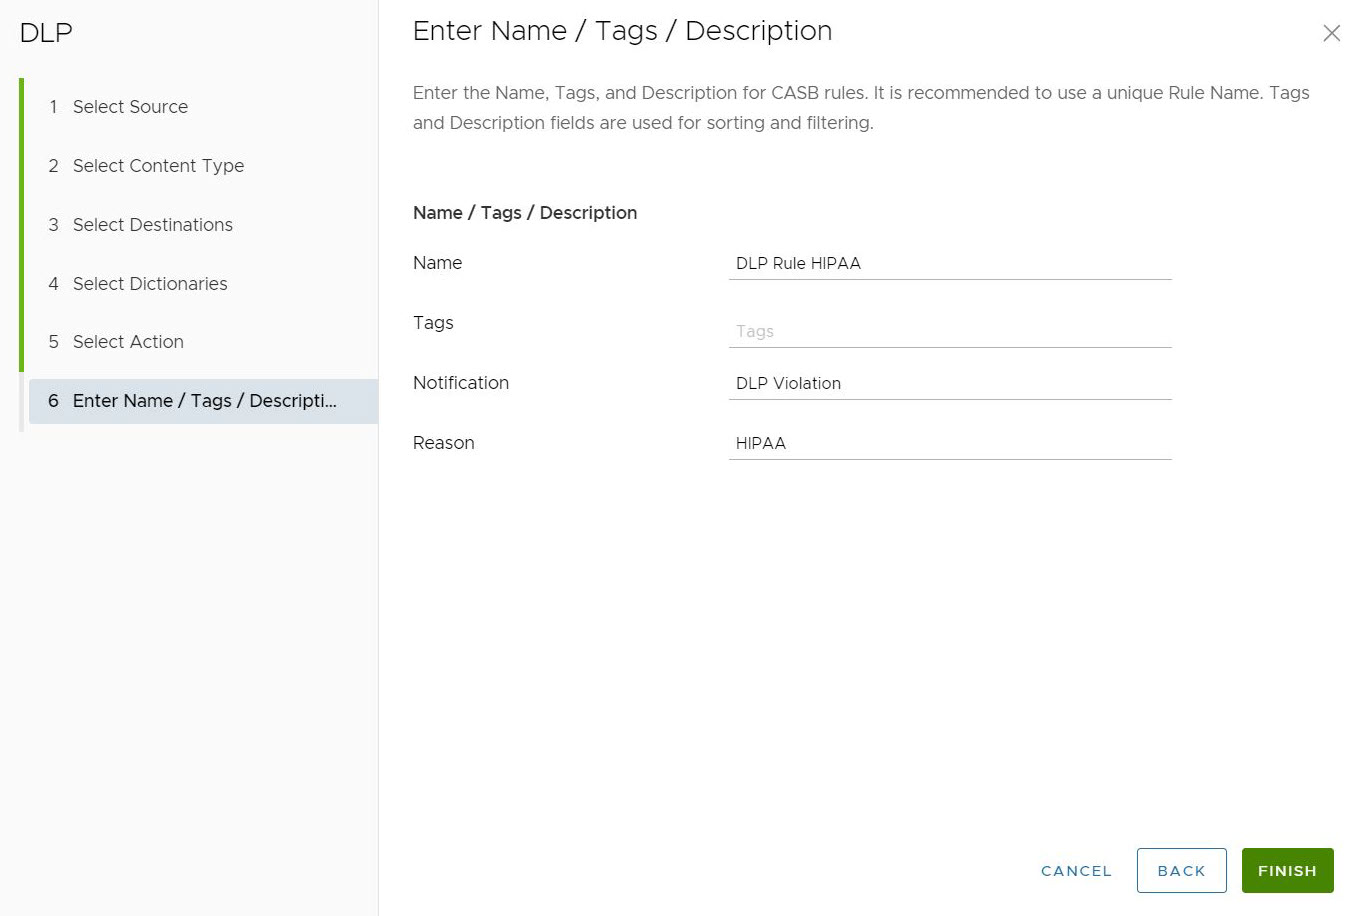
- Click Finish. A DLP rule is created and gets listed on the DLP rule section for the Security Policy.
- Click Publish for the DLP Rule to take effect in this Security Policy.
Note: It takes about five minutes for the DLP Rule to take effect from the time users publish it. After publishing the Security Policy, users can Apply the Security Policy.
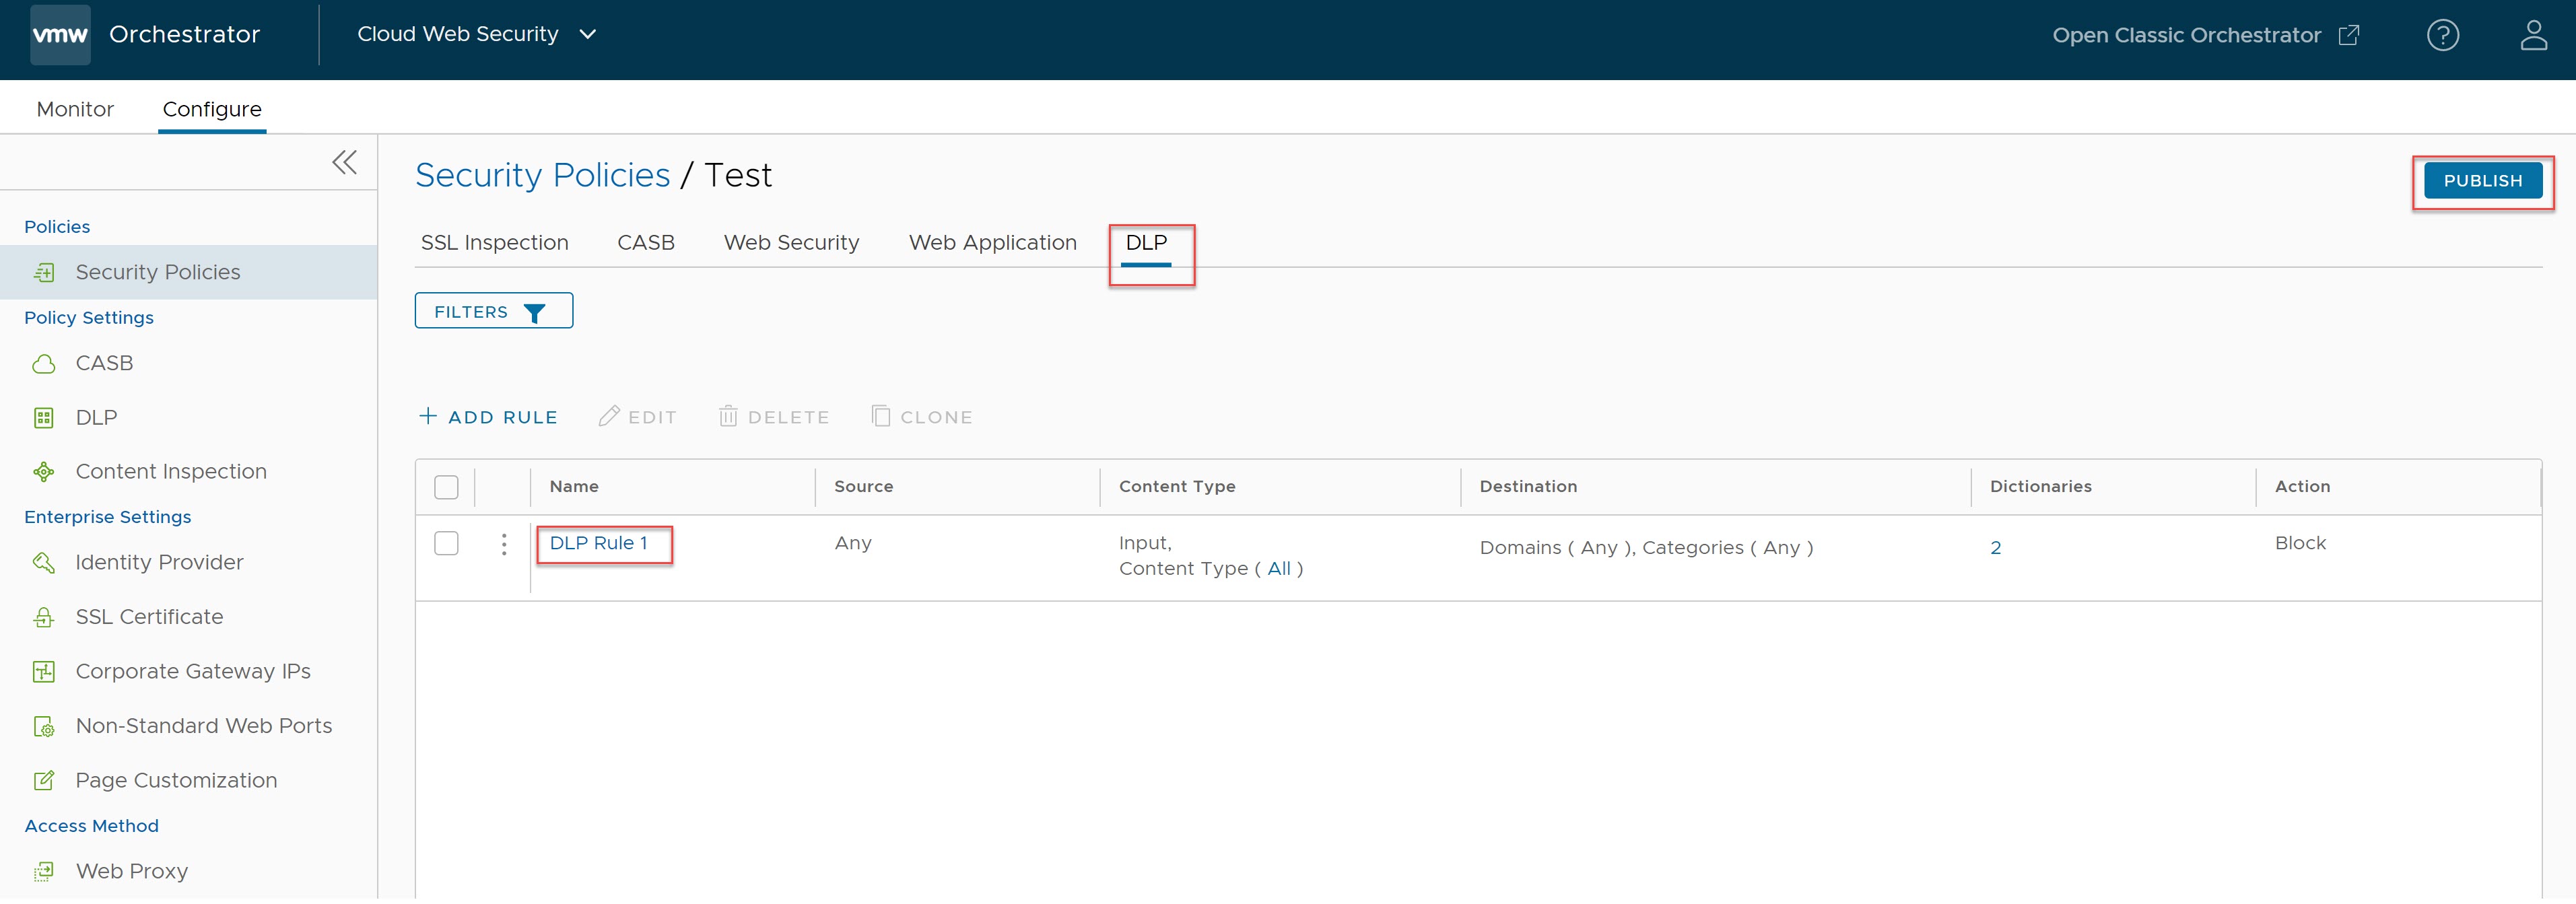
After publishing, a DLP Rule can be edited and republished as needed in the same way that it was first created.
For more information about DLP Enterprise settings, see Data Loss Prevention.
