


Describes in detail how to configure a Cloud Access Security Broker (CASB) rule for a selected Security Policy.
Before you begin
To configure a Security Policy, users must have first created a Security Policy. For specific instructions on how to create a Security Policy, see Creating a Security Policy.
Configuration Steps
To configure a CASB rule, perform the following steps:
- Navigate to .
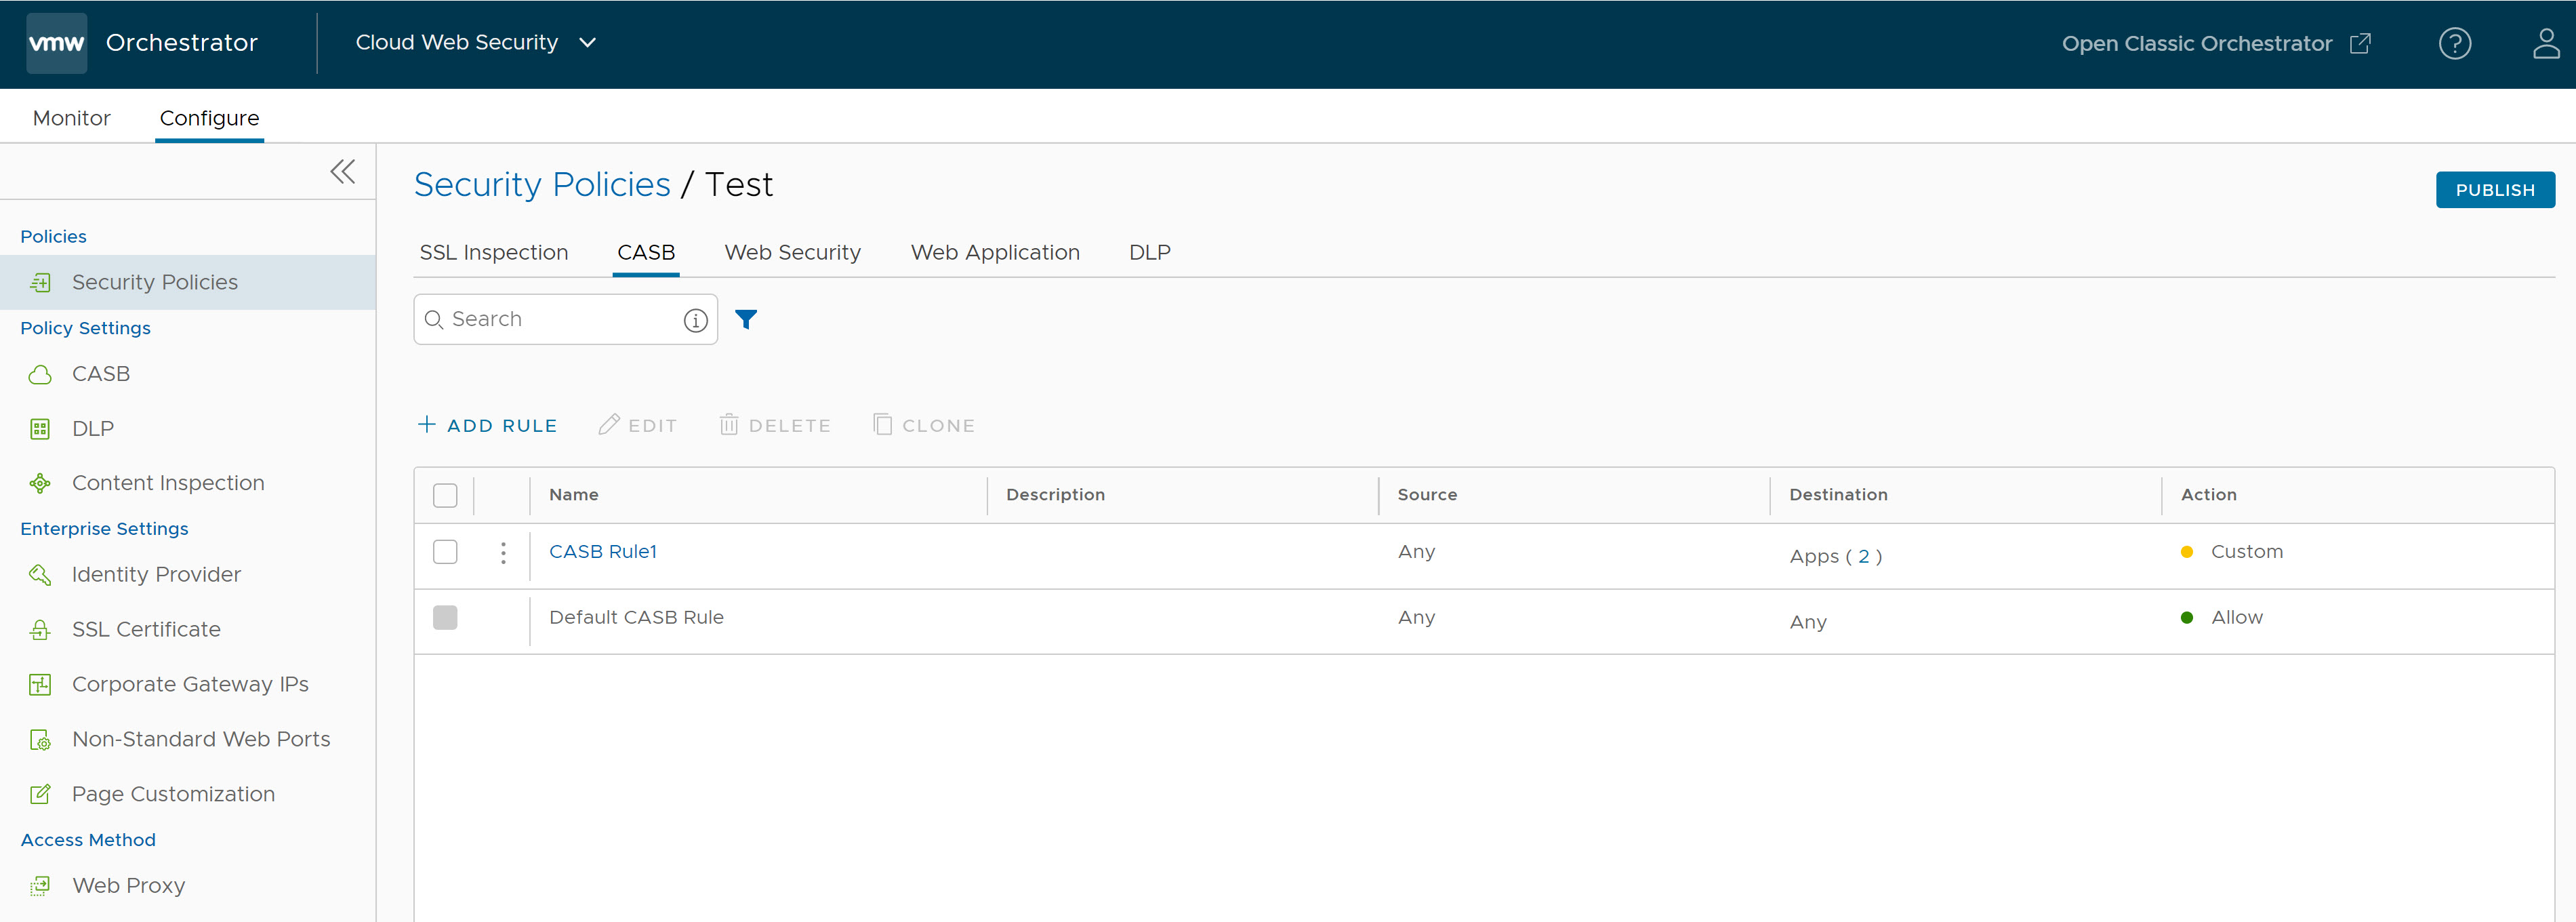
- Select a security policy to configure CASB rule and then click the CASB tab.
- In the CASB tab of the Security Policies screen, click + ADD RULE.
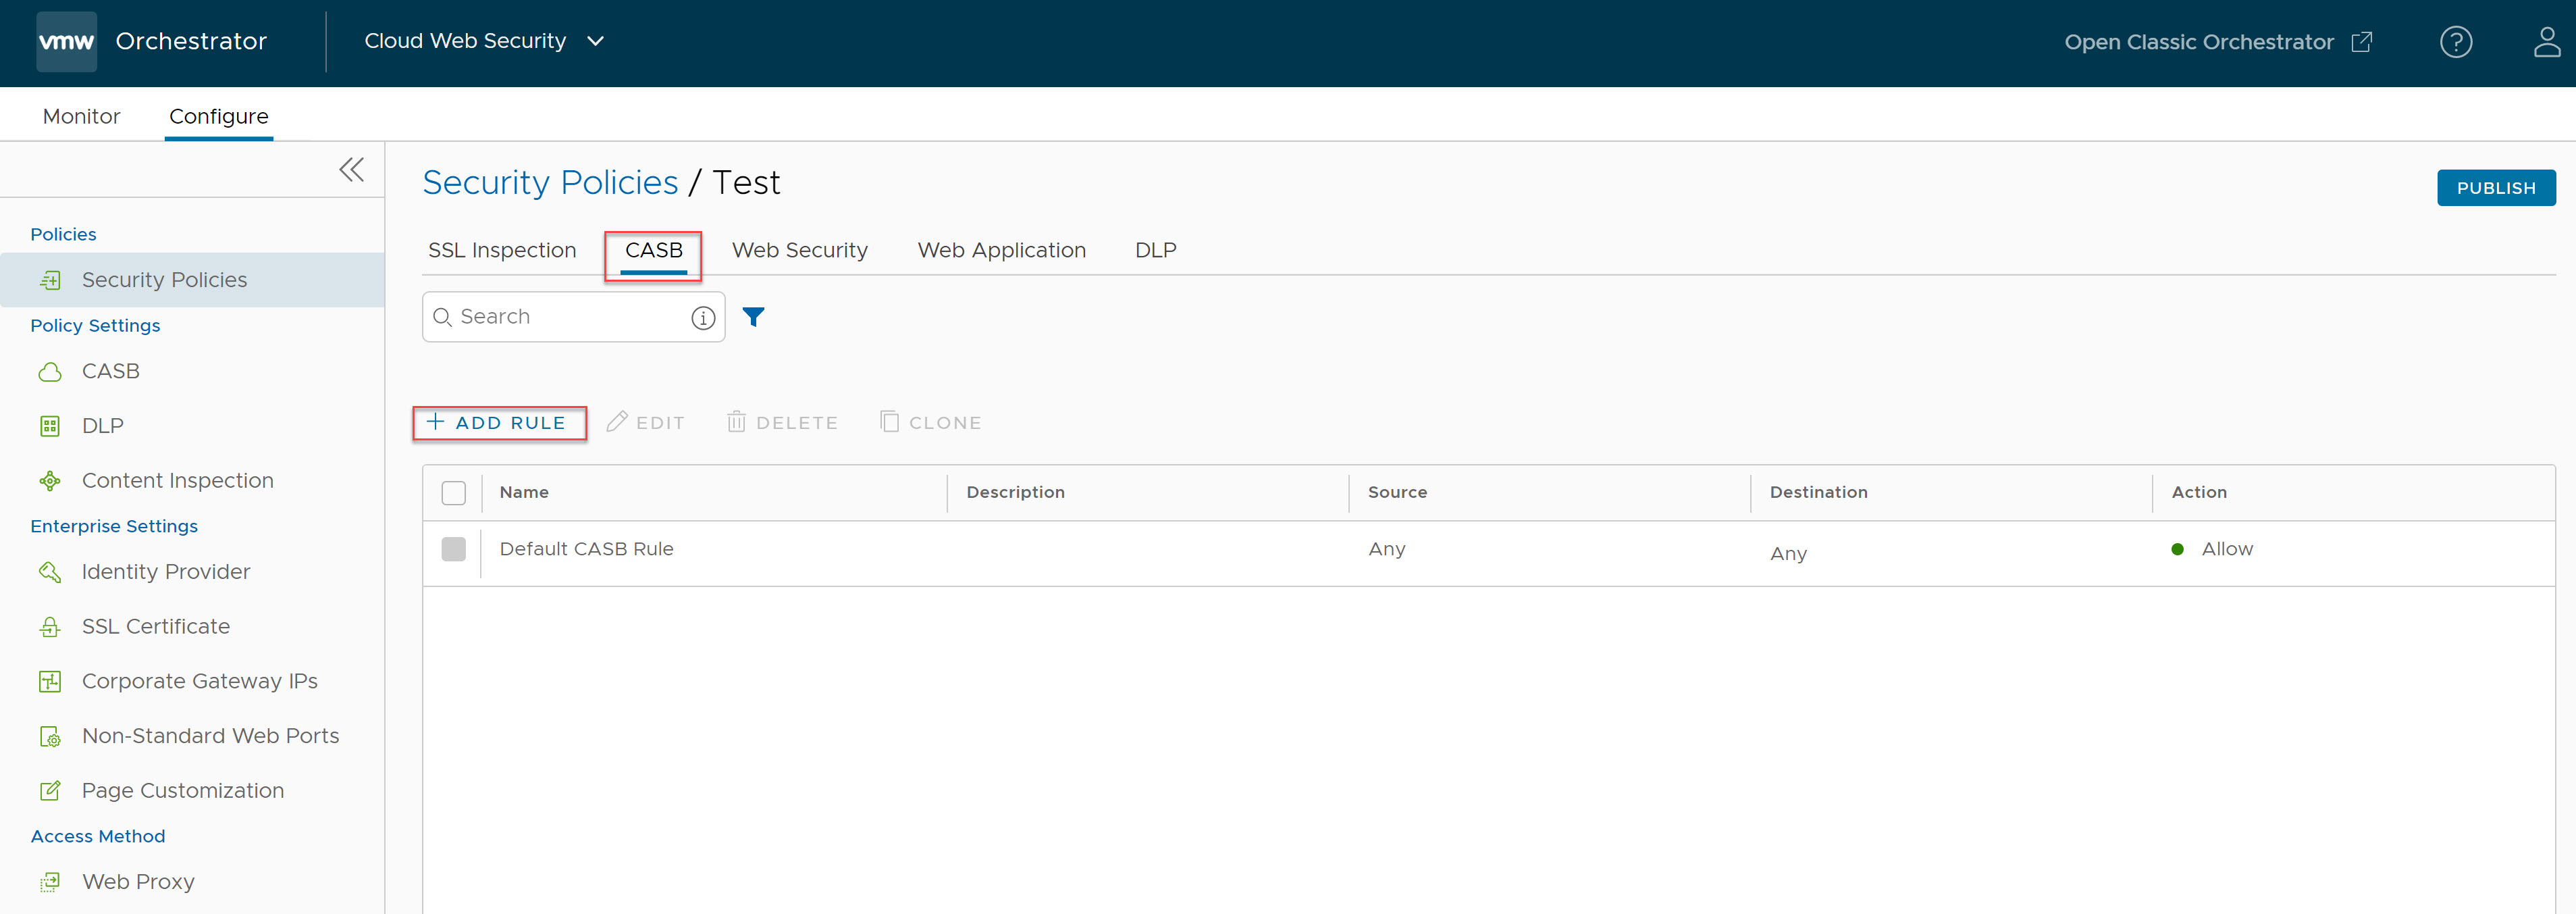
The Select Source screen appears.
- In the Select Source screen, select the All Users and Groups check box to apply the rule to all users and groups, or deselect that check box to specify Users and Groups.
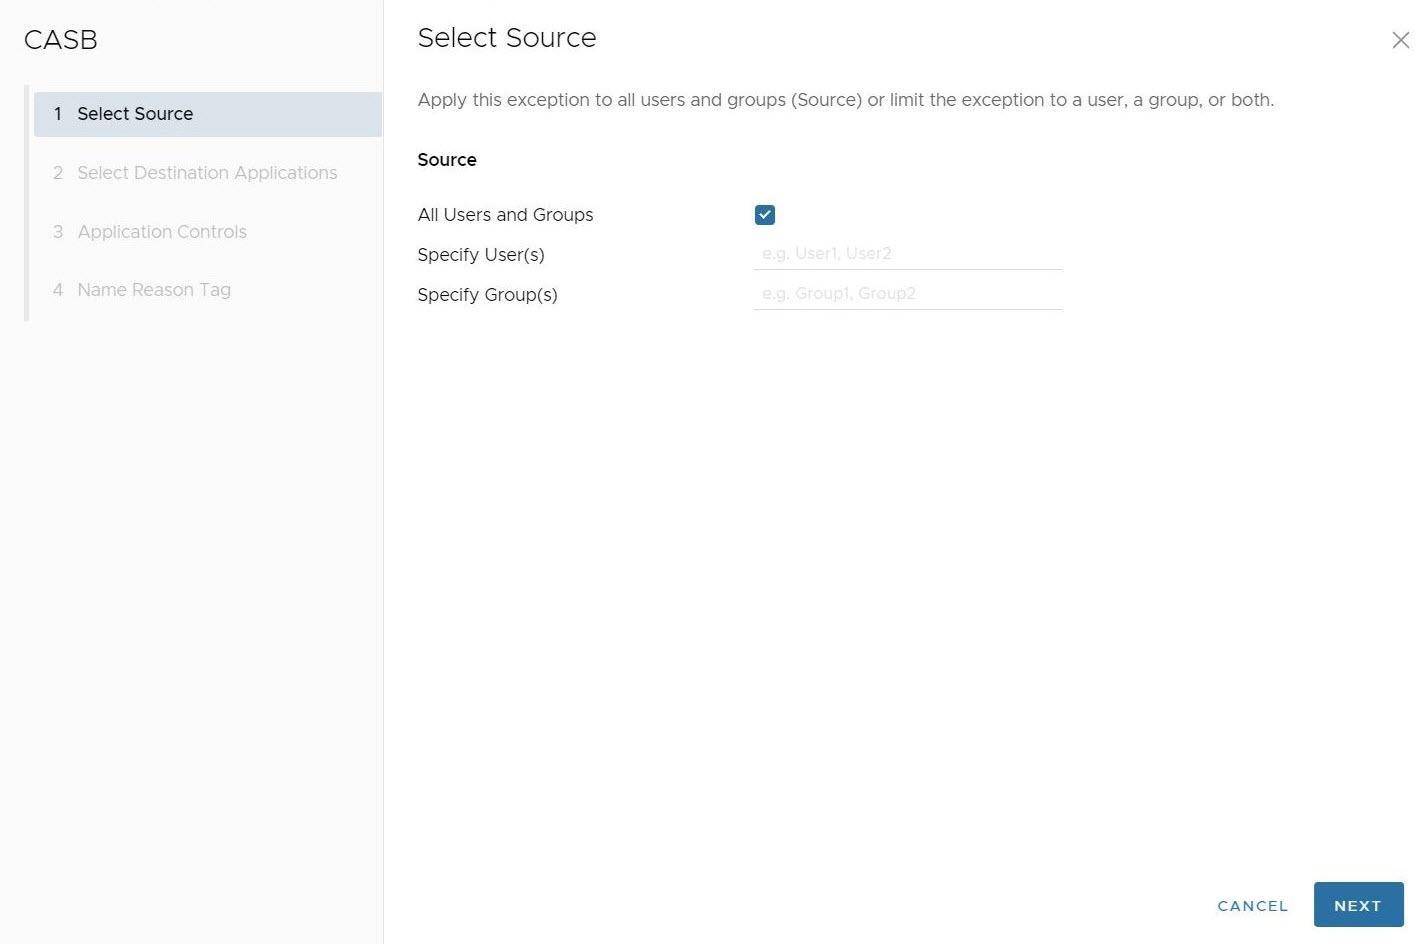 Note: All Users and Groups is the only option for customers that do not have an Identity Provider (IdP) like Workspace ONE or Azure Active Directory (AD) configured for Cloud Web Security.Important: Cloud Web Security must be configured with an Identity Provider (IdP) like Workspace ONE or Azure Active Directory (AD) for specific Users and Groups to work.
Click Next, the Select Destination Applications screen appears.
- In the Select Destination Applications screen, users can configure the CASB Control rule with one or more applications which will be applied to the rule. The selection screen allows users to sort applications by name, category name, or risk score.
Note: At the bottom of the screen, users can configure the number of applications shown at one time, to a maximum of 100. The default value is 10. Users also have the option of showing all applications or only the selected applications.

After selecting the applications for this CASB Control rule, click Next.
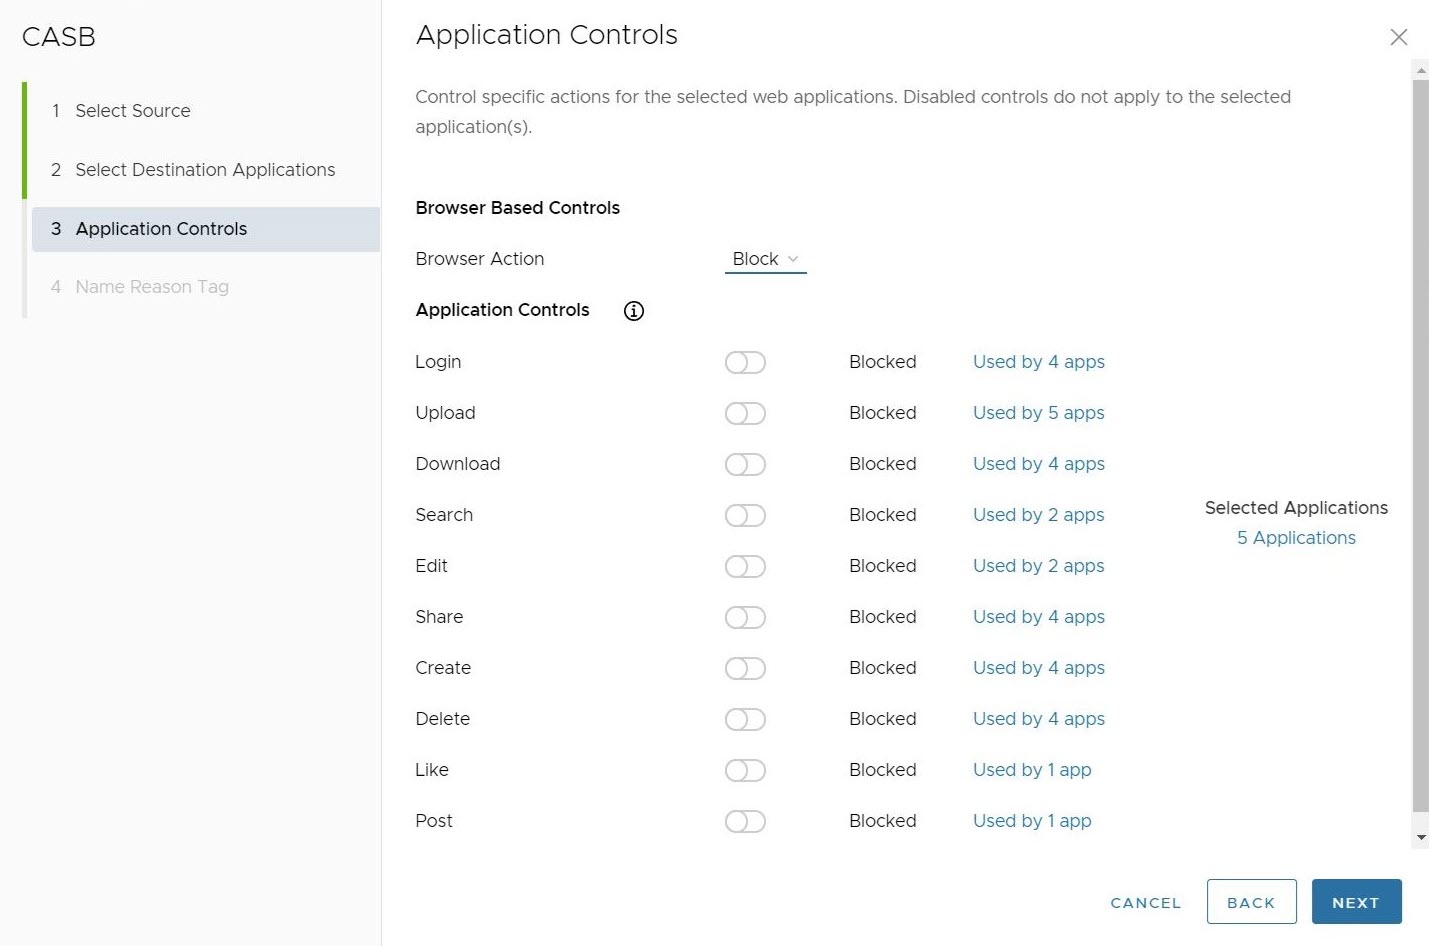
- In the Applications Controls screen, users can configure application control actions for the selected web applications that they can either block or allow. This includes Login, Upload, Download, Search, Edit, Share, Create, Delete, Like, and Post. Users can choose two paths for controlling the selected applications:
- Users can select to block all application controls, in effect preventing the selected applications from operating in any way on the client's browser.
- Or users can select which controls are blocked and which are allowed. In this instance blocking all application controls except the downloading files.
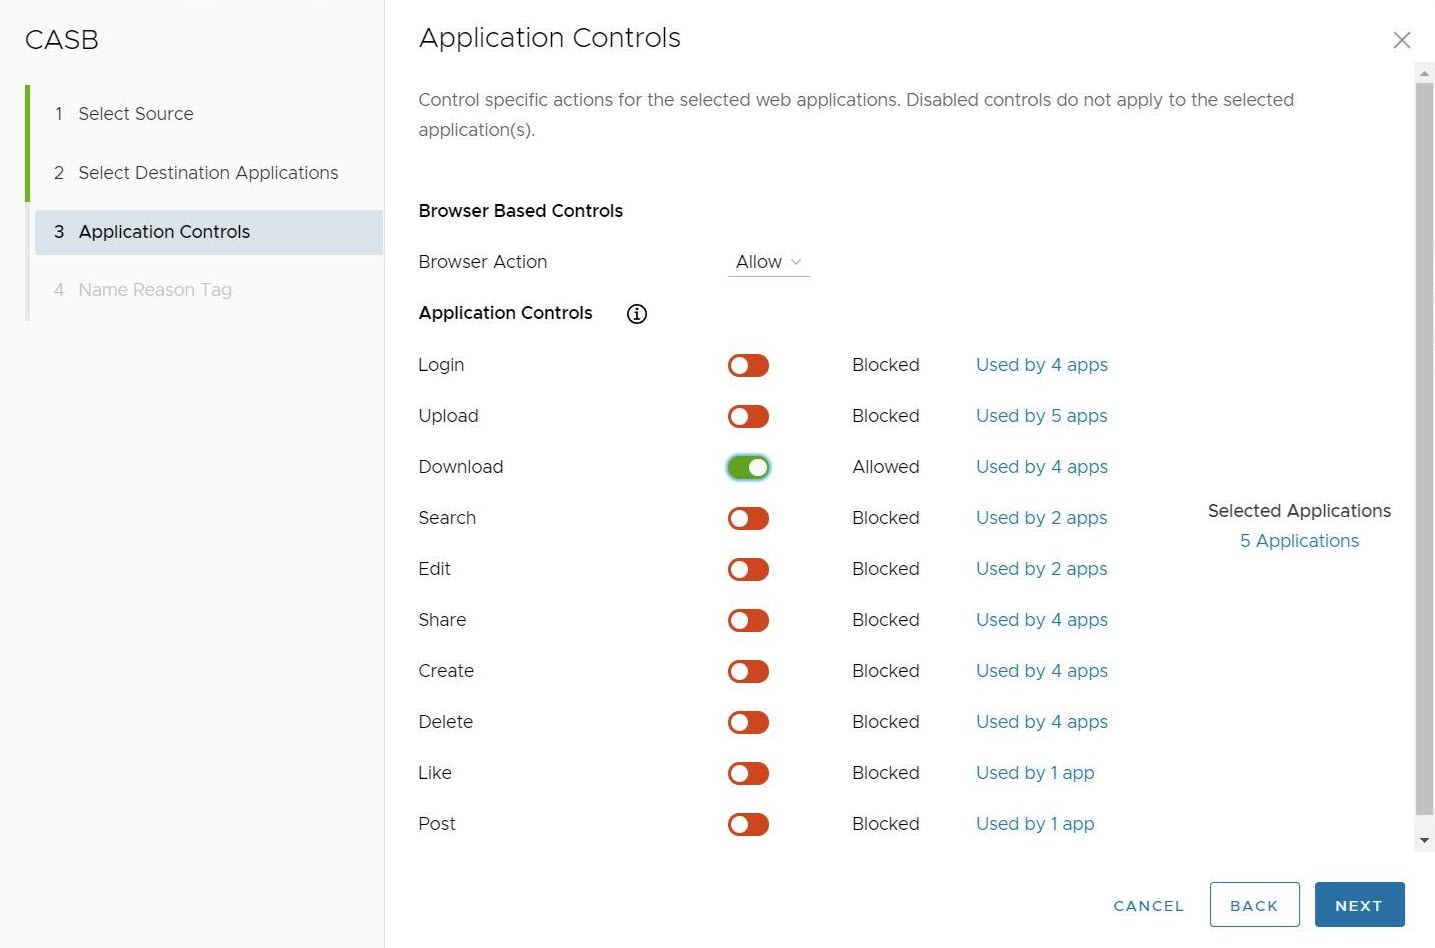
In the Applications Controls Screen, users can confirm which Applications are being used by this rule by clicking # Applications under the Selected Applications heading to the right of the screen.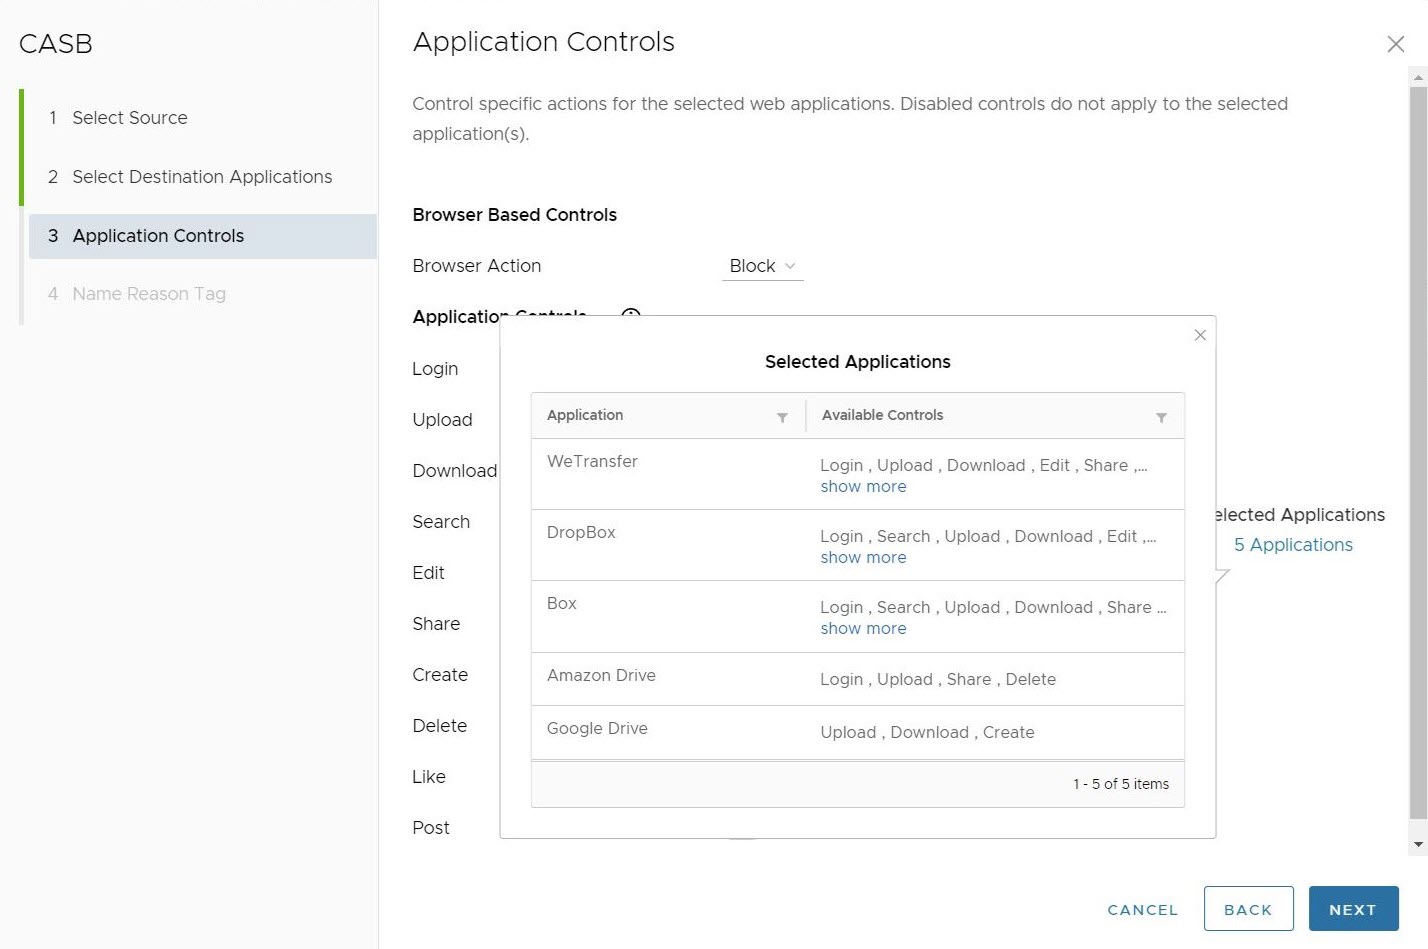 Users can also see which applications are used by a specific Application Control rule by clicking on the Used by # apps to the right of a particular Application Control.
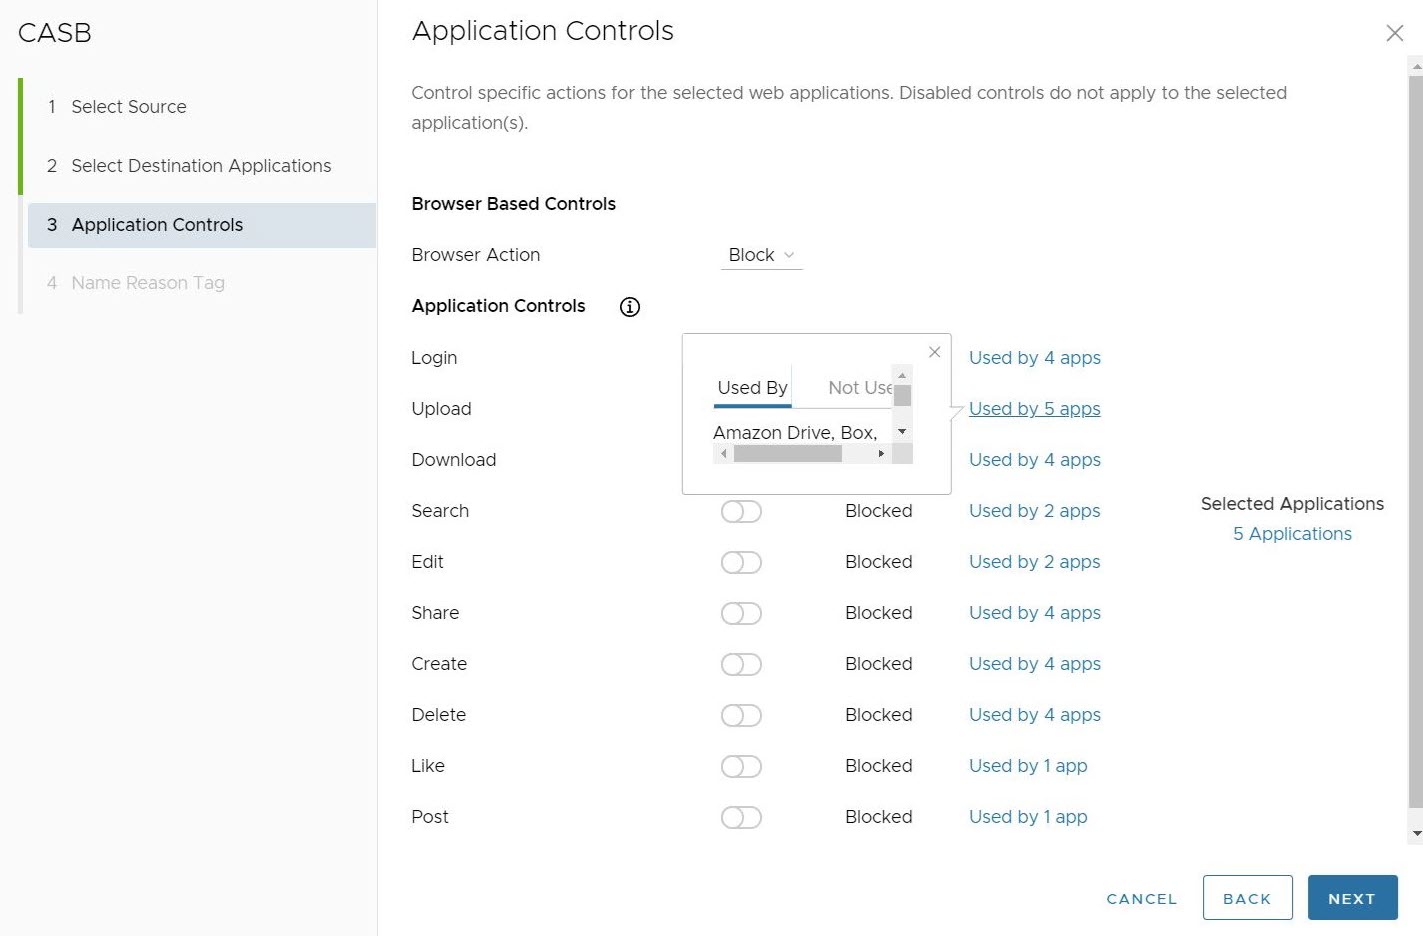
After configuring the set of Application Controls to be applied, click Next.
- Users can select to block all application controls, in effect preventing the selected applications from operating in any way on the client's browser.
- In the Name Reason Tag screen, configure a unique Rule Name (required), Tags (if used), Reason (if needed), and a Position for the rule on the list of CASB rules (the options are either 'Top of List' or 'Bottom of List').
Note: The Position field designates the rule's position on the list of CASB rules.
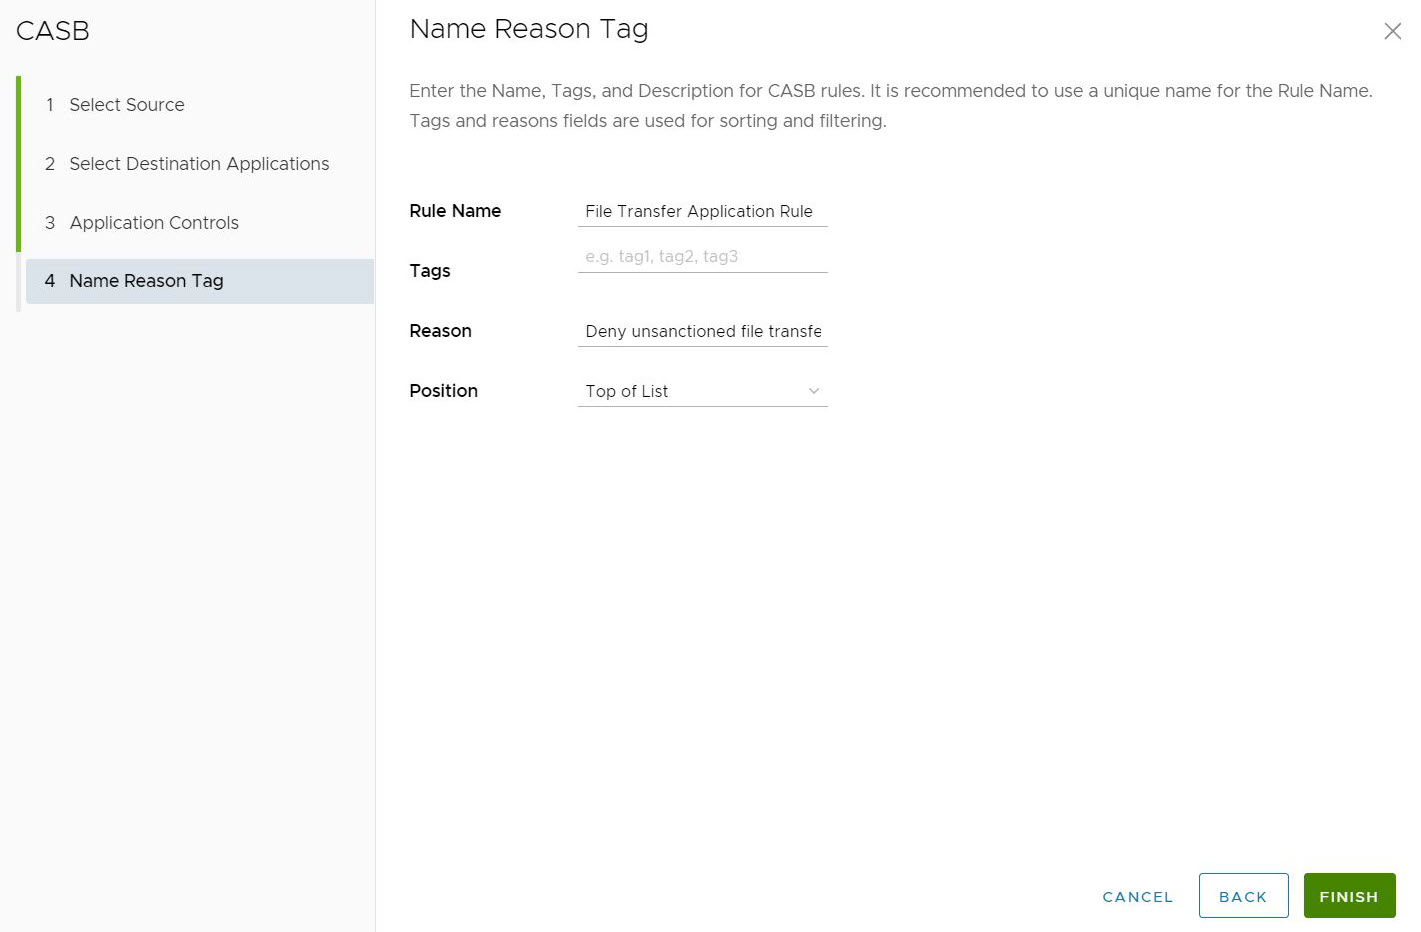
- Click Finish. A CASB rule is created for the selected applications. To apply the CASB Control Rule to traffic, click Publish.
 Note: The Orchestrator requires up to five minutes to successfully publish the new rules.
After publishing, a rule can be edited and republished as needed in the same way that it was edited above.
Note: The Default CASB Rule cannot be edited or changed in any way. - After publishing the Security Policy, users can Apply the Security Policy.
For more information about CASB Enterprise settings, see Cloud Access Security Broker.
