This section covers configuring Azure Active Directory (AD) as an Identity Provider (IdP) for Cloud Web Security. This allows Cloud Web Security policies to be configured to match on a username or groups as well as log the user access in the Web and DLP logs. We first cover the Azure AD configuration, and then the VMware Cloud Orchestrator configuration.
Prerequisites
Users need the following to configure an Azure Active Directory as an identity provider with
Cloud Web Security:
- An Azure account
- An Azure Active Directory (AD) tenant
Tip: The process for creating an Azure AD tenant is documented here.
- A customer Enterprise on a production VMware Cloud Orchestrator with Cloud Web Security activated. The Orchestrator must use Release 4.5.0 or later.
Azure Configuration
- Log into the Azure portal https://portal.azure.com/ using either your Enterprise credentials or a local user to your Azure AD tenant.
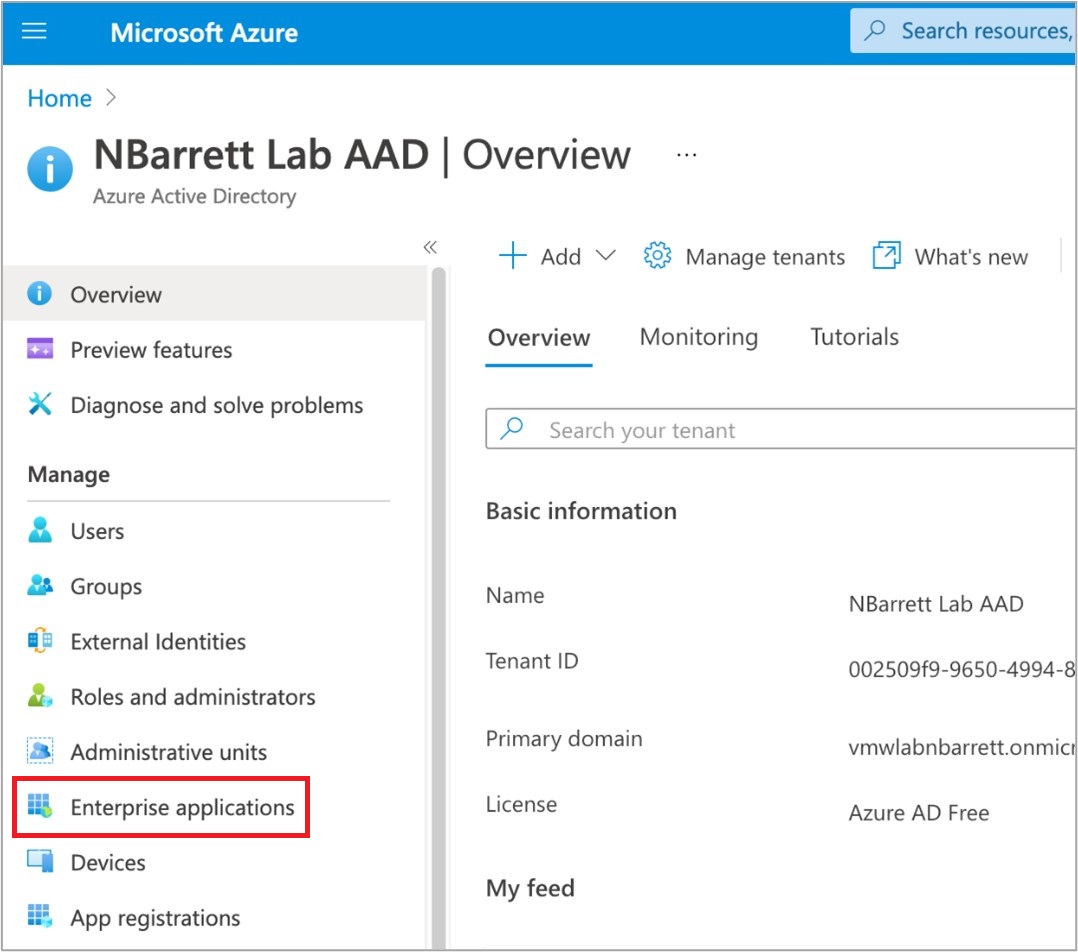
- Access the Azure Active Directory service by searching for active directory in the top search bar.
- Click on Enterprise Applications in the left-hand side panel:
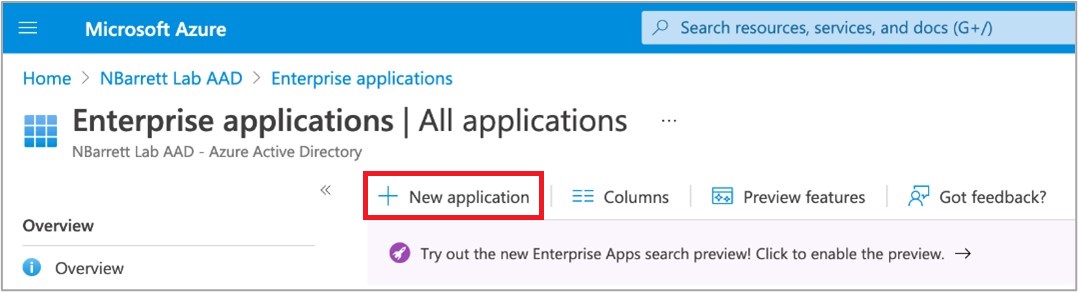
- Click on New application at the top of the Enterprise Applications panel:
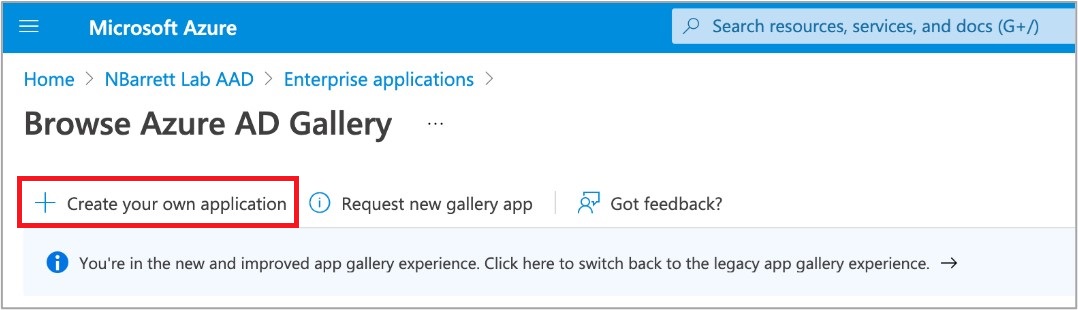
- Click on Create Your Own Application at the top of the New Application panel.
- Enter a name (for example, CWS) and ensure that the Non-gallery radio option is selected.
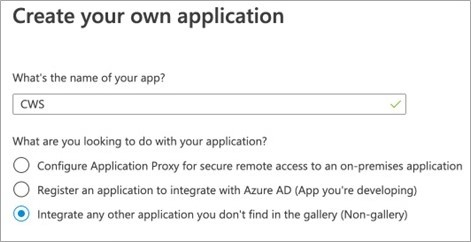
- Click Create at the bottom of the Create Your Own Application form.
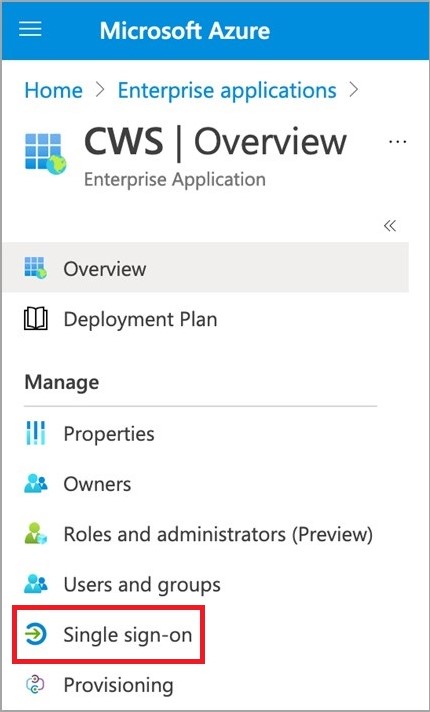
- Click on the Single sign-on panel using the left-side panel of your Cloud Web Security (CWS) Enterprise application page.
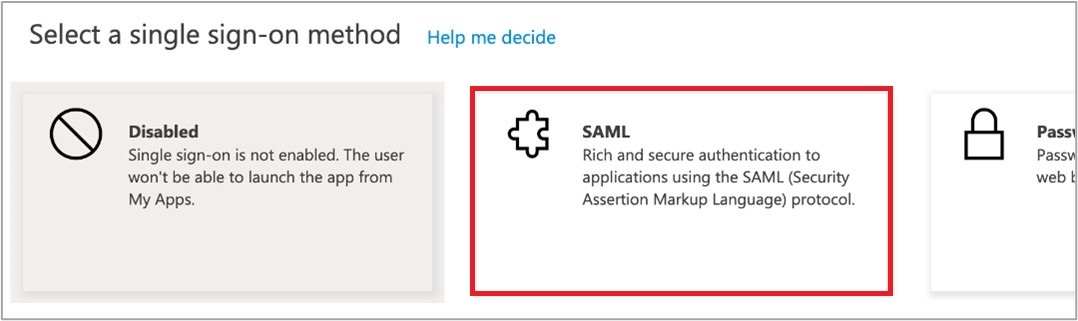
- Click SAML (Security Assertion Markup Language) as your single sign-on method of choice.
- Fill in section (1) using the upper-right edit pencil icon as shown below. After entering all the required details, click Save at the top of the pop-over pane.
Field Name Field Value Field Description Identifier (Entity ID) https://safe-cws-sase.vmware.com/safeview-auth-server/saml/metadata Azure AD allows multiple values. Set it to this value and select the Default check box for it. This is the Entity ID that Cloud Web Security will present itself as in the SAML AuthRequest message. Reply URL (ACS URL) https://safe-cws-sase.vmware.com/safeview-auth-server/saml This is the URL that Azure AD will redirect the SAML assertion payload to. This is how Cloud Web Security learns that users are authenticated successfully. Sign-on URL https://safe-cws-sase.vmware.com/safeview-auth-server/saml This is used for Azure AD initiating authentication into Cloud Web Security (versus Cloud Web Security redirecting to Azure AD). This is not typically used. - Copy the following items from section (3) and (4) into a text editor (for example, Windows Notepad or Mac TextEdit).
Field Name Field Description Section (3) - Certificate (Base64) This is the public key of the key-pair used by Azure AD to sign SAML assertions. It allows Cloud Web Security to validate the assertions were truly created by this Azure AD integration. Download this file and keep its contents handy. It should start with -----BEGIN CERTIFICATE----- and end with -----END CERTIFICATE-----. Section (4) - Azure AD Identifier This is the SAML entityID for the Azure AD IdP. In the payload of the Reply URL (see step 10), this indicates to Cloud Web Security that the SAML assertion came from this Azure AD integration. Section (4) - Login URL This is the Azure AD login URL that Cloud Web Security will redirect to in order to allow users to login to Azure AD (if they are not already logged in). - Click on the pencil icon in the upper-right corner of User Attributes & Claims.
- Add a Group Claim using the following setting. Select the “Group ID” as source attribute.
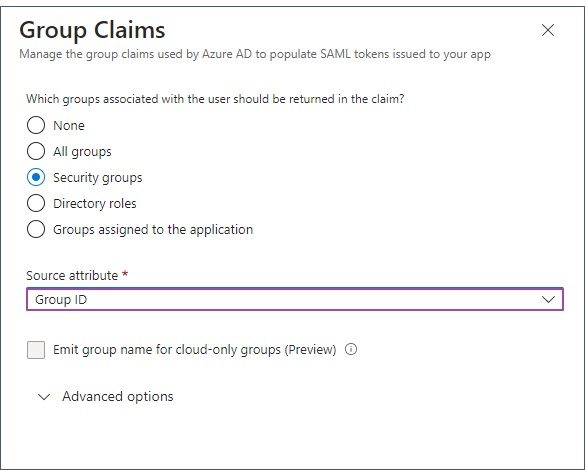 In the Attribute & Claims window, the group claim is added.
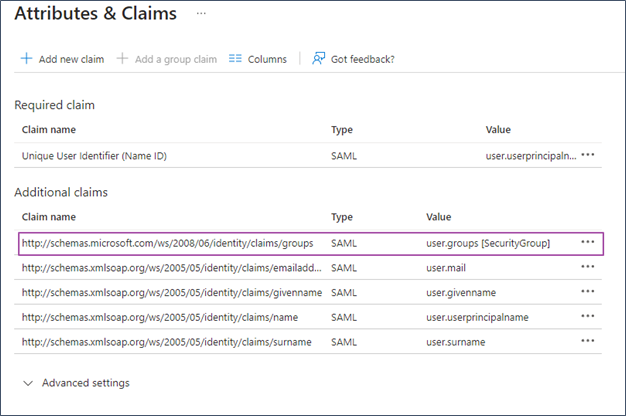
- The Azure AD SAML configuration is now complete.
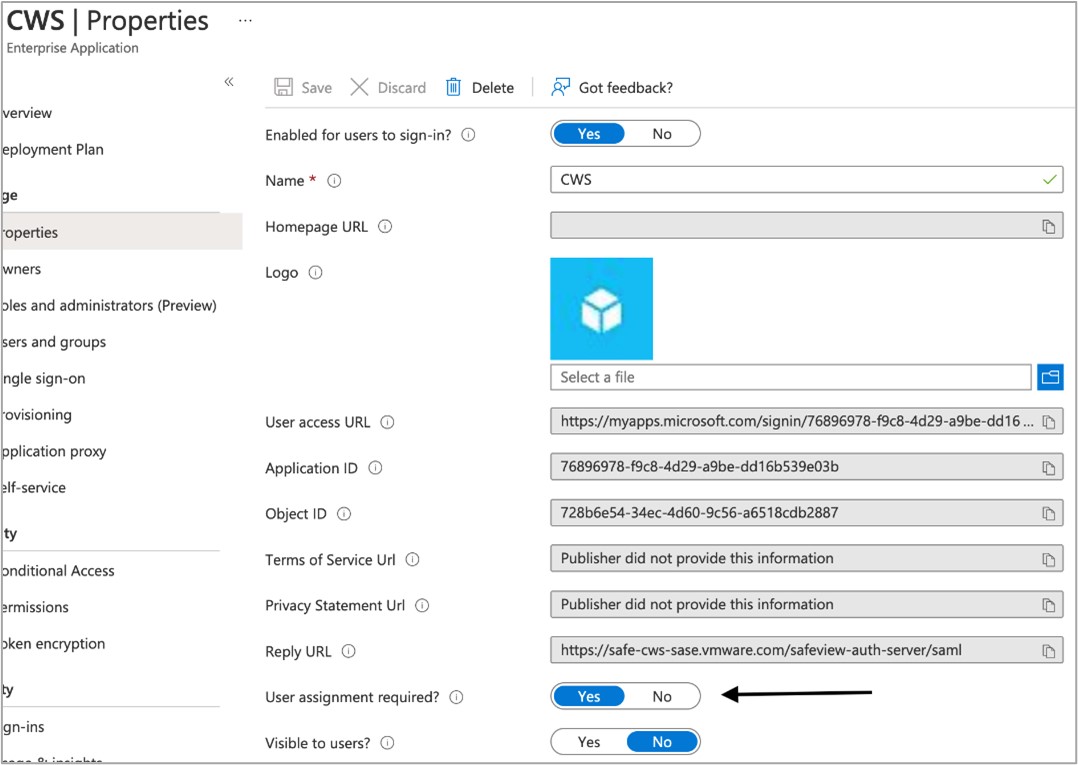
- Click into the Users and Groups section of the Cloud Web Security Enterprise applications page.
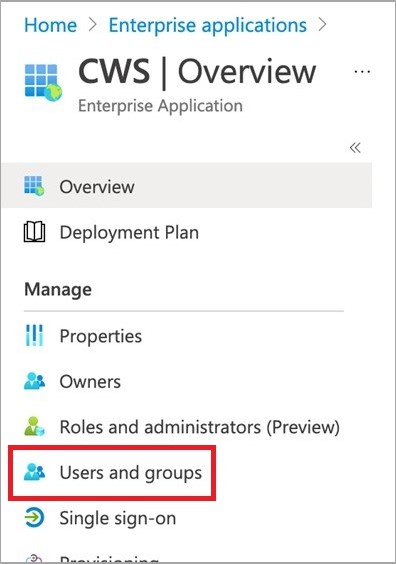
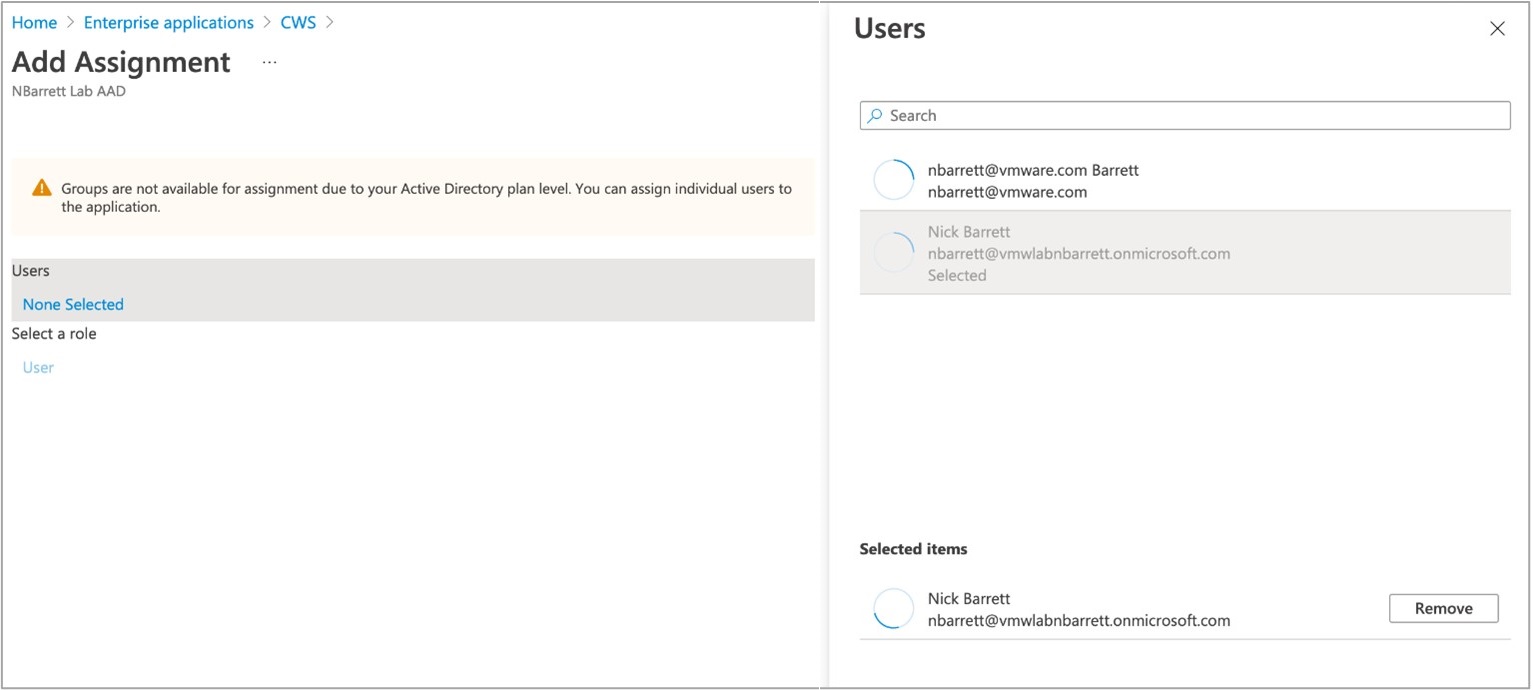
- Select users and/or groups that should be allowed access into the Cloud Web Security application. Then click Assign.
 Important:
- If this step is not done, users will be shown an error that the application is not approved for them when they attempt to authenticate in the Cloud Web Security workflow.
- Groups are only an option if users have an upgraded Azure Active Directory P1 or P2 tenant. The default AD plan level will only allow assigning individual users to the application.
- In the Azure portal, navigate to Azure Active Directory > Groups and select the group name to display the group properties. Copy the Object ID value from the Azure Group.
Note: To use the Azure Group in the CWS Policy, you would need to obtain the Object ID for an Azure Group.
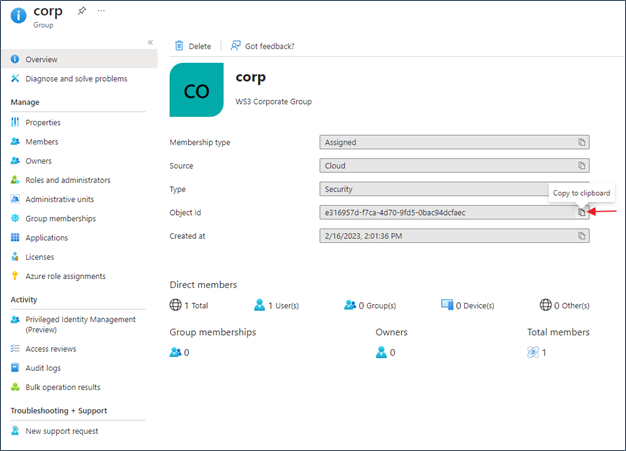 Use the Object ID to specify the Azure Group you would want to match on in a CWS policy. In the following example, the Azure AD group “ corp” is matched on a URL filtering policy for the Gambling category.
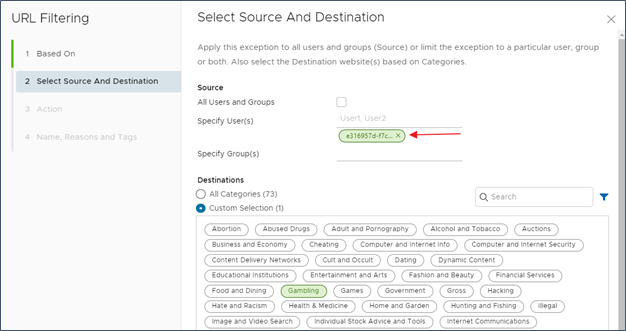 To avoid confusion, it is also advisable to include information in the Reason field of the CWS policy that references back to the original Azure Group name. In the following example, refer to “ corp” group or create a tag.
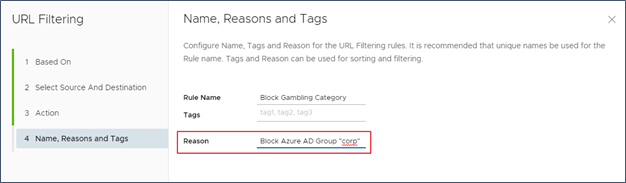
VMware Cloud Orchestrator Configuration
- Log onto the Orchestrator UI.
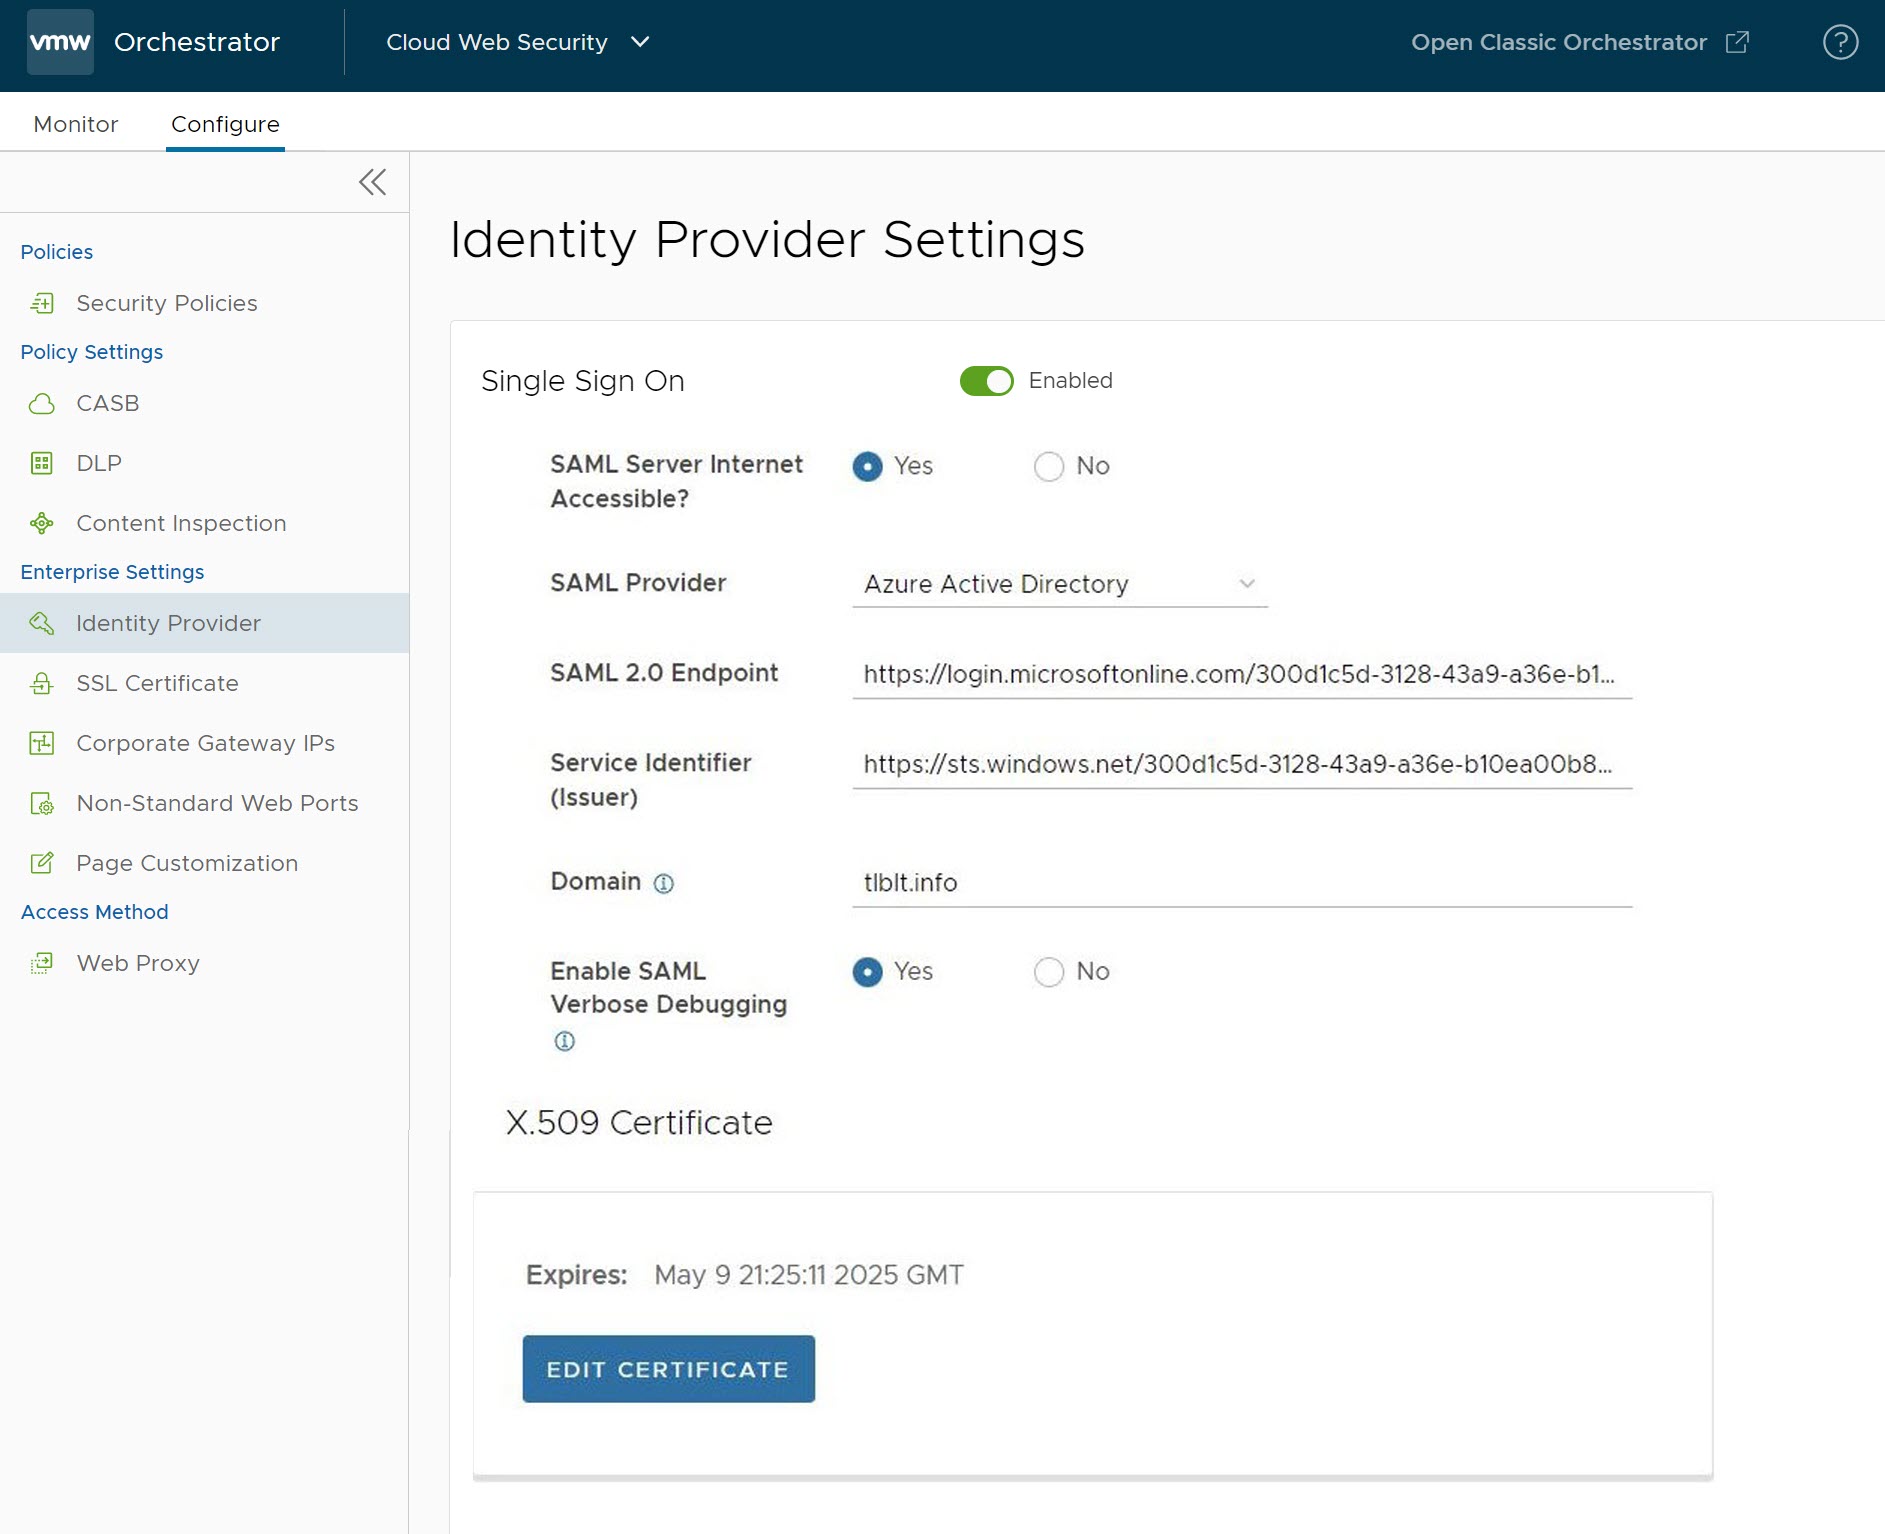
- Go to . The Identity Provider Settings page appears.
- Toggle Single Sign On to Enabled.

- Configure the following details:
- For SAML Server Internet Accessible select Yes
- For SAML Provider select Azure Active Directory
- For SAML 2.0 Endpoint, copy the Login URL from your notepad application as per step 11 of the Azure AD configuration.
- For Service Identifier (Issuer), copy the Azure AD Identifier from your notepad application as per step 11 of the Azure AD configuration.
- Activate SAML Verbose Debugging if needed.
- This turns on debugging messages for a period of 2 hours, after which the debugging is deactivated automatically.
- The SAML debug messages can be viewed in the Chrome Developer console.
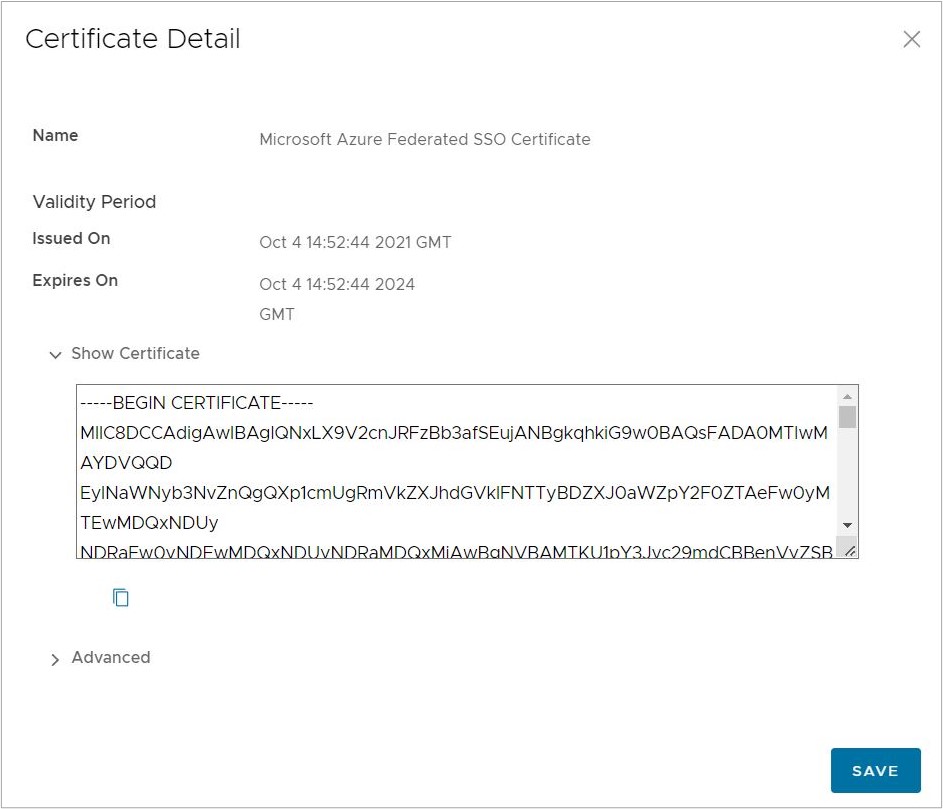
- Under the X.509 Certificate section, click on Add Certificate and copy the certificate from the notepad application as per step 11 of the Azure AD configuration and paste here, and then click Save.
- Finally, click Save Changes to complete the configuration changes on the Configure Authentication screen.
- Add an SSL Bypass rule for the Workspace ONE Access domain by following the steps below:
- Navigate to .
- Select an existing policy to add SSL Bypass rule and click the Edit button.
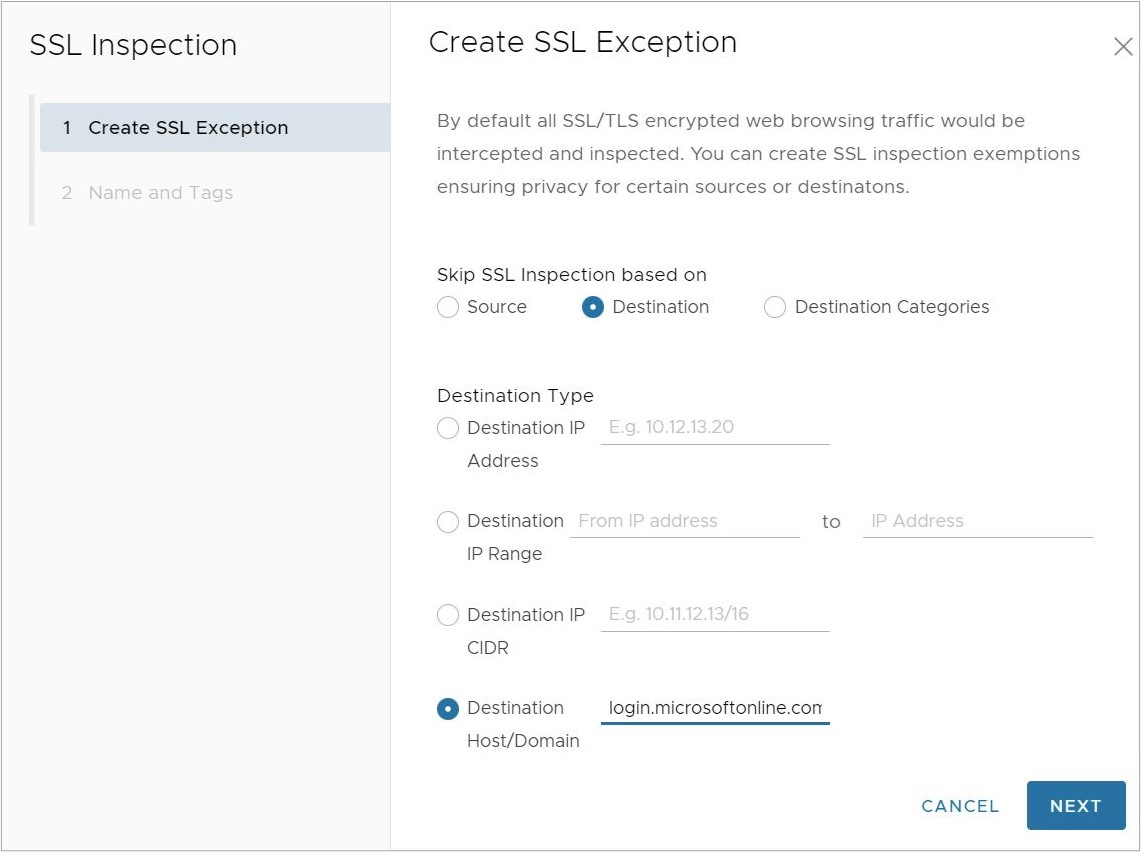
- Click the SSL Inspection tab and click + Add Rule. The Create SSL Exception screen appears.
- In the Create SSL Exception screen, configure the following and click Next:
- For Skip SSL Inspection based on, select Destination.
- For Destination Type, select Destination Host/Domain.
- For Domain, enter any one of the following domains:
- login.microsoftonline.com
- sts.windows.net
- microsoftonline-p.com
- msauth.net
- msftauth.net
- In the Name and Tags screen, enter a unique name for the rule and add a reason, if needed.
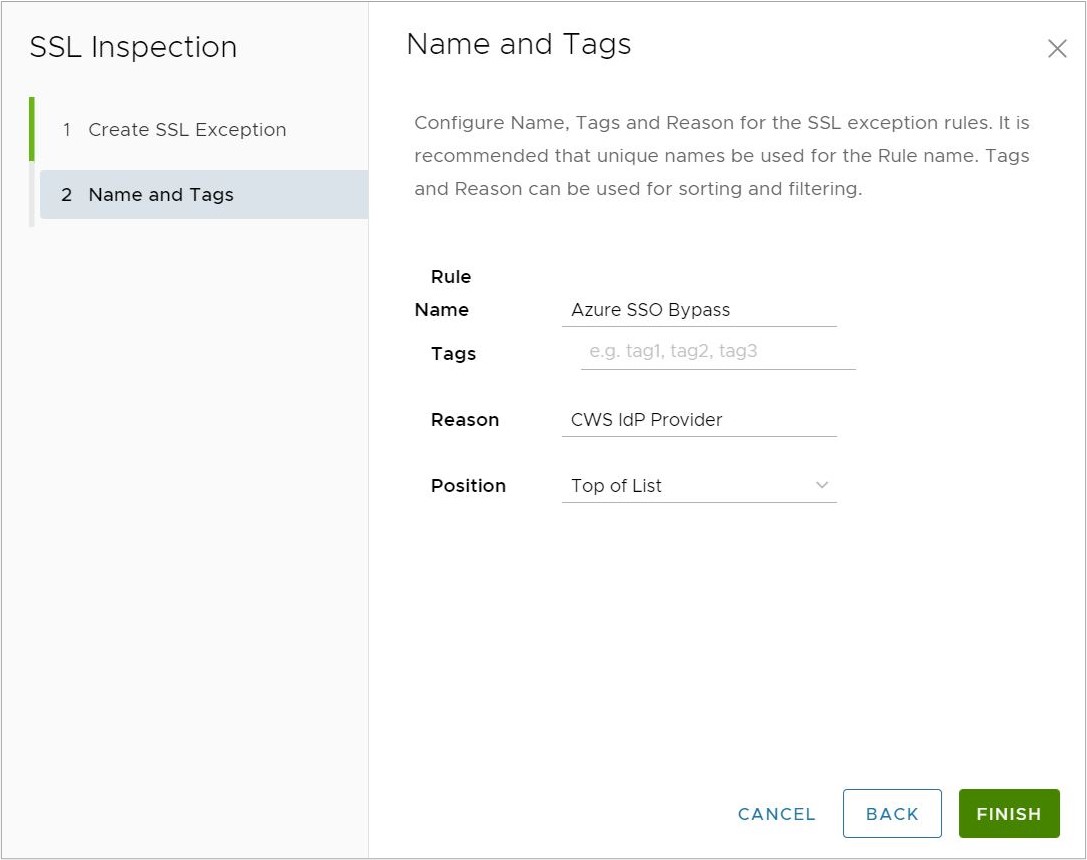
- Click Finish, and then Publish the applicable Security Policy to apply this new rule.
Important: The domain login.microsoftonline.com is part of the Microsoft 365 group of domains as found in the document: Domains and CIDRs Where an SSL Inspection Bypass Rule Is Recommended. If users have already configured an SSL Bypass rule which includes the full Microsoft 365 domain group, users can skip this step. If users attempt to configure the above rule while also having the full Microsoft 365 domain group included in an existing SSL Bypass rule, the new rule will throw an error as a unique domain may not be duplicated in multiple SSL bypass rules.For more information on domains that should have SSL Bypass rules configured, consult Domains and CIDRs Where an SSL Inspection Bypass Rule Is Recommended.
Troubleshooting
This section covers potential issues with your Azure AD IdP for Cloud Web Security configuration.
| Problem | Proposed Solution |
|---|---|
Users are getting the following error message when authenticating:

|
|