


VMware Cloud Web Security allows users to configure a CWS Security Policy rule to inspect browser-based web applications like Chrome, Edge, Firefox, Safari, and so on, but the rule would not apply for Non-Browser Web Applications like Slack or Dropbox. Beginning with Release 1.10.0, users have the option to configure rules to inspect browser traffic on Non-Browser Web Applications.
- Navigate to .
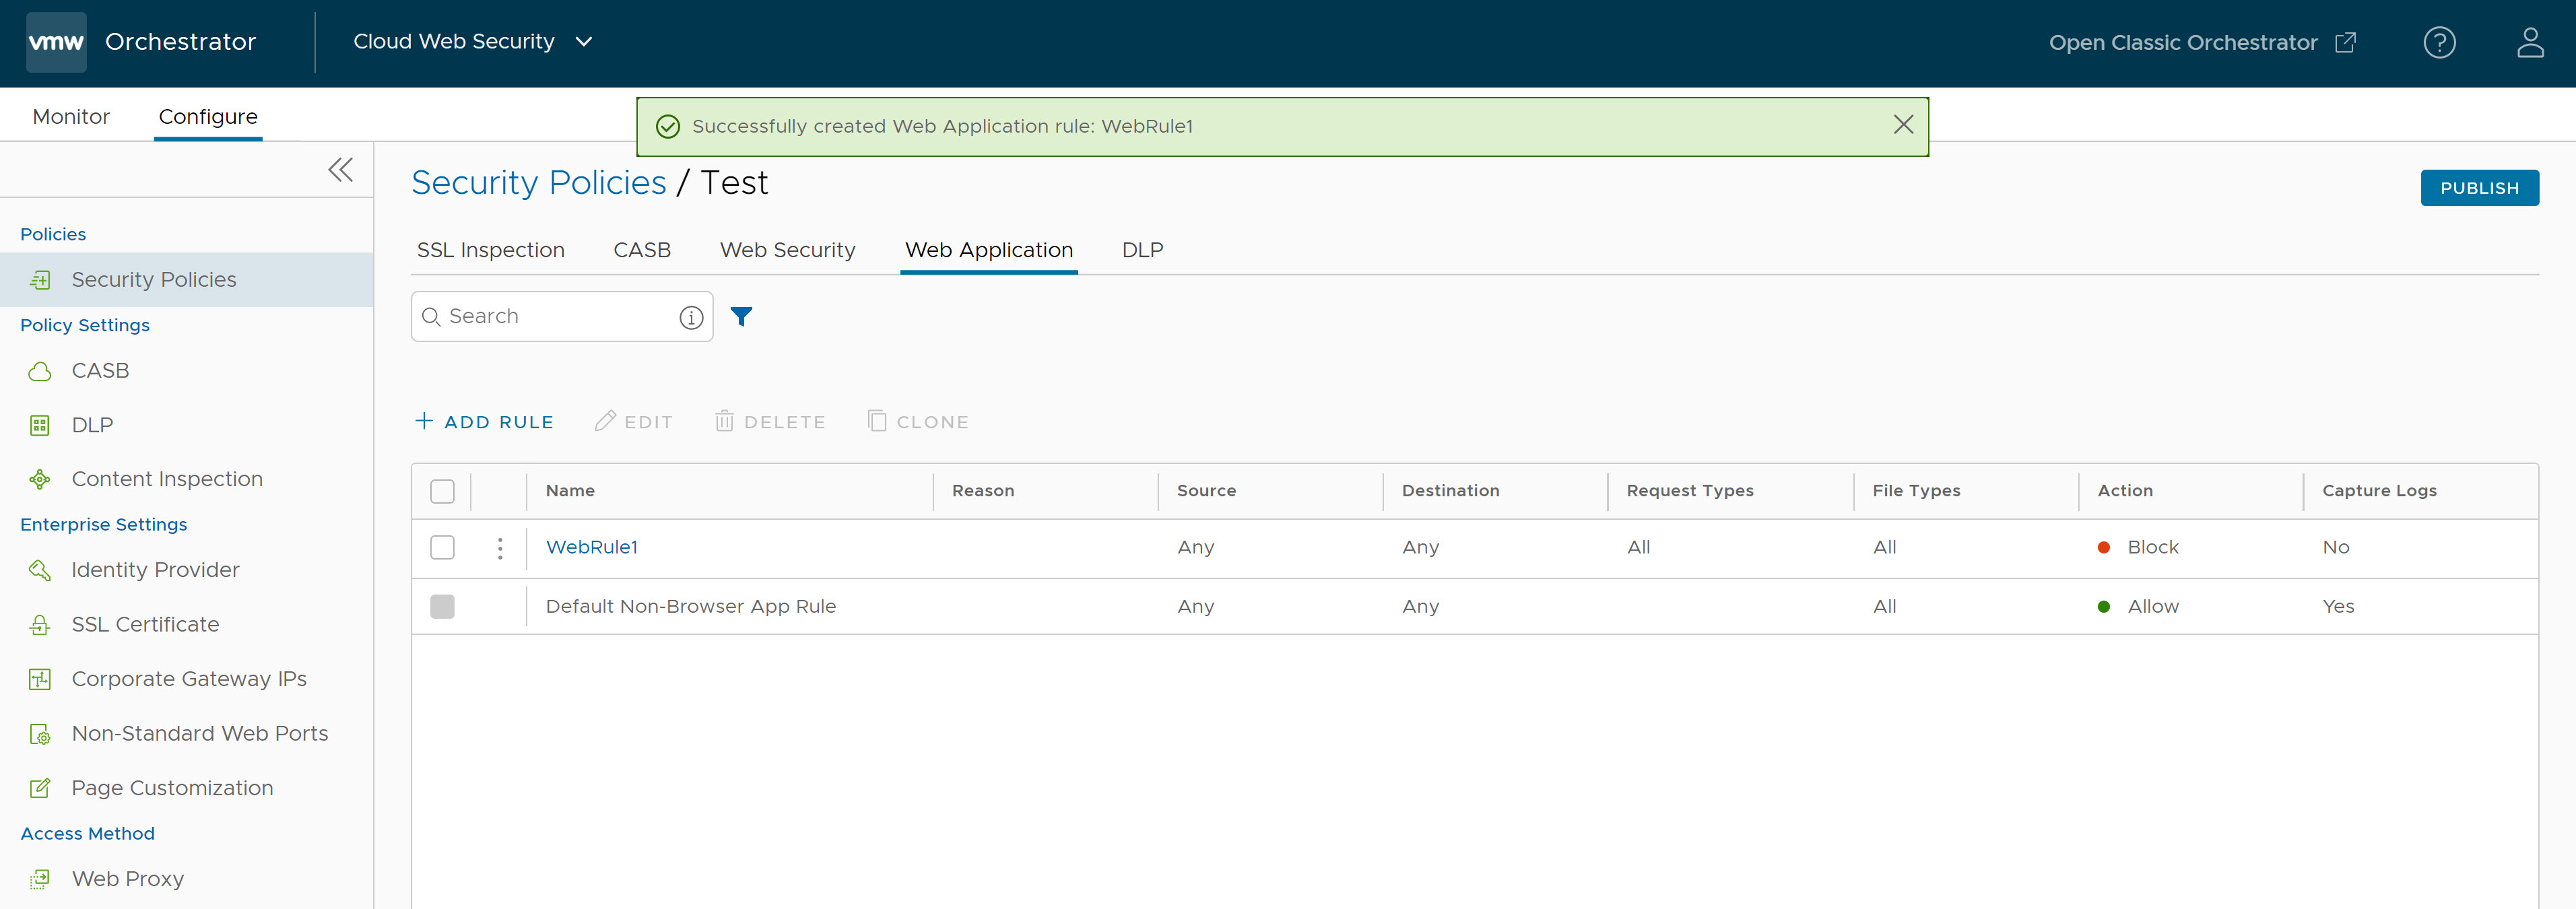
- Select a security policy to configure Web Applications rule. In the selected Security Policies screen, click the Web Application tab.
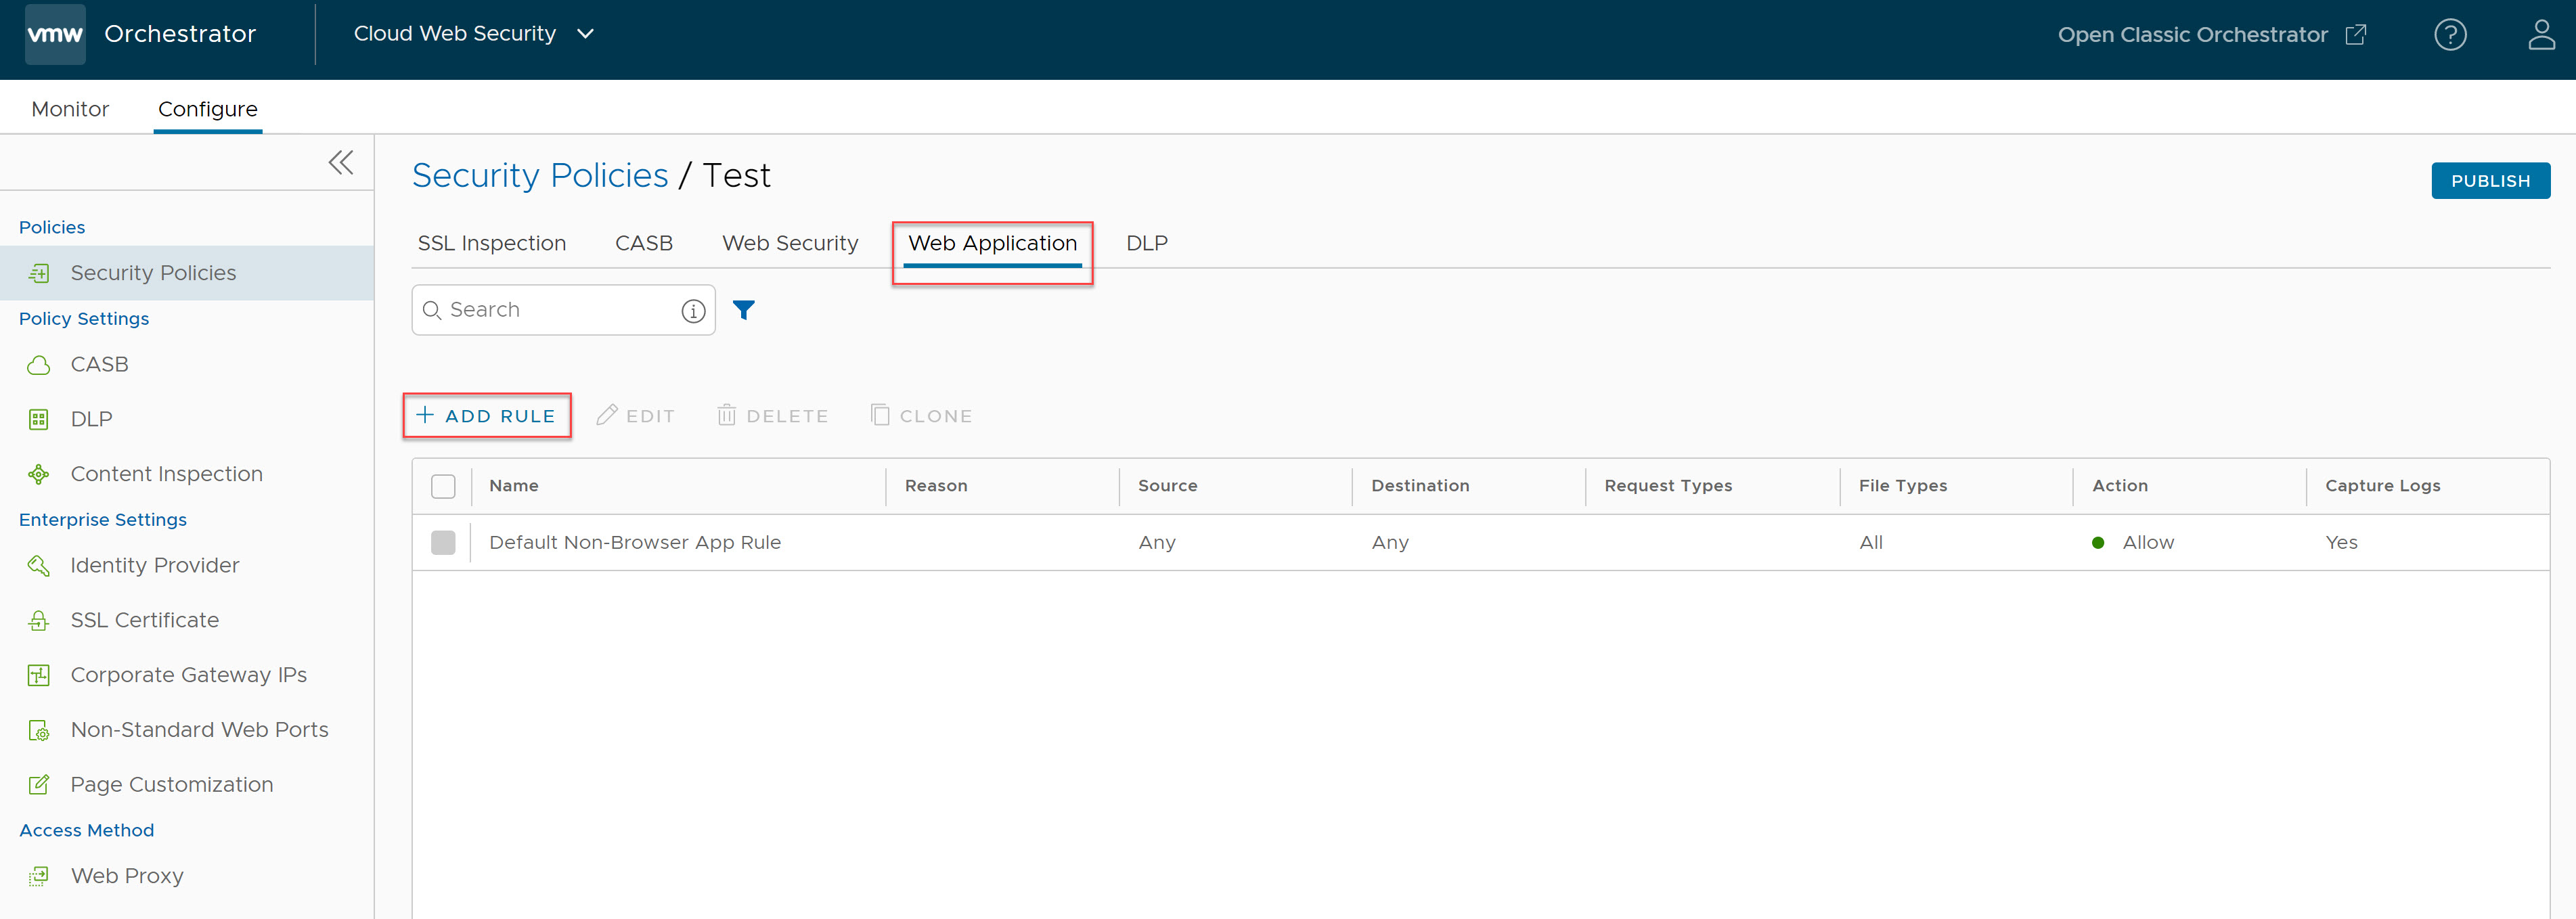
- Click + ADD RULE and enter all the required details such as Source type, Destination type, Request and File types, Action and Log details to create a new Non-Browser Web Application rule.
- In the Source screen, select the source for which Non-Browser Web Application inspection should apply. Users can select the source based on IP Address/IP Range, User Agent, or Browser as described in the following table.
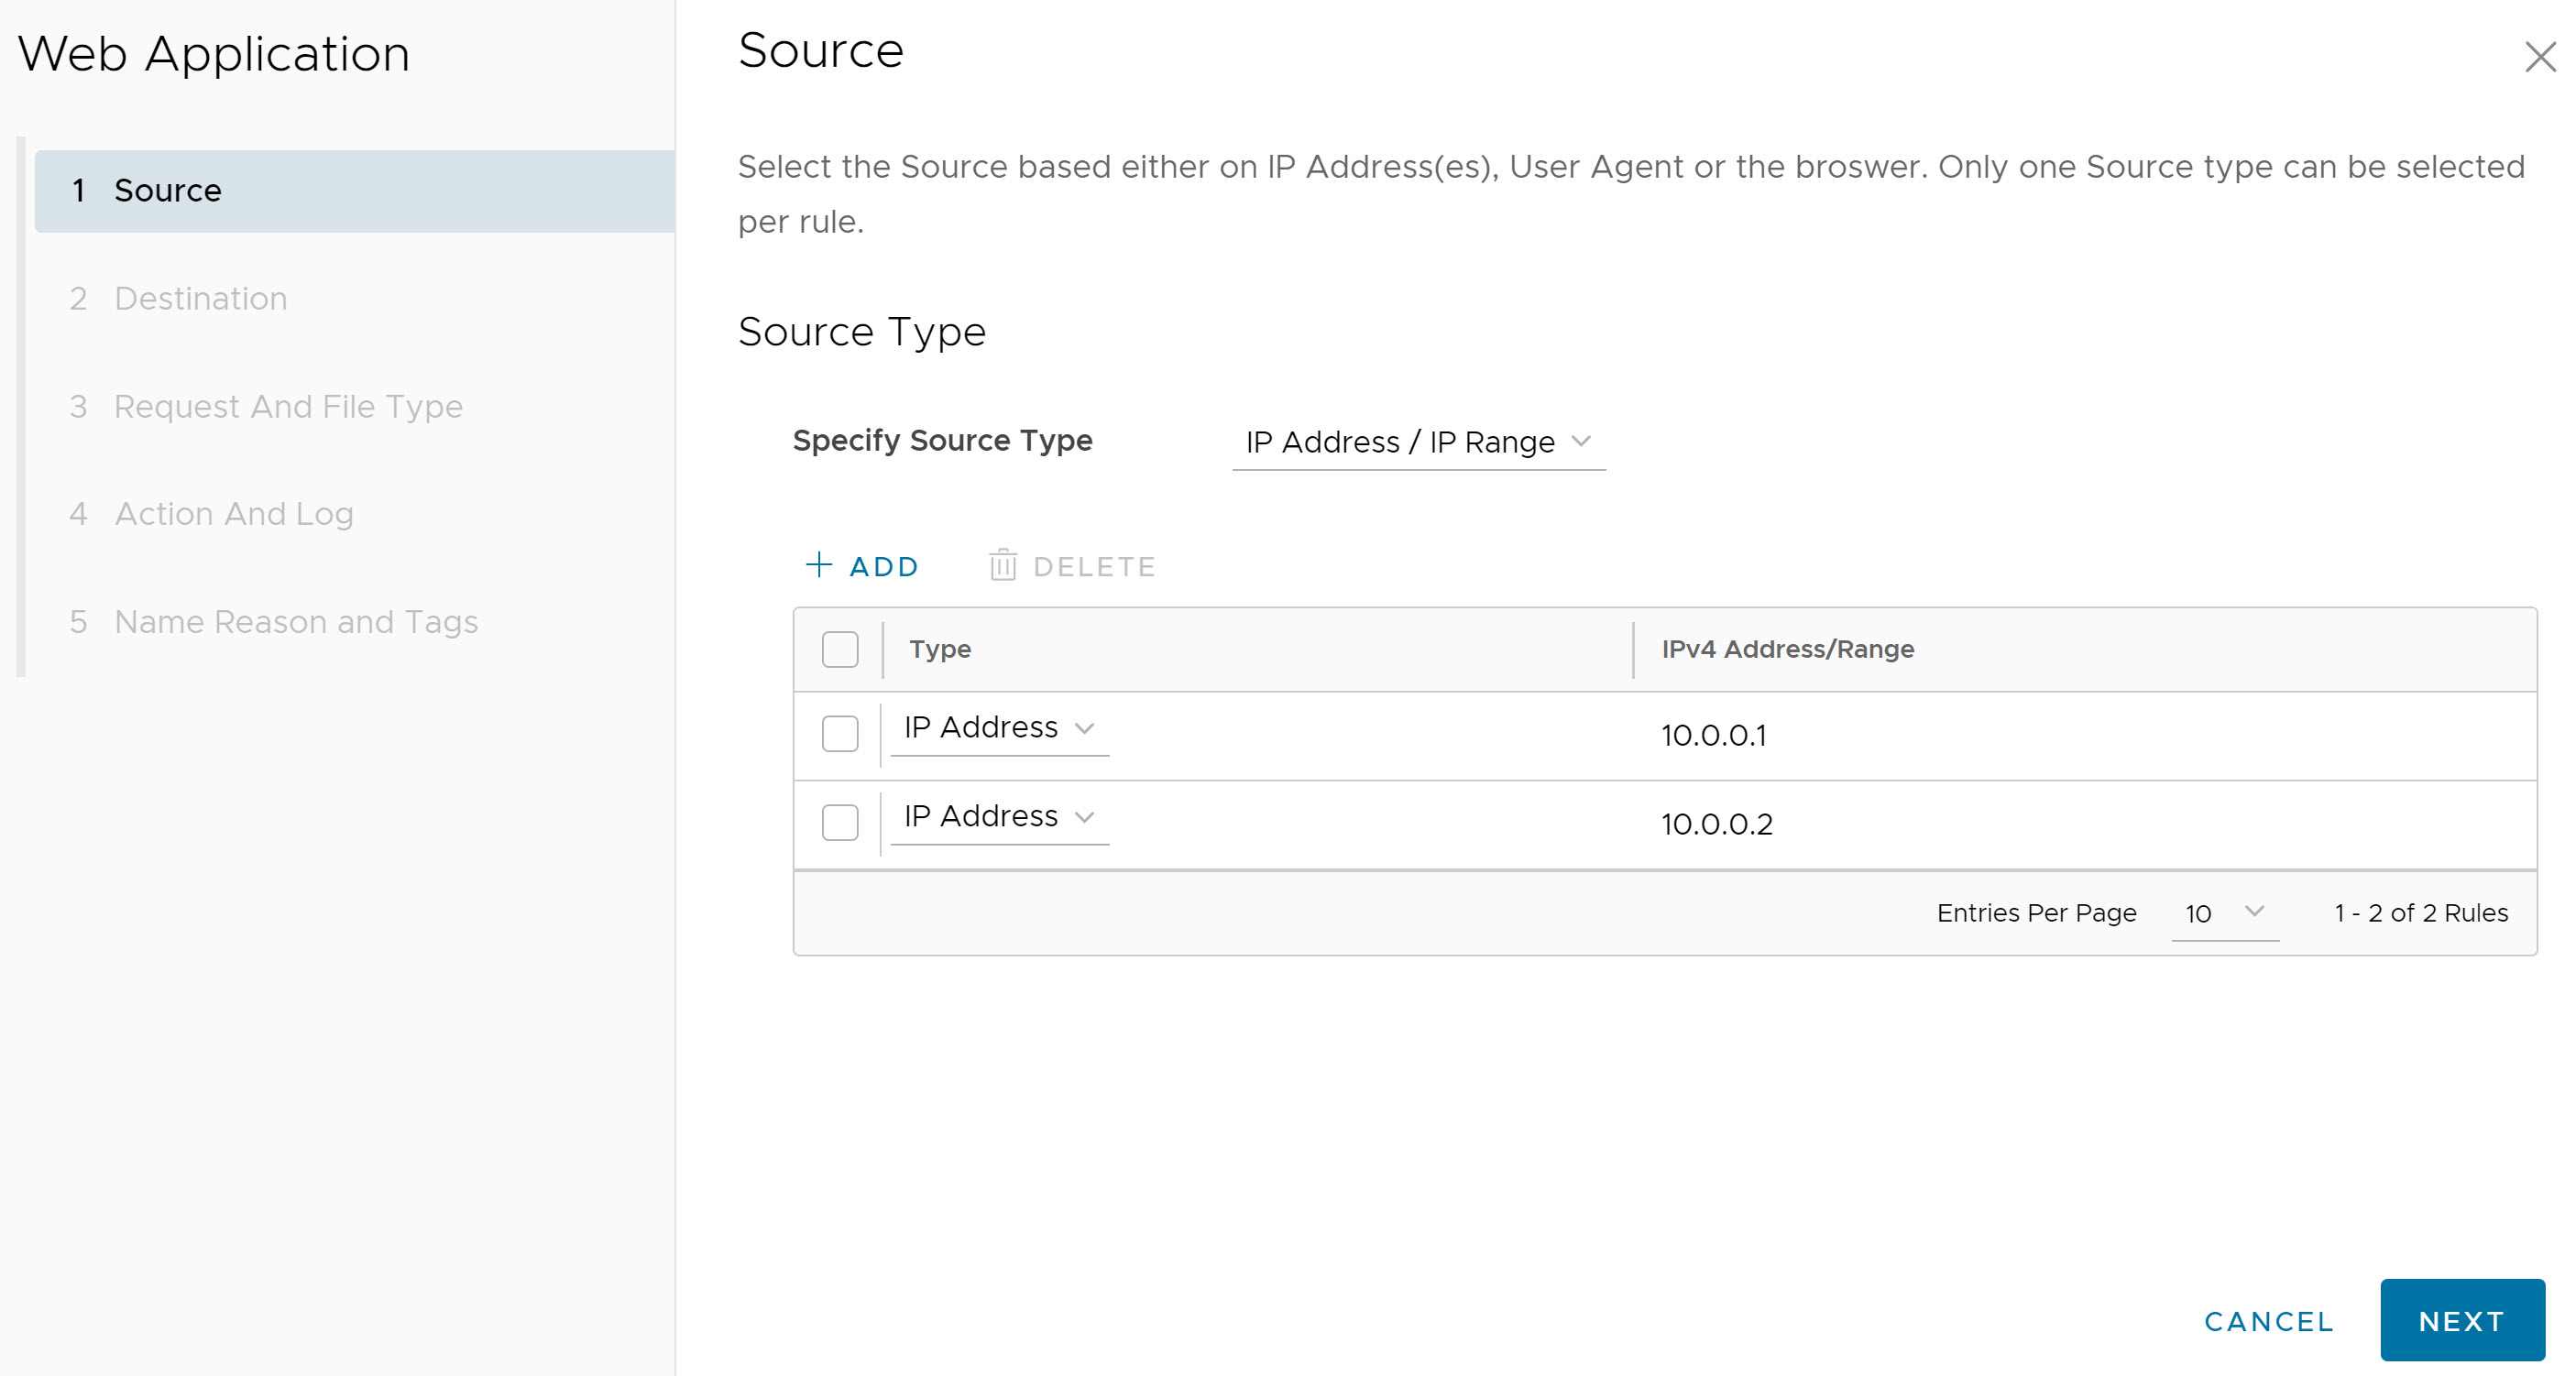
Field Description Any The default setting is "Any" and the policy inspects browser traffic on Non-Browser Web Applications from all source types. IP Address/IP Range Specify an IP address (for example, 10.0.0.1) or IP range (for example, 10.01.1- 10.0.2.225) to apply the rule. User Agent Set policy actions based on the match criteria (text or expression) specified using the following: - Equals
- Starts with
- Contains
- Ends with
- RegEx
Optionally, users can also include specific Source IP Address/IP range or use the default setting "Any Source IP Address".
Browser Specify the web browsers to apply the rule. Users can set policy actions based on any of the following web browsers: - Google Chrome
- Microsoft Internet Explorer
- Microsoft Edge
- Mozilla Firefox
- Apple Safari
- Samsung Internet
Optionally, users can also include specific Source IP Address/IP range or use the default setting "Any Source IP Address".
Note: Only one Source type can be selected per rule.Click Next. The Destination screen appears.
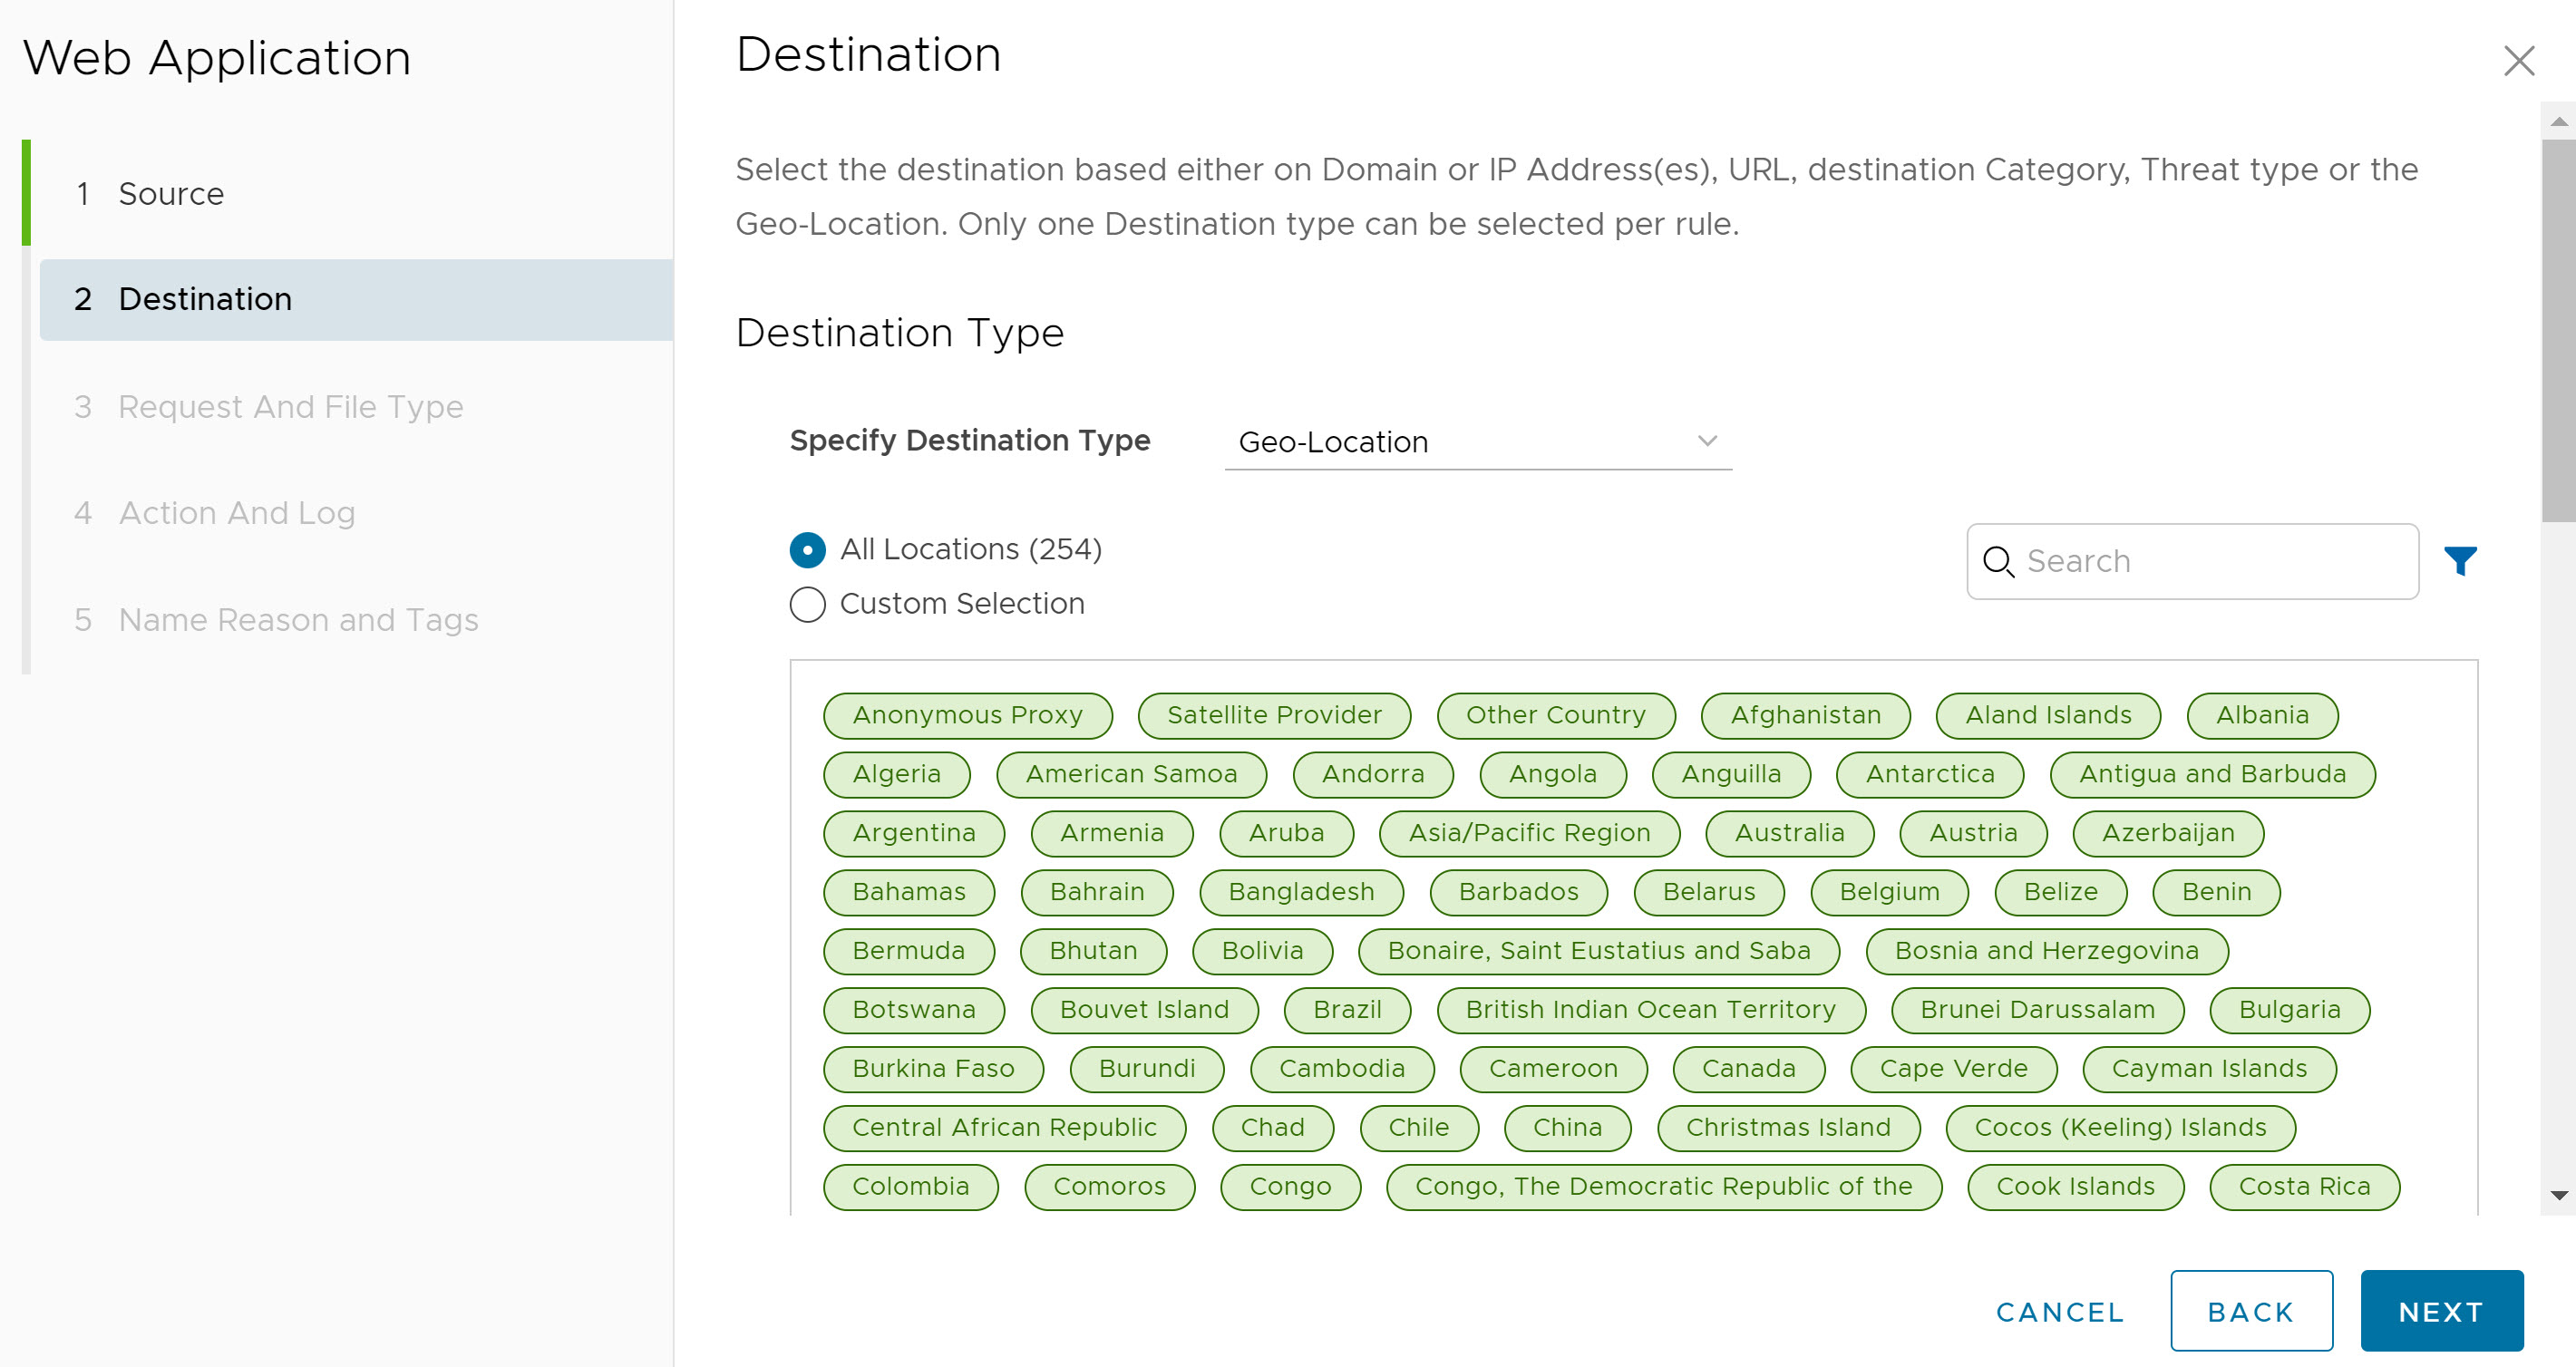
- In the Destination screen, select the destination for which Non-Browser Web Application inspection should apply. Users can select the destination based on Domain, IP Address/IP Range, URL, Category, Threat, or Geo-Location as described in the following table.
Field Description Any The default setting is "Any" and the policy inspects browser traffic on Non-Browser Web Applications from all destination types. Domain/IP Address/IP Range Specify Fully Qualified Domain Names (FQDN), IP address (for example, 10.0.0.1) or IP range (for example, 10.01.1- 10.0.2.225) to apply the rule. URL - Regex Set policy actions for URLs based on the match criteria (text or expression) specified using the following: - Equals
- Starts with
- RegEx
Category Select either All Categories or Custom Selection. The All Categories option highlights all available categories and applies them to the rule. The Custom Selection option allows users to specify which categories to apply to the rule by clicking on each category. Threat Select either All Threats or Custom Selection. The All Threats option highlights all available threats and applies them to the rule. The Custom Selection option allows users to specify which threats to apply to the rule by clicking on each threat. Geo-Location Select either All Locations or Custom Selection. The All Locations option highlights all available locations and applies them to the rule. The Custom Selection option allows users to specify which locations to apply to the rule by clicking on each location. Note: Only one Destination type can be selected per rule.Click Next. The Request And File Type screen appears.
- In the Request And File Type screen, select the Request Type (Uploads, Downloads, or Both) and the File Type for the rule to apply. Users can also select the HTTP method (POST, PUT) for the Upload request type. Optionally, users can also enter the minimum file size for the action to apply.
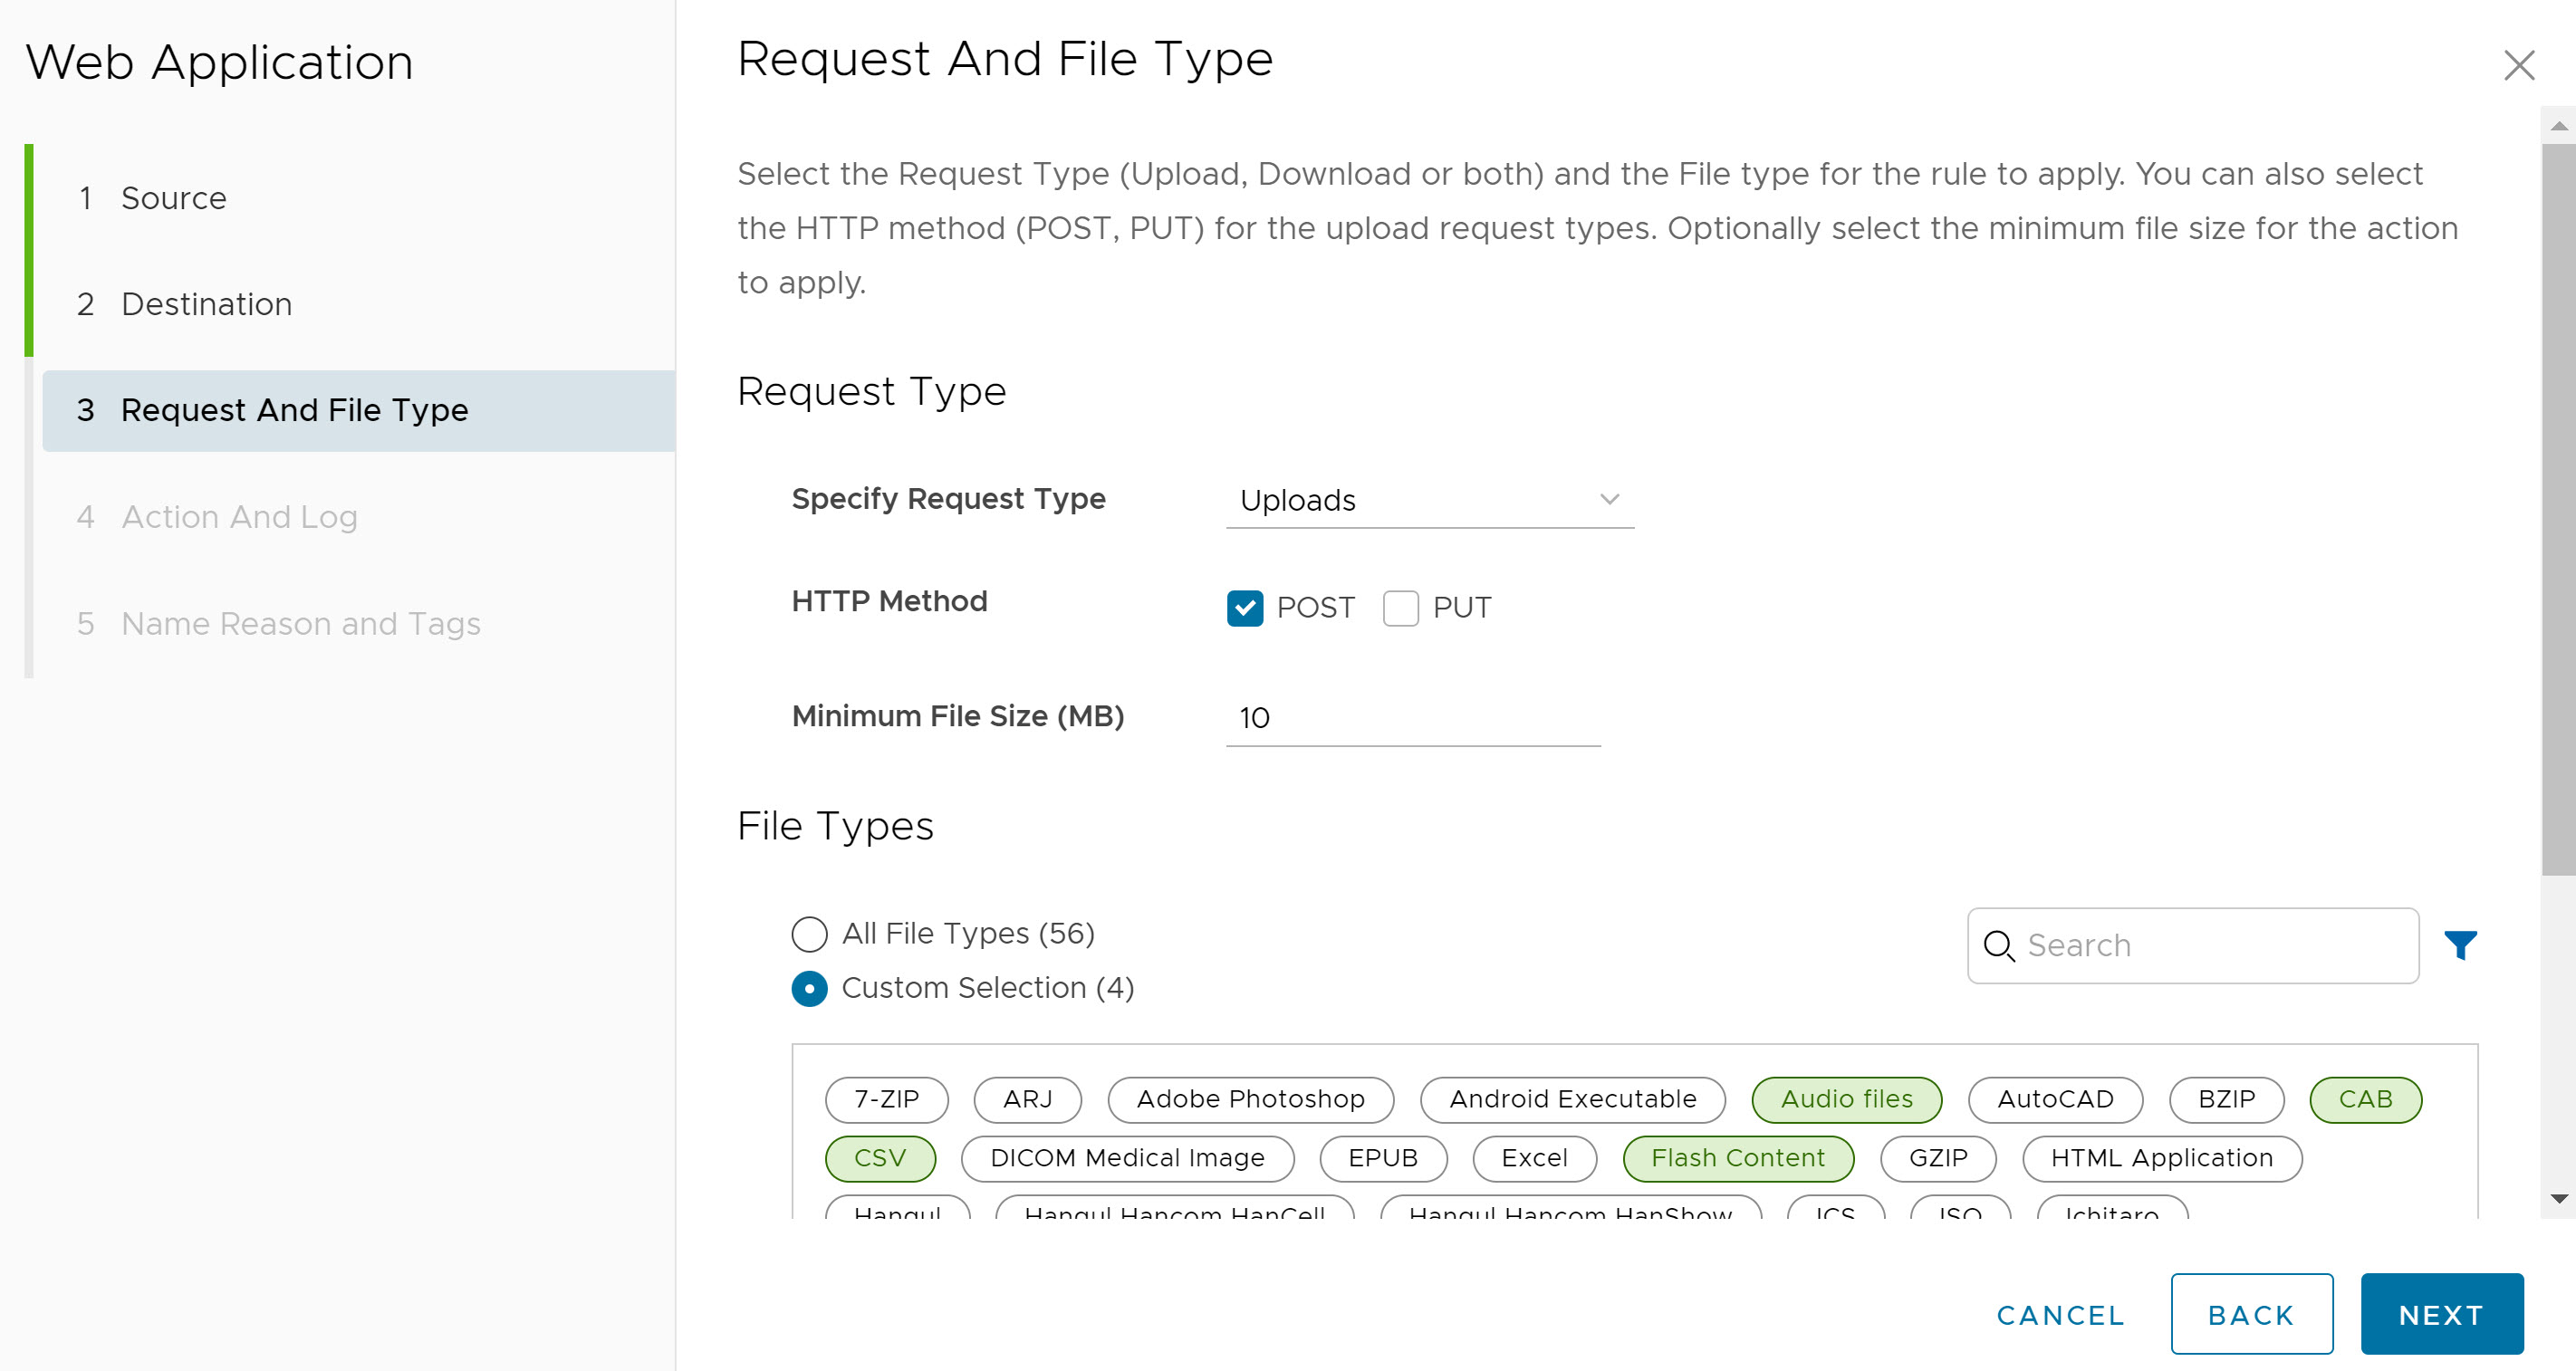
Click Next. The Action and Log screen appears.
- In the Action And Log screen, select the action (Allow or Block) to be taken if the rule criteria are met. Optionally, users can collect the logs for this rule by turning ON the Capture Logs toggle button.
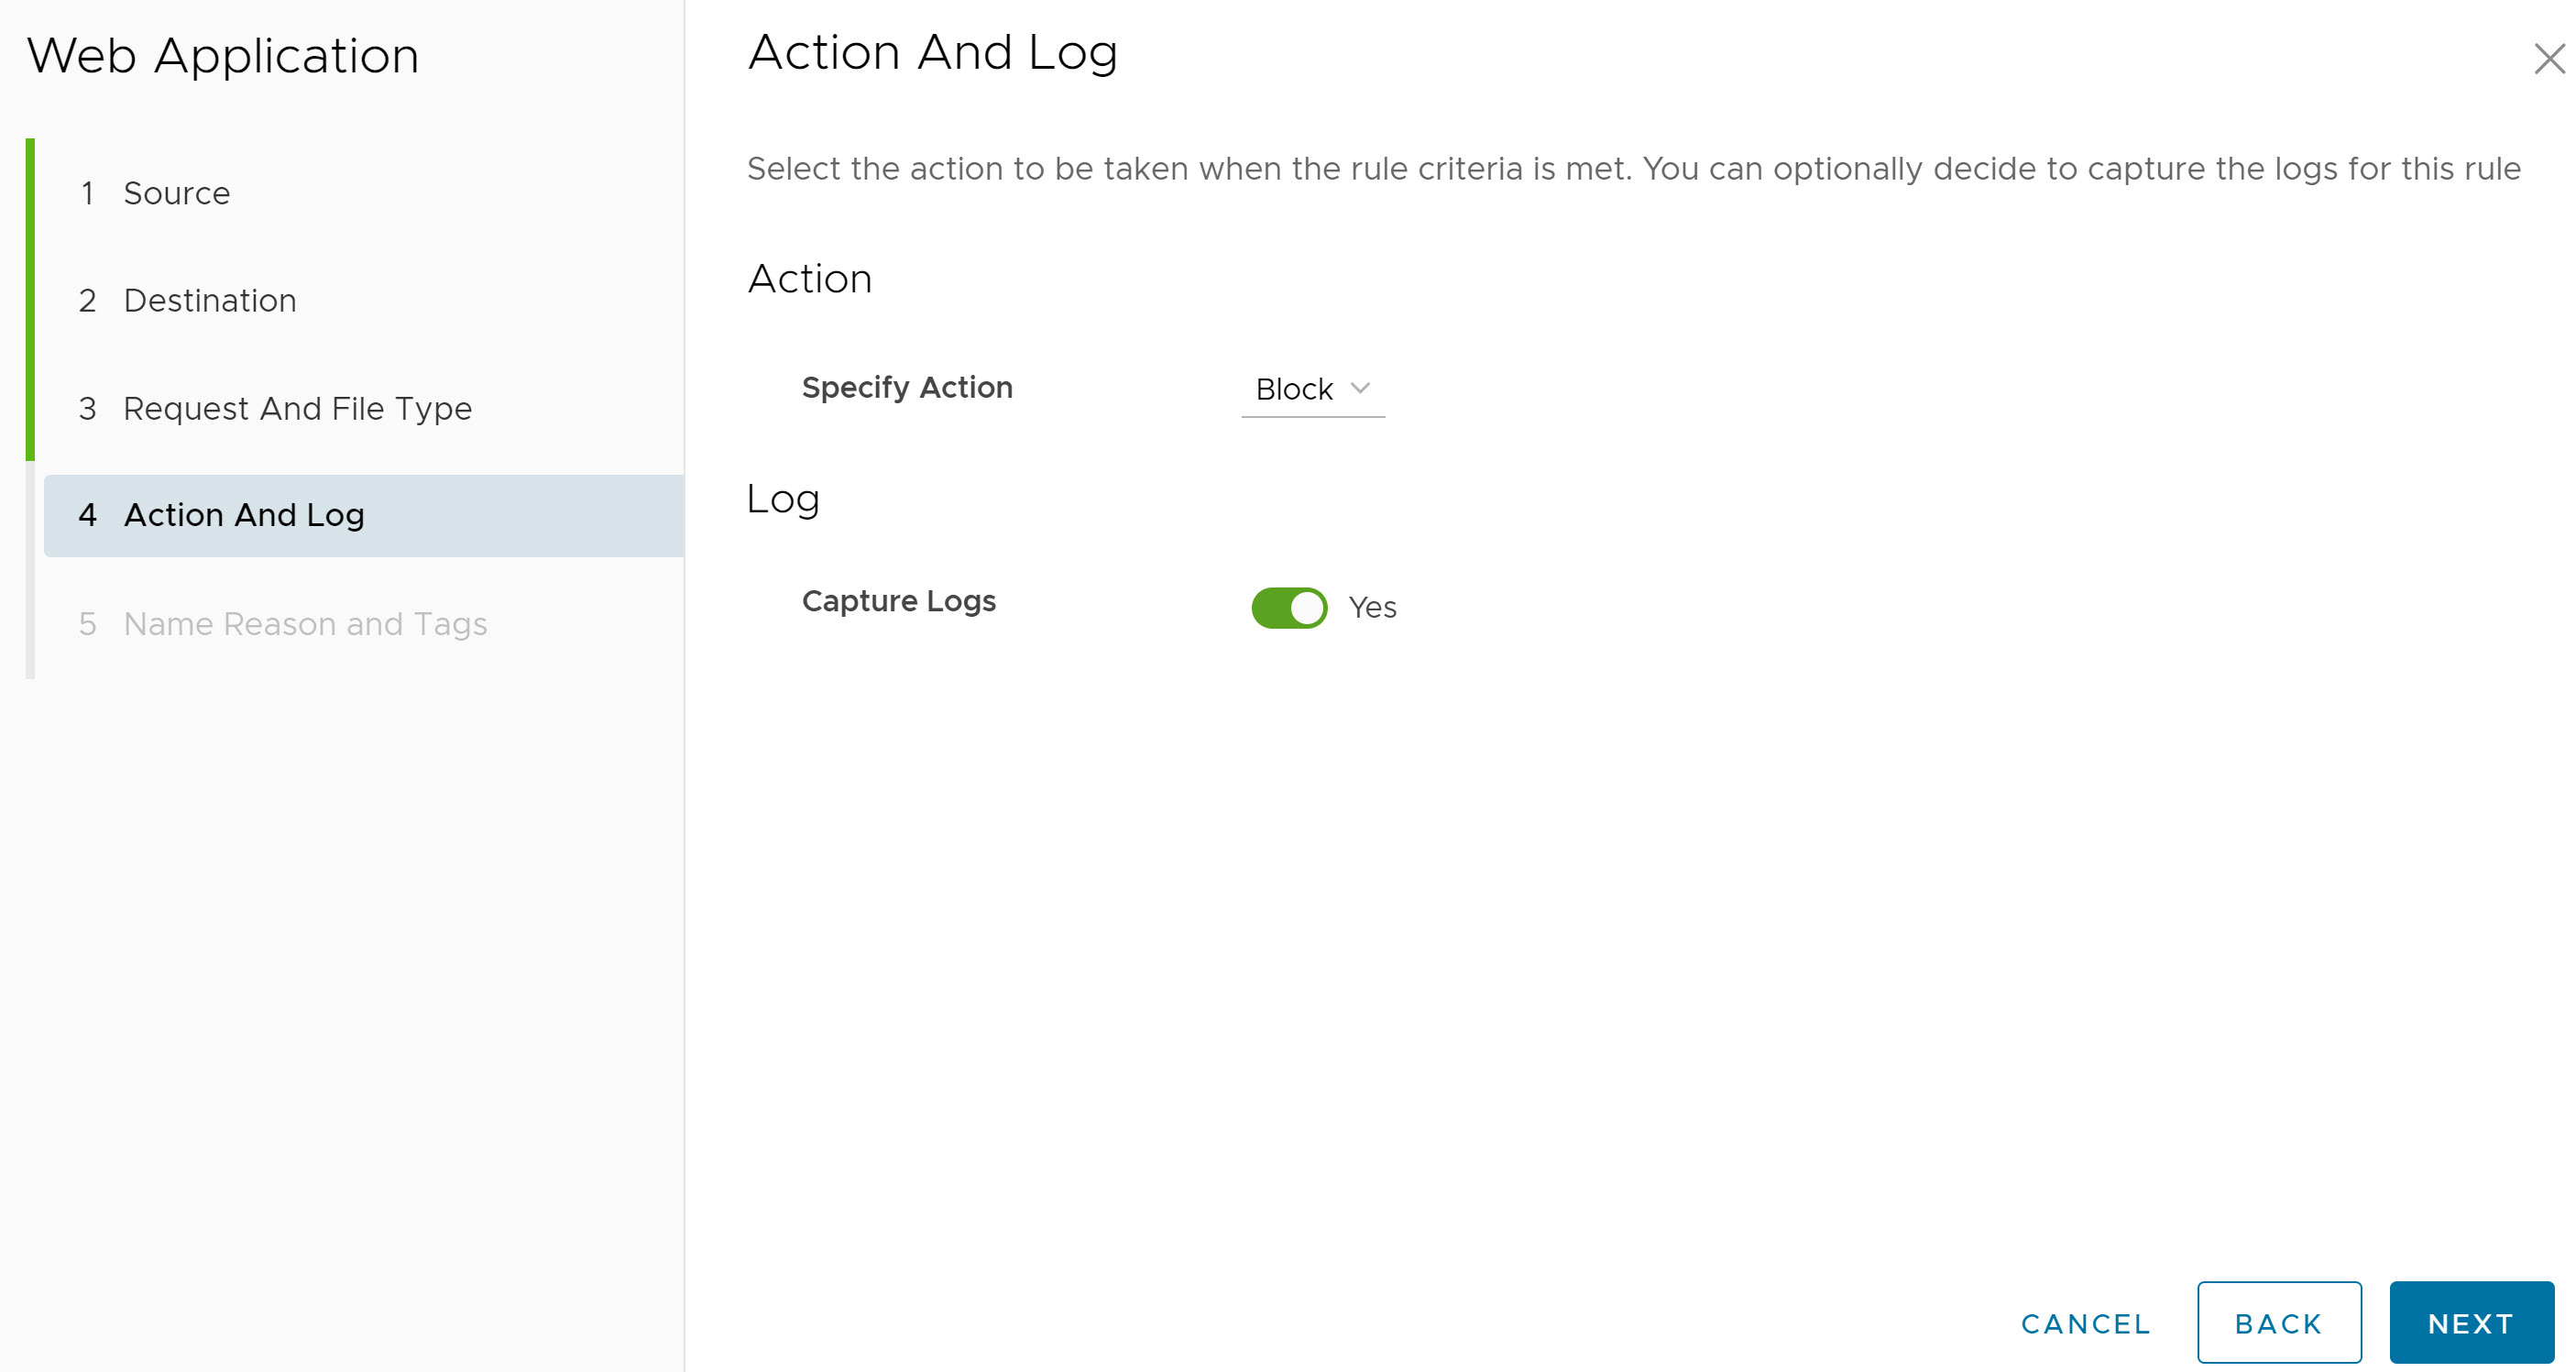
Click Next. The Name, Reason and Tags screen appears.
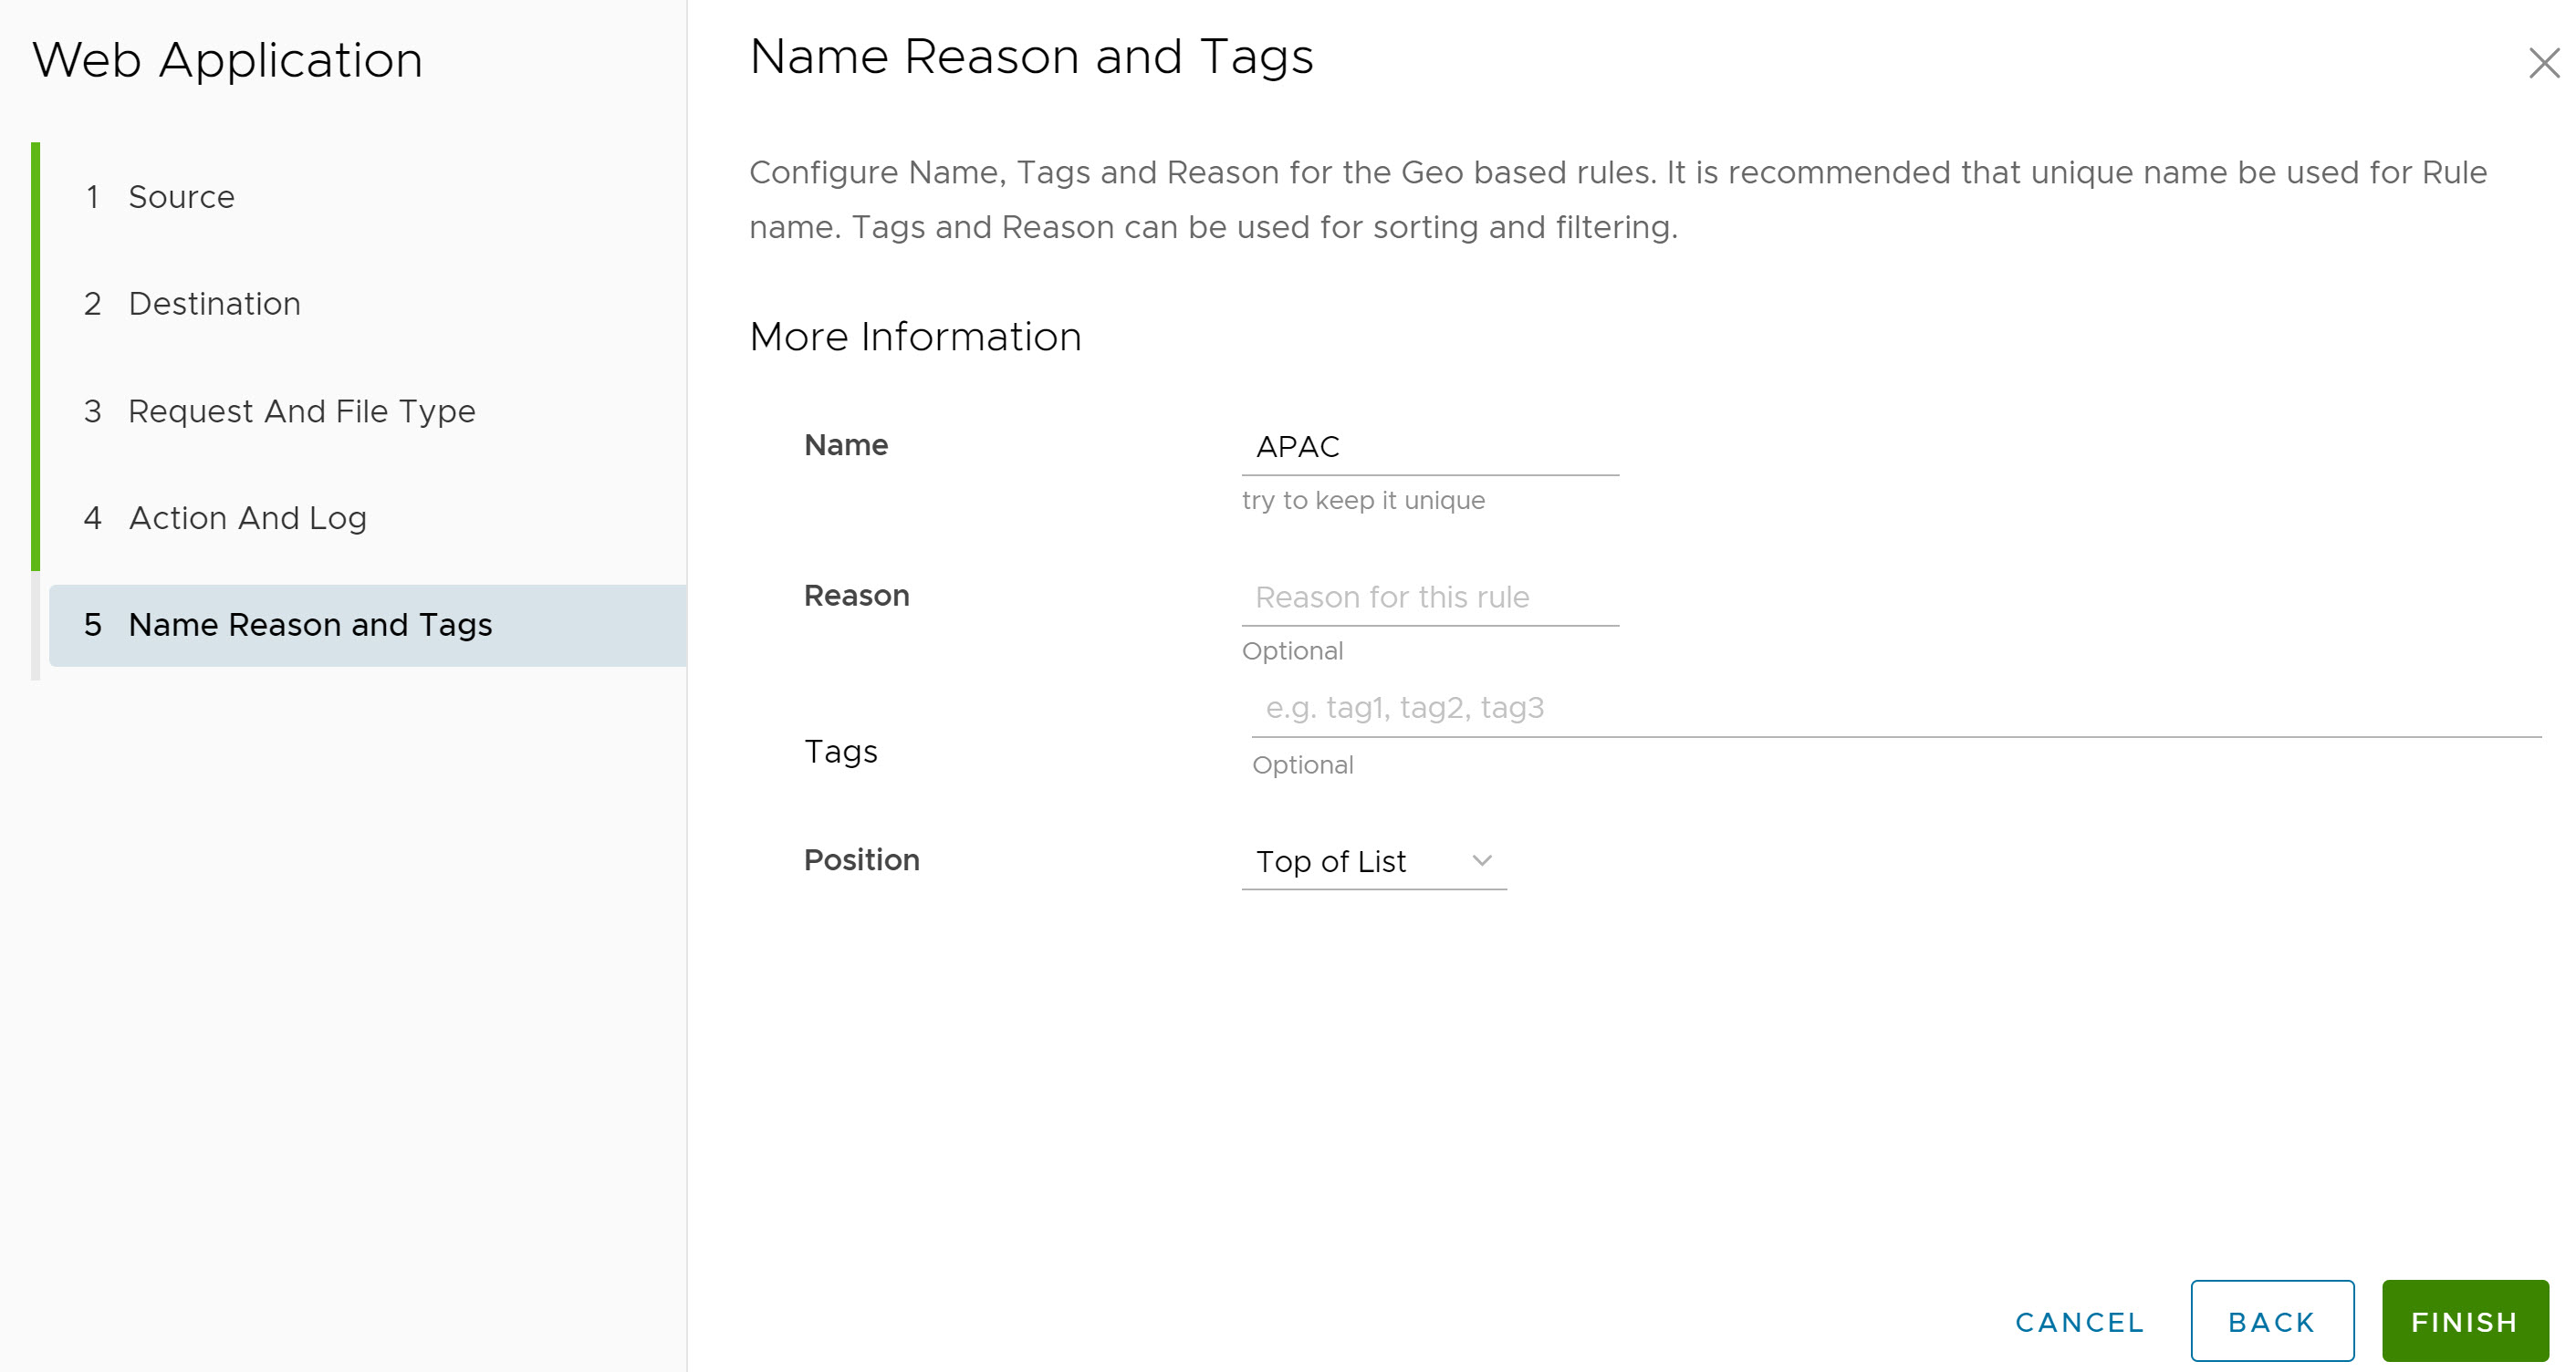
- In the Name, Reason and Tags screen, configure a unique Rule Name (required), Tags (if used), Reason (if needed), and a Position for the rule on the list of Non-Browser Web Application rules (the options are either 'Top of List' or 'Bottom of List').
Note: The Position field designates the rule's position on the list of Web Application rules.
- Click Finish and the newly created Web Application rule appears in the Web Application list.
- For the new Security Policy rule to take effect, select the rule and click the Publish button on the upper right-hand corner of the screen.
- After publishing the Security Policy, users can Apply the Security Policy.
- For an existing security policy, users can perform the following actions by selecting the check box of the policy:
- Edit - Allows to modify an existing policy rule.
- Clone - Allows to clone a policy from an existing one.
- Delete - Allows to delete a policy.
