


The Kalkitech Virtual Protection Relay (VPR) application was initially created for conceptual testing and to aid in developmental and training activities. It is included here to demonstrate a more rudimentary method in deploying a virtual machine with power system protection capabilities, from the ground up.
Prerequisites
VMware ESXi 7.0 Update 3 or later running on a capable server.
Minimum compute available:
One or more physical CPU cores
2 GB or more RAM
8 GB or more storage (thick provision)
Real-time operating system installation image (ISO), such as Photon OS (publicly available).
Kalkitech VPR and HMI application files (not commercially available, contact Kalkitech)
Note:Kalkitech HMI uses Java runtime environment.
Procedure
- Upload the Photon OS ISO file to the vSphere datastore.
Figure 1. Upload ISO to vSphere Datastore 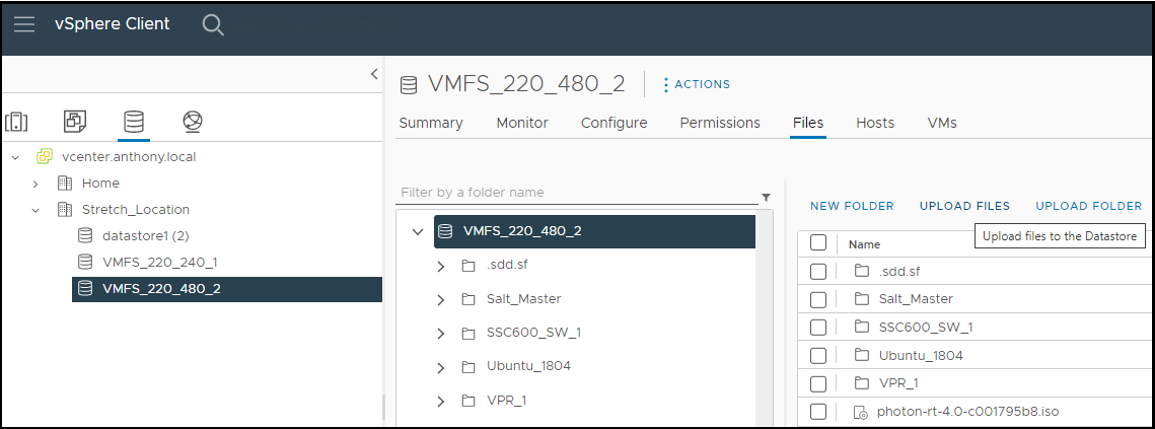
- Select Create a new virtual machine and click NEXT.
Figure 2. Create a Virtual Machine 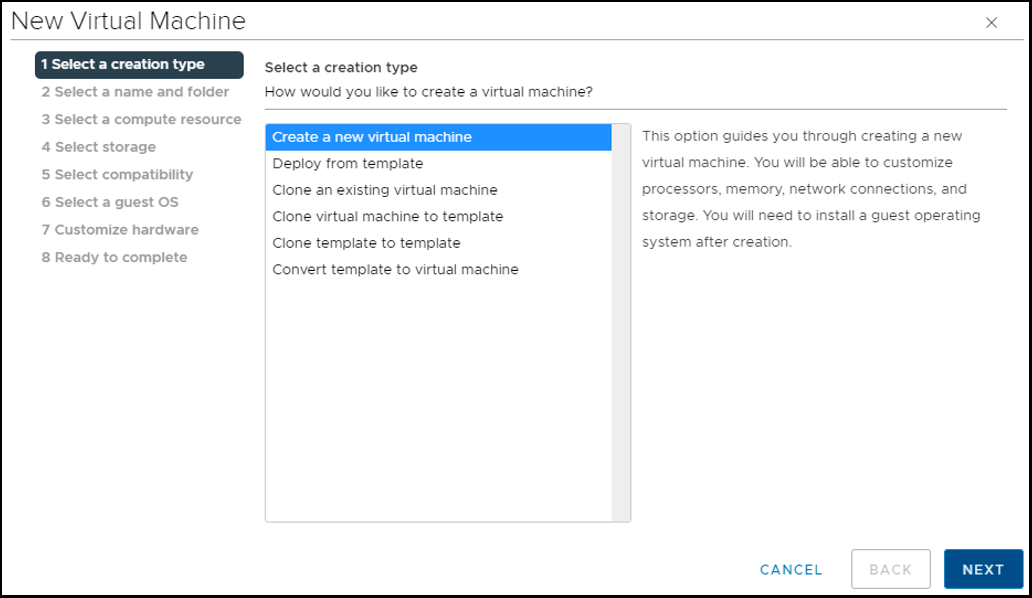
- Select a storage location for the VM to install.
Figure 3. Select Storage Location 
- Select a guest OS to match to the ISO file being used.
Figure 4. Select Guest OS 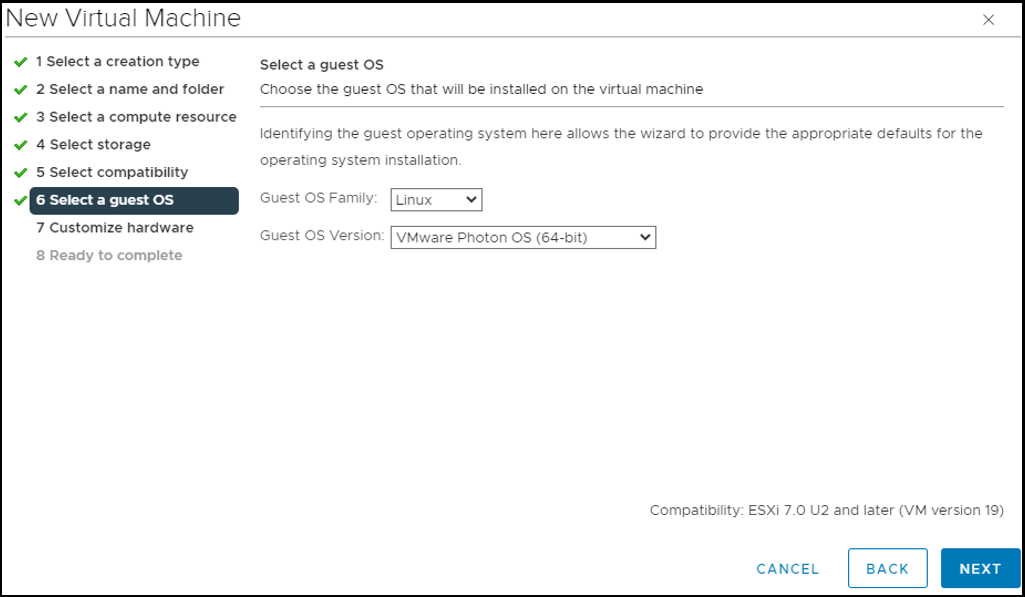
- Customize the virtual hardware to be allotted to the VM.
Click Virtual Hardware and update the following components:
CPU = 1
Reservation = Maximum (the sample image shows 2.7 GHz)
Figure 5. CPU Configuration 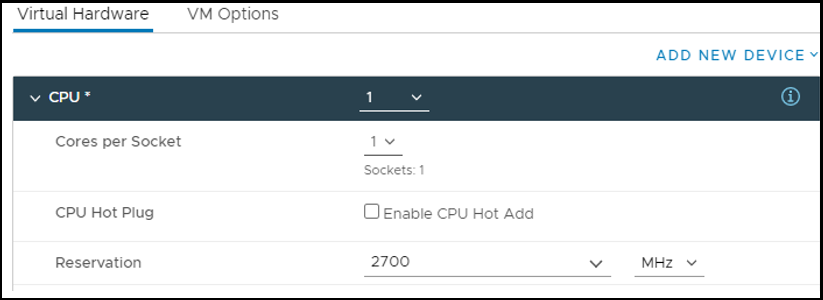
Memory = 2 GB
Select the Reserve all guest memory (All locked) checkbox.
New Hard Disk = 8 GB
Disk Provisioning = Thick Provision Lazy Zeroed
Note:The New Network defaults to an available network already established on the ESXi host (for example, VM Network). For testing purposes, this might be adequate to carry both station and process bus traffic. If it is used for both, ensure to edit the vSwitch settings to Accept Promiscuous mode. However, if you want to use this VM for production purposes, then splitting the networks is recommended. The station bus can remain on a virtual adapter such as VMXNET 3.
Figure 6. VM vNIC for Station Bus Traffic 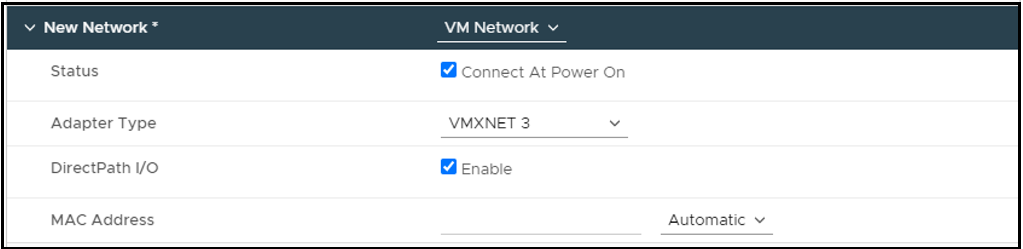
However, the process bus traffic must be accommodated by PCI passthrough. The PCI passthrough can be added when establishing a new VM (if a passthrough port is available), or later after the VM is built. See Install Virtual Appliance for details.
New CD/DVD Drive = Datastore ISO File. It prompts you to select an ISO file from an existing datastore.
Select the Connect At Power On checkbox.
Figure 7. Select ISO File 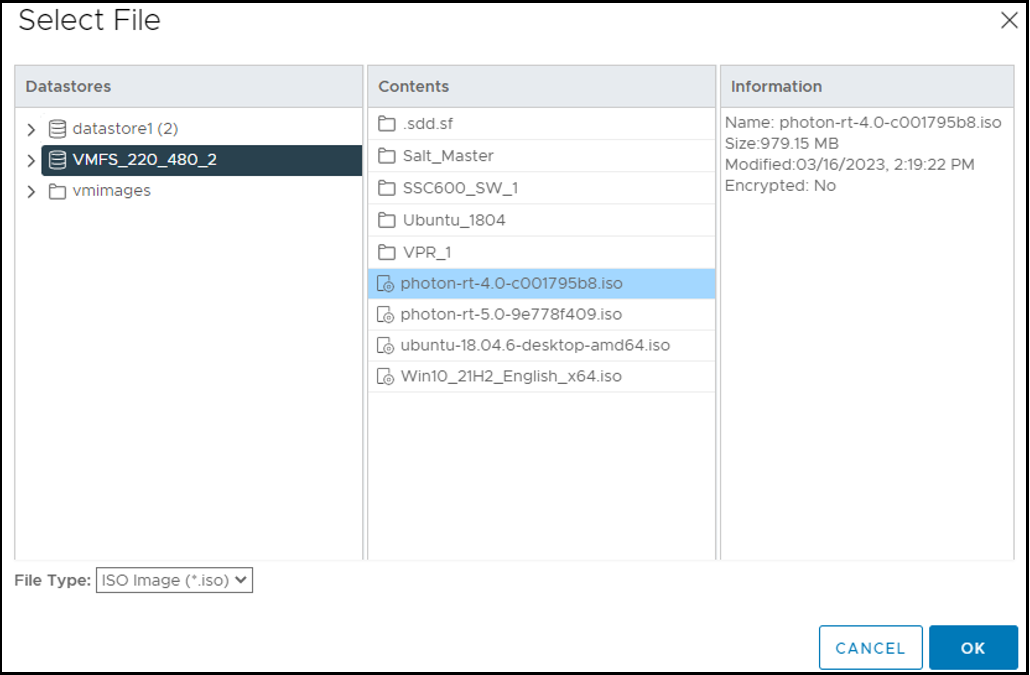
Figure 8. Connect At Power On 
Click and update the following components:
Deselect Enable Logging.
Latency Sensitivity = High
Configuration Parameters > EDIT CONFIGURATION
Enable backing guest vRAM:sched.mem.lpage.enable1GPage = TRUE
Advanced settings to benefit compute latency and timers
sched.cpu.affinity.exclusiveNoStats = TRUEmonitor.forceEnableMPTI = TRUE
timeTracker.lowLatency = TRUE
- Using remote or web console, the OS can be initialized. Using Photon, in this example, click Install to begin the installation.

- Now that the VM can be accessed using SSH, use an SFTP client software (such as WinSCP) to access the file structure of the VM.
Figure 9. SFTP Client Software 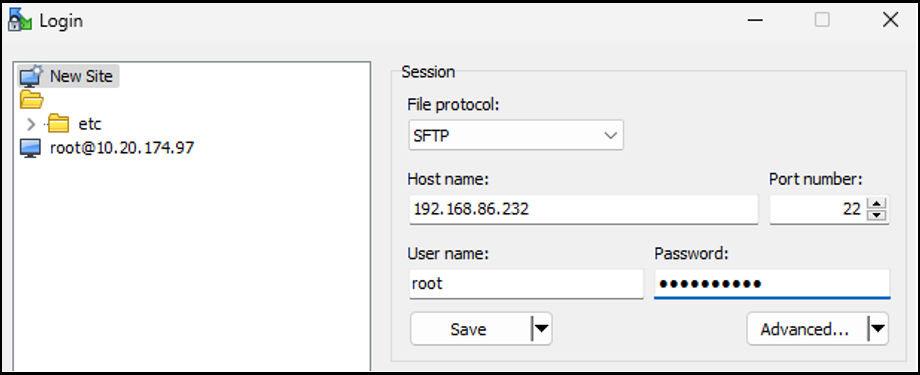
- Copy the entire Kalkitech application to this new folder (for example, /home/vpr/vpr-1.x.x) and edit the properties of the Kalkitech folder to update the permissions to an octal value of 0774 (allowing read, write, and execute for Owner and Group, and read access for Others).
Next, edit the sample_script.sh file located within the /home/vpr/vpr-1.x.x directory to ensure it matches your VM network parameters. In the example provided in VPR Communication Parameters, the station bus uses the eth0 adapter, while the process bus uses the eth1 adapter.
The IP address of each is specified here (IP1 and IP2). If only one network is leveraged (for test reasons), NET1 = NET2 and IP1 = IP2.
Figure 10. VPR Communication Parameters 
The IED name in this file must match the iedName VPR’s Substation Configuration Description (SCD) file exactly.
