You can now download and install Windows 11 on your Apple Silicon Mac from the Fusion user interface.
Windows 11 introduces new system requirements for physical and virtual machines.
VMware Fusion 13 provides the necessary hardware and security requirements to satisfy these requirements, and gives options for the user to customize if necessary.
- TPM 2.0 device (or vTPM equivalent)
- UEFI Firmware
When you install Windows 11 on a physical machine, the PC must have a TPM chip of at least version 2.0. The vTPM in VMware virtual machines is a representation of a physical TPM 2.0, and requires a measure of encryption. While creating a Windows virtual machine, you may choose between a full encryption or a fast encryption of the virtual machine to satisfy the requirements for the vTPM. After the VM is encrypted, Fusion automatically adds the vTPM during the installation walkthrough.
These requirements are for both the traditional x86-based Windows as well as Windows for Arm devices, which is required when you use Fusion on Macs with Apple silicon such as the M1 and M2 chips.
The following steps provide a walkthrough of a fresh Windows 11 guest installation on an Apple Silicon Mac host using the new built-in ISO download utility.
Prerequisites
Procedure
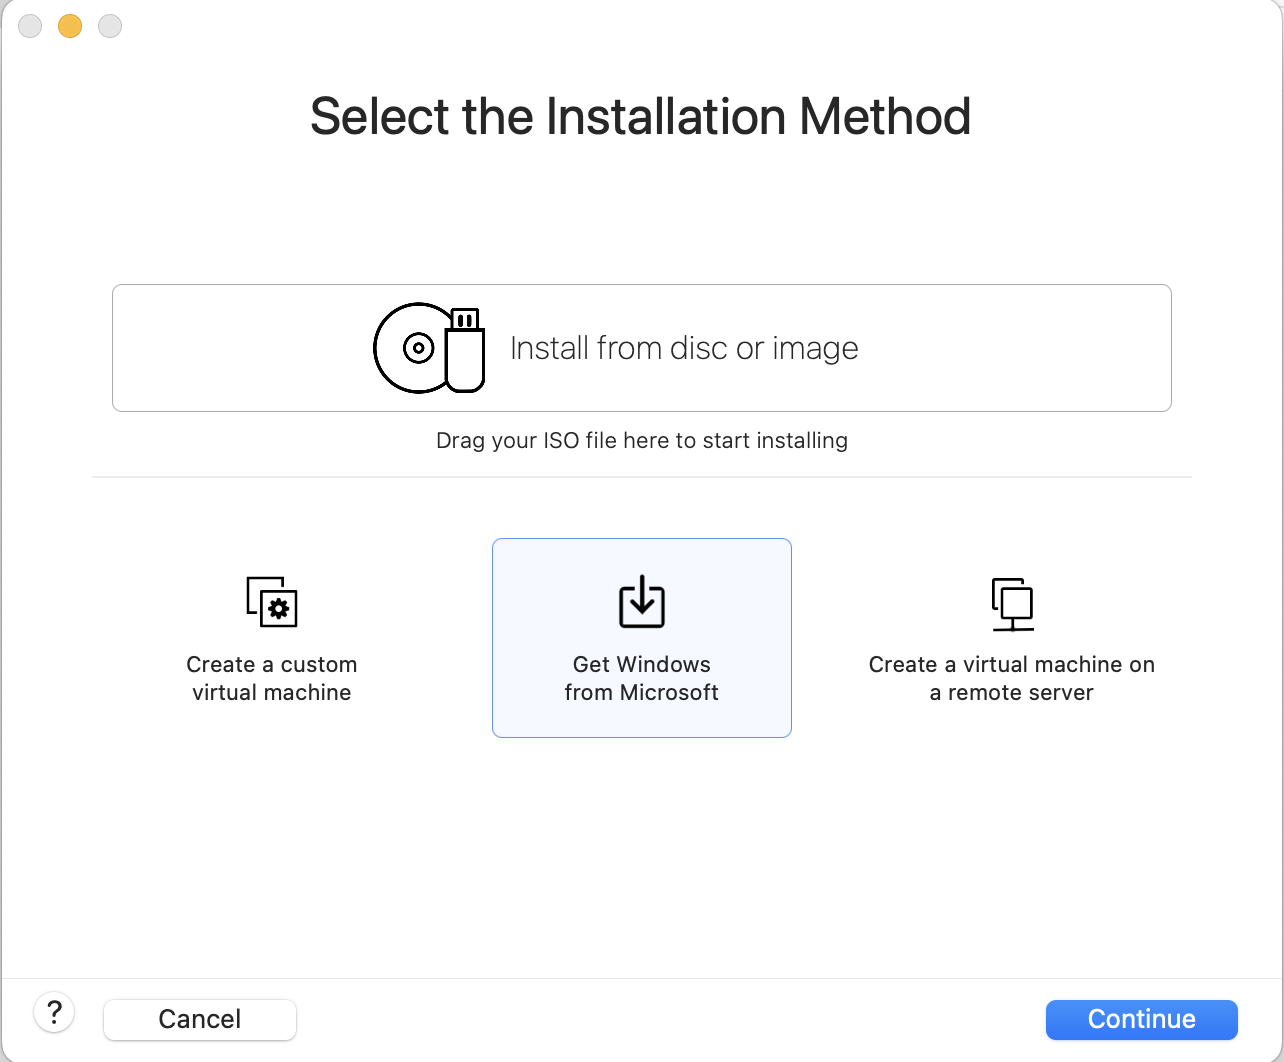
- Select .

A dialog box named Select the Installation Method appears. - Select Get Windows from Microsoft, and click Continue.
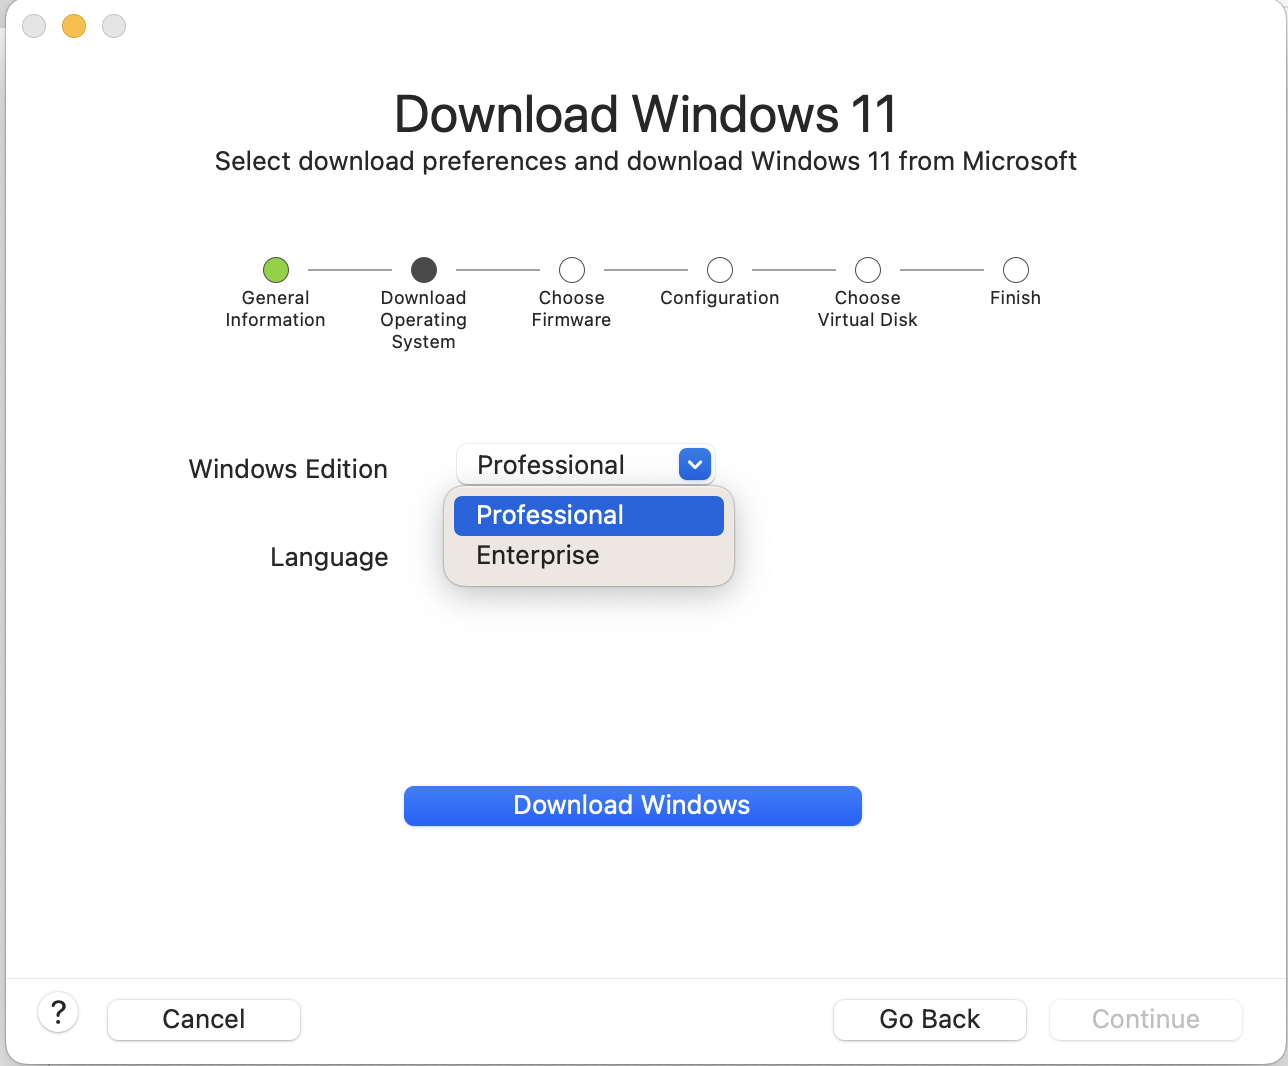
The Download and Install Windows 11 window appears. - In the Windows Edition field, select your preferred edition for Windows 11.
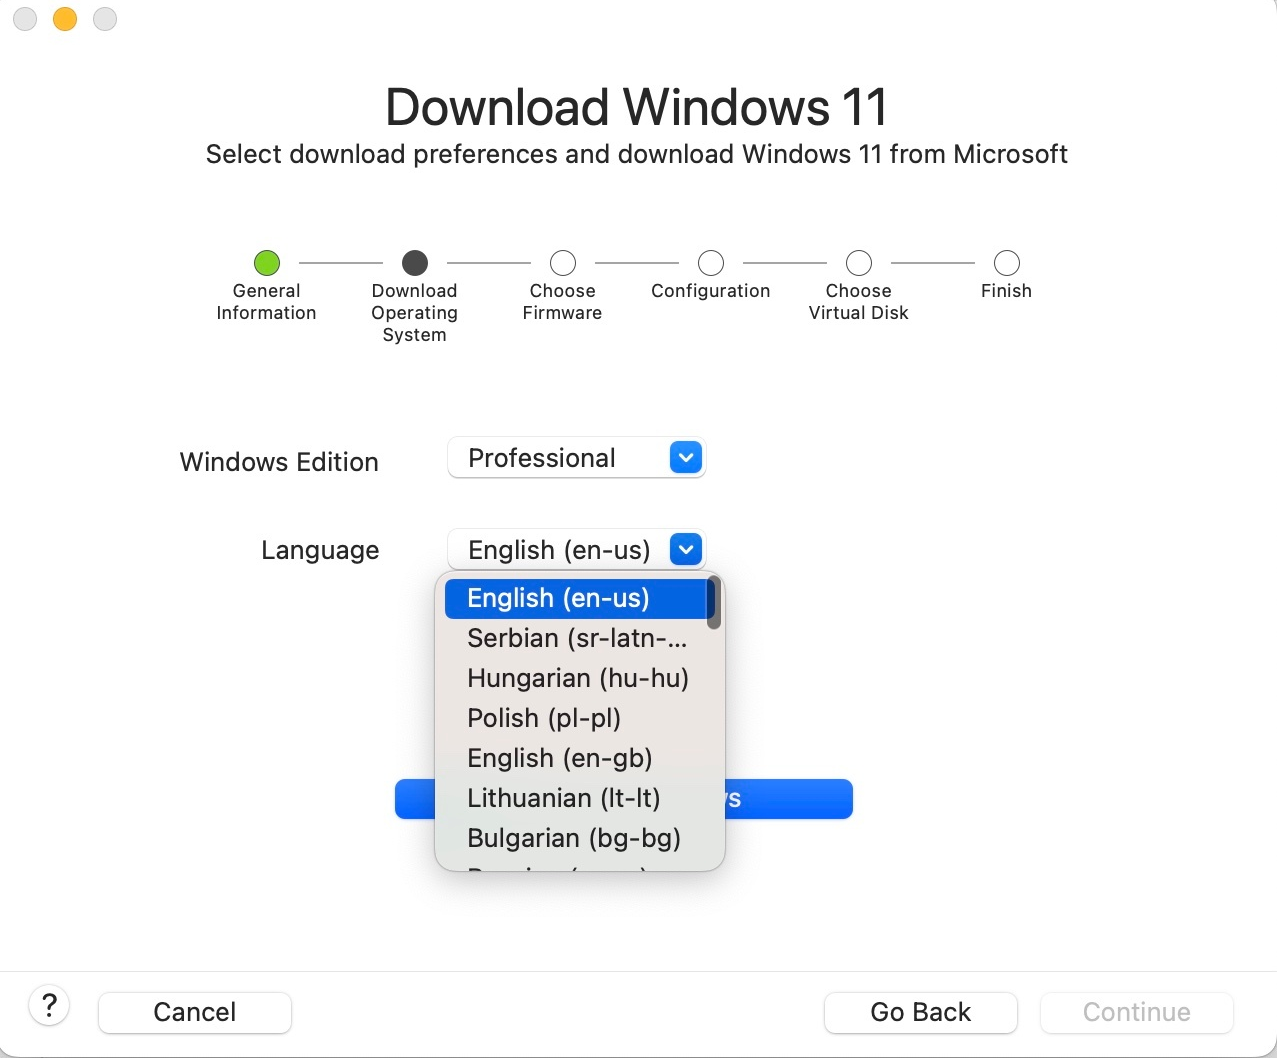
- In the Language field, select your preferred language for Windows 11.
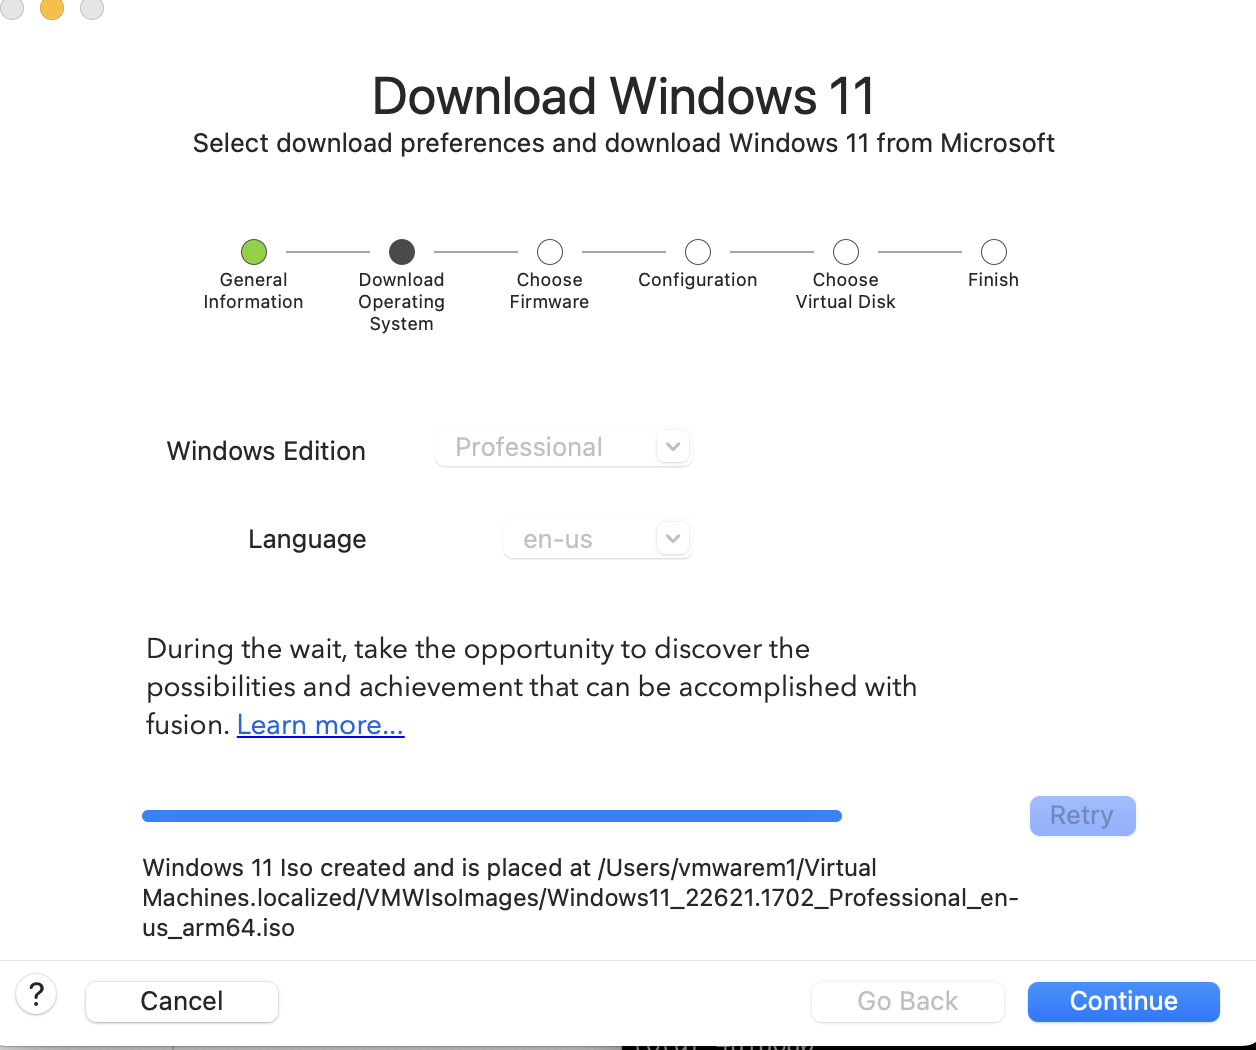
- Click Download Windows.
Fusion downloads and creates the Windows 11 ISO file for installation. After the ISO file is created, you can see the path to the ISO in the dialog. You may use this ISO file to install Windows 11 any number of times in any number of virtual machines.