


This topic describes how to provide an existing Certificate Authority (CA) certificate to BOSH CredHub and how to generate a new CA certificate with BOSH CredHub for use with VMware Tanzu GemFire for Tanzu Application Service.
Warning: This procedure involves restarting all of the VMs in an existing VMware Tanzu Application Service for VMs (Tanzu Application Service for VMs) deployment in order to propagate a CA certificate. The operation can take a long time to complete.
Overview
Enabling TLS provisions VMware Tanzu GemFire for Tanzu Application Service service instances with a certificate, so that apps, gfsh, and Pulse can establish encrypted connections with the GemFire for Tanzu Application Service service instance.
The certificate deployed on the GemFire for Tanzu Application Service service instance is a server certificate. The server certificate is generated by CredHub, a component designed for centralized credential management in Tanzu Application Service for VMs. CredHub is deployed on the same VM as the BOSH Director.
CredHub generates the server certificate using a Certificate Authority (CA) certificate. The CA certificate must be provided to CredHub by the operator or generated by CredHub.
Apps use the CA certificate to authenticate components of GemFire for Tanzu Application Service service instances. Apps that communicate with GemFire for Tanzu Application Service must have access to the CA certificate in order to validate that the server certificate can be trusted.
Warning: An operator must rotate the CA certificate if it expires or if it becomes compromised. To rotate your CA certificate, see Managing Certificates. Do not attempt to rotate a CA certificate on your own. Contact Tanzu Network support and perform the procedure with their assistance.
Provide or Generate a CA Certificate
TLS authorization requires a credential generated by CredHub. You do not need to create a new User Account and Authentication (UAA) client for CredHub specifically to support TLS, as long as a UAA Client exists with credhub.write and credhub.read permissions. The client used in this section is one that was created during the Ops Manager installation process: the ops_manager client.
Perform the following steps to log in to CredHub and provide or generate a CA certificate:
-
From the Ops Manager VM, set the API target of the CredHub CLI to your CredHub server:
credhub api https://BOSH-DIRECTOR:8844 --ca-cert=/var/tempest/workspaces/default/root_ca_certificateWhere
BOSH-DIRECTORis the IP address of the BOSH Director VM.For example:
$ credhub api https://10.0.0.5:8844 --ca-cert=/var/tempest/workspaces/default/root_ca_certificate -
Log in to CredHub:
credhub login --client-name=CLIENT-NAME --client-secret=CLIENT-SECRETWhere: *
CLIENT-NAMEis the client name, usuallyops_manageror a CredHub-specific UAA client of your own creation. *CLIENT-SECRETis the client secret. Locate this under the Credentials tab of the Ops Manager tile with the nameBosh Commandline Credentials.For example:
$ credhub login \ --client-name=ops_manager \ --client-secret=abcdefghijklm123456789 -
Use the CredHub CLI to check whether a services CA certificate already is present:
credhub get --name="/services/tls_ca"If you already have a certificate at the
services/tls_capath, skip to step 5. -
Use the CredHub CLI to generate a CA certificate or provide an existing one.
Note: Your deployment may have multiple CA certificates. VMware recommends that you use a dedicated CA certificate for services.
-
If you do not have a CA certificate, use the CredHub CLI to generate one:
credhub generate \ --name="/services/tls_ca" \ --type="certificate" \ --no-overwrite \ --is-ca \ --common-name="rootCA" -
If you have an existing CA certificate that you want to use, create a new file named
root.pemwith the contents of the certificate. Then enter the following command, specifying the path toroot.pemand the private key for the certificate:credhub set \ --name="/services/tls_ca" \ --type="certificate" \ --certificate=./root.pem \ --private=ERKSOSMFF...
-
-
Use the BOSH CLI v2 to extract the
certificateportion from the CA certificate and print it:bosh interpolate <(credhub get --name=/services/tls_ca) \ --path=/value/certificate -
Record the output of the
bosh interpolatecommand.
Add the CA Certificate to Ops Manager
Add the CA certificate to Ops Manager by adding it to the BOSH Director tile and the Tanzu Application Service tile.
Add the CA certificate to the BOSH Director tile:
-
Navigate to the Ops Manager Installation Dashboard and select the Bosh Director tile. Click Security.
-
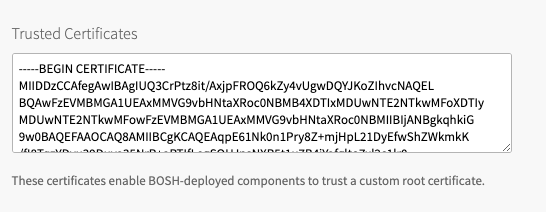
Copy and paste the contents of the CA certificate into Trusted Certificates. If Trusted Certificates are already listed, append the new certificate to the existing content.
-
Check Include Tanzu Ops Manager Root CA in Trusted Certs to place the Tanzu Ops Manager Root CA into the trusted certificate field. The BOSH Director then places this CA into the truststore of every VM that it deploys.

-
For Generate VM passwords or use single password for all VMs, select Generate passwords or Use default BOSH password, depending on your implementation needs.

-
Click Save.
Add the CA certificate to the Tanzu Application Service tile
-
The CA certificate must also be added for the Gorouter. On the Tanzu Application Service for VMs tile, navigate to the Settings tab.
-
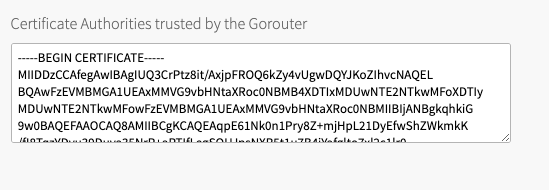
Click on Networking. Add the CA certificate to the box labeled Certificate Authorities Trusted by Gorouter.
-
Scroll down and add the CA certificate to the box labeled Certificate Authorities trusted by the HAProxy.

-
Click Save.
Save Your Changes
- Return to the Installation Dashboard.
- Click Review Pending Changes. For more information, see Reviewing Your Pending Product Changes in Tanzu Operations Manager in the VMware Tanzu Operarations Manager documentation.
- Click Apply Changes.
