To install the Carbon Black Cloud launcher and sensor on a Windows VM, run the recovery plan, start the VM, and then install the sensor.
When you run a
recovery plan for ransomware recovery and configure the plan to pause, to manually install the sensor on a VM, you have two methods to install the sensor:
- Log into the recovery SDDC vCenter and Enable Carbon Black on Virtual Machines (steps 1 through 7 in that task). Use this option if you do not have access to the Carbon Black Cloud service tile, or if you are a partner using the CPN (Cloud Provider Network) console.
- Use the Carbon Black Cloud security console, which requires setting up a configuration file before you install and having at least one Carbon Black Cloud role associated with your user.
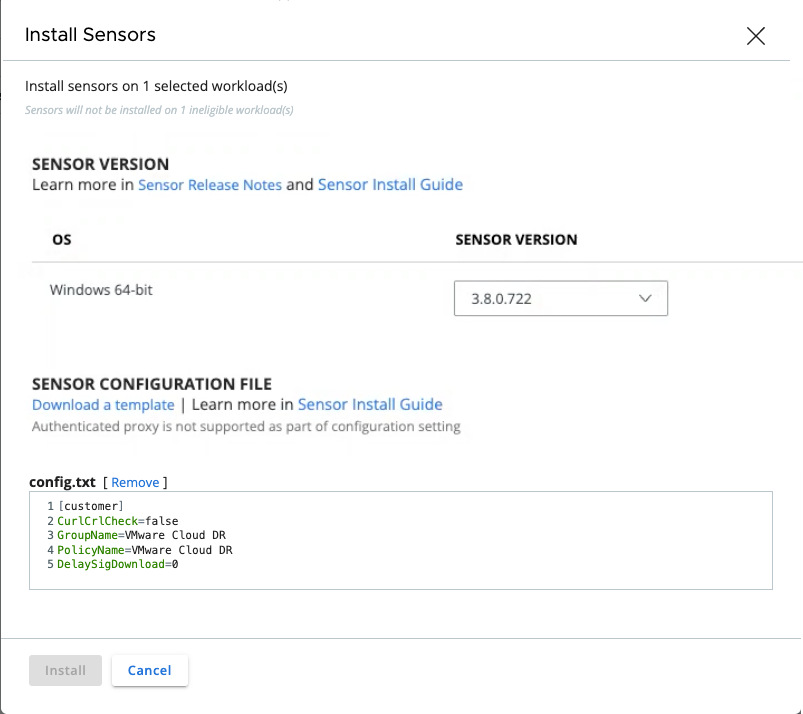
Carbon Black Cloud Console Sensor Installation Prerequisite
If you are installing the sensor from the
Carbon Black Cloud console, before you perform this task you need to create a configuration file that you will upload to
Carbon Black Cloud when you install the Windows sensor.
Note: If you do not have access to the
Carbon Black Cloud console, then you do not need a configuration file.
Create the configuration file using either the INI, TXT, CONF, or CFG file extension, and then add the following to the contents of the file, exactly as is:
[customer]
CurlCrlCheck=false
GroupName=VMware Live Cyber Recovery
PolicyName=VMware Live Cyber Recovery
DelaySigDownload=0
Have this file available before you start the recovery plan plan.
Procedure
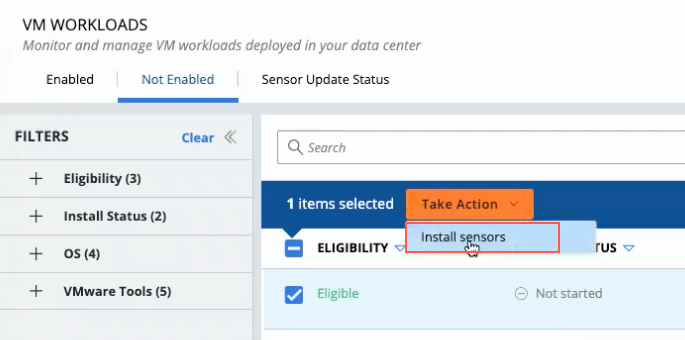
- As the VM starts, the system pauses the VM recovery so you can install the Windows sensor. Under Start VM, you see the following:
- Next, select the Eligible check box next to the VM, and then from the Take Action menu, select Install Sensors.
- Select the file you created before starting this task. You see the file uploaded.