You can recover virtual machine guest files from VMware Live Cyber Recovery snapshots, which you can then manually restore to any destination of your choice.
- The Virtual machines list.
- A snapshot inside a protection group.
- The Other menu during ransomware recovery, when VMs are in the validation state.
Note: For supported file systems on Windows and Linux, and for a full list of caveats and limitations with guest file recovery, see
Guest File Recovery.
If you are recovering files from large VMs, you can select a snapshot to use for the VM, close the dialog box, and return later when the snapshot is loaded.
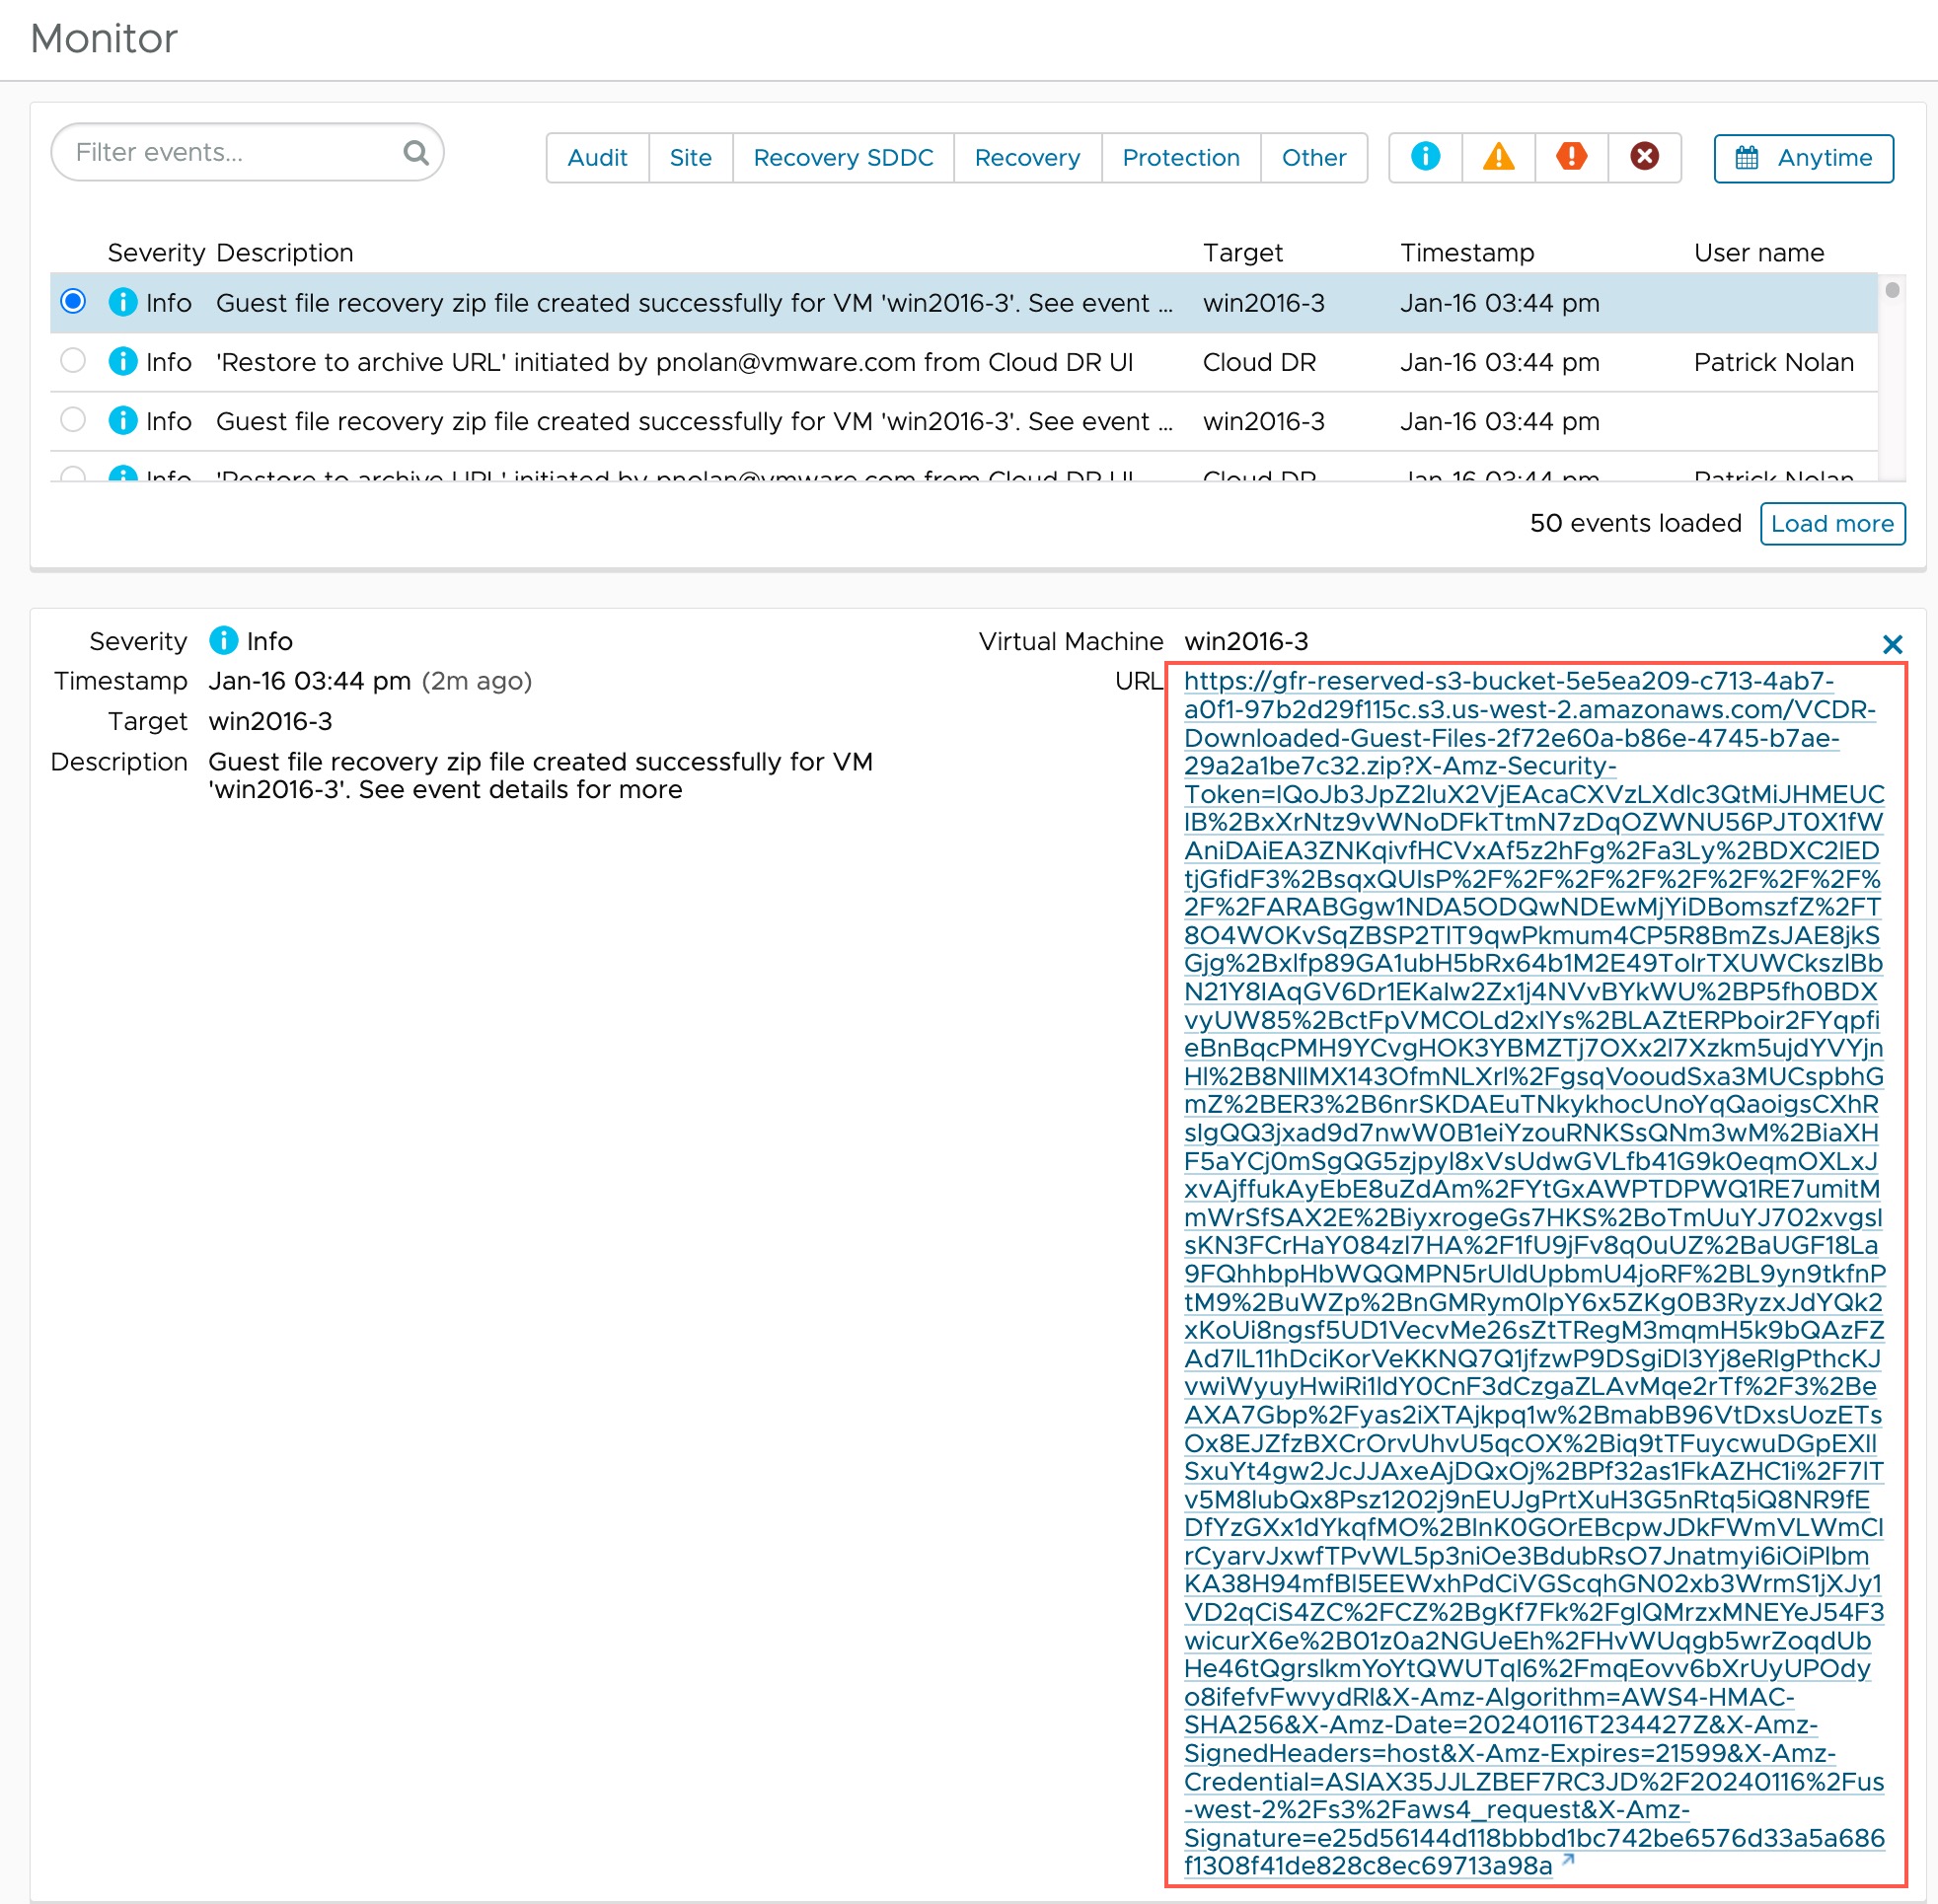
Every guest file download is also available as a link from the
list that you can send to other users. The download link expires after six hours. The user on the local system must have file-level permissions to unzip the package.
Note: If you are using
access lists for
VMware Live Cyber Recovery, only IP addresses listed in the Management access list can download a guest file for recovery.
Note: During guest file recovery on Windows VMs, you might see drives or partitions that are un-selectable and listed as unsupported. These drives and partitions are reserved by Microsoft OS and are not accessible buy
VMware Live Cyber Recovery.
Procedure
- Once the VM has loaded, in the Recover guest files dialog box you can select files from the list of Available files and folders. Click the down arrow to download individual files or folders. When you click the down arrow after selecting a file or folder, the ZIP package downloads immediately.
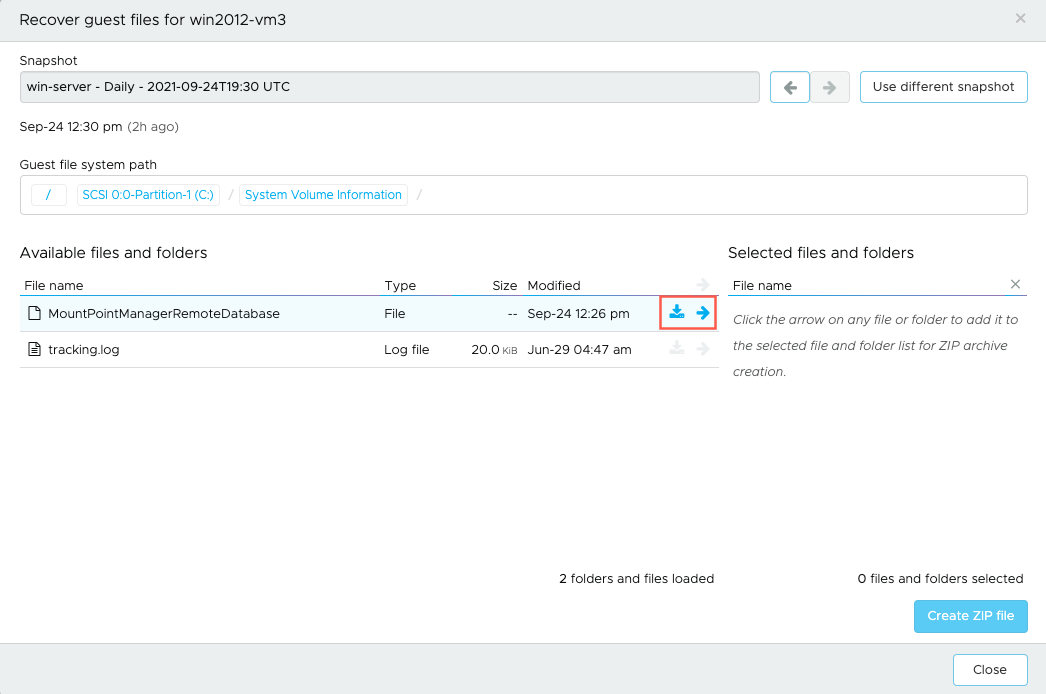
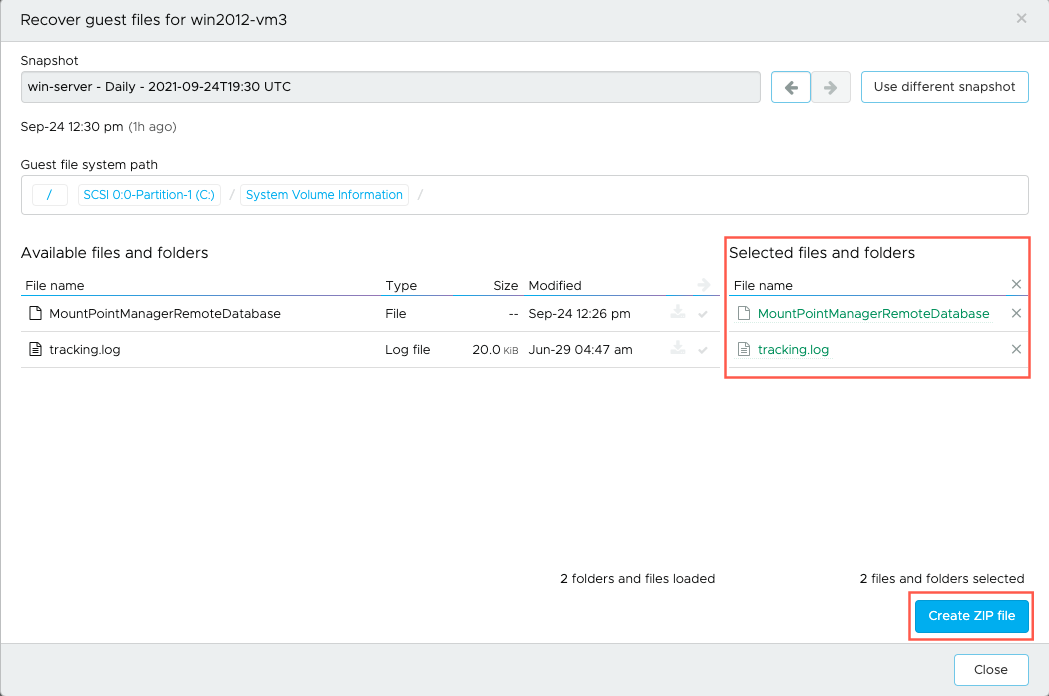
- To download multiple files, click the right arrow to select multiple files. After you have selected files for download, click Create ZIP file to start the download.
- You can access the same link from the list. The download link expires after six hours. The user on the local system must have file-level permissions to unzip the package.