


This section explains how to enable client certificate authentication on NSX Advanced Load Balancer. When client certificate authentication is enabled, NSX Advanced Load Balancervalidates SSL certificates presented by a client against a trusted certificate authority and a configured client revocation list (CRL).
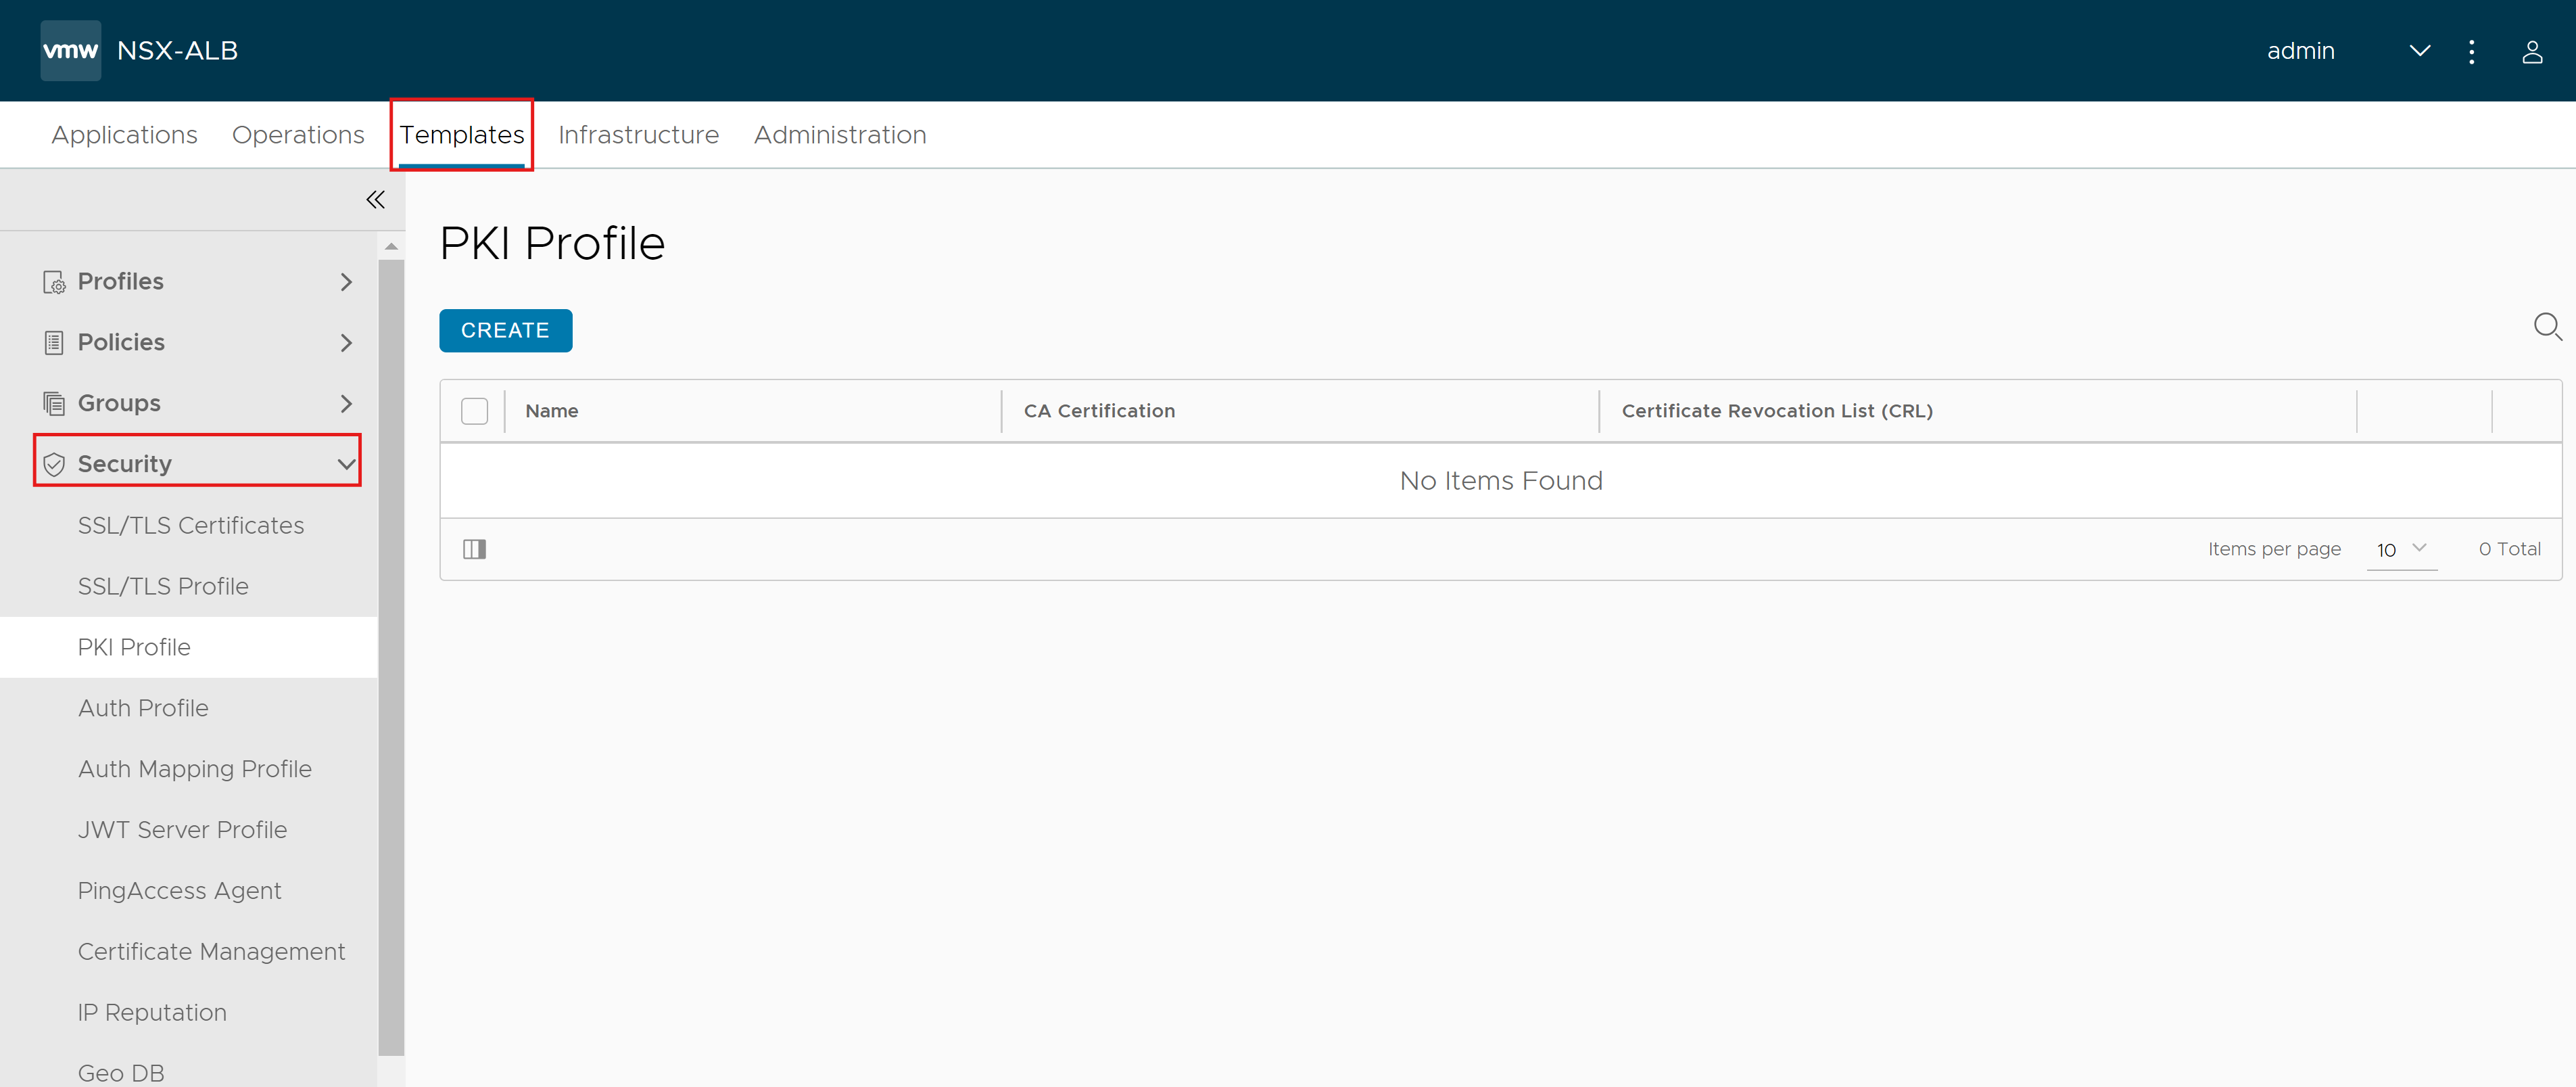
Creating PKI Application Profile Using NSX Advanced Load Balancer UI
Navigate to . Click Create. Alternatively, you can edit an existing PKI profile, if required.
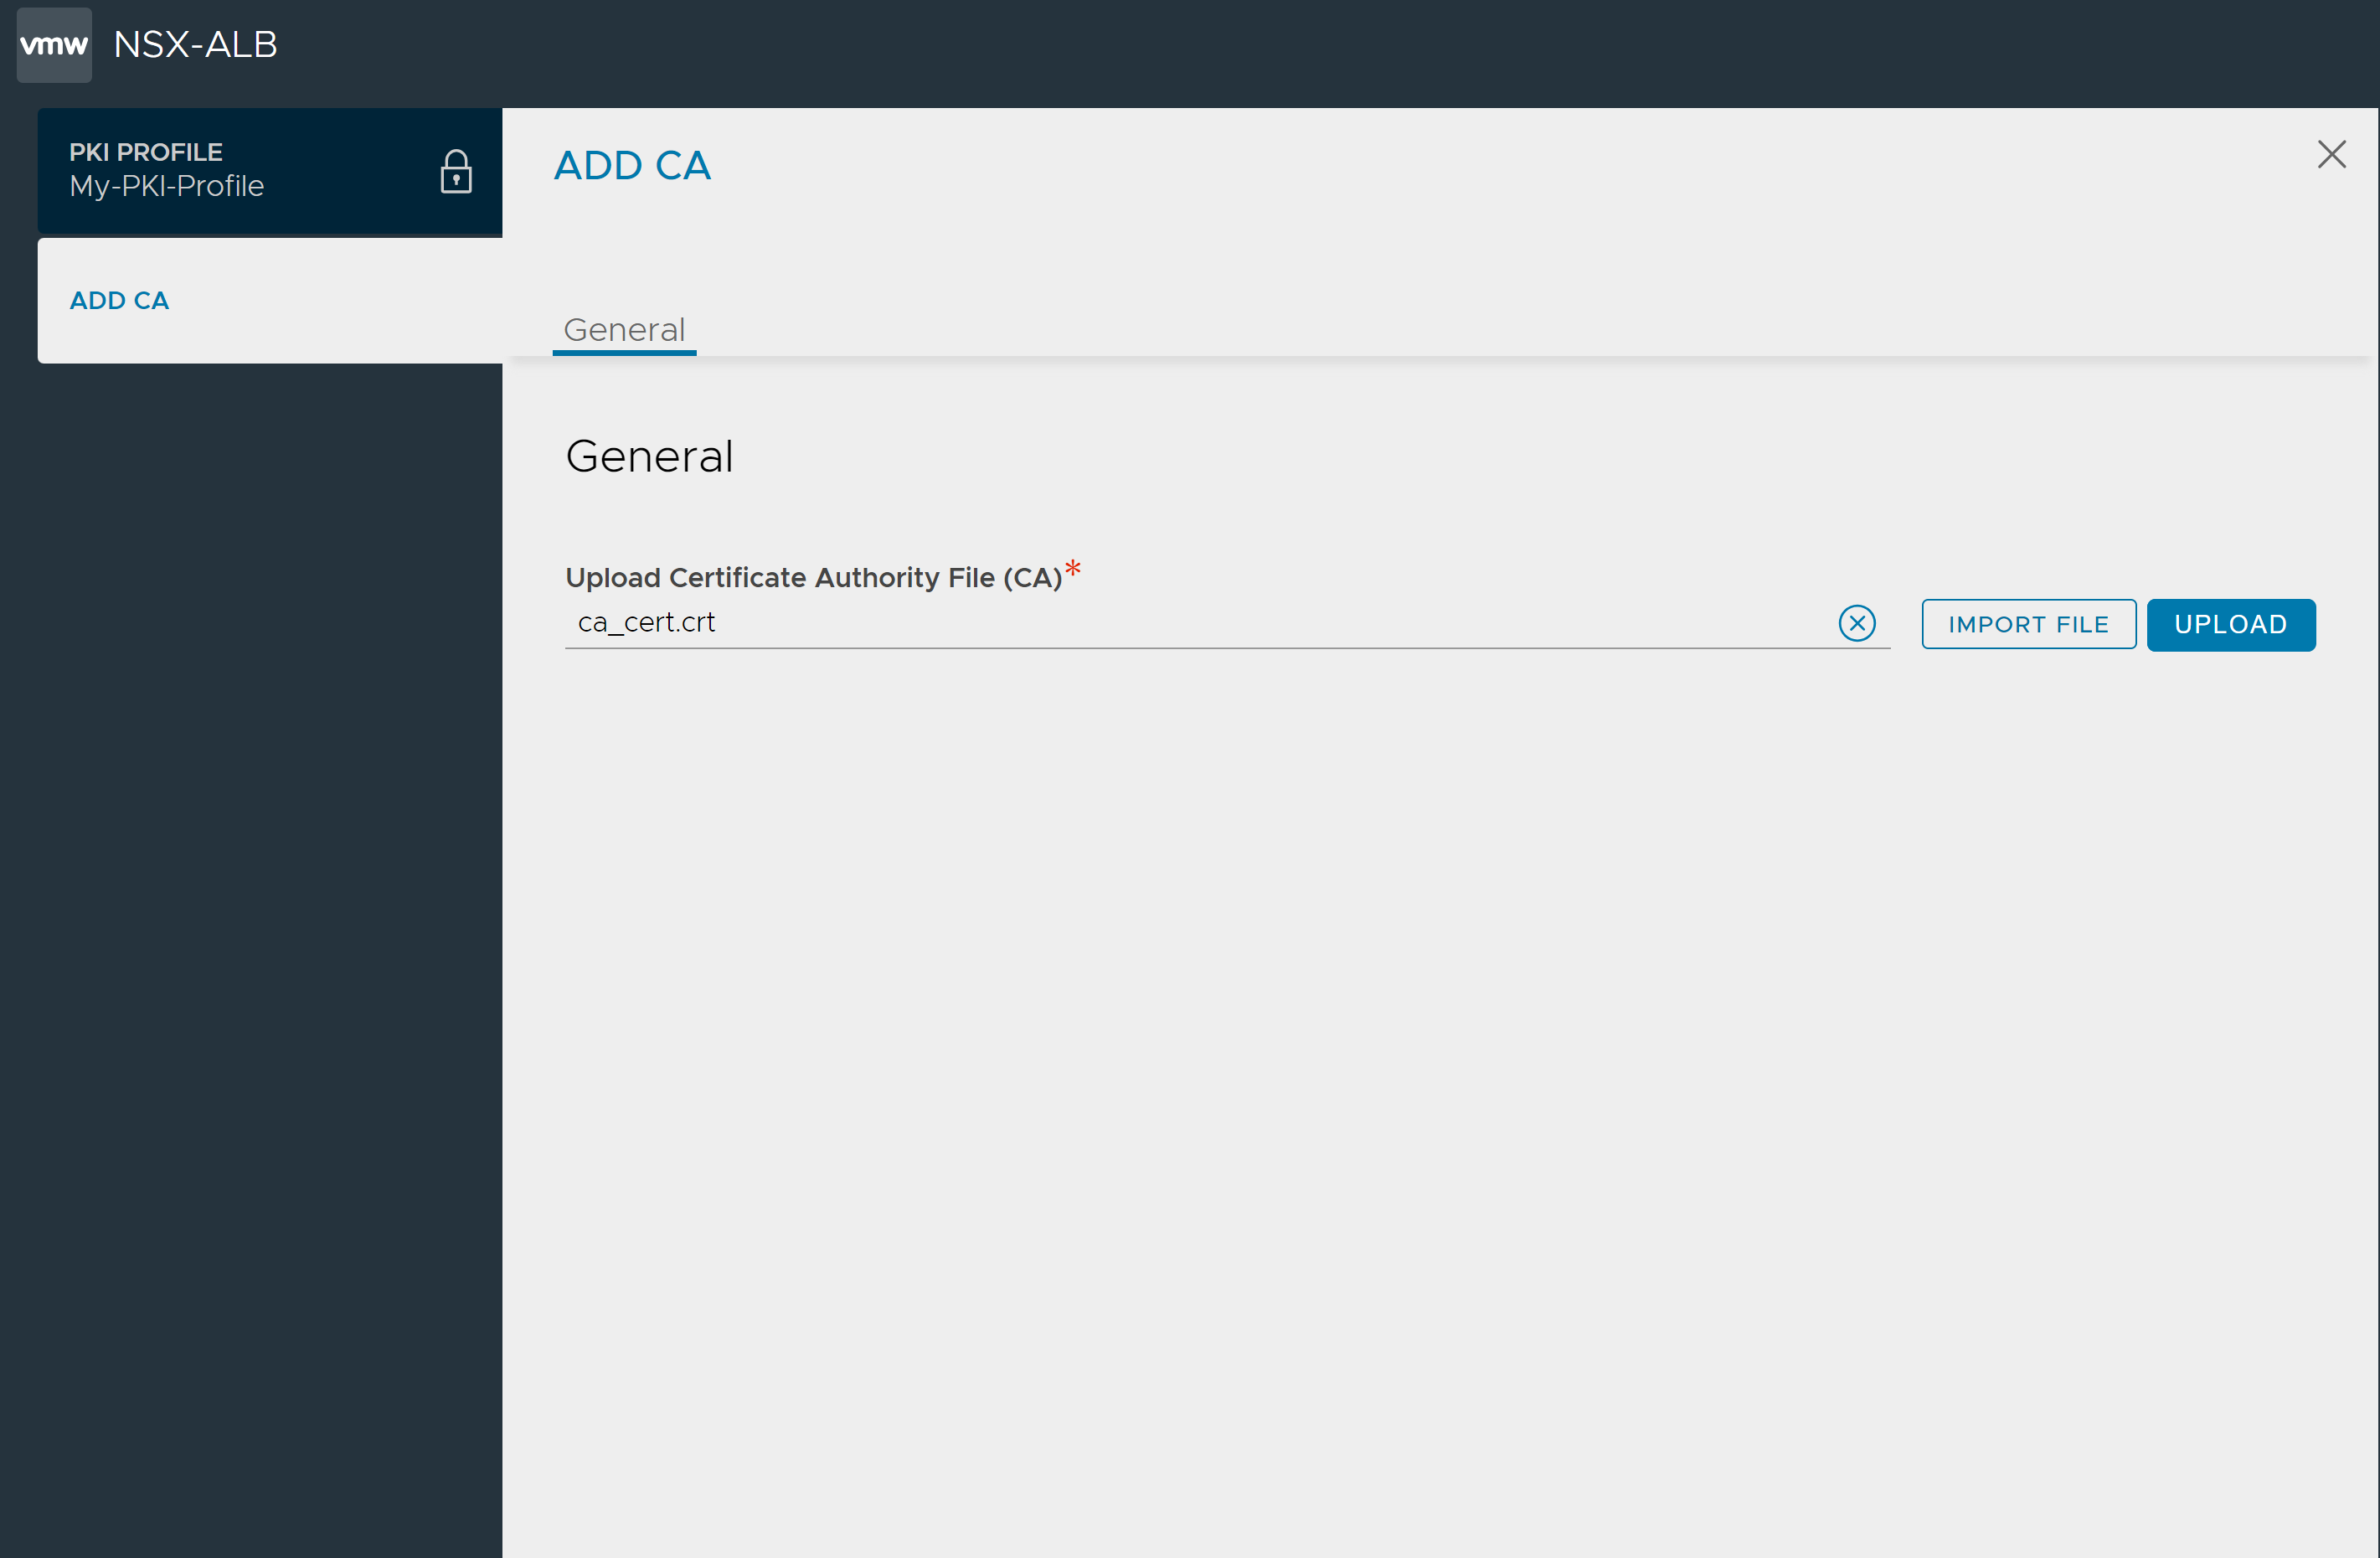
Under the Certificate Authority (CA) tab, click Add to Import File and Upload the Certificate Authority file.
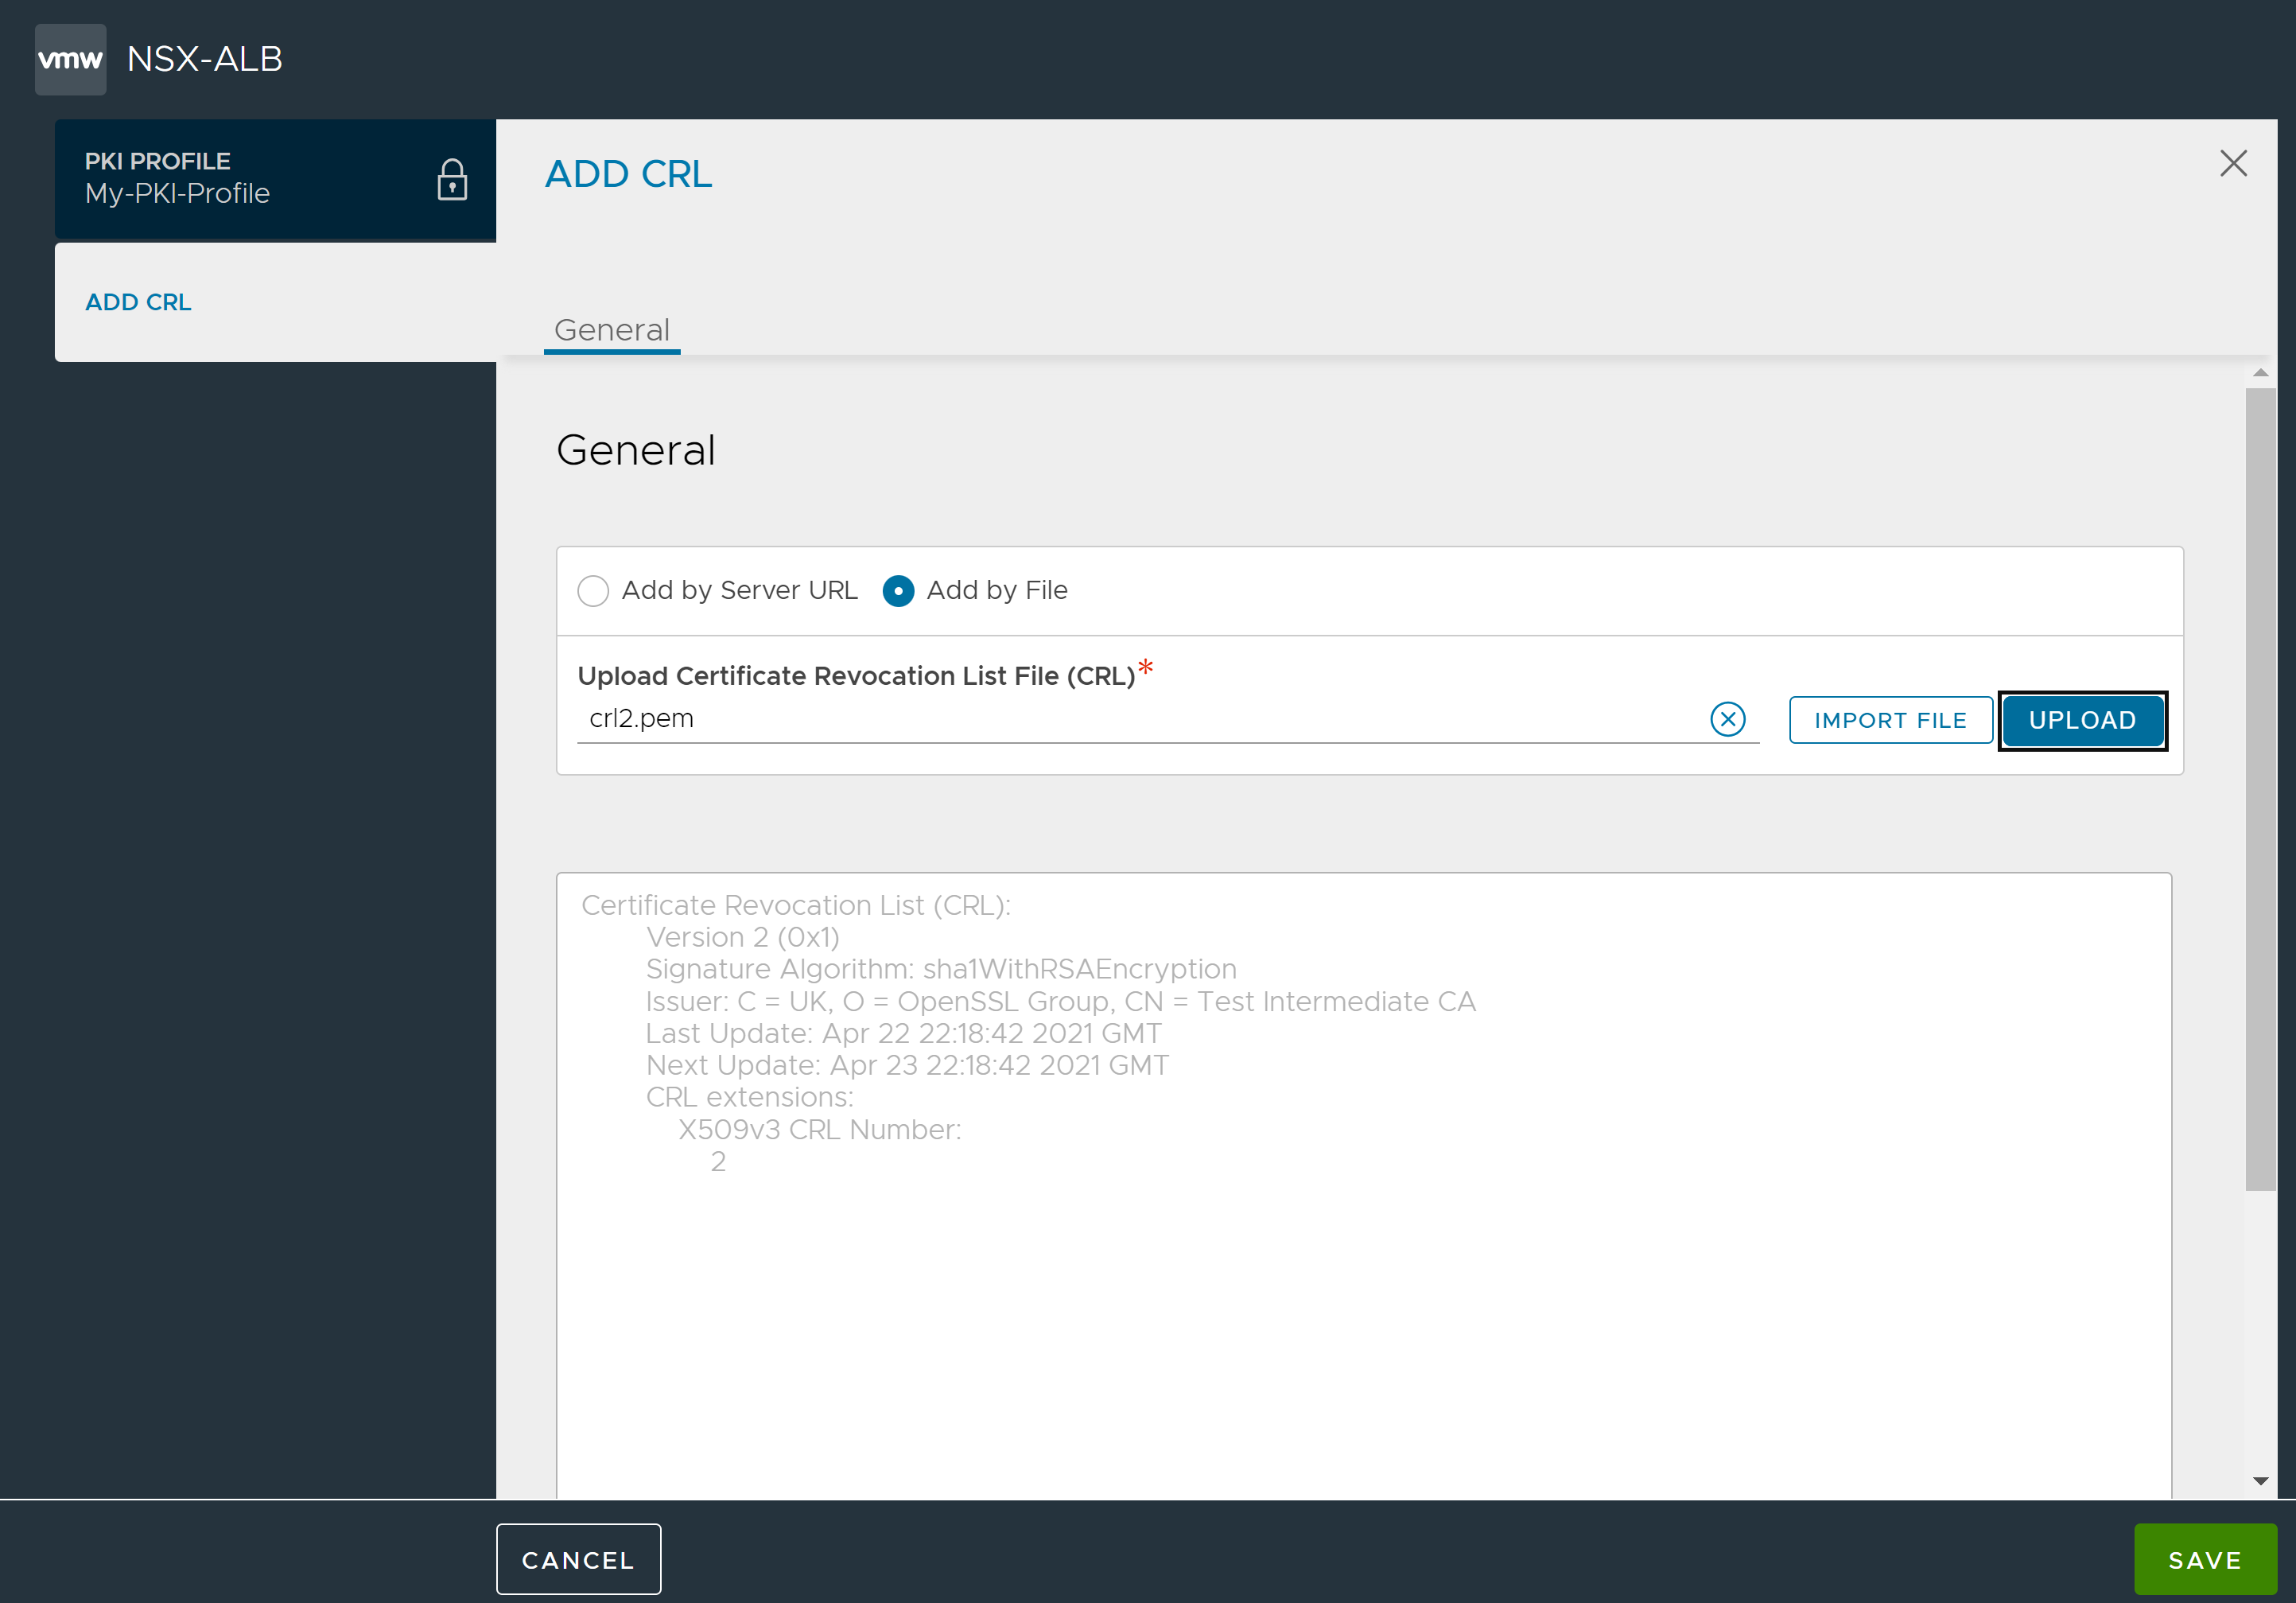
Under the Certificate Revocation List (CRL) tab, click Enable CRL Check.
Click Add to either enter the Server URL or Add CRL by file. In this illustration, the option to Add by File is selected.
Click Import File to select the CRL file.
Click Upload.
Click Save.
Click Save to save the PKI Profile.
The CA file and the CRL file have been added to the PKI Profile. The application profile should contain a CRL for each of the intermediate CA in the chain of trust.
Creating PKI Application Profile using the NSX Advanced Load Balancer CLI
To create the PKI Profile using the CLI, use the following:
[admin:My-Avi-Controller-17.2.10]: > configure pkiprofile My-PKI-Profile
[admin:My-Avi-Controller-17.2.10]: pkiprofile> ca_certs
New object being created
[admin:My-Avi-Controller-17.2.10]: pkiprofile:ca_certs> certificate --
Please input the value for field certificate (Enter END to terminate input):-----BEGIN CERTIFICATE-----
MIIFAzCCA+ugAwIBAgIEUdNg7jANBgkqhkiG9w0BAQsFADCBvjELMAkGA1UEBhMC
VVMxFjAUBgNVBAoTDUVudHJ1c3QsIEluYy4xKDAmBgNVBAsTH1NlZSB3d3cuZW50
cnVzdC5uZXQvbGVnYWwtdGVybXMxOTA3BgNVBAsTMChjKSAyMDA5IEVudHJ1c3Qs
r2RsCAwEAAaOCAQkwggEFMA4GA1UdDwEB/wQEAwIBBjAP
jbEnmUK+xJPrSFdDcSPE5U6trkNvknbFGe/KvG9CTBaahqkEOMdl8PUM4ErfovrO
GhGonGkvG9/q4jLzzky8RgzAiYDRh2uiz2vUf/31YFJnV6Bt0WRBFG00Yu0GbCTy
BrwoAq8DLcIzBfvLqhboZRBD9Wlc44FYmc1r07jHexlVyUDOeVW4c4npXEBmQxJ/
B7hlVtWNw6f1sbZlnsCDNn8WRTx0S5OKPPEr9TVwc3vnggSxGJgO1JxvGvz8pzOl
u7sY82t6XTKH920l5OJ2hiEeEUbNdg5vT6QhcQqEpy02qUgiUX6C
-----END CERTIFICATE-----
END
[admin:My-Avi-Controller-17.2.10]: pkiprofile:ca_certs> save
[admin:My-Avi-Controller-17.2.10]: pkiprofile> no crl_check
[admin:My-Avi-Controller-17.2.10]: pkiprofile> save
Configuring the HTTP Profile
1. Navigate to and click Create.
2. Select HTTP as the Type.
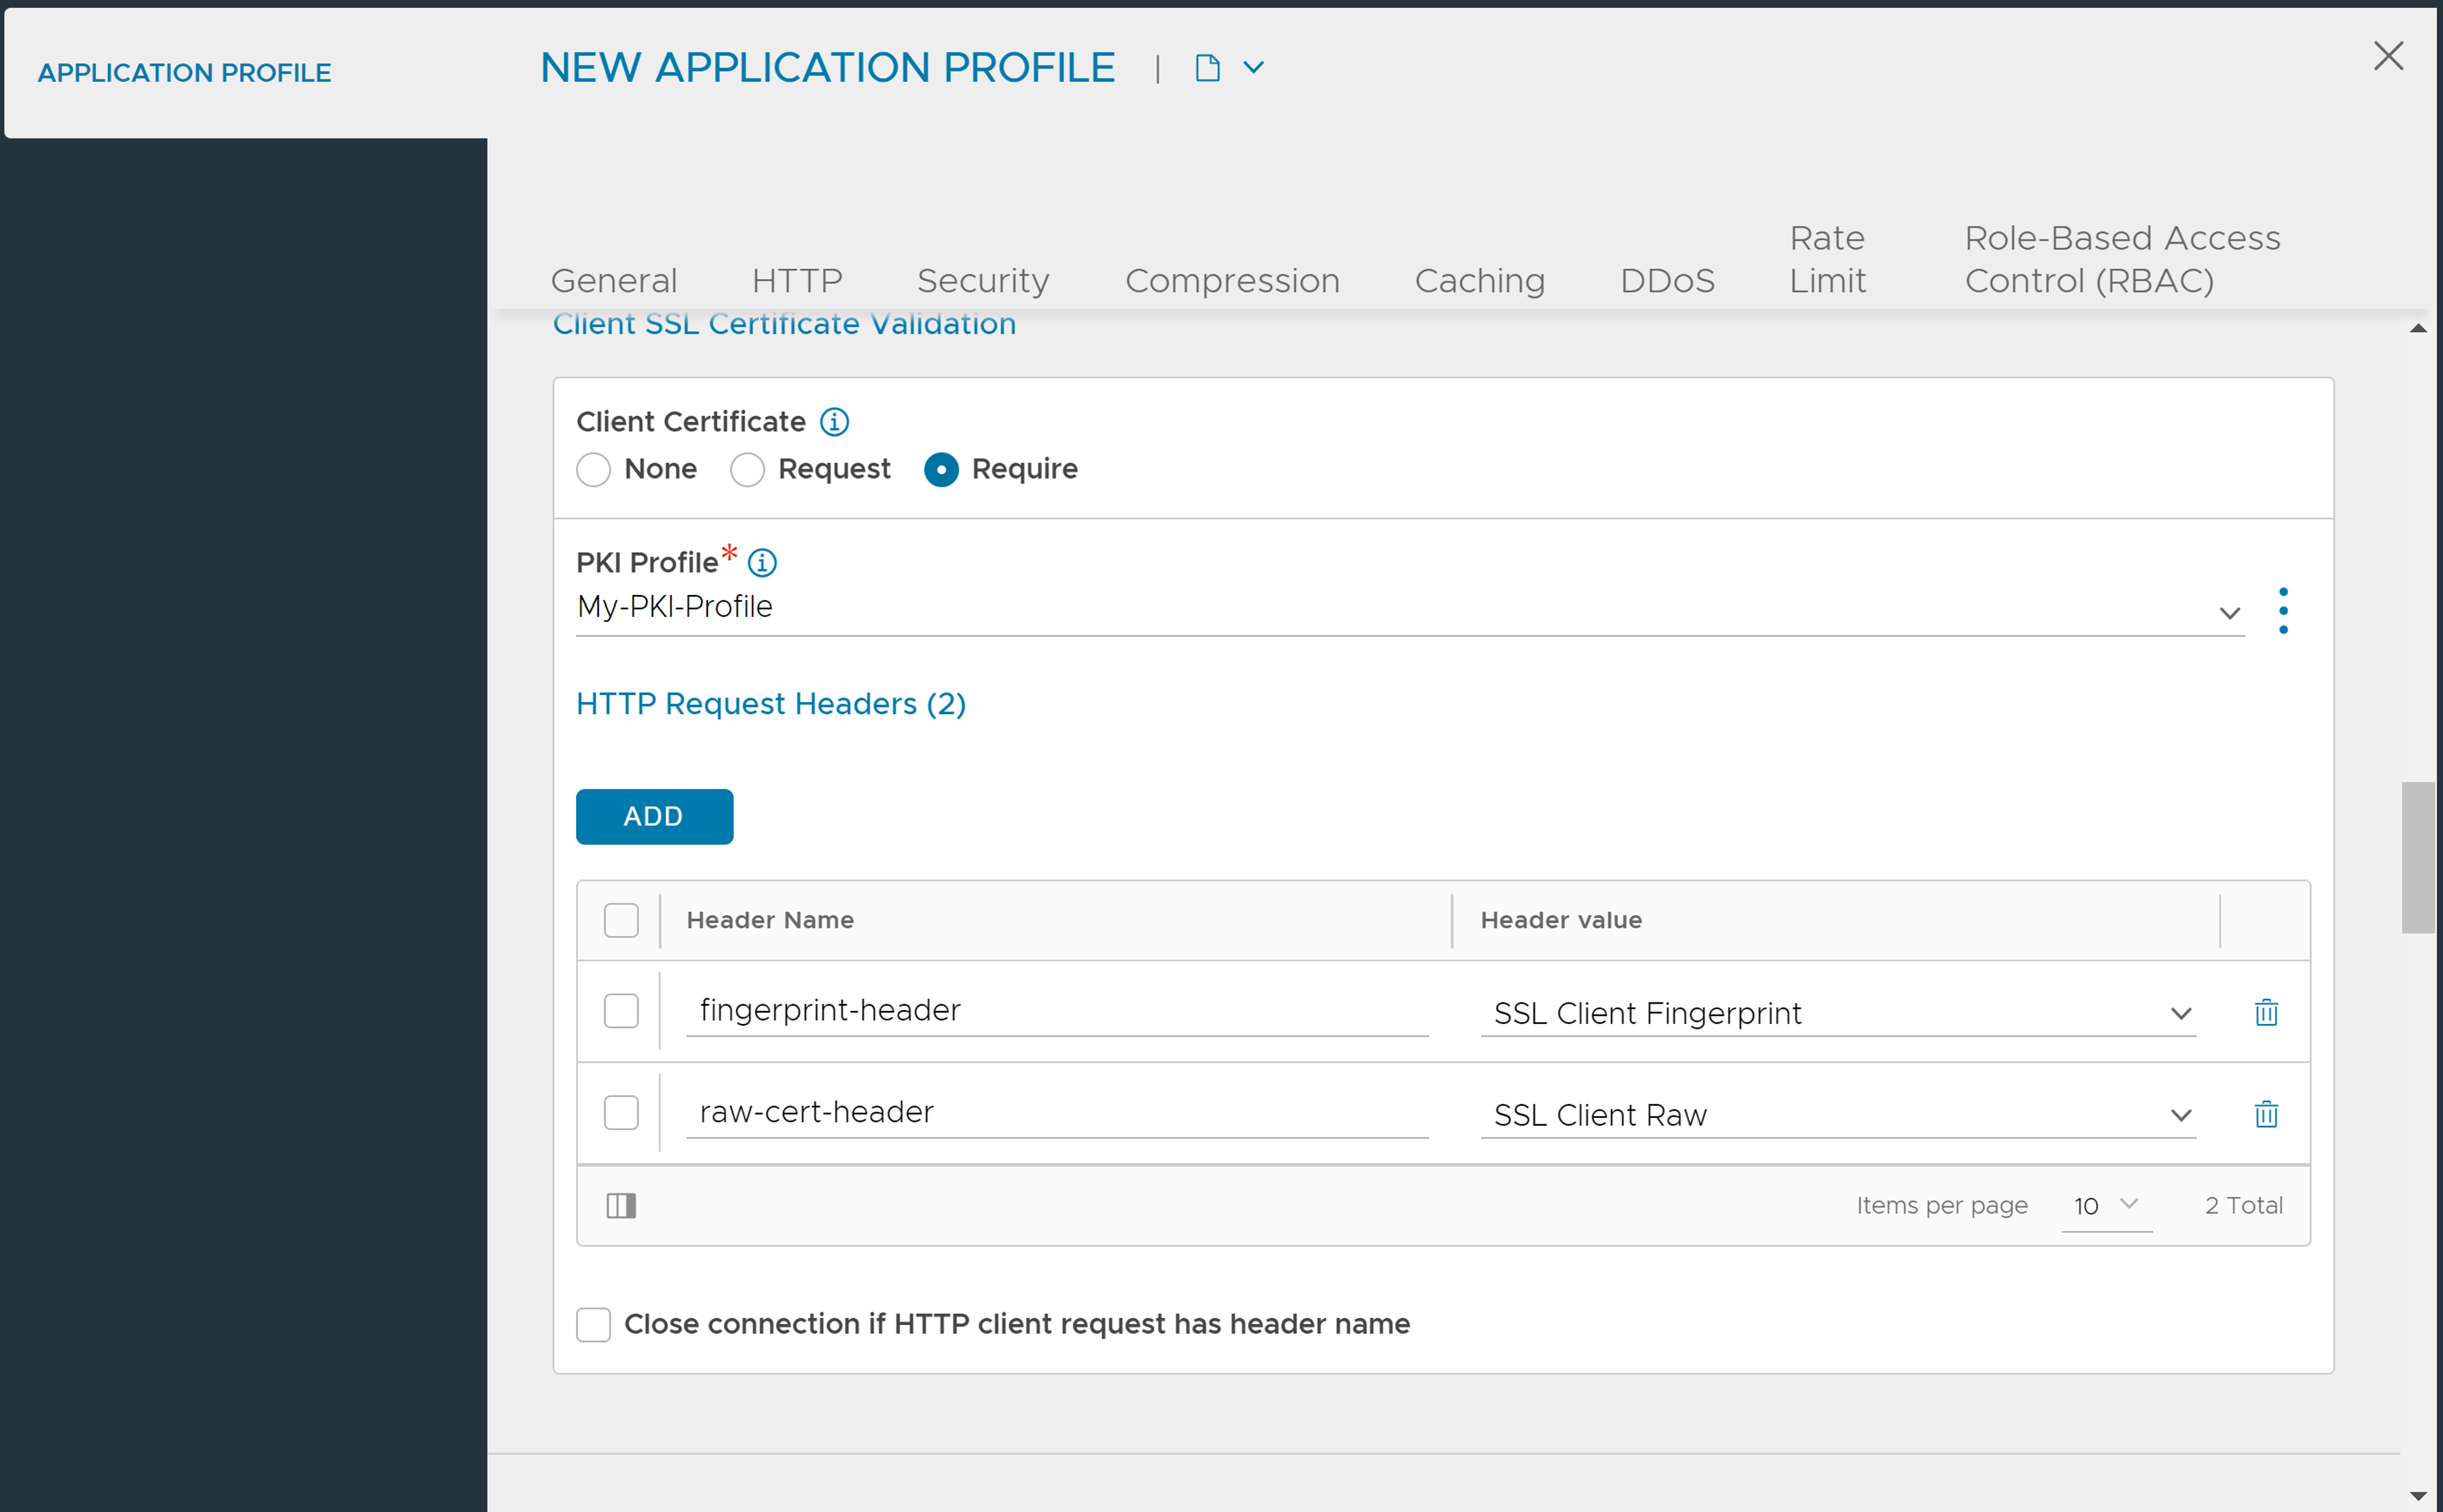
3. Under the Security tab, in the Client SSL Certificate Validation section, select Require.
4. Select the PKI Profile created, with the CA and CRL configured.
5. Under HTTP Request Headers, click Add to configure the HTTP headers to be displayed in the application logs.
6. Click Save.
Configuring L4 SSL/ TLS Profile
The NSX Advanced Load Balancer CLI interface can be used to configure L4 SSL/TLS application profiles for client SSL certificate validation.
1. Login to the NSX Advanced Load Balancer CLI (shell).
2. Edit or create the application profile for your L4 SSL/ TLS application. For instance, my-L4-app-profile.
> [admin:our-controller]: > configure applicationprofile my-L4-app-profile
3. Declare the profile to be type L4.
> [admin:our-controller]: applicationprofile> type application_profile_type_l4
4. Enter tcp_app_profile submode.
[admin:our-controller]: applicationprofile> tcp_app_profile
ssl_client_certificate_mode. If you key in just a portion of the keyword, followed by pressing the
Tab key twice, three choices appear.
> [admin:our-controller]: applicationprofile:tcp_app_profile> ssl_client_certificate_mode ssl_client_certificate_
ssl_client_certificate_none      Enum option does not have an e_description option
ssl_client_certificate_request   Enum option does not have an e_description option
ssl_client_certificate_require   Enum option does not have an e_description option
6. Select the desired validation type.
> [admin:our-controller]: applicationprofile:tcp_app_profile> ssl_client_certificate_mode ssl_client_certificate_require7. For either
ssl_client_certificate_request or ssl_client_certificate_require mode, a PKI profile is required and must exist previous to saving the application profile.
> [admin:our-controller]: applicationprofile:tcp_app_profile> pki_profile_ref My-PKI-Profile8. Save the configuration.
> [admin:our-controller]: applicationprofile:tcp_app_profile> save
> [admin:our-controller]: applicationprofile> save
> [admin:our-controller]:
Associating Application Profile with Virtual Service
To associate the application profile created with the virtual service, follow the steps below:
Navigate to the .
Select the required virtual service.
-
Click the edit icon and select the HTTP application profile created.
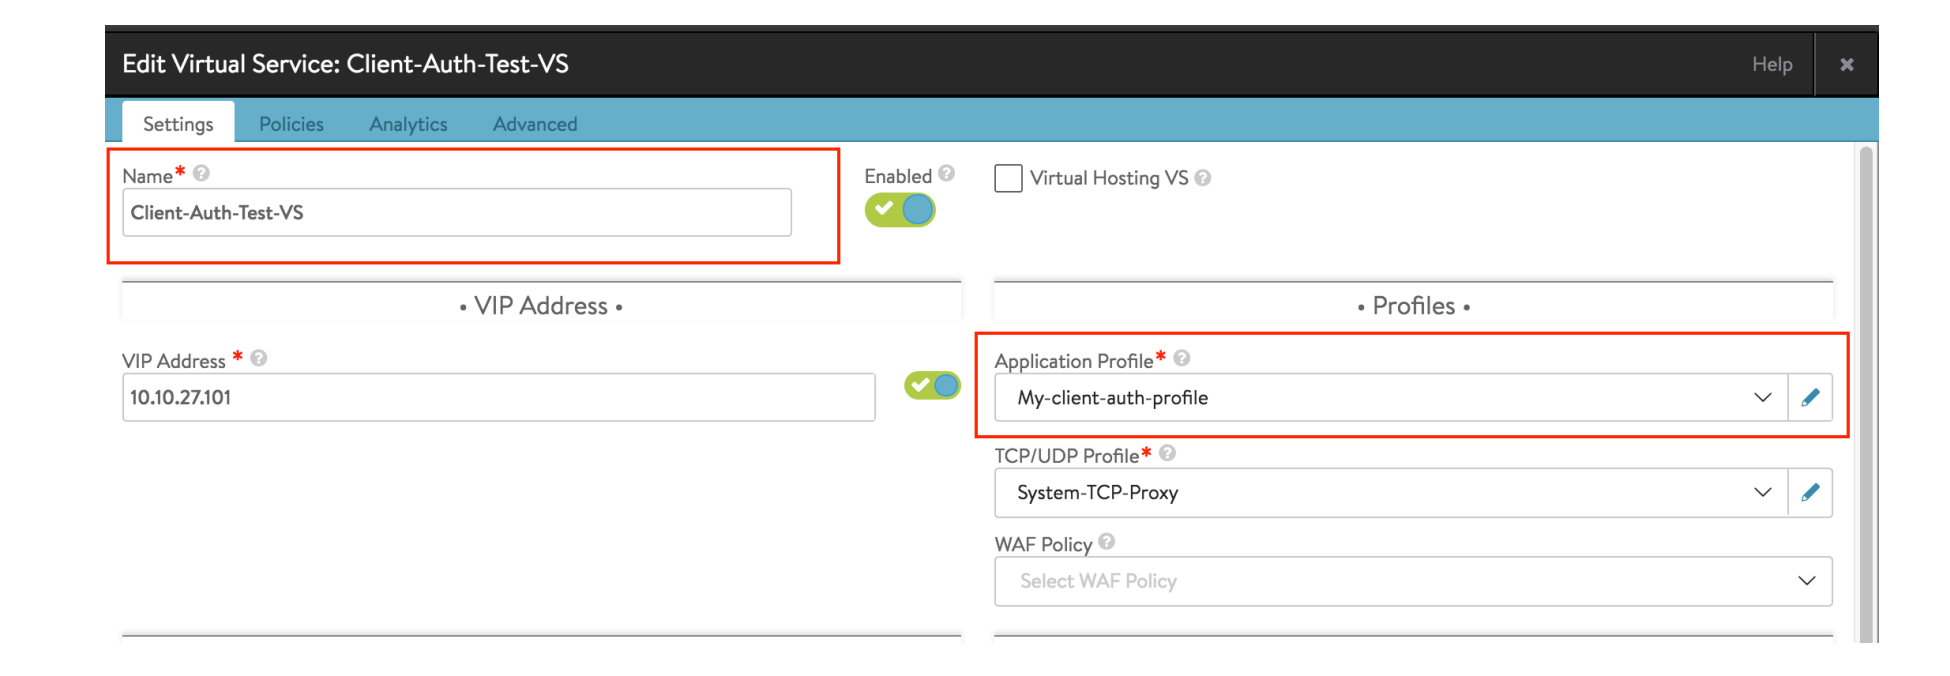
Click Save.
