


The various roles and the associated policies mentioned in the previous section can be created using the AWS web interface (AWS management console) too.
This section discusses configuration steps for the following mandatory policies and the associated roles:
vmimport policy
vmimport role (associated with vmimport policy)
AviController-Refined-Role
AviController-EC2-Policy (associated with AviController-Refined-Role)
AviController-IAM-Policy (associated with AviController-Refined-Role)
Follow the same steps to create the optional policies as required.
Procedure
- Creating vmimport policy.
- Log in to the AWS console using the AWS customer account where you plan to deploy Service Engines and select Policies.
- Select Create policy, select JSON tab, copy and paste the content from the JSON file (vmimport-role-policy.json), and click Review Policy.
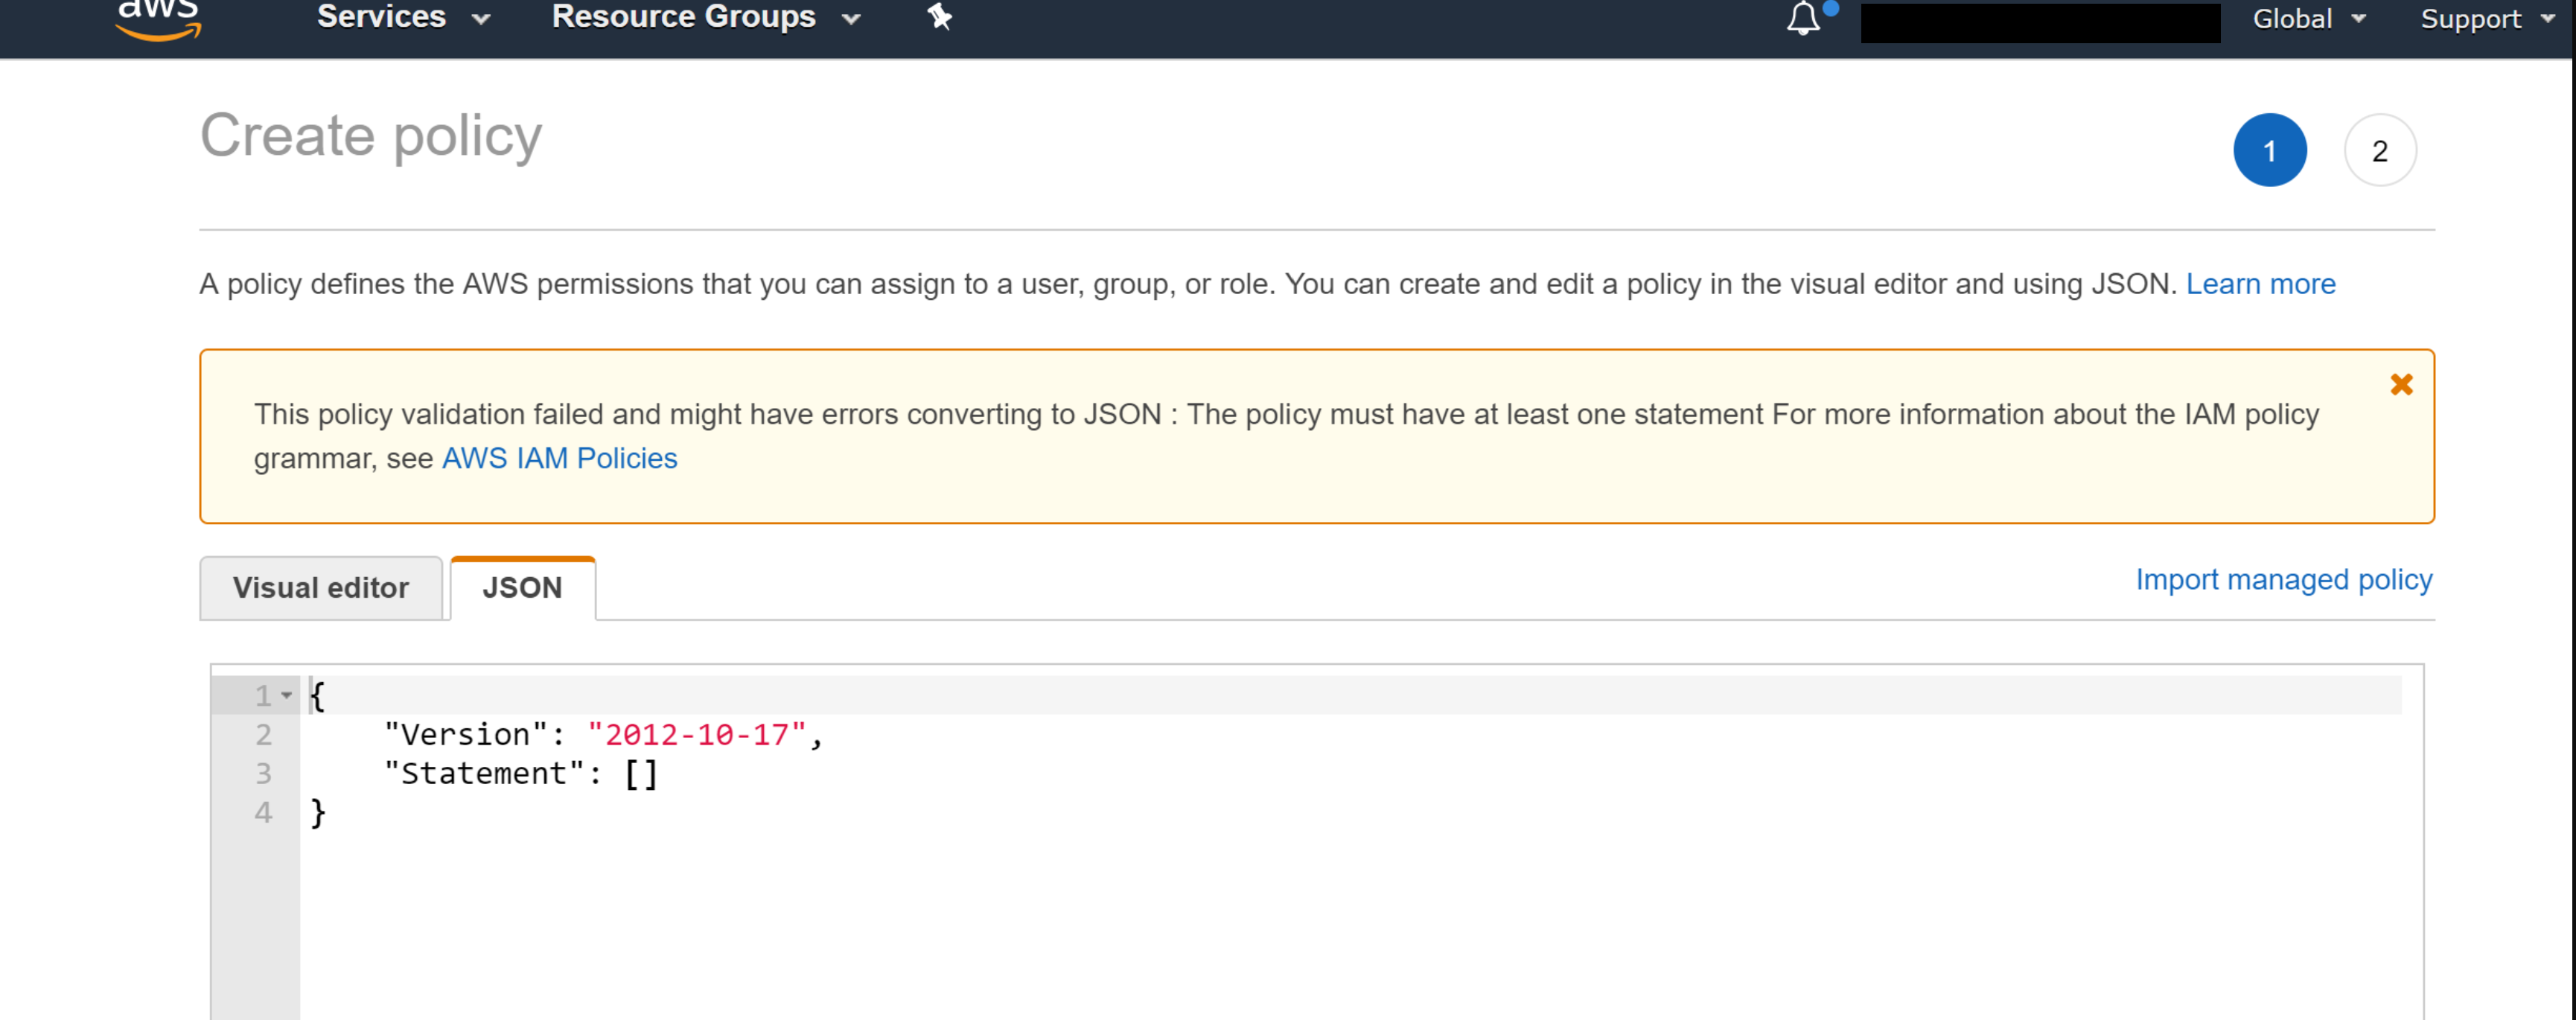
- Provide the name for the policy (vmimport), the description (optional), click Create Policy. It is mandatory to use the name of the vmimport policy as vmimport
- Creating vmimport role and associating it with the vmimport policy.
- Select Roles, then click Create role.
- Select the type of trusted identity (AWS Service), choose the service (EC2) that will use this role, and click Next: Permissions.
- Select the policy created in the previous step (vmimport policy), and click Next: Review.
- Provide the Role name, Role description, and click Create role.
- Once the role is created, the AWS web interface will exhibit the following message: The role vmimport has been created.
- For vmimport role, Trust relationships should be edited. Navigate to the Trust relationships tab, click Edit, and copy the content of vmimport-role-trust.json(from the table mentioned in the beginning) to the JSON tab, and click Update Trust Policy.
- Creating AviController-Refined-Role.
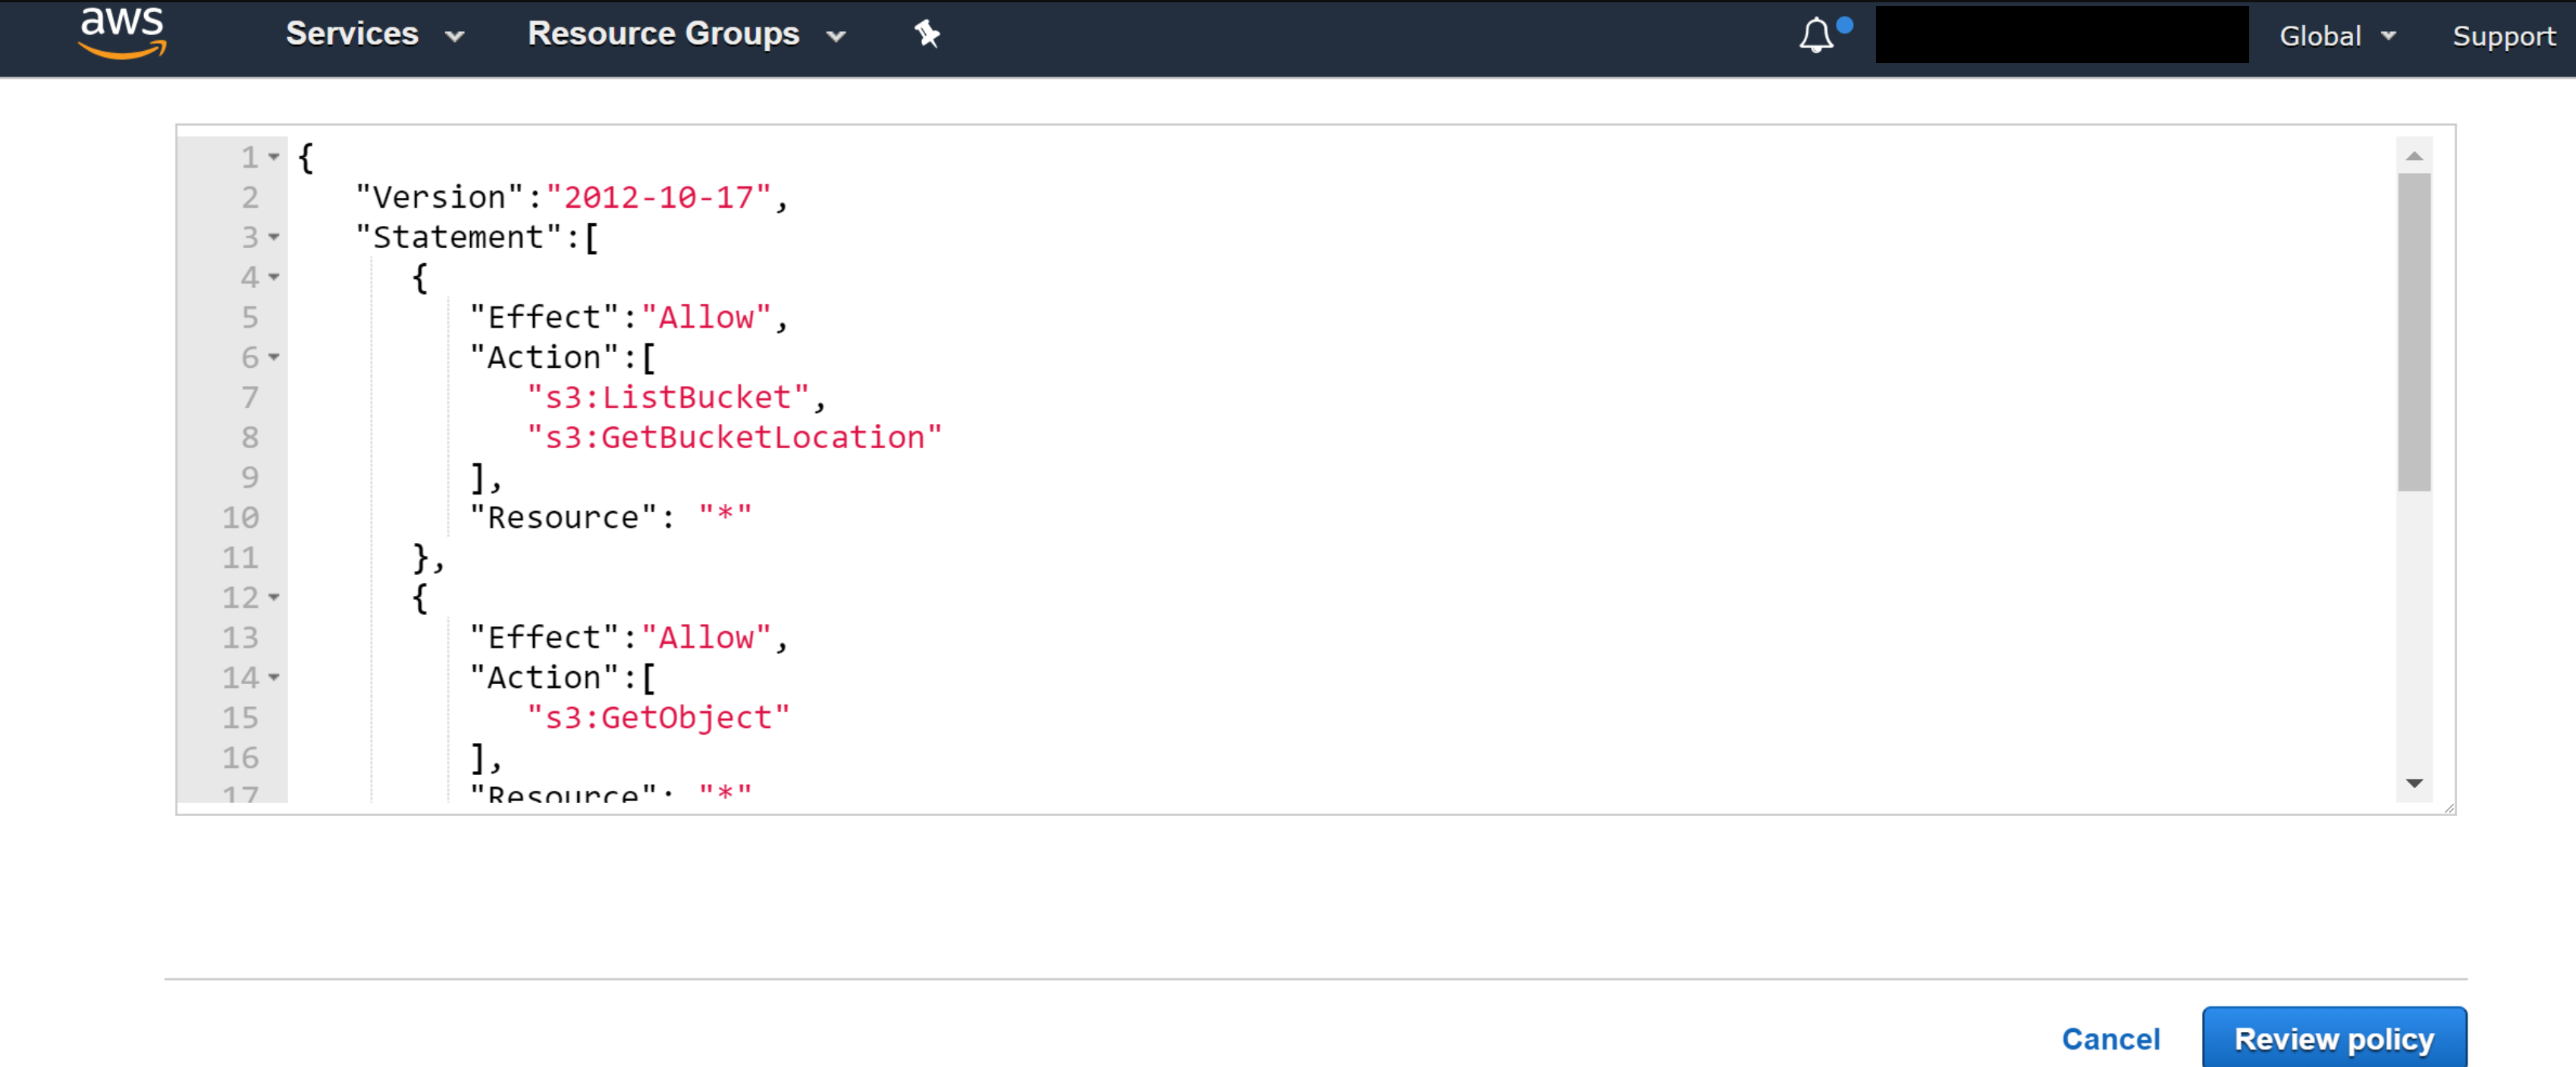
- To Create Policies, select the Policies option on the AWS web interface, and click Create Policy.
- Select the JSON tab, copy the content from the JSON file (avicontroller-role-policy.json), paste it into the JSON box, and click Review Policy.
- Provide the name for the policy (AviController-EC2-Policy) and the description (optional). Select the Create Policy option.
- Once the policy is successfully created, the AWS web interface will exhibit the message.
- Follow the steps mentioned above to create AviController-IAM-Policy. Choose the policy name and the JSON file as mentioned in the table provided at the beginning of the topic.
- Based on the requirement, create the other optional policies as well. For example, If NSX Advanced Load Balancer will use the AWS DNS service, create a policy named AviController-R53-Policy and copy-and-paste the contents of the avicontroller-role-53-policy.json file into the Policy Document field.
- Creating Role and associating it with the required policies.
- Select Roles and click Create Role.
- Select the type of trusted identity (AWS Service), choose the service (EC2) that will use this role, and click Next: Permissions.
- Select the policy created in the previous step (AviController-EC2-Policy), and (AviController-IAM-Policy), and select Next: Preview.
- Provide the role name (AviController-Refined-Role) and the description (optional). Click Create role.
- Once the role is created, the AWS web interface will exhibit the following message: The role avi-controller-refined-role has been created.
Results
The new roles should be on the list.
There are three ways an AWS cloud can be created in NSX Advanced Load Balancer, namely, using the Access/Secret key, the IAM roles of the Controller, and Cross-Account AssumeRole.
To use the Cross-Account AssumeRole method, the user must have either the Access/Secret key or the IAM roles of the Controller as prerequisites.
Both the Access/Secret key and IAM roles of the Controller methods mentioned above require a vmimport role to be present. However, while using the Access/Secret key method, the user whose keys are used must have all the necessary permissions for executing all the operations done in NSX Advanced Load Balancer similar to the IAM role.
AviController-Refined-Role needs to be present if you choose to use the IAM roles of the Controller option. If the AviController-Refined-Role role is created using AWS CLI, then an instance profile is required as created in step-4. But, if the role is created using AWS GUI, then it is not required to create an instance profile separately, as it is automatically created along with the role.
Once all the required roles and policies are configured, see Installing NSX Advanced Load Balancer in Amazon Web Services to install the NSX Advanced Load Balancer EC2 instance.
For more information, see Managing access keys for IAM users.
