NSX Advanced Load Balancer integrates with Amazon Web Services (AWS) to provide DNS services to applications running on instances in AWS.
AWS Cloud in NSX Advanced Load Balancer supports AWS DNS by enabling
route53_integrationin the cloud configuration and does not require this DNS profile configuration.A separate DNS provider configuration (as described below) is required only for cases where AWS provides the infrastructure service for other clouds (For example, Mesos Cluster running on AWS instances).
AWS DNS is supported only for North-South DNS provider.
CNAME record type is not supported; only A record is supported for AWS DNS.
DNS Configuration
Navigate to .
Click .
To use AWS as the DNS provider, choose one of the following credentials:
- Identity and Access Management (IAM) roles
-
Set of policies that define access to resources within AWS
- AWS customer account key
-
Unique authentication key associated with the AWS account
If using IAM Role:
Follow the steps in IAM Role Setup for Installation into AWS to set up the IAM roles before beginning deployment of the NSX Advanced Load Balancer Controller EC2 instance.
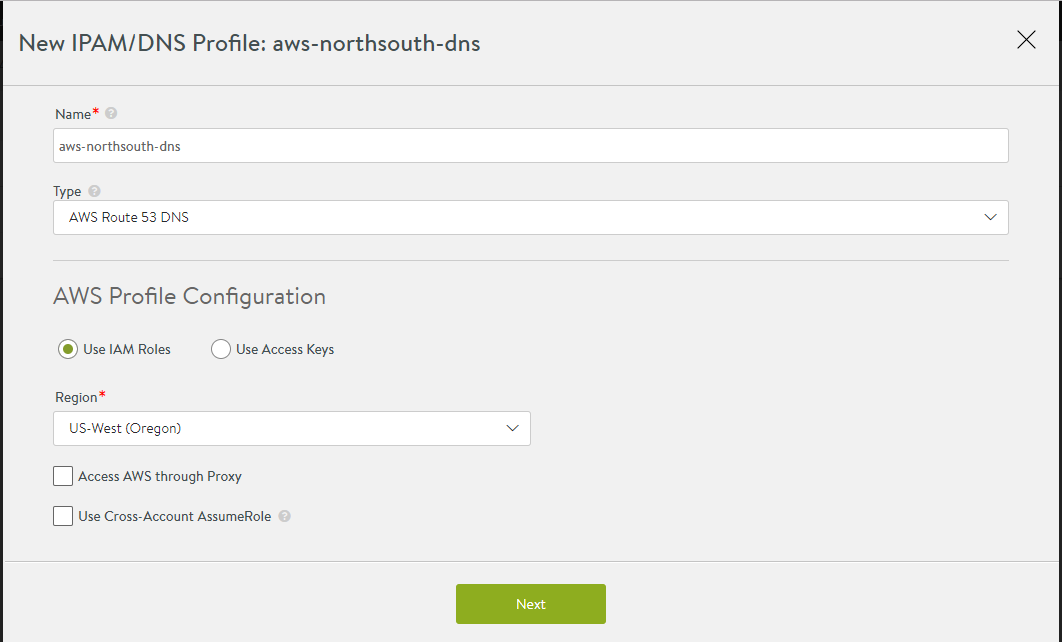
Select AWS Route 53 DNS from the Type drop-down menu.
Select Use IAM Roles under AWS Profile Configuration section.
If using Access Key:
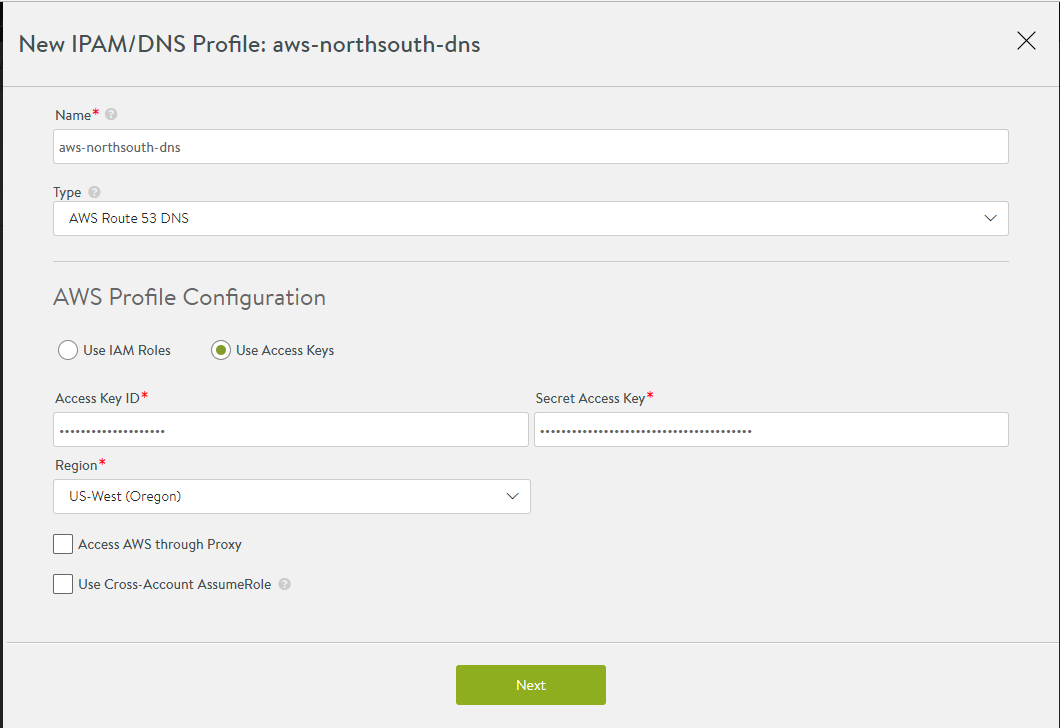
Select AWS, then select Use Access Keys
-
Enter the following information:
Field
Description
Access Key ID
AWS customer key ID.
Secret Access Key
Customer key.
Region
AWS region into which the VIPs will be deployed.
Access AWS through Proxy
Select if access to AWS endpoints requires a proxy server.

Use Cross-Account AssumeRole
Select if the AWS credentials or role is being leveraged to access across accounts.
For more information, see AWS Cross-Account AssumeRole Support.
Click Next.
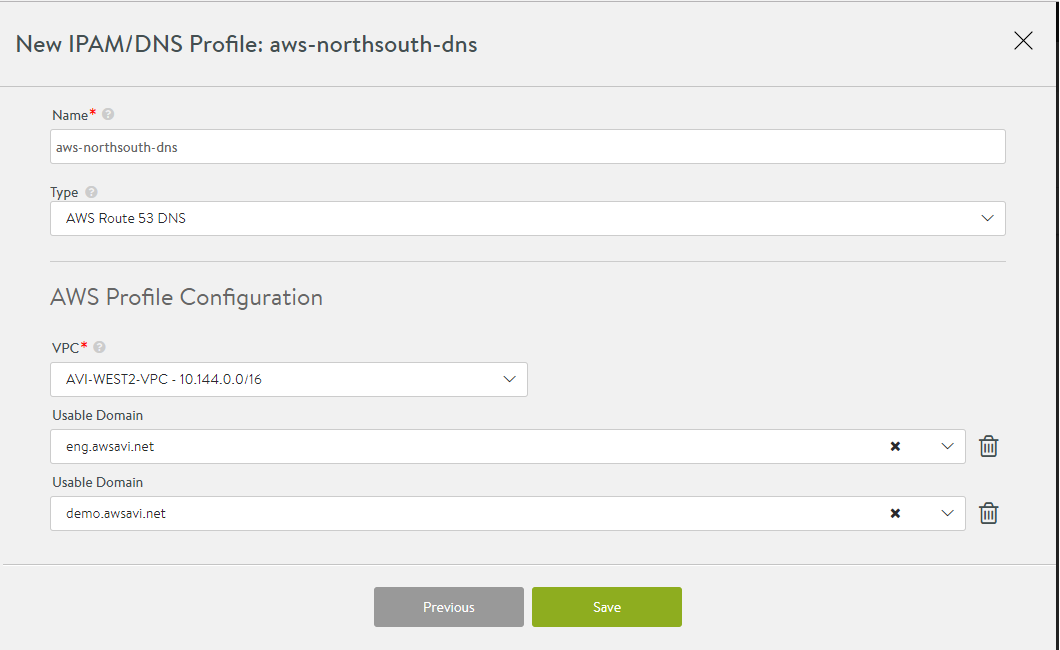
Enter the following fields in the AWS Profile Configuration:
In the VPC drop-down menu, select the appropriate VPC from the available VPCs in that region.
Usable Domain displays the available domain names associated with that VPC. Configure at least one domain for virtual service’s FQDN registration with Route 53.
Click Save.