Load balancing for app volume manager is achieved by configuring an L7 virtual service with HTTPS application profile.
To configure an L7 virtual service with HTTPS application profile,
Procedure
- Create Custom Health Monitor for UAG as shown below:
- Install the SSL certificate Required for L7 VIP.
Note:
For this set up, a certificate named Horizon_Certificate has been installed. You can install a different certificate for the app volume manager.
- Creating the App Volume Manager Pool -
- From the NSX Advanced Load Balancer UI, navigate to .
- Click Create Pool.
- Click SET Cloud & VRF and select the vCenter cloud from the Cloud drop-down menu. Enter VRF Context and click SET.
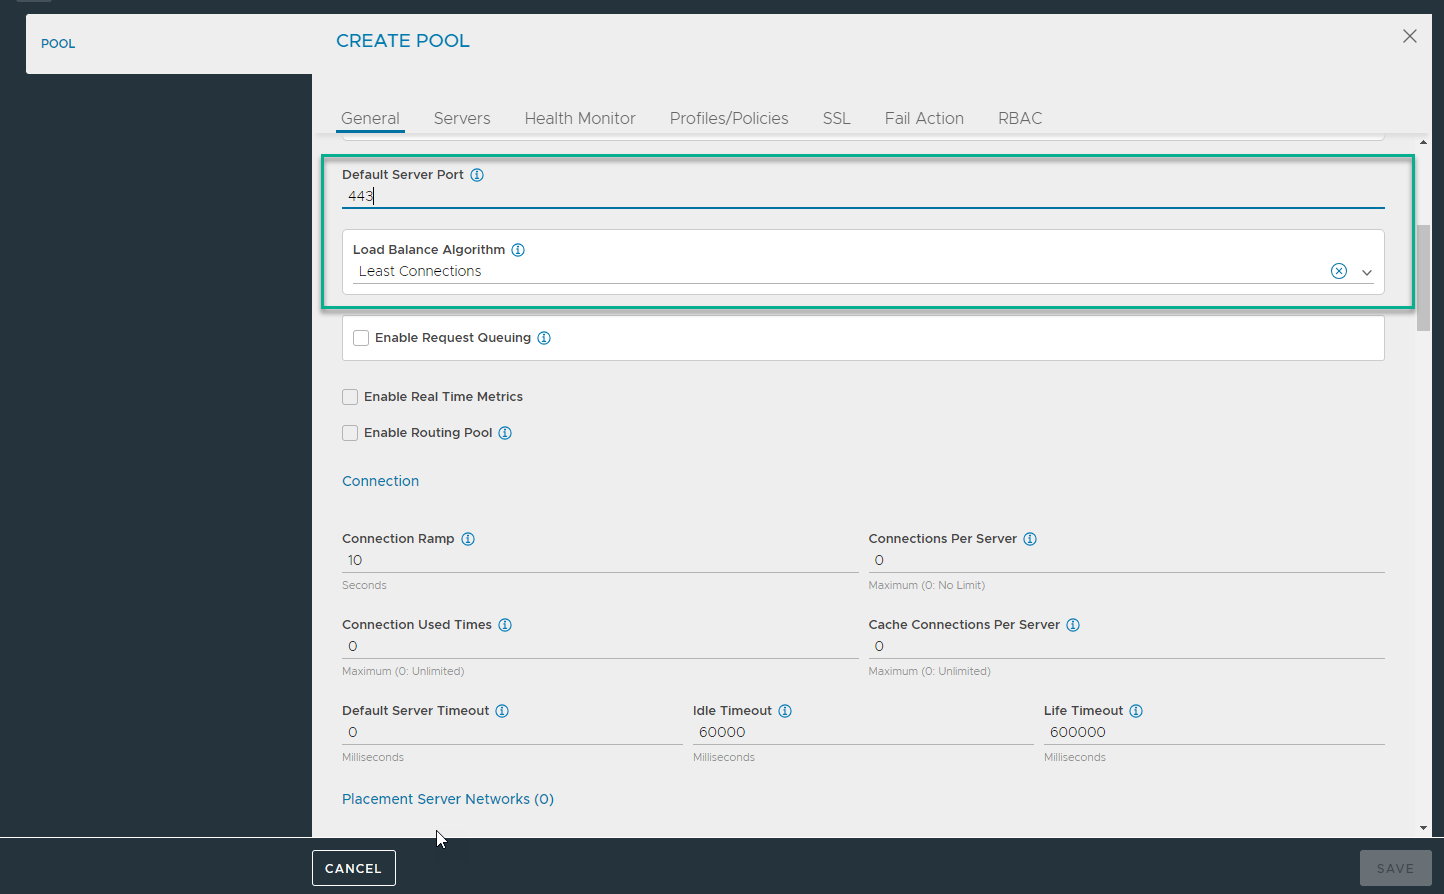
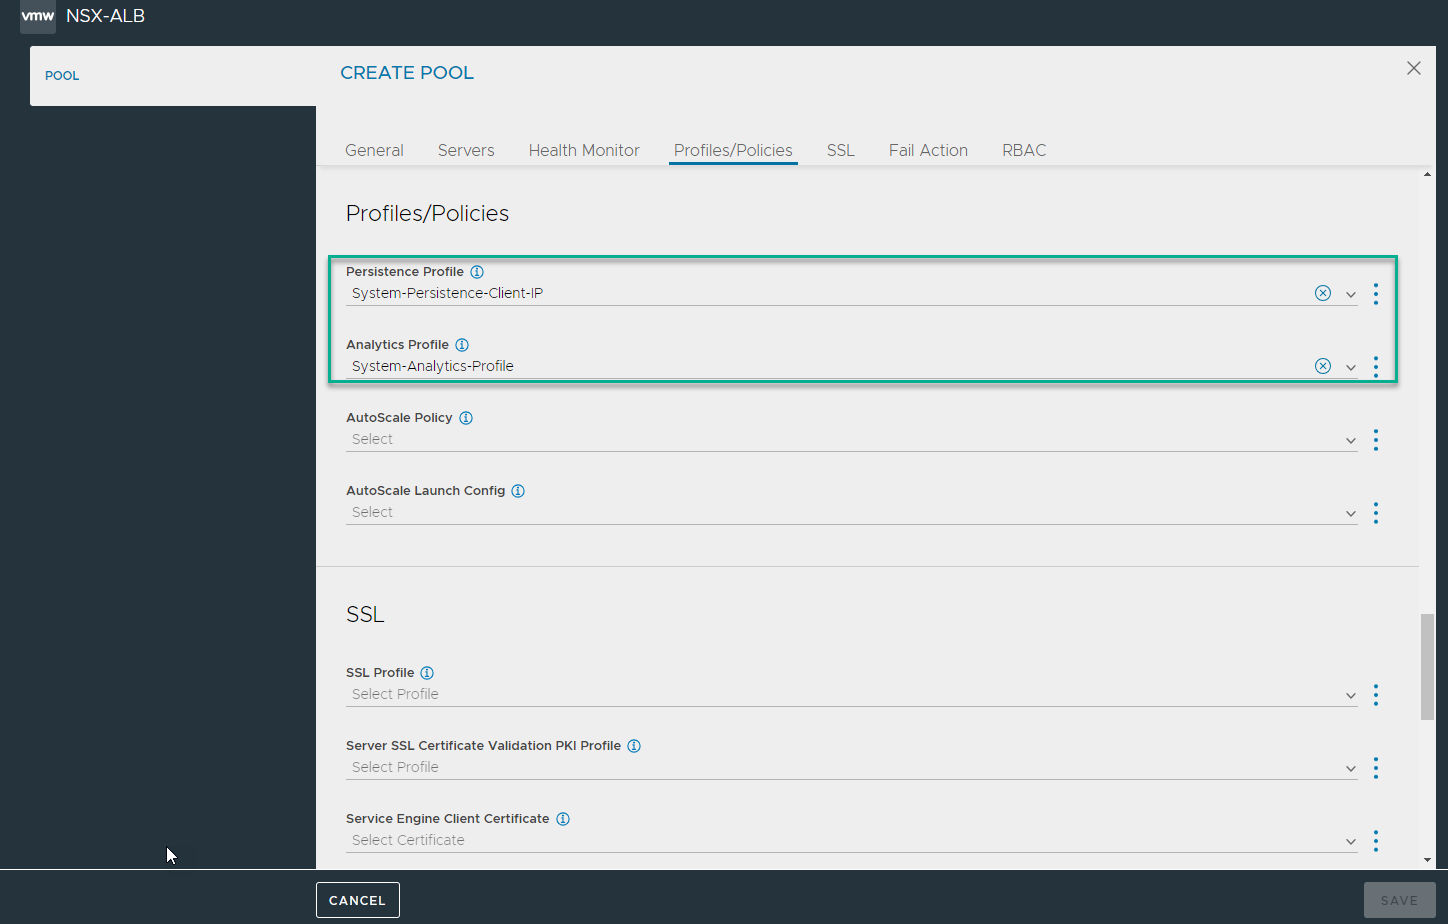
- Enter the following details in the Create Pool screen:
Field |
Value |
Default Server Port |
443 |
Load Balance Algorithm |
Least Connections |
Persistence Profile |
System-Persistence-Client-IP |
Analytics Profile |
Systems-Analytics-Profile |
- To bind the monitor, click Health Monitor tab and select the HTTPS Health Monitor that was created.
- Click SSL tab and select System-Standard as the SSL Profile.
- Enter Server IP Address and click Add.
- Click Save.
- Creating Application Profile
- From the UI, navigate to .
- Click Create.
- Enter the Name of the profile.
- Select the Type as HTTP.
- Ensure Connection Multiplex is disabled.
- Click Save.
- Creating L7 Virtual Service
- From the UI, navigate to .
- Click .
- In the New Virtual Service screen, enter the virtual service name and other details.
- Under VIP Address, enter the IPv4 VIP Address.
- Select the Application Profile that was created.
- Under , click Switch to Advanced and add 443 as the Port select SSL.
- Under Pool, select the pool that was created for app volumes.
- Under SSL Settings, select System-Standard as the SSL Profile and select the SSL Certificate.
- Click Next.
- Navigate to Step4: Advanced and click Save.


