


This method is the legacy way of configuring NSX Advanced Load Balancer. It is recommended to use Load Balancing for Horizon Environments in (n+1) Mode using 307 Solution instead.In this design, only the primary HTTPS protocol will be load balanced by NSX Advanced Load Balancer. UAGs have to be configured with public IPs and the Blast External URL and PCoIP External URL on each UAG will be configured to the same UAG.
Follow the steps below to configure (n+1)VIP in NSX Advanced Load Balancer:
Procedure
- Create a Pool
- From the UI, navigate to .
- Click Create Pool.
- Under Servers, click IP Address, Range or DNS Name to Select Servers By.
- Enter the IP address, and click Add.
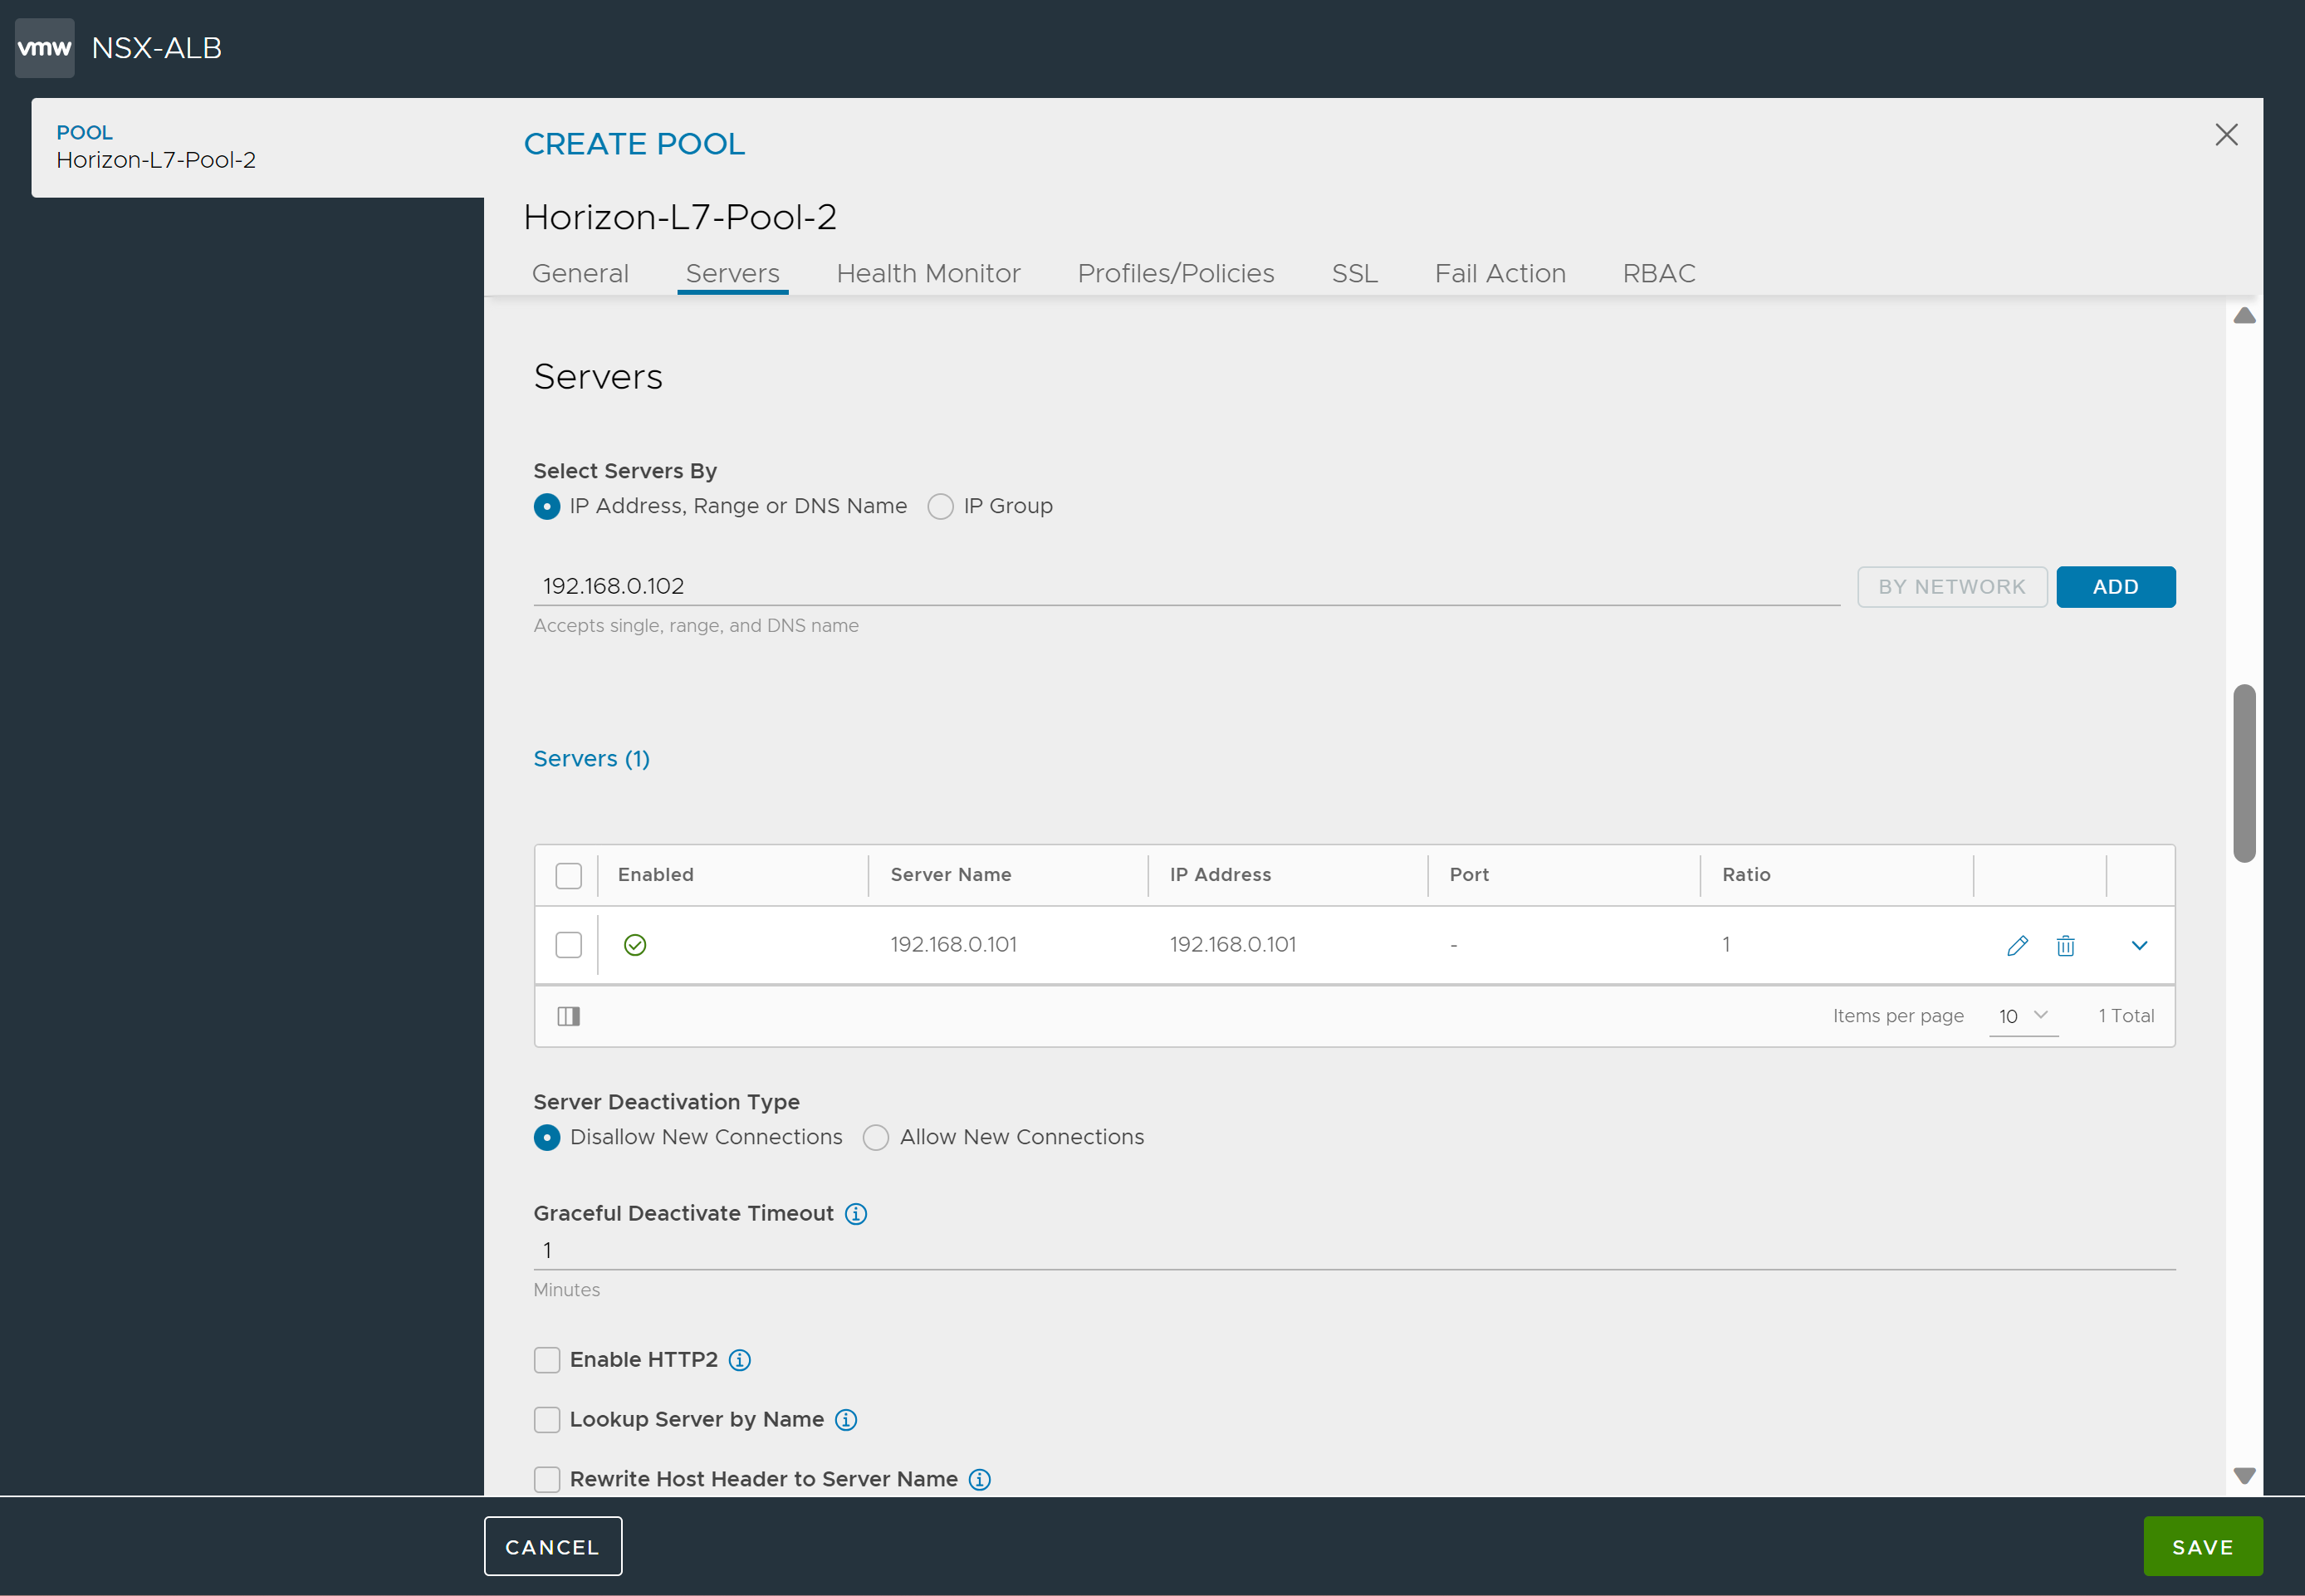
- In the New Pool: screen enter details as shown below:
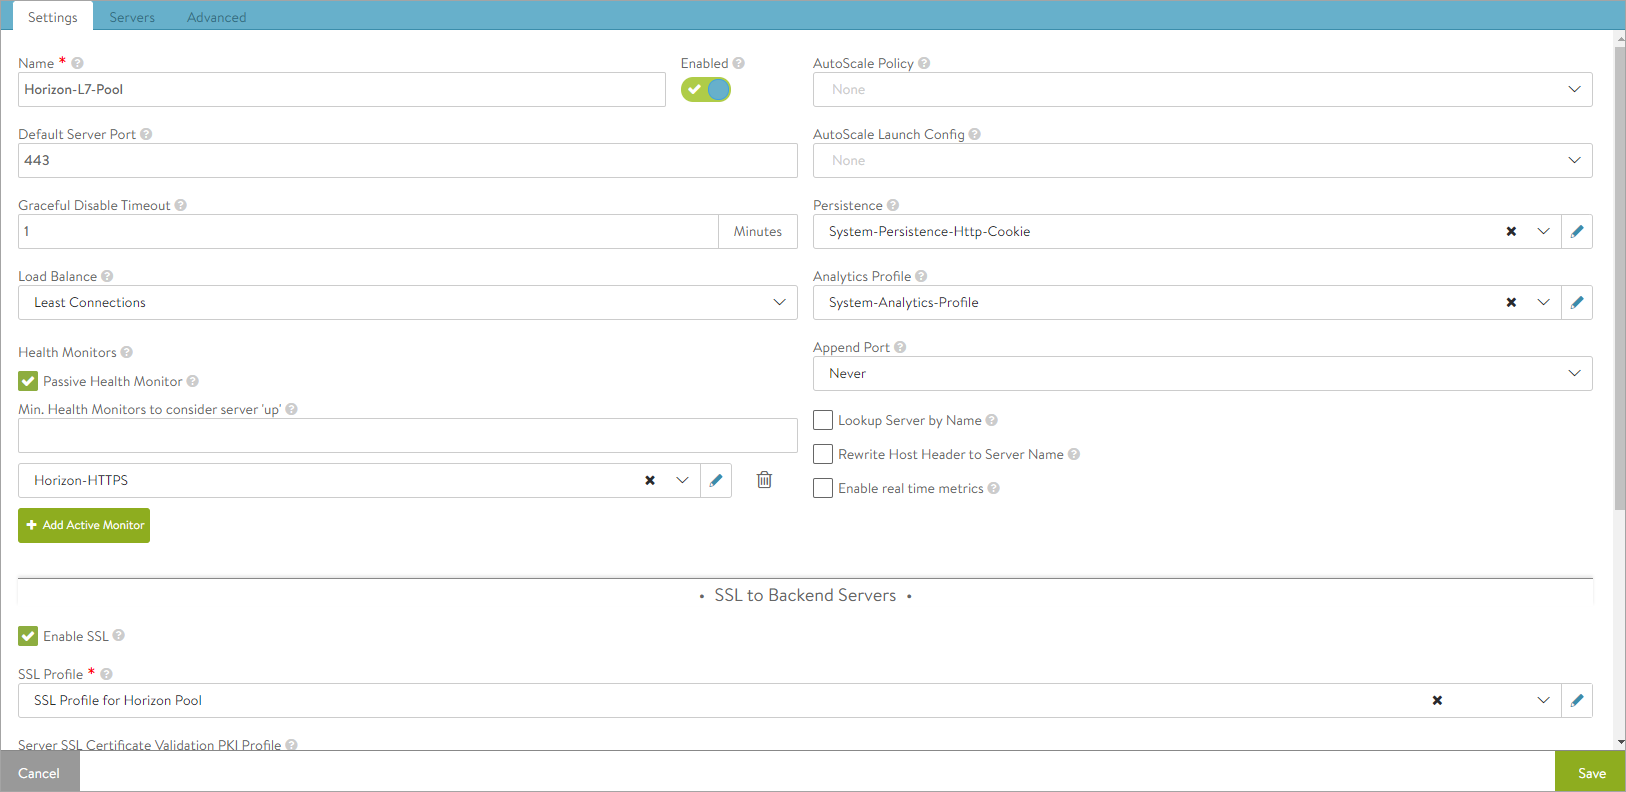
Note:HTTP-cookie is used for creating persistence. The persistence profile can be modified if required.
For more information, see Create Persistence Profile topic in the VMware NSX Advanced Load Balancer Configuration Guide.
- To bind the monitor, click on Add Active Monitor and select the HTTPS monitor that was created.
It is recommended to create an HTTPS type monitor with the required timers. Set the timeout interval to be more than six seconds to account for any delay caused by connection servers response to the health monitor probes, if connection servers are configured with full logging level (used for debugging).
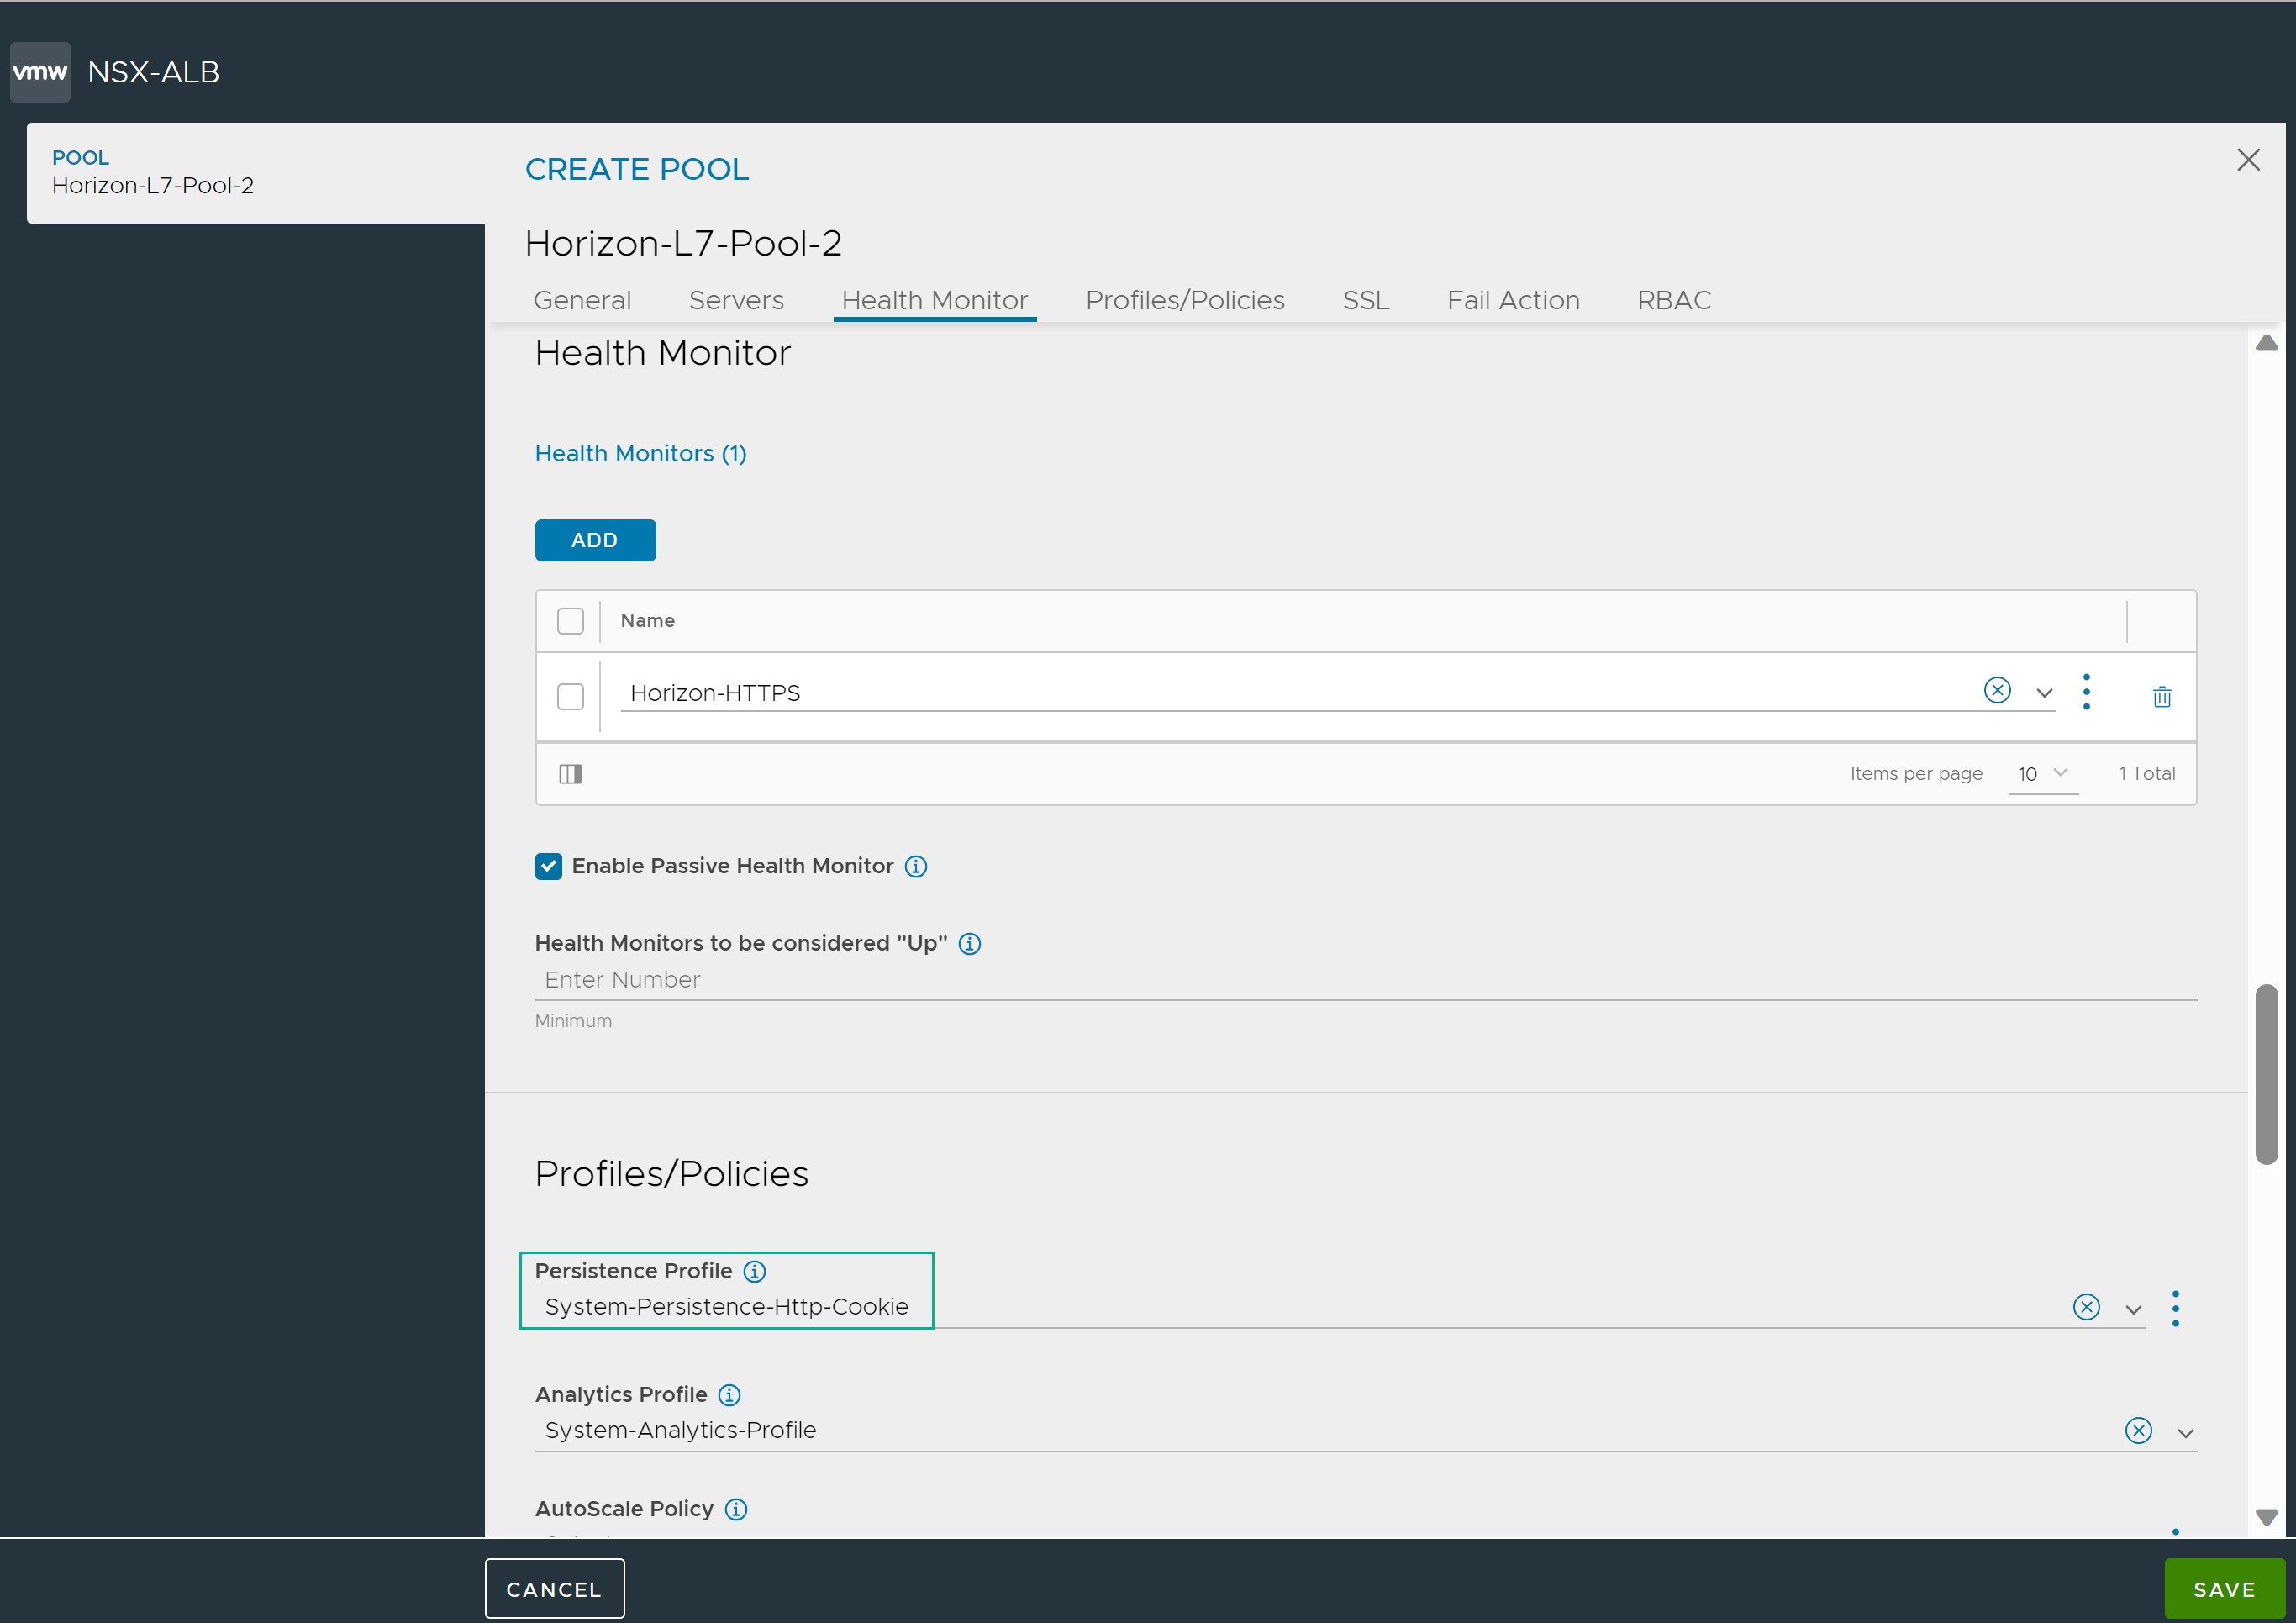
- In the CREATE Pool screen enter details as shown below:
- Disable Connection Multiplexing for the System-Secure-HTTP-VDI profile.
- Create an L7 Virtual Service
To create the new L7 virtual service,
- From the UI, navigate to .
- Click .
- In the New Virtual Service screen, enter the virtual service name and other details.
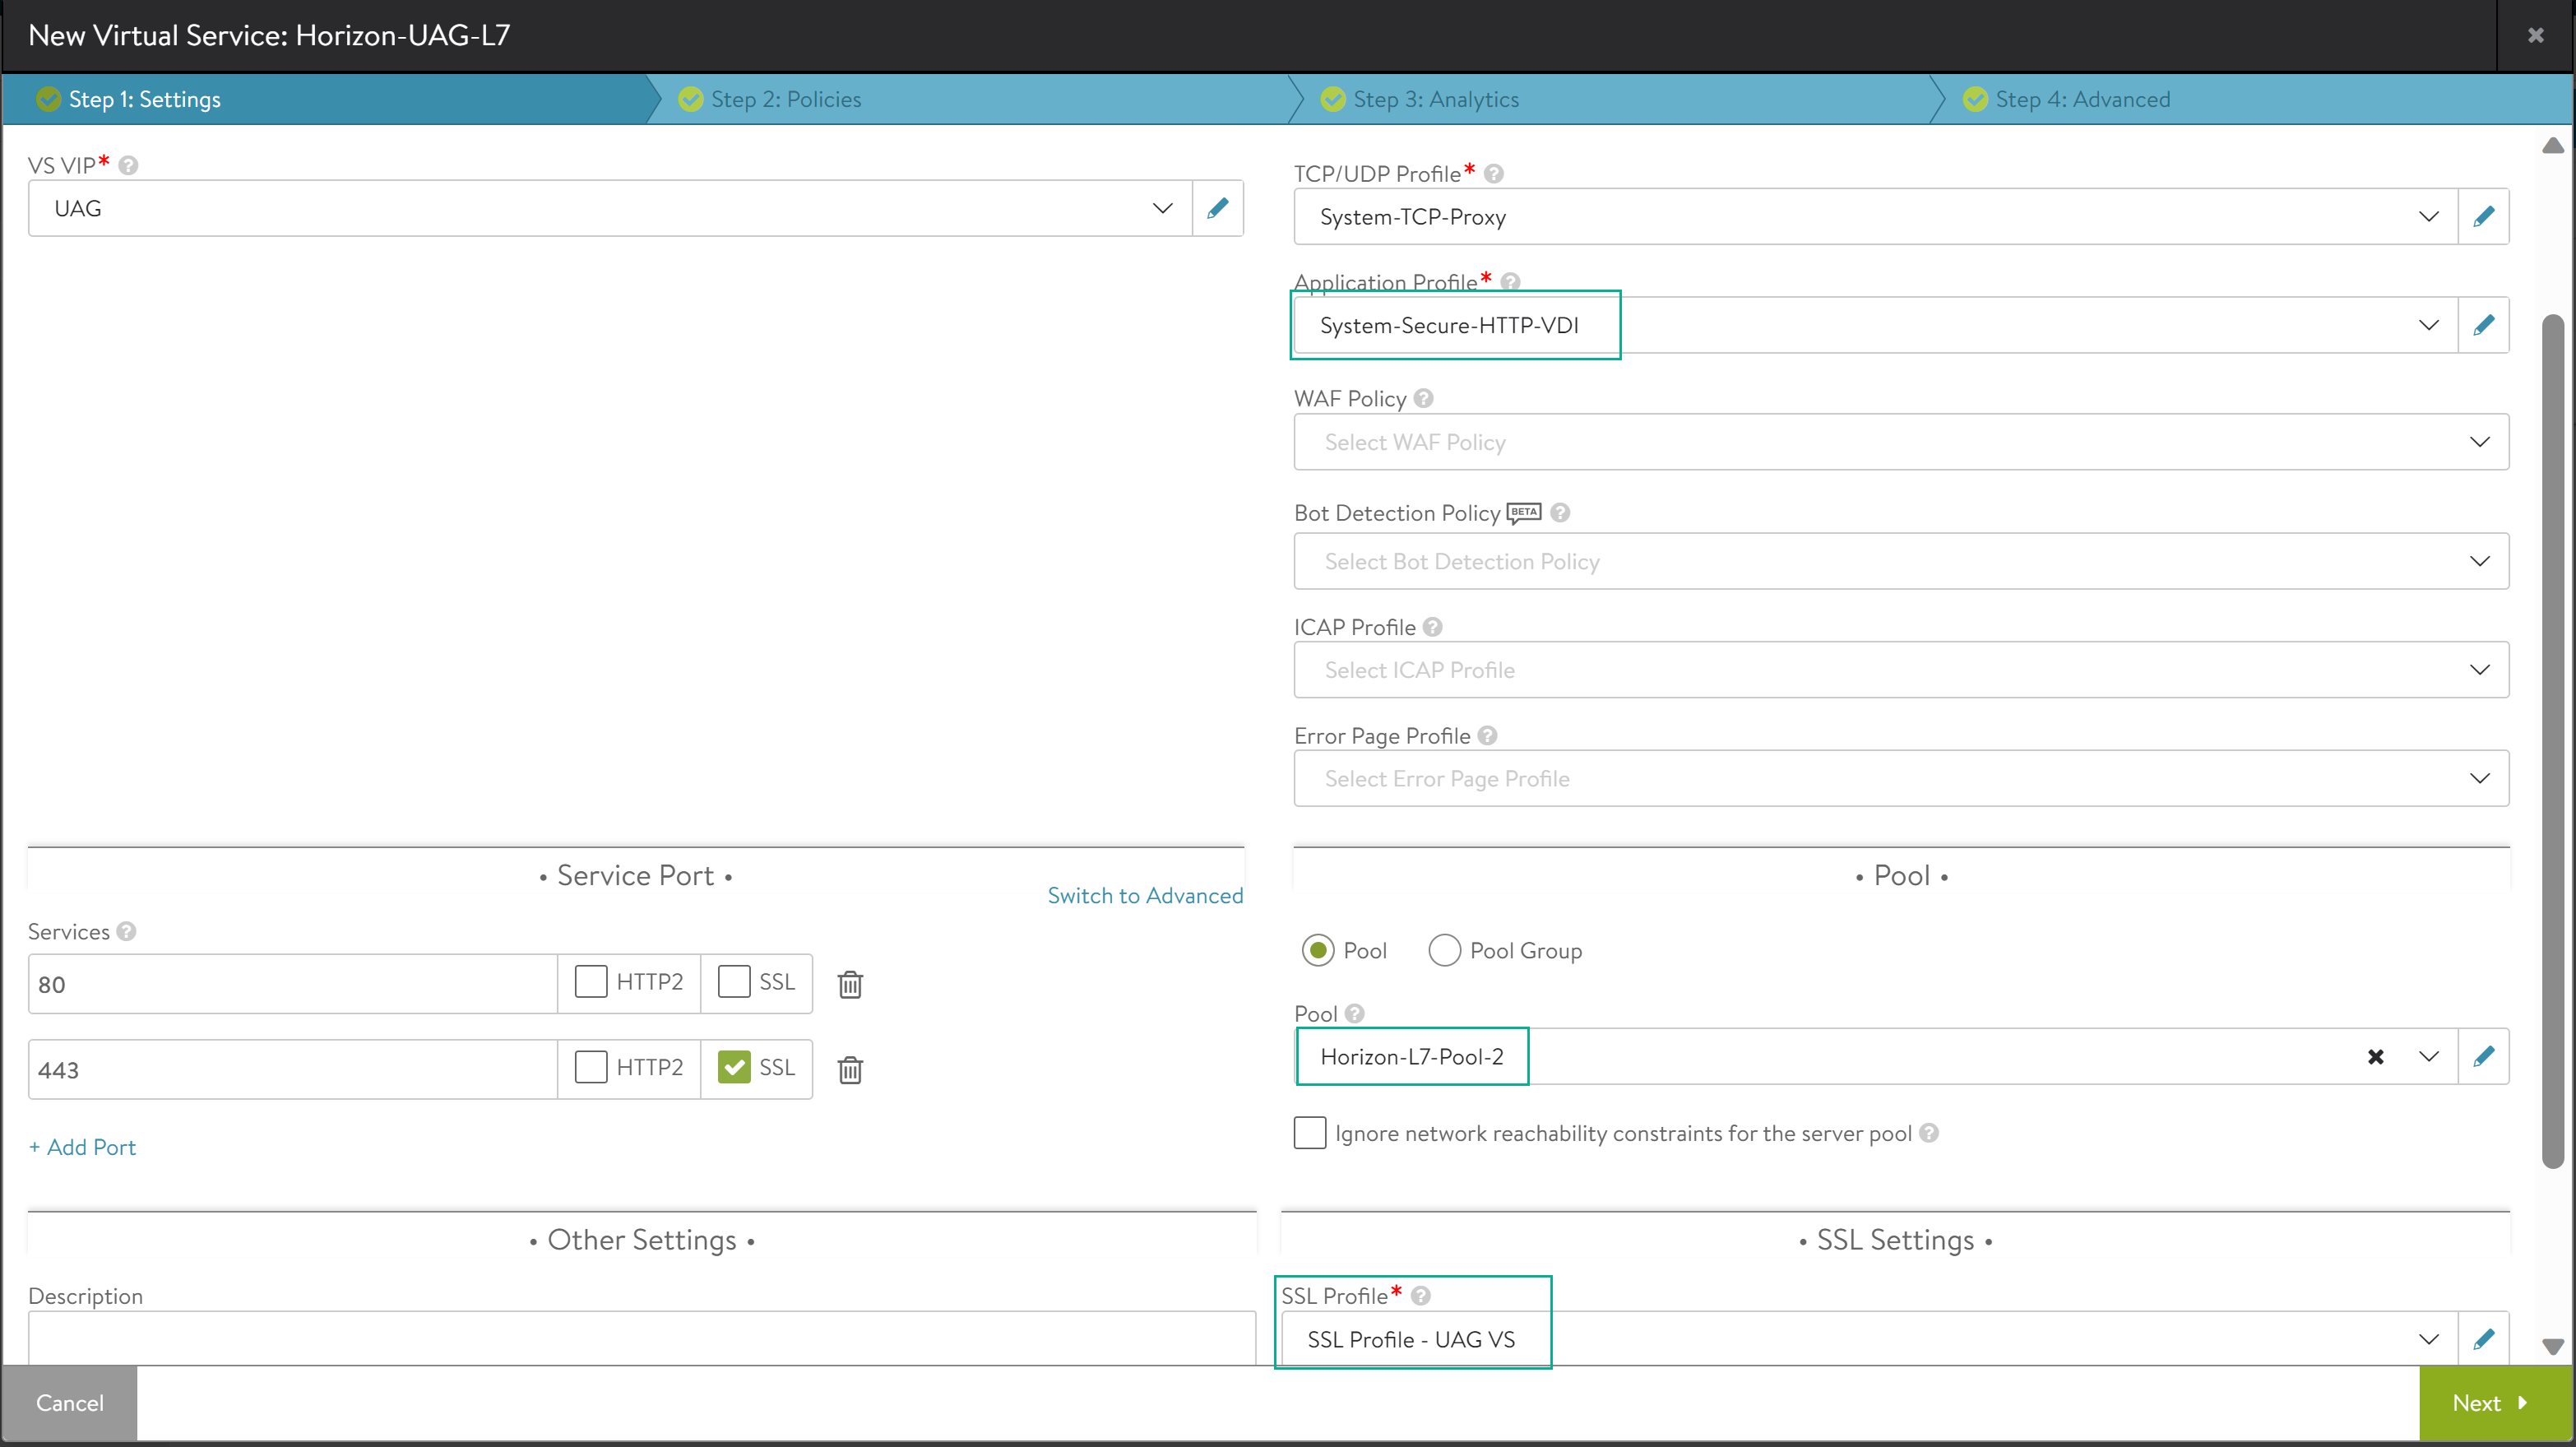
- Under , click Switch to Advanced and add the following port numbers for the secondary protocols.
- Select the pool (Horizon-L7-pool).
- Select the SSL Profile created for the virtual service
- Click Next.
Note:Ensure that connection multiplexing is disabled for the System-Secure-HTTP-VDI profile.
To know how to deactivate connection multiplexing, see Disable Connection Multiplexing.
