


Both L4 and L7 virtual services are supported to Load balance traffic to connection servers. However, it is recommended to use L7 virtual services. This guide discusses using L7 virtual service to load balance traffic to connection servers.
Create Custom Health Monitor for Connection Servers
From the UI, navigate to .
Click Create.
In the New Health Monitor screen, select the Type as HTTPS.
-
Set the Send Interval to 30 seconds and Receive Timeout to 10 seconds.
Select the Response Code as 2xx.
Select an appropriate SSL Profile.
Click Save.
Create an SSL Profile
Create an SSL profile with session reuse deactivated. Follow the steps shown below:
To create a new SSL profile,
In the UI, navigate to .
Select the Type as Application Profile.
In the New SSL/TLS Profile screen, ensure TLS 1.2 is selected under Accepted Versions for backward compatibility with older Horizon clients.
Ensure the option Enable SSL Session Reuse is deactivated.
Under Ciphers, click Select From List to select the following ciphers:
TLS_ECDHE_RSA_WITH_AES_128_GCM_SHA256
TLS_ECDHE_RSA_WITH_AES_128_CBC_SHA256
TLS_ECDHE_RSA_WITH_AES_256_GCM_SHA384
TLS_ECDHE_RSA_WITH_AES_256_CBC_SHA384
Click Save.
Creating a Pool
If connection servers are configured in replica, persistence on the connection server is not required. In case of non-replica, use Consistent Hash - Source IP address as the load balancing algorithm.
Enable SSL to backend and select the appropriate SSL profile (Connection-Server-SSL-Profile used here).
To create a pool,
Navigate to .
Click Create Pool
-
Enter the details as shown below:
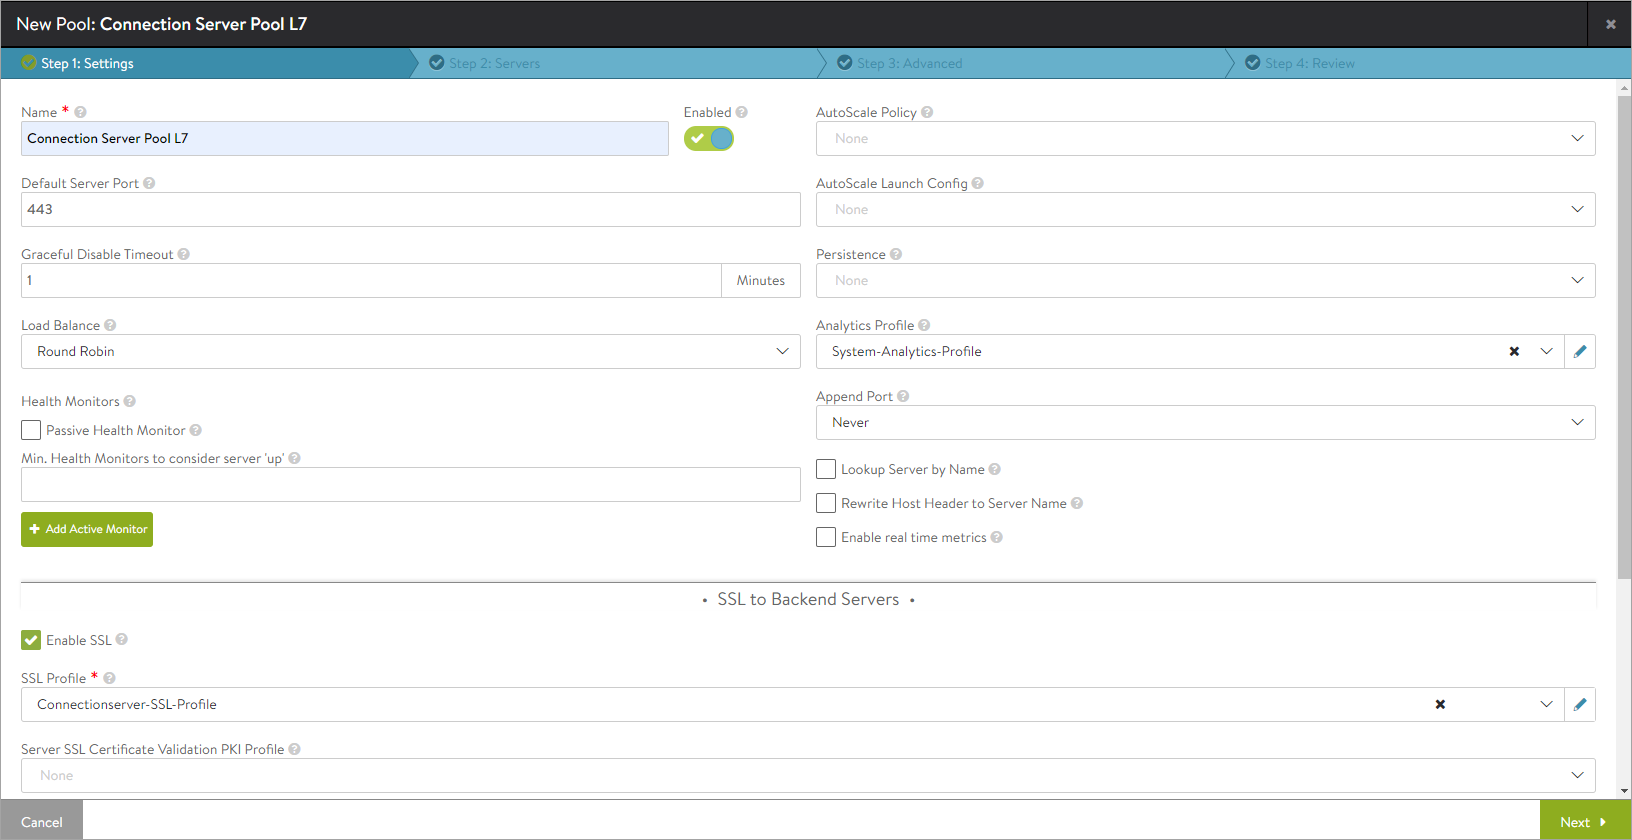
Click Next and Save.
Creating an Application Profile
Creating an L7 Virtual Service
To create the L7 virtual service,
Navigate to .
Click .
-
Select the Application Profile created for connection server.
Enable SSL and choose the SSL profile that was created for the virtual service.
Select the Connection Server Pool.
-
The virtual service is as shown below:
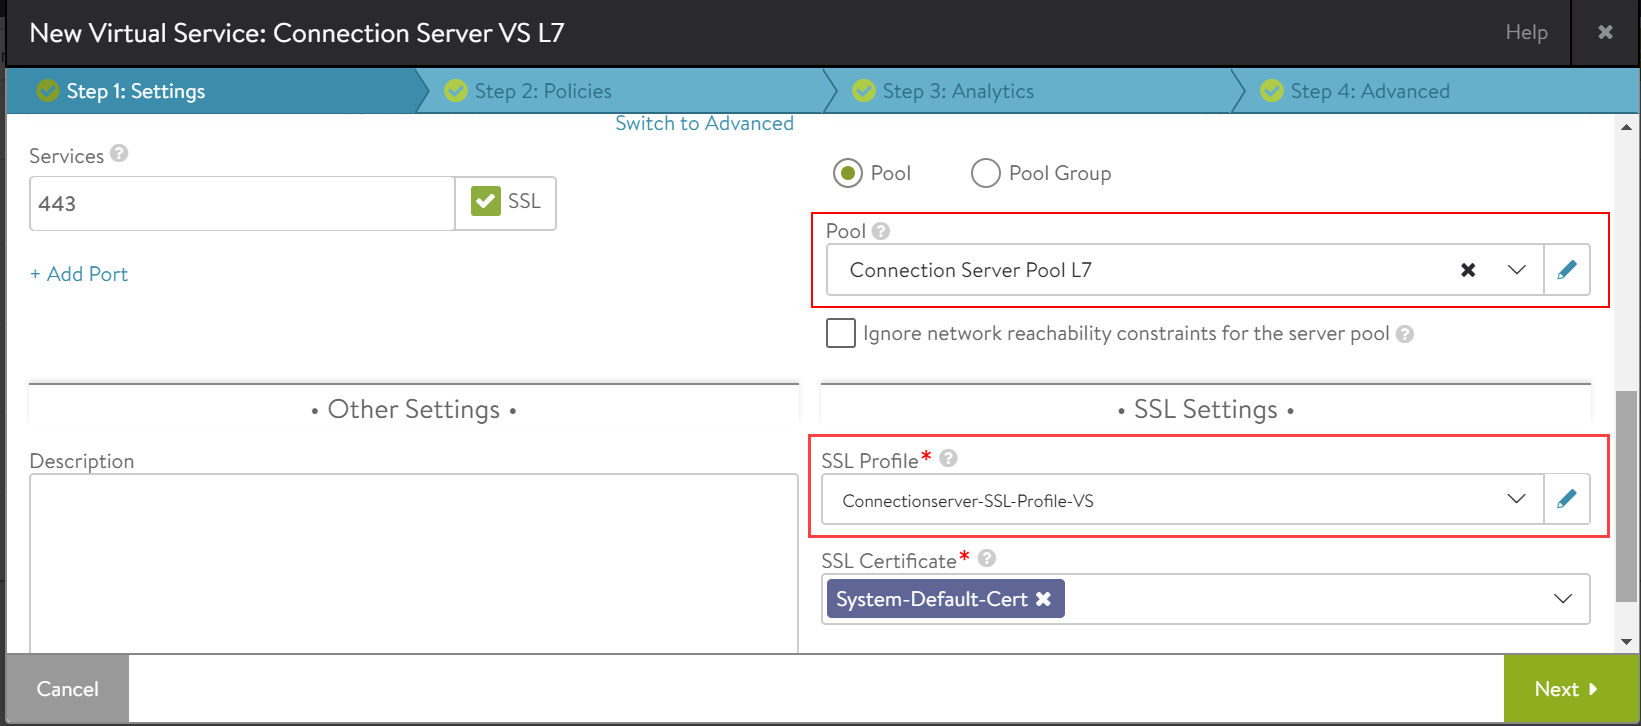
Click Next and navigate to Step 4: Advanced.
Click Save.
The following are the changes in the UAG server when the load balancer is present between the UAG and connection server:
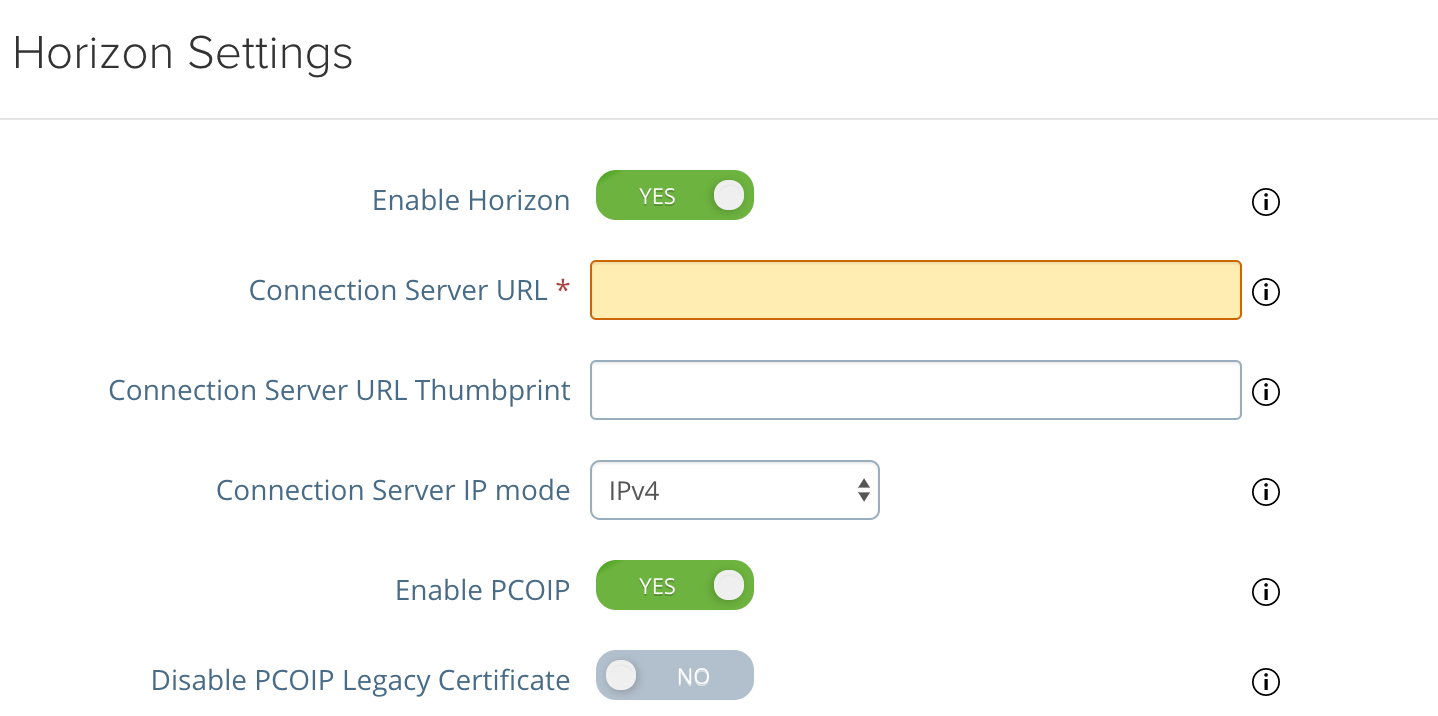
The connection server URL must point to the NSX Advanced Load Balancer.
The connection server URL thumb print:
For an L7 virtual service: The connection server URL thumbprint is taken from the certificate that is bound to the NSX Advanced Load Balancer.
For an L4 virtual service: The connection server URL thumbprint must be taken from the certificate that is present in the connection server itself.
For an L4 virtual service with SSL (System-SSL-Application) the connection server URL thumbprint is taken from the certificate that is bound to the NSX Advanced Load Balancer.
For connection servers, connection multiplexing has to be deactivated for the System-Secure-HTTP-VDI profile.
To know how to deactivate connection multiplexing, see Disable Connection Multiplexing.
