


This topic discusses configuration changes required to enable VLAN trunking on NSX Advanced Load Balancer SEs running on ESXi in no-orchestrator mode.
Procedure
- Provide the required details as shown below and click Save.
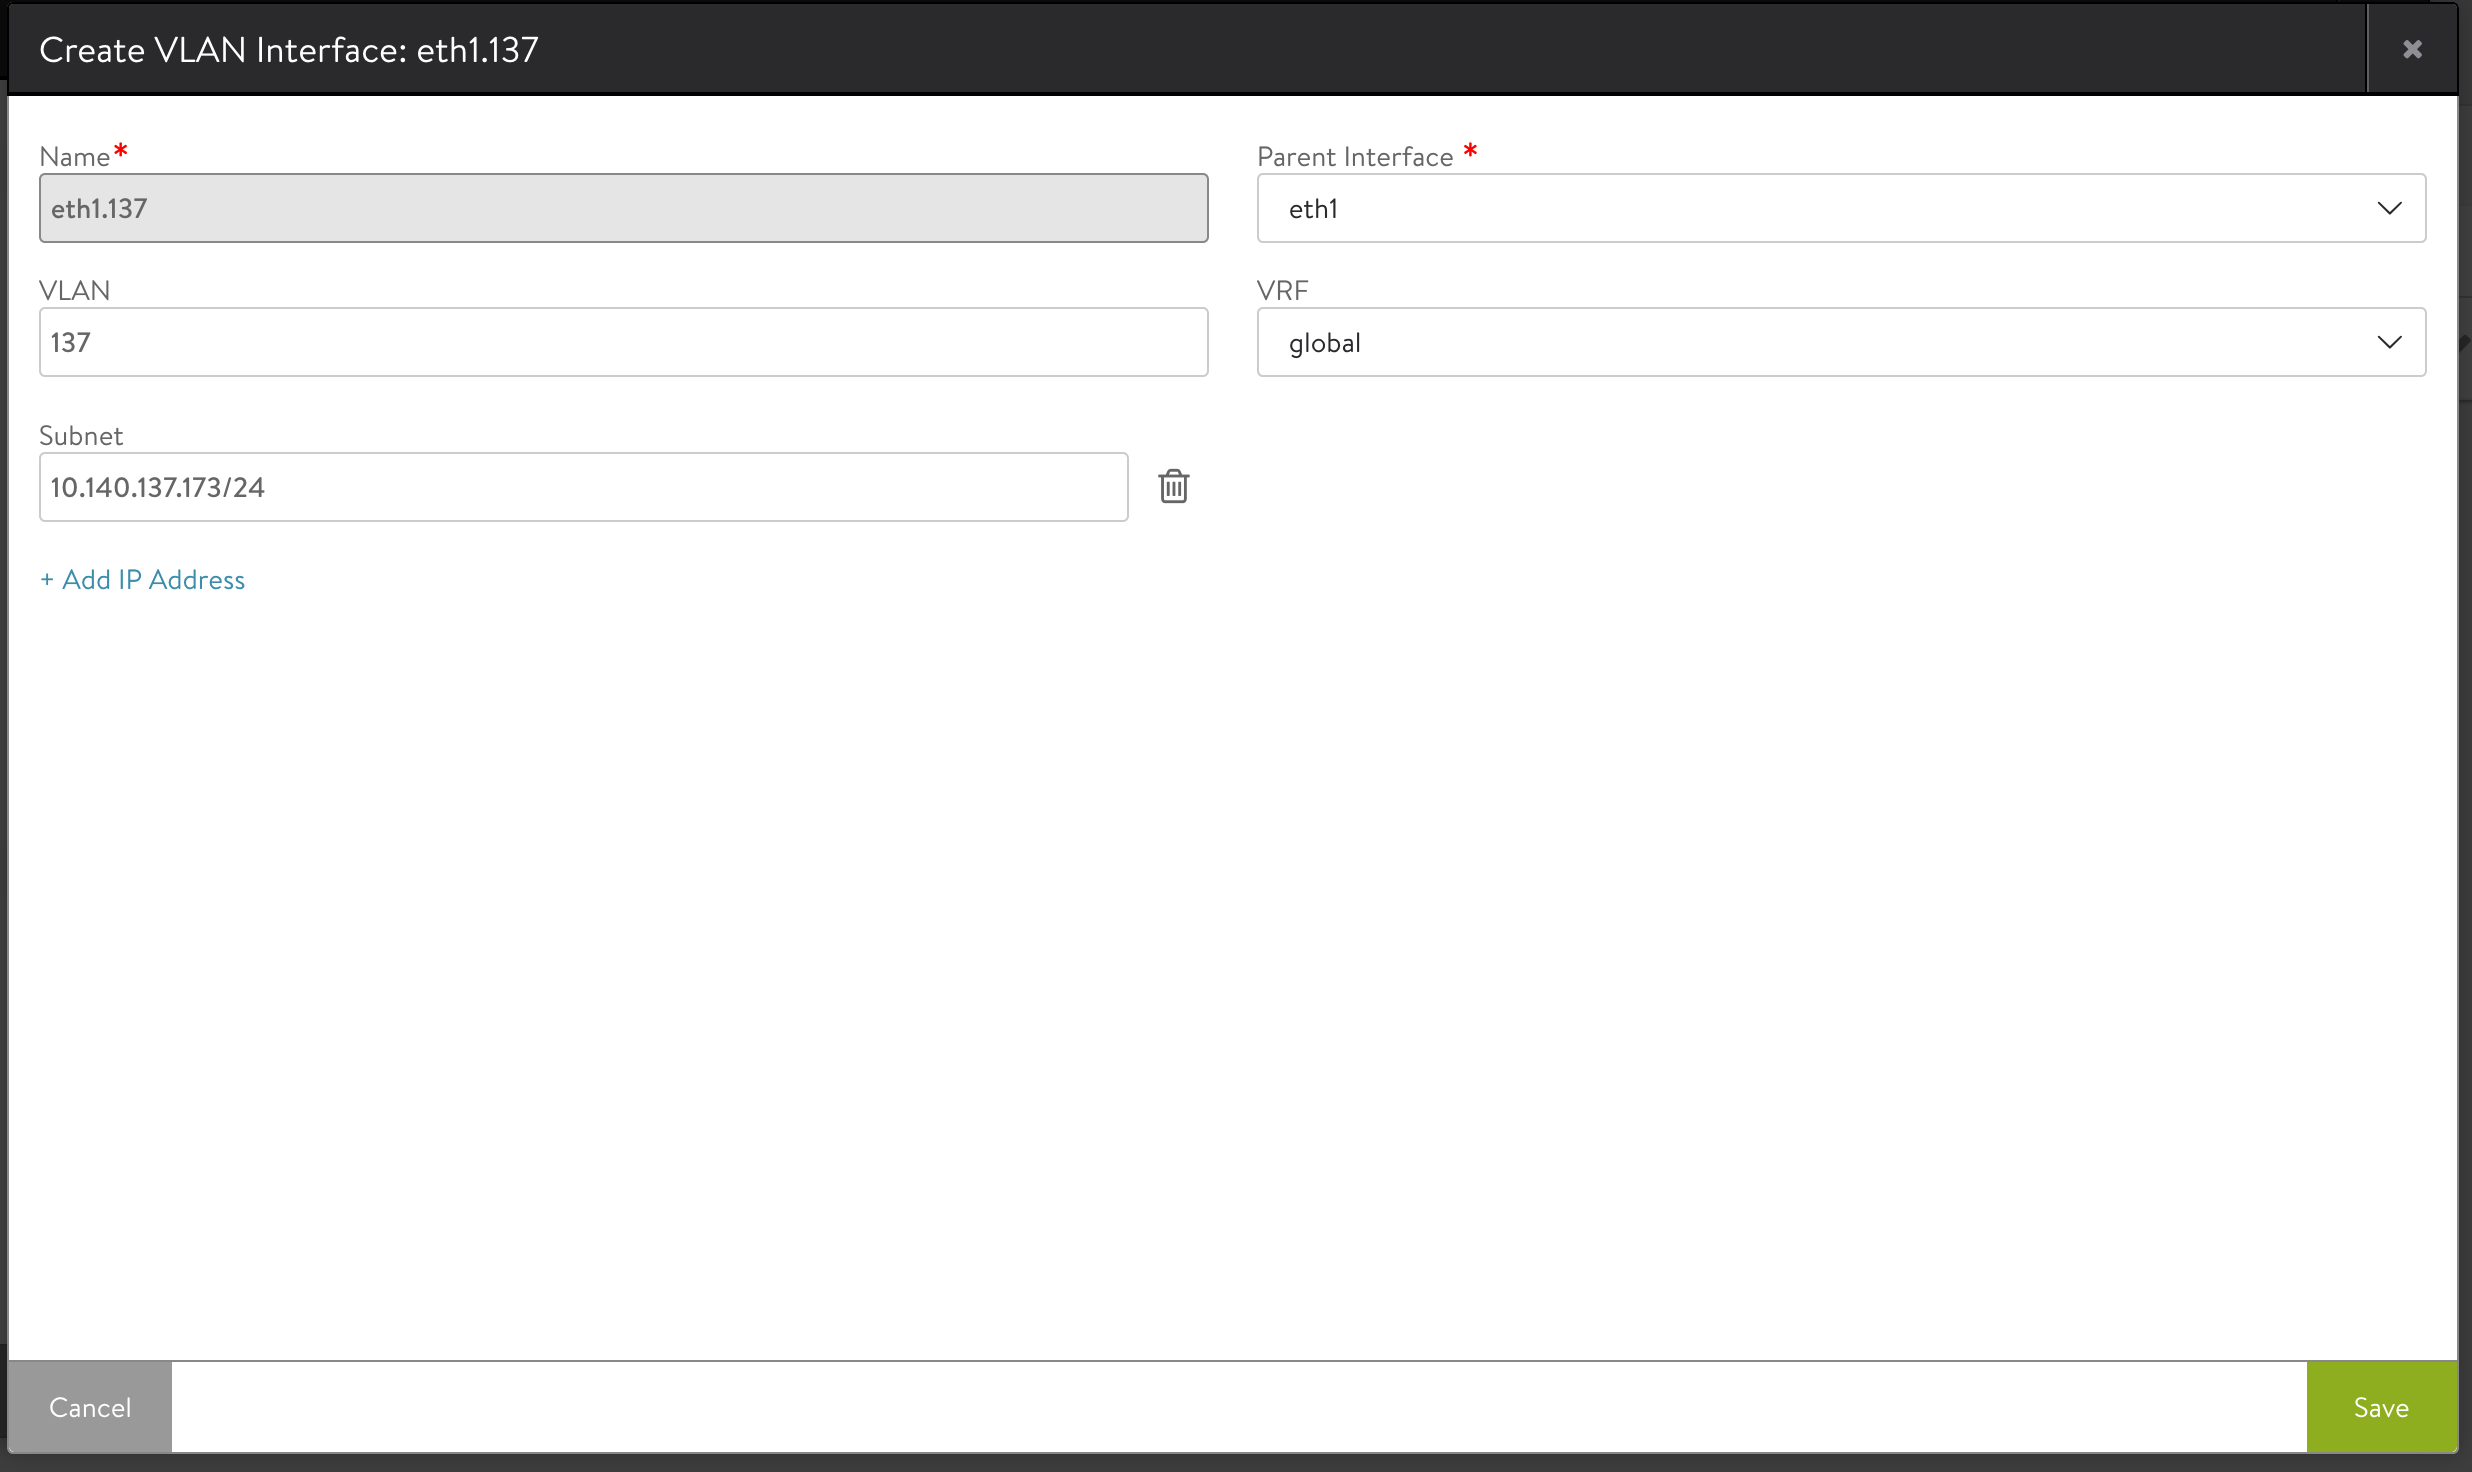
In the above example, VLAN trunking is enabled on the Ethernet interface 1 with VLAN 137.
You can now place the virtual service on SE using the usual way.
To create virtual service on NSX Advanced Load Balancer, see the Virtual Services topic in the VMware NSX Advanced Load Balancer Configuration Guide.
