Firewall rule table implements the NSX Security policy which you can create using the NSX Manager GUI or the REST API framework.

Here are the high-level steps to understand and prepare for defining the security policy.
  • VM Inventory Collection: You can identify and organize a list of all hosted virtualized workloads on the NSX-T transport nodes. The inventory is dynamically collected and saved by NSX Manager as the nodes – ESXi or KVM that are added as NSX-T transport nodes. You can view a list of inventories by navigating to the Inventory > Virtual Machines menu.
  • Tag: NSX-T allows to tag virtual machine, segment, and segment-port. To tag each of these objects, go to the relevant object page or go to Inventory > Tags. Objects can have one or more tags. For example, a VM can have Tag = PROD, Tag = HR-APP or Tag = WEB-Tier.
  • Group Workloads: You can use the NSX-T logical grouping construct with dynamic or static membership criteria based on VM name, tags, segment, segment port, IPs, or other attributes.
  • Define Security Policy: You can define the security policy using the distributed firewall rule table available at Security > Distributed Firewall. You can organize the policy based on pre-defined categories like ethernet, emergency, infrastructure, environment, and application.

For details, see NSX-T Data Center Administration Guide.

Add Tags

You can select existing tags that are available in the inventory or create new tags to add to an object.

Procedure

  1. With admin privileges, log in to NSX Manager.
  2. Edit an object for tags. Objects can be virtual machines, segments, or segment ports. You can use inventory for each object to tag the object or go to Inventory > Tags for creating and assigning tags.
    To tag the objects directly, for example virtual machines, click Inventory > Virtual Machines. Next to the virtual machine that you want to edit, click Actions menu, and click Edit.
  3. In the Tag drop-down menu, enter a tag name. When you are done, click Add Item(s).
    The maximum length of the tag name is 256 characters.

    If tags exist in the inventory, the Tag drop-down menu displays a list of all the available tags and their scope. The list of available tags includes user-defined tags, system-defined tags, and discovered tags. You can select an existing tag from the drop-down menu and add it to the virtual machine.

  4. (Optional) Enter a tag scope.
    For example, let us say, you want to tag virtual machines based on their operating system (Windows, Mac, Linux). Create three tags, such as Windows, Linux, and Mac, and set the scope of each tag to OS.
    The maximum length of the scope is 128 characters.

    If you selected an existing tag from the inventory, the scope of the selected tag is applied automatically. Otherwise, you can enter a scope for the new tag that you are creating.

  5. Click the + icon.
    The tag is added to the virtual machine.
  6. (Optional) Repeat steps 3–5 to add more tags to the virtual machine.
  7. Click Save.

Add Groups

Groups include different objects that are added both statically and dynamically and can be used as the source and destination of a firewall rule.

Procedure

  1. Select Inventory > Groups from the navigation panel.
  2. Click Add Group, then enter a group name.
  3. Click Set.
  4. In the Set Members window, select the Group Type.
    Table 1.
    Group Type Description
    Generic

    This group type is the default selection. A Generic group definition can consist of a combination of membership criteria, manually added members, IP addresses, MAC addresses, and Active Directory groups.

    When you define membership criteria in the group, the members are dynamically added in the group based on one or more criteria. Manually added members include objects, such as segment ports, distributed ports, distributed port groups, VIFs, virtual machines, and so on.

    IP Addresses Only

    This group type contains only IP addresses (IPv4 or IPv6). IP Addresses Only groups with only manually added IP address members are not supported for use in the Applied To in DFW rules. It is possible to create the rule, but it will not be enforced.

    After a group of type IP Addresses Only is realized in NSX-T Data Center, you cannot edit the group type to Generic. However, if the group type is Generic, you can edit the group type to IP Addresses Only. In this case, only the IP addresses are retained in the group. All the membership criteria and other group definitions are lost.

  5. On the Membership Criteria page, click Add Criterion to add members in the group dynamically based on one or more membership criteria.
  6. Click Members to add static members in the group.
  7. (Optional) Click IP/MAC Addresses to add IP and MAC addresses as group members. IPv4 addresses, IPv6 addresses, and multicast addresses are supported.
    Click Action > Import to import IP/MAC Addresses from a TXT file or a CSV file containing comma-separated IP/MAC values.
  8. Click AD Groups to add Active Directory Groups. This is used for Identity firewall. Groups with Active Directory members can be used in the source of a distributed firewall rule for Identity Firewall. Groups can contain both AD and compute members.
  9. (Optional) Enter a description and tag.
  10. Click Apply
    Groups are listed, with an option to view the members and where the group is used.

Distributed Firewall Policy

Distributed firewall comes with predefined categories for firewall rules. Categories allow you to organize security policies.

Categories are evaluated from left to right (Ethernet > Emergency > Infrastructure > Environment > Application), and the distributed firewall rules within the category are evaluated top down.

Table 2. Distributed Firewall Rule Categories
Ethernet

We recommend you include Layer 2 rules for this category.

Emergency

We recommend you include quarantine and allow rules for this category.

Infrastructure

We recommend you include rules which define access to shared services for this category. For example:

  • AD
  • DNS
  • NTP
  • DHCP
  • Backup
  • Management servers
Environment

We recommend you include rules between zones for this category. For example:

  • Production vs development
  • PCI vs non-PCI
  • Inter business unit rules
Application

We recommend you include rules between:

  • Applications
  • Application tiers
  • Micro services

Add a Distributed Firewall Policy

Distributed firewall monitors all the East-West traffic on your virtual machines.

Procedure

  1. With admin privileges, log in to NSX Manager.
  2. Select Security > Distributed Firewall from the navigation panel.
  3. Ensure that you are in the correct pre-defined category, and click Add Policy.
  4. Enter a Name for the new policy section.
  5. (Optional) Use Applied to to apply the rules within policy to a selected group. By default, the policy Applied to field is set to DFW, and the policy rules are applied to all workloads. When you change the default, if both the policy level and the rules within have Applied to set to a group, the policy level Applied to takes precedence over Applied to at the rule level.
    Note: Groups consisting of only IP addresses, MAC Addresses, or Active Directory groups cannot be used in the Applied To text box.

    Applied to defines the scope of enforcement per policy, and is used mainly for optimization of resources on ESXi and KVM hosts. It helps in defining a targeted policy for specific zones, tenants or applications, without interfering with other policy defined for other applications, tenants and zones.

  6. To configure the following policy settings, click the gear icon.
  7. Click Publish. Multiple policies can be added, and then published together at one time.
    The new policy is shown on the screen.
  8. Select a policy section and click Add Rule and enter a rule name.
  9. In the Sources column, click the edit icon and select the source of the rule. Groups with Active Directory members can be used for the source text box of an IDFW rule.
  10. In the Destinations column, click the edit icon and select the destination of the rule. If not defined, the destination matches any.
  11. In the Services column, click the edit icon and select services. The service matches Any if not defined.
  12. The Profiles column is not available when adding a rule to the Ethernet category. For all other rule categories, in the Profiles column, click the edit icon and select a context profile, or click Add New Context Profile. See #GUID-654F5332-2978-49F8-BE83-297E5C69C22F
    This parameter used for L7 Application ID filtering and FQDN filtering.
  13. Click Apply to apply the context profile to the rule.
  14. Use Applied to to apply the rule to a selected group. When creating a DFW rule using guest introspection, make sure that the Applied to field applies to the destination group. By default, the Applied To column is set to DFW, and the rule is applied to all workloads. When you change the default, and both the policy level and the rules within have Applied To set to Groups, then the policy level Applied To takes precedence over Applied To at the rule level.
    Note: Groups consisting of only IP addresses, MAC Addresses, or Active Directory groups cannot be used in the Applied To text box.
  15. In the Action column, select an action.
    Option Description
    Allow Allows all L3 or L2 traffic with the specified source, destination, and protocol to pass through the current firewall context. Packets that match the rule, and are accepted, traverse the system as if the firewall is not present.
    Drop Drops packets with the specified source, destination, and protocol. Dropping a packet is a silent action with no notification to the source or destination systems. Dropping the packet causes the connection to be retried until the retry threshold is reached.
    Reject Rejects packets with the specified source, destination, and protocol. Rejecting a packet is a more graceful way to deny a packet, as it sends a destination unreachable message to the sender. If the protocol is TCP, a TCP RST message is sent. ICMP messages with administratively prohibited code are sent for UDP, ICMP, and other IP connections. One benefit of using Reject is that the sending application is notified after only one attempt that the connection cannot be established.
    Jump to Application Starting in NSX-T Data Center 3.1. This action is only available for the Environment category.

    Allows the traffic that matches with Environment category rules to continue on for the Application category rules to apply. Use this action when traffic matches with Environment category rules and exits, but you want the Application category rules to apply.

    For example, if there is an Environment category rule with the action Allow for a specific source and there is an Application category rule with the action Drop for the same source, packets that match the Environment category are allowed through the firewall and further rules are no longer applied. With the Jump to Application action, the packets matches the Environment category rule, but continues on to the Application category rules and the result is that those packets are dropped.

  16. Click the status toggle button to enable or disable the rule.
  17. Click the gear icon to configure the following rule options:
    Option Description
    Logging Logging is turned off by default. Logs are stored at /var/log/dfwpktlogs.log file on ESXi and KVM hosts.
    Direction Refers to the direction of traffic from the point of view of the destination object. IN means that only traffic to the object is checked, OUT means that only traffic from the object is checked, and In-Out, means that traffic in both directions is checked.
    IP Protocol Enforce the rule based on IPv4, IPv6, or both IPv4-IPv6.
    Log Label

    Log Label is carried in the Firewall Log when logging is enabled. Only the first 31 characters in the generated log are supported, although you are able to enter a longer label.

  18. Click Publish. Multiple rules can be added and then published together at one time.
  19. The data path realization status of policy with Transport Nodes details shown on the right side of the policy table.

Add Distributed IDS/IPS Policy

IDS/IPS rules are created in the same manner as distributed firewall (DFW) rules. First, create an IDS policy, and then create rules for this policy.

Procedure

  1. Navigate to Security > IDS/IPS > Distributed FW Rules.
  2. Click Add Policy to create a policy and enter a policy name.
  3. Click the gear icon to configure the required policy settings.
    Option Description
    Stateful A stateful firewall monitors the state of active connections and uses this information to determine which packets to allow through the firewall.
    Locked The policy can be locked to prevent multiple users from editing the same sections. When locking a section, you must include a comment.

    Some roles such as enterprise administrator have full access credentials, and cannot be locked out.

  4. Click Add Rule to add a rule and enter a rule name.
  5. Configure source, destination, and services to determine which traffic needs IDS inspection. IDS supports any type of group for source and destination.
  6. In the Security Profiles column, select the required profile for the rule.
  7. In the Applied To column, select the appropriate option to limit the scope of the rules. By default, the Applied To column is set to DFW, and the rule is applied to all workloads. You can also apply the rules or policies to the selected groups. Groups consisting of only IP addresses, MAC addresses, or Active Directory groups cannot be used in the Applied To text box.
  8. Select the required Mode from the following options:
    • Detect Only - Detects intrusions against signatures and does not take action.
    • Detect and Prevent - Detects intrusions against signatures and takes action to drop or reject as specified in the signature through profile or through global setting.
  9. Click the gear icon to configure the following rule options.
    Option Description
    Logging Logging is turned off by default. Logs are stored in the /var/log/dfwpktlogs.log file on ESXi and KVM hosts.
    Direction Refers to the direction of traffic from the point of view of the destination object. IN means that only traffic to the object is checked. OUT means that only traffic from the object is checked. In-Out means that traffic in both directions is checked.
    IP Protocol Enforce the rule based on IPv4, IPv6, or both IPv4-IPv6.
    Log Label Log Label is carried in the Firewall Log when logging is enabled.
  10. Click Publish. When rules are successfully pushed to the host the status will display Success.
  11. Click the graph icon to view
    • policy status - rules have been successfully pushed to the hosts
    • transport node status and errors
    For advanced policy configuration, refer to the NSX-T Data Center Administration Guide.

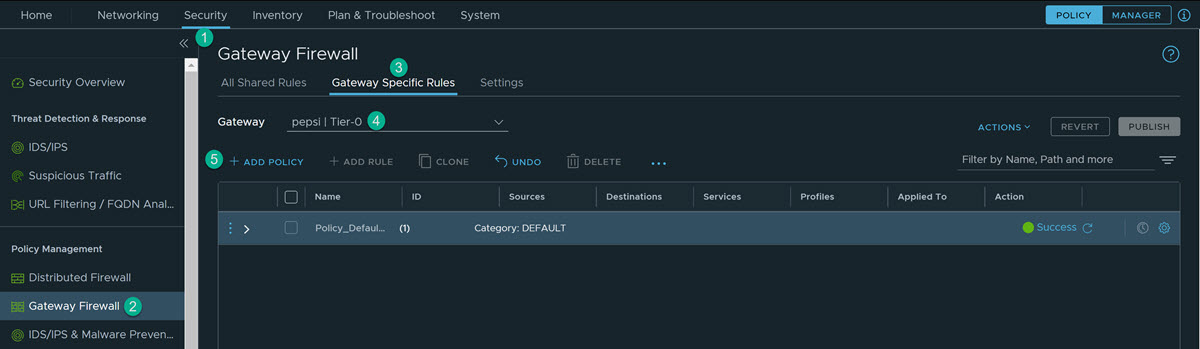
Gateway Firewall Policy

You can configure gateway firewall by adding rules under a firewall policy section that belongs to a predefined category.

Procedure

  1. Go to Security > Gateway Firewall > Gateway Specific Rules.
  2. Select T0-Gateway and click Add Policy.
    Add GFW policy
  3. Add the rule.
  4. Add service for the rule.
  5. Provide details like source, destination, services, and gateway and select action.
  6. Publish the policy and the rule.