


You can use the NSX Manager as a single pane of glass to define Security policies for different scenarios using different security controls.
NSX Manager is the application that you use to administer your NSX-T environment. The NSX Manager provides a web-based graphical user interface (GUI) and REST APIs for creating, configuring, and monitoring NSX-T Data Center components. The basic step of deploying NSX-T in your environment involves deploying NSX Manager, preparing ESXi host as a host transport node (for Distributed Firewall), and deploying NSX Edge VMs (for NSX Gateway Firewall).
Prerequisites
| Review the NSX Manager installation requirements. | See NSX Manager Installation |
| If NSX system components are behind a firewall, add a policy to allow the relevant ports. See details on Ports and Protocols. | See Ports and Protocols |
- Make sure you have supported vCenter Server/ ESXi versions.
- You have configured the DNS and NTP servers correctly.
For more details, see:
1: Download the NSX Manager OVA
- Go to the VMware downloads page at https://my.vmware.com/web/vmware/downloads.
NSX Security is available under Networking & Security.

- Download the NSX Manager NSX Global Manager / NSX Cloud Service Manager for VMware ESXi Open Virtualization Appliance (OVA) file. You can download the OVA to a local datastore or a local web server. If you downloaded the OVA file to a local web server, copy the file path of the NSX Manager appliance OVA file. For example, http://<local-web-server>/nsx-unified-appliance-3.2.0.0.<buildnumber>.ova. You should provide this path while deploying the appliance.
2: Deploy the NSX Manager
You must deploy the NSX Manager appliance and register the appliance with the vCenter Server.
- In vCenter Server, right-click the host (for example, Cluster-NSX) where you want to deploy the appliance and select Deploy OVF Template.

- Select the downloaded NSX Manager appliance OVA file.
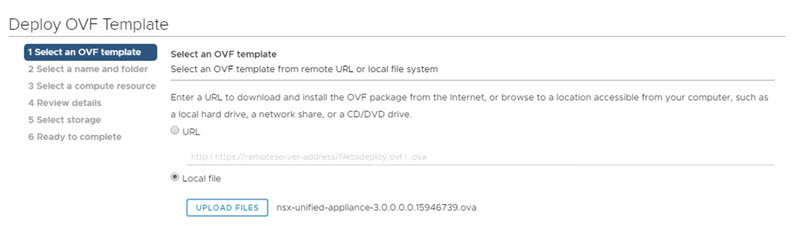
- Follow the prompts and provide the following information.
- Enter the NSX Manager appliance VM name and select the vCenter Server folder for the appliance VM.
- Select ESXi to host the NSX Manager.
- Review NSX Manager VM details.
- Select the NSX Manager VM size.
- Select the storage for the NSX Manager VM.
- Select the vSphere Distributed Switch (VDS) Port Group for the NSX Manager managed vNIC (vCenter Management Port Group).
- Enter the NSX-T Manager information such as hostname, IP, DNS, NTP. Select Rolename as NSX Manager and enter the password. The password must meet the following requirements:
- At least 12 characters in length
- At least one lowercase letter, one uppercase letter, one numeric character, and one special character (except quotes)
- At least five different characters
- Review the NSX Manager VM settings.

- After the NSX Manager deployment is finished, power on the NSX Manager VM.
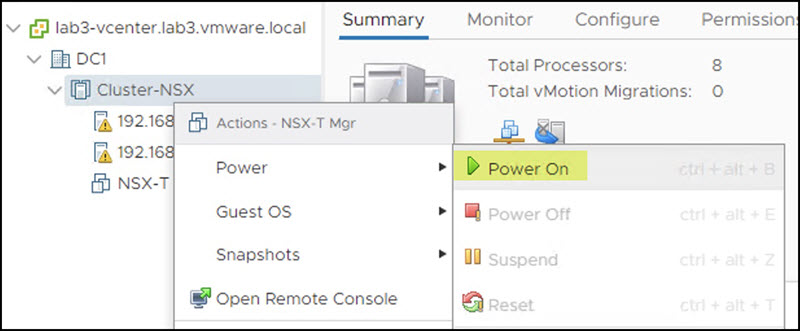
Note the IP address of the NSX Manager VM. You can now access the NSX Manager appliance UI from your browser using https://<nsx-manager-ip-address>.
- For production deployment, you need three node NSX Manager clusters. To deploy additional NSX Manager nodes:
-
From your browser, log in to the NSX Manager appliance at https://<nsx-manager-ip-address> using the admin credentials.
- Click . Provide the required information and follow the prompts to install the additional NSX Manager appliances.
-
- Click Set Virtual IP and provide a virtual IP address for the NSX Manager Cluster. The virtual IP allows you to access the NSX Manager cluster using a single IP.
- Use the configured IP address for accessing the NSX management plane. From a browser, log in to the NSX Manager using the virtual IP address assigned to the cluster at https://<vip-address>.
NSX Security Licenses
You can find a detailed list of features associated with the various licensing editions of VMware NSX Security in the Knowledge Base article.
-
From your browser, log in to the NSX Manager appliance at https://<nsx-manager-ip-address> using the admin credentials.
- Add your NSX-T license from the page.
The evaluation license is available at the NSX-T Product Evaluation Center.
