


You can configure a static route on the tier-0 router to external networks. After you configure a static route, there is no need to advertise the route from tier-0 to tier-1, because tier-1 routers automatically have a static default route towards their connected tier-0 router.
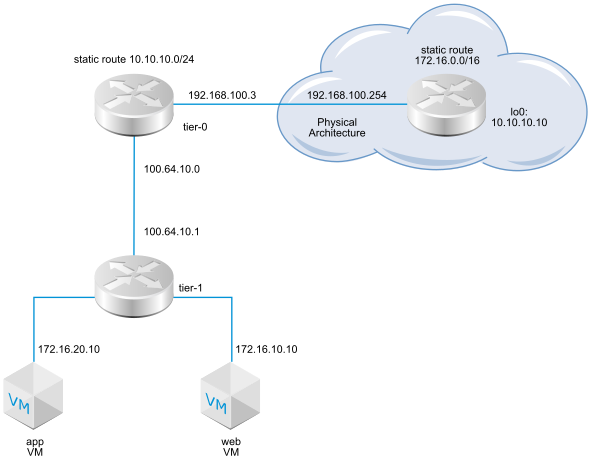
The static route topology shows a tier-0 logical router with a static route to the 10.10.10.0/24 prefix in the physical architecture. For test purposes, the 10.10.10.10/32 address is configured on the external router loopback interface. The external router has a static route to the 172.16.0.0/16 prefix to reach the app and web VMs.
Recursive static routes are supported.
Prerequisites
- Verify that the physical router and tier-0 logical router are connected. See Verify the Tier-0 Logical Router and TOR Connection.
- Verify that the tier-1 router is configured to advertise connected routes. See Create a Tier-1 Logical Router in Manager Mode.
-
Verify that Manager mode is selected in the NSX Manager user interface. See NSX Manager. If you do not see the Policy and Manager mode buttons, see Configure the User Interface Settings.
Procedure
What to do next
Check that the static route is configured properly. See Verify the Static Route on a Tier-0 Router.
