


If you have a ESXi host that is managed in vCenter Server, you can access the host VMs through the Web-based vSphere Web Client. In this case, you can use this procedure to attach VMs to NSX logical switches.
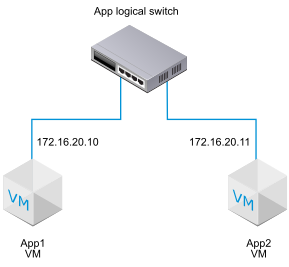
The example shown in this procedure shows how to attach a VM called app-vm to a logical switch called app-switch.
Prerequisites
- The VMs must be hosted on hypervisors that have been added to the NSX fabric.
- The fabric nodes must have NSX management plane (MPA) and NSX control plane (LCP) connectivity.
- The fabric nodes must be added to a transport zone.
- A logical switch must be created.
Procedure
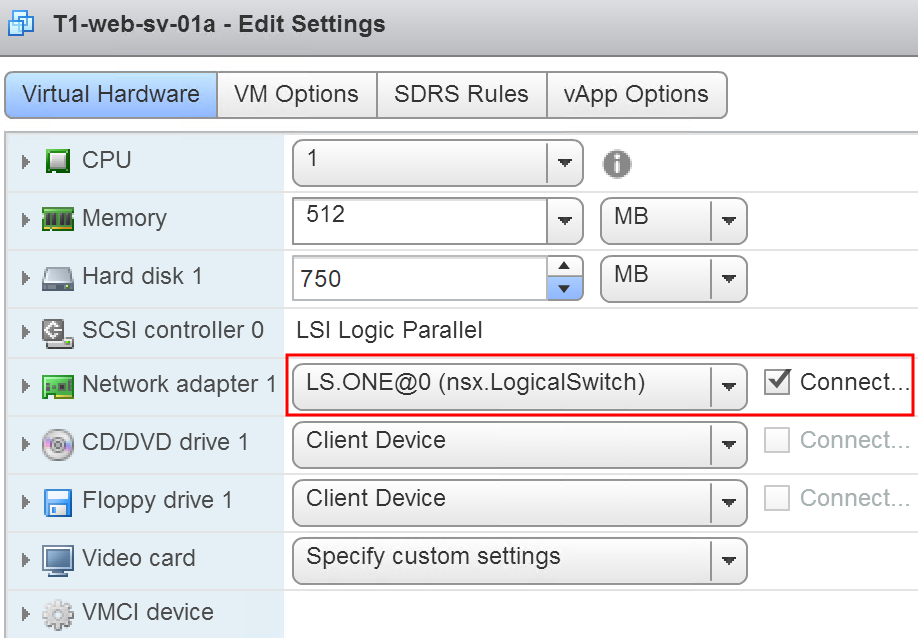
- In the vSphere Web Client, edit the VM settings, and attach the VM to the NSX logical switch.
For example:
Results
After attaching a VM to a logical switch, logical switch ports are added to the logical switch. You can view logical switch ports and the VIF attachment ID on the NSX Manager UI. In Manager mode, select .
Use the GET https://<mgr-ip>/api/v1/logical-ports/ API call to view port details and Admin status for the corresponding VIF attachment ID. To view the Operational status, use the https://<mgr-ip>/api/v1/logical-ports/<logical-port-id>/status API call with the appropriate logical port ID.
If two VMs are attached to the same logical switch and have IP addresses configured in the same subnet, they should be able to ping each other.
What to do next
Add a logical router.
You can monitor the activity on the logical switch port to troubleshoot problems. See "Monitor a Logical Switch Port Activity" in the NSX Administration Guide.
