Elastic IP Addresses (EIPs) are public IP address resources that you can purchase and hold independently. You can create an EIP or reinstate a released EIP through the console. This topic describes how to create an EIP and bind it to the secondary (public) interface.
Prerequisites
- Ensure you have an AliCloud account and login information.
- Ensure you have an Elastic Network Interface (ENI) to assign the Elastic IP. For steps to create ENI, see Create an Elastic Network Interface.
Procedure
- Log on to the VPC console.
- In the left-side navigation pane, click Elastic IP Addresses.
The
Elastic IP Addresses page appears.
- Click Create EIP.
The
Elastic IP page appears.
- Configure EIP.
- Select the region of the EIP to be created.
Ensure that the EIP and the cloud instance to be associated with the EIP belong to the same region.
- Set the maximum bandwidth for the EIP to be created, depending on the requirement.
- Select the number of the EIPs that you want to create with the same configurations. The default value for Quantity is 1.
- Click Buy Now.
The
Confirm Order page appears.
- Enable Elastic IP Agreement of Service checkbox and click Activate.
On the
Elastic IP Addresses page, click
Refresh to view the newly created EIP instance.
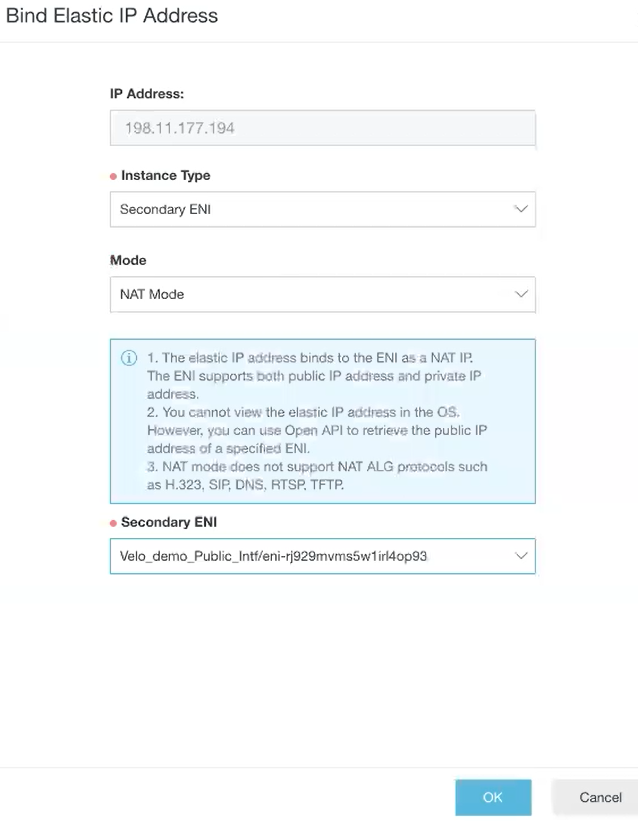
- To associate the EIP instance to a secondary (public) Elastic Network Interface (ENI) of the Edge, click Bind under the Actions column. The Bind Elastic IP Address page appears.

- From the Instance Type drop-down menu, select secondary ENI.
- From the Secondary ENI drop-down menu, select the interface to which you want to bind the EIP.
- Click OK.
