


The Authentication feature allows you to set the authentication mode for a Partner and an Enterprise user.
To access the
Authentication tab:
- Login to the SASE Orchestrator as a Partner and from the top menu, click Administration from the top menu.
- From the left menu, click User Management, and then click the Authentication tab. The following screen appears:
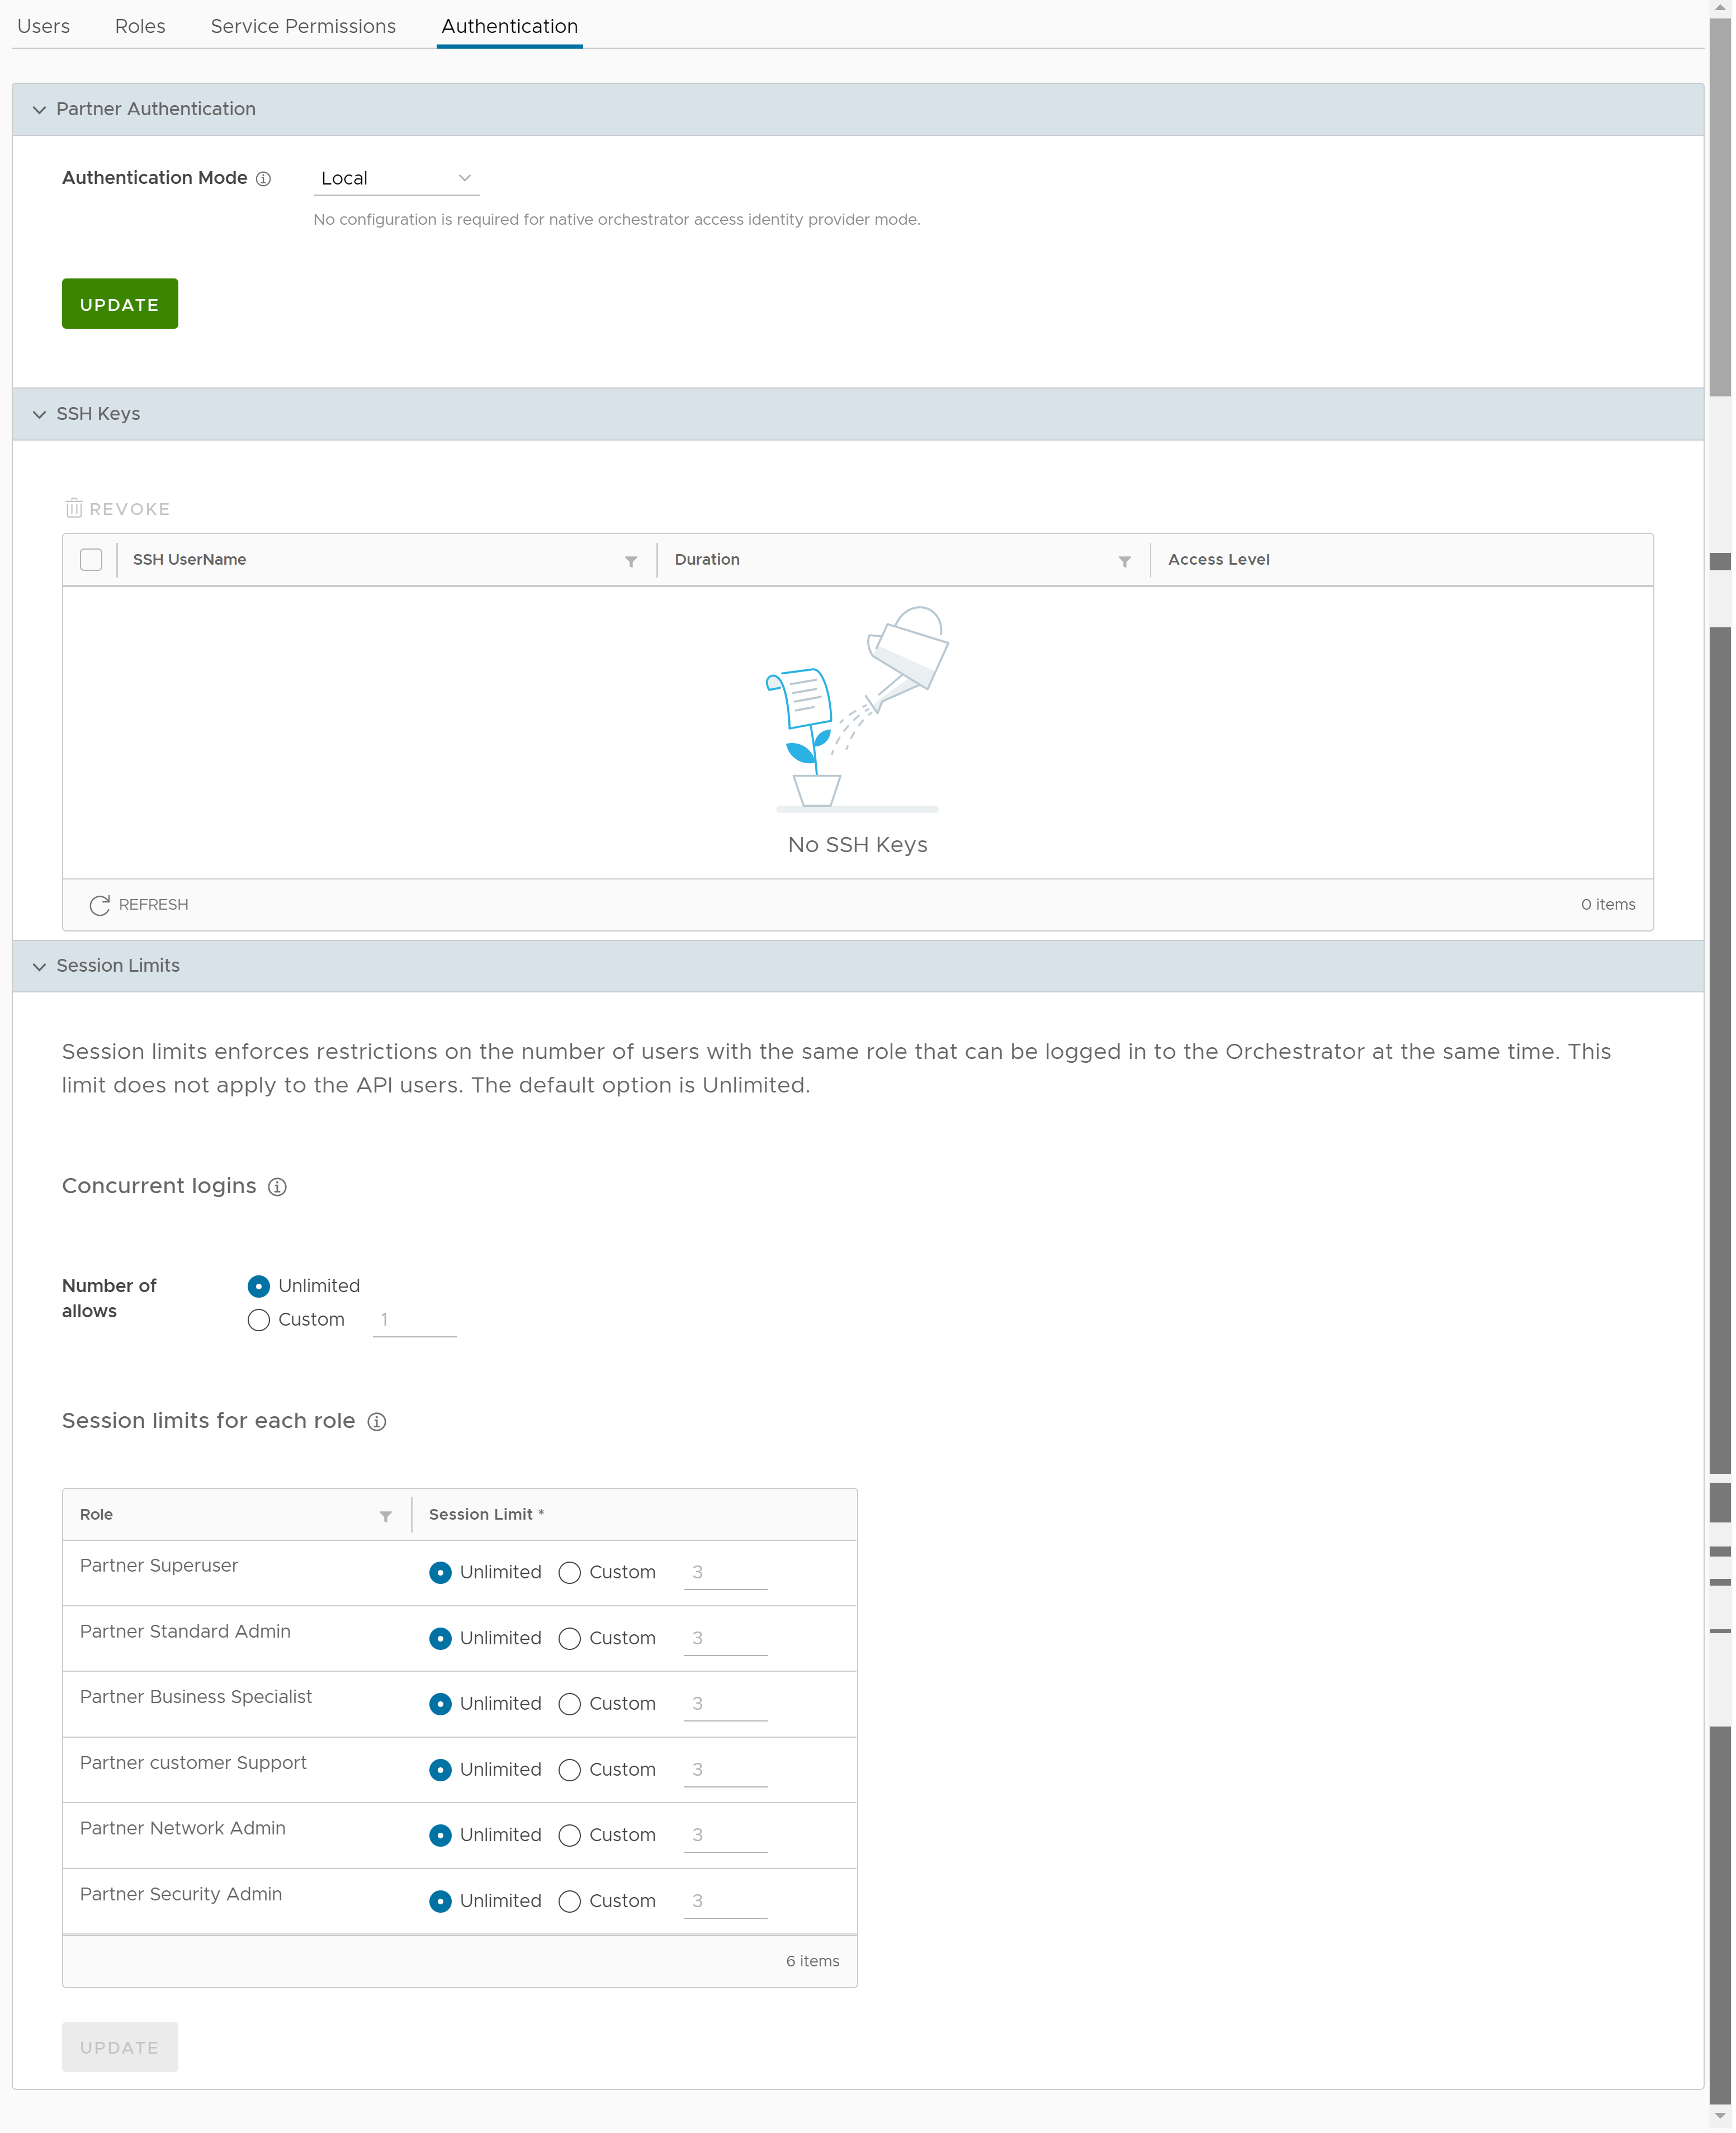
Partner Authentication
Select one of the following Authentication modes:
- Local: This is the default option and does not require any additional configuration.
- Single Sign-On: Single Sign-On (SSO) is a session and user authentication service that allows users to log in to multiple applications and websites with one set of credentials. Integrating an SSO service with SASE Orchestrator enables SASE Orchestrator to authenticate users from OpenID Connect (OIDC)-based Identity Providers (IdPs).
To enable Single Sign On (SSO) for SASE Orchestrator, you must enter the Orchestrator application details into the Identity Provider (IdP). Click each of the following links for step-by-step instructions to configure the following supported IdPs:You can configure the following options when you select the Authentication Mode as Single Sign-on.
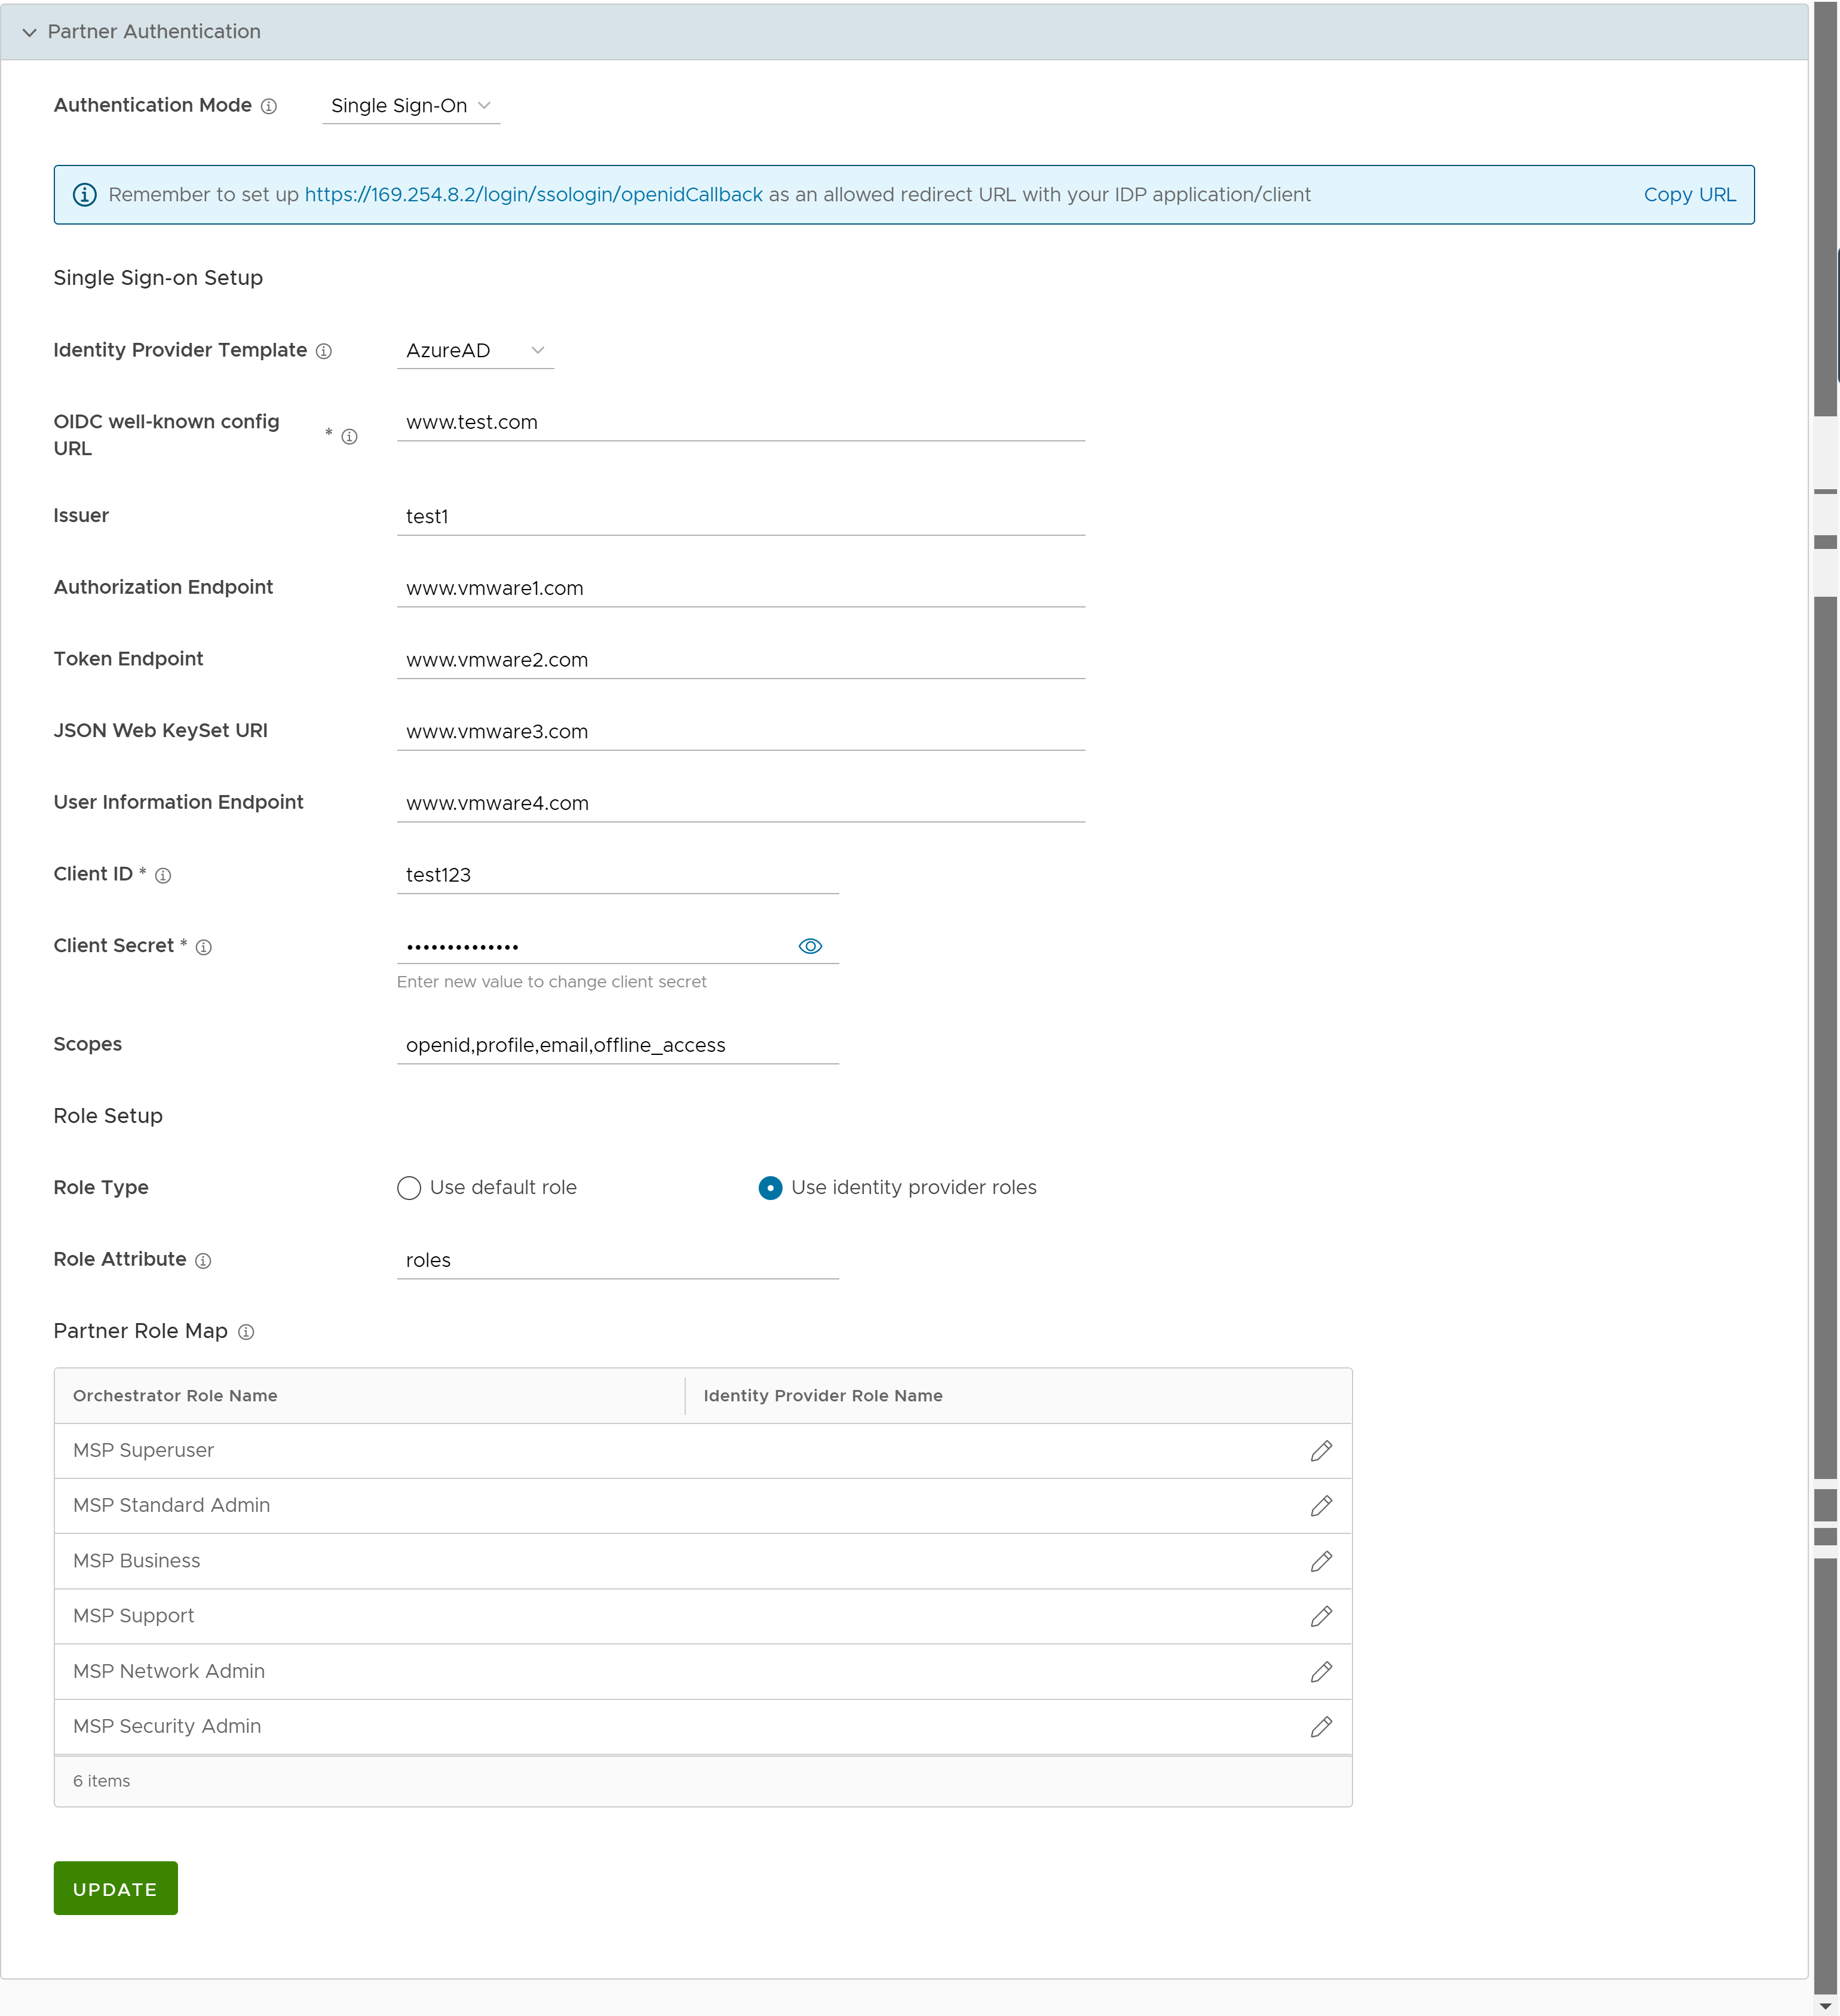
Option Description Identity Provider Template From the drop-down menu, select your preferred Identity Provider (IdP) that you have configured for Single Sign On. This pre-populates fields specific to your IdP. Note: You can also manually configure your own IdPs by selecting Others from the drop-down menu.Organization Id This field is available only when you select the VMware CSP template. Enter the Organization ID provided by the IdP in the format: /csp/gateway/am/api/orgs/<full organization ID>. When you sign in to VMware CSP console, you can view the organization ID you are logged into by clicking on your username. This information also appears under Organization details. Use the "Long Organization ID".OIDC well-known config URL Enter the OpenID Connect (OIDC) configuration URL for your IdP. For example, the URL format for Okta will be: https://{oauth-provider-url}/.well-known/openid-configuration.Issuer This field is auto-populated based on your selected IdP. Authorization Endpoint This field is auto-populated based on your selected IdP. Token Endpoint This field is auto-populated based on your selected IdP. JSON Web KeySet URI This field is auto-populated based on your selected IdP. User Information Endpoint This field is auto-populated based on your selected IdP. Client ID Enter the client identifier provided by your IdP. Client Secret Enter the client secret code provided by your IdP, that is used by the client to exchange an authorization code for a token. Scopes This field is auto-populated based on your selected IdP. Role Type Choose one of the following two options: - Use default role
- Use identity provider roles
Role Attribute Enter the name of the attribute set in the IdP to return roles. Partner Role Map Map the IdP-provided roles to each of the Partner user roles. Click Update to save the entered values. The SSO authentication setup is complete in the SASE Orchestrator.
SSH Keys
You can create only one SSH Key per user. Click the User Information icon located at the top right of the screen, and then click to create an SSH Key.
As a Partner, you can also revoke an SSH Key.
Click the Refresh option to refresh the section to display the most current data.
For more information, see Configure User Account details.
Session Limits
Note: To view this section, an Operator user must navigate to
, and set the value of the system property
session.options.enableSessionTracking to
True.
The following are the options available in this section:
| Option | Description |
|---|---|
| Concurrent logins | Allows you to set a limit on concurrent logins per user. By default, Unlimited is selected, indicating that unlimited concurrent logins are allowed for the user. |
| Session limits for each role | Allows you to set a limit on the number of concurrent sessions based on user role. By default, Unlimited is selected, indicating that unlimited sessions are allowed for the role.
Note: The roles that are already created by the Partner in the
Roles tab, are displayed in this section.
|
Click Update to save the selected values.
