Operators send notification emails about Gateway migration to Administrators with Super User privileges. Plan your migration based on the notification email that you receive from your Operator.
To avoid any service disruption, ensure that you migrate to the new Gateway within the Migration Deadline mentioned in the notification email.
To migrate from a quiesced Gateway to a new Gateway, perform the following steps:
Prerequisites
Before you migrate the Edges and NSDs (if configured) from the quiesced Gateway to the new Gateway, ensure that you schedule a maintenance window as traffic may be disrupted during migration.
Procedure
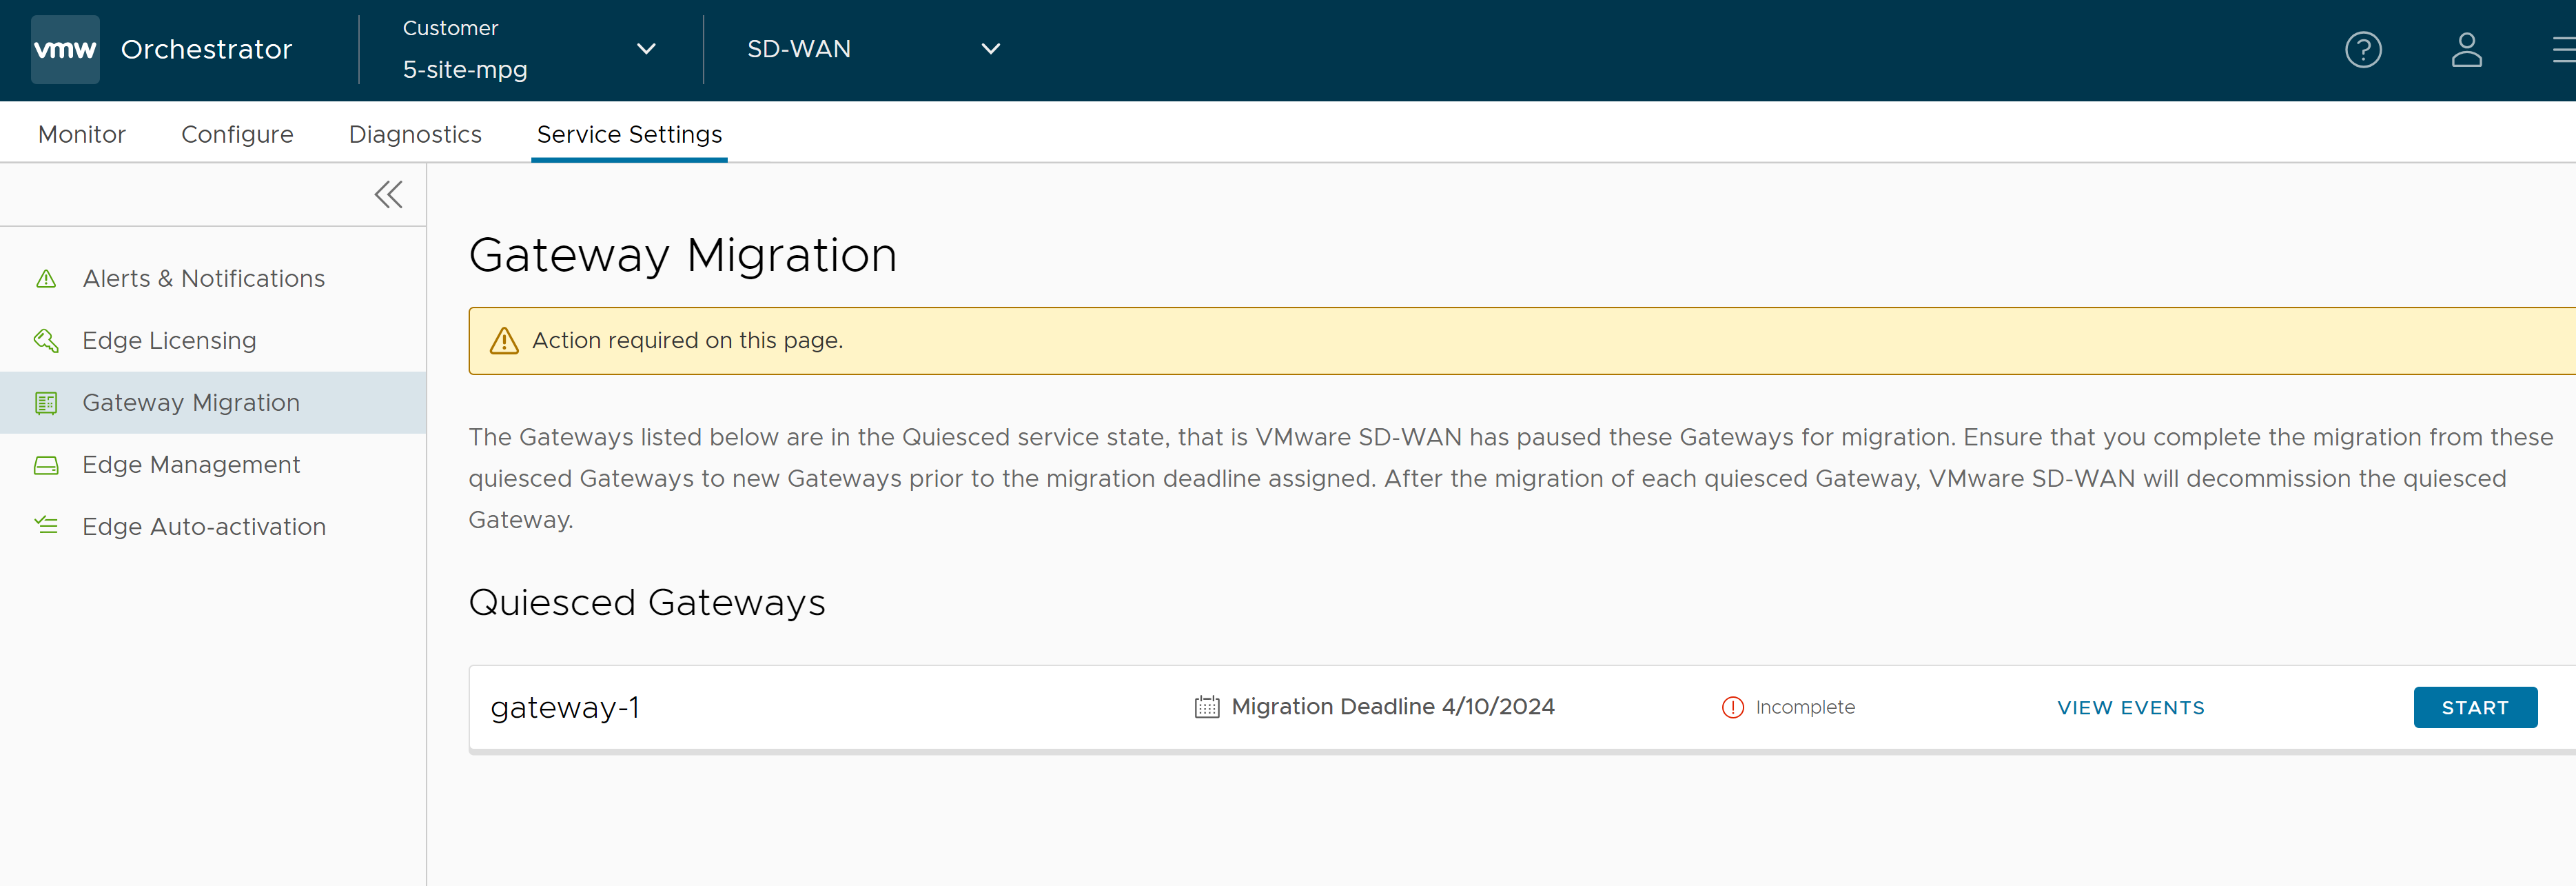
- In the SD-WAN service of the Enterprise portal, go to Service Settings > Gateway Migration. The list of quiesced Gateways appears.
- Make the required configuration to all the NSDs that are configured through the quiesced Gateway.

- Click the View IKE IPSec link to view a sample configuration for the NSD. Copy the template and customize it to suit your deployment.
- Add the IP address of the SD-WAN Gateway (new Gateway IP) to each NSD configured for the quiesced Gateway.
For example, if you have configured an NSD for AWS, you must add the IP address of the new Gateway in the NSD configuration in the AWS instance.
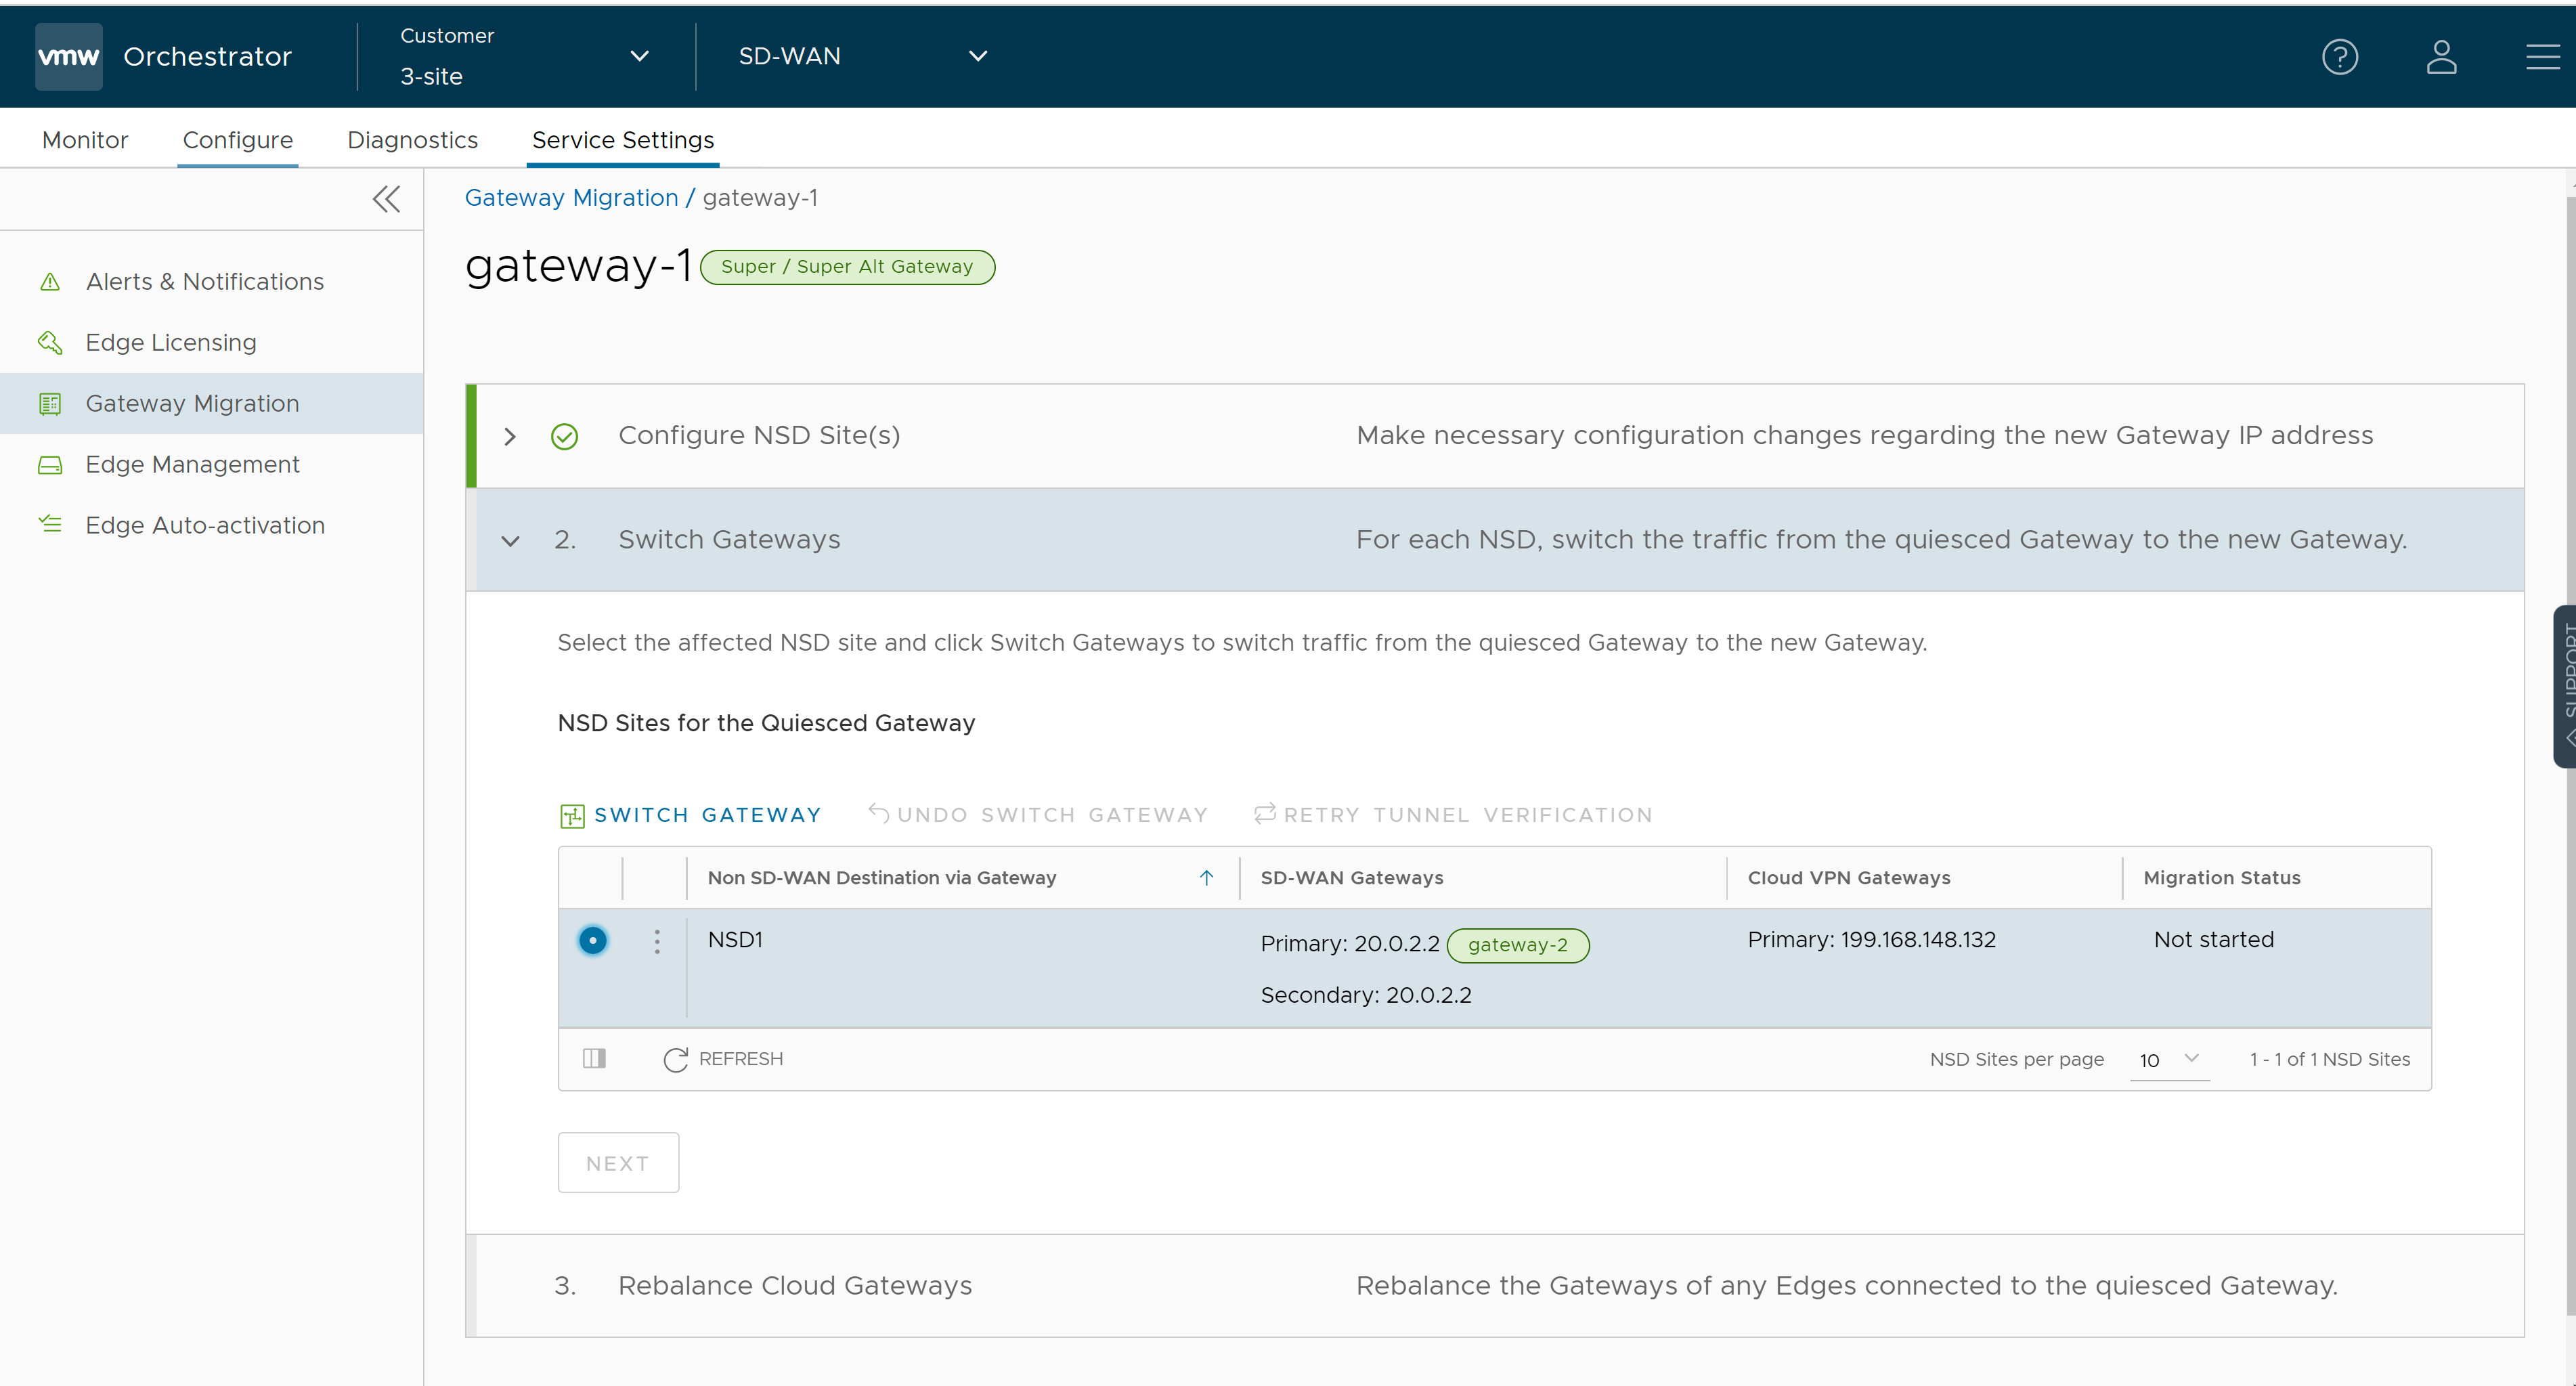
- After making the configuration changes to all the NSDs, select the The listed NSD site(s) have been configured check box, and then click Next.
Note: The Configure NSD Site(s) option is not available for NSDs configured automatically as well as for Gateways with Data Plane role that are not attached to any NSDs. - Select each NSD and click Switch Gateway to switch the traffic from the quiesced Gateway to the new Gateway.
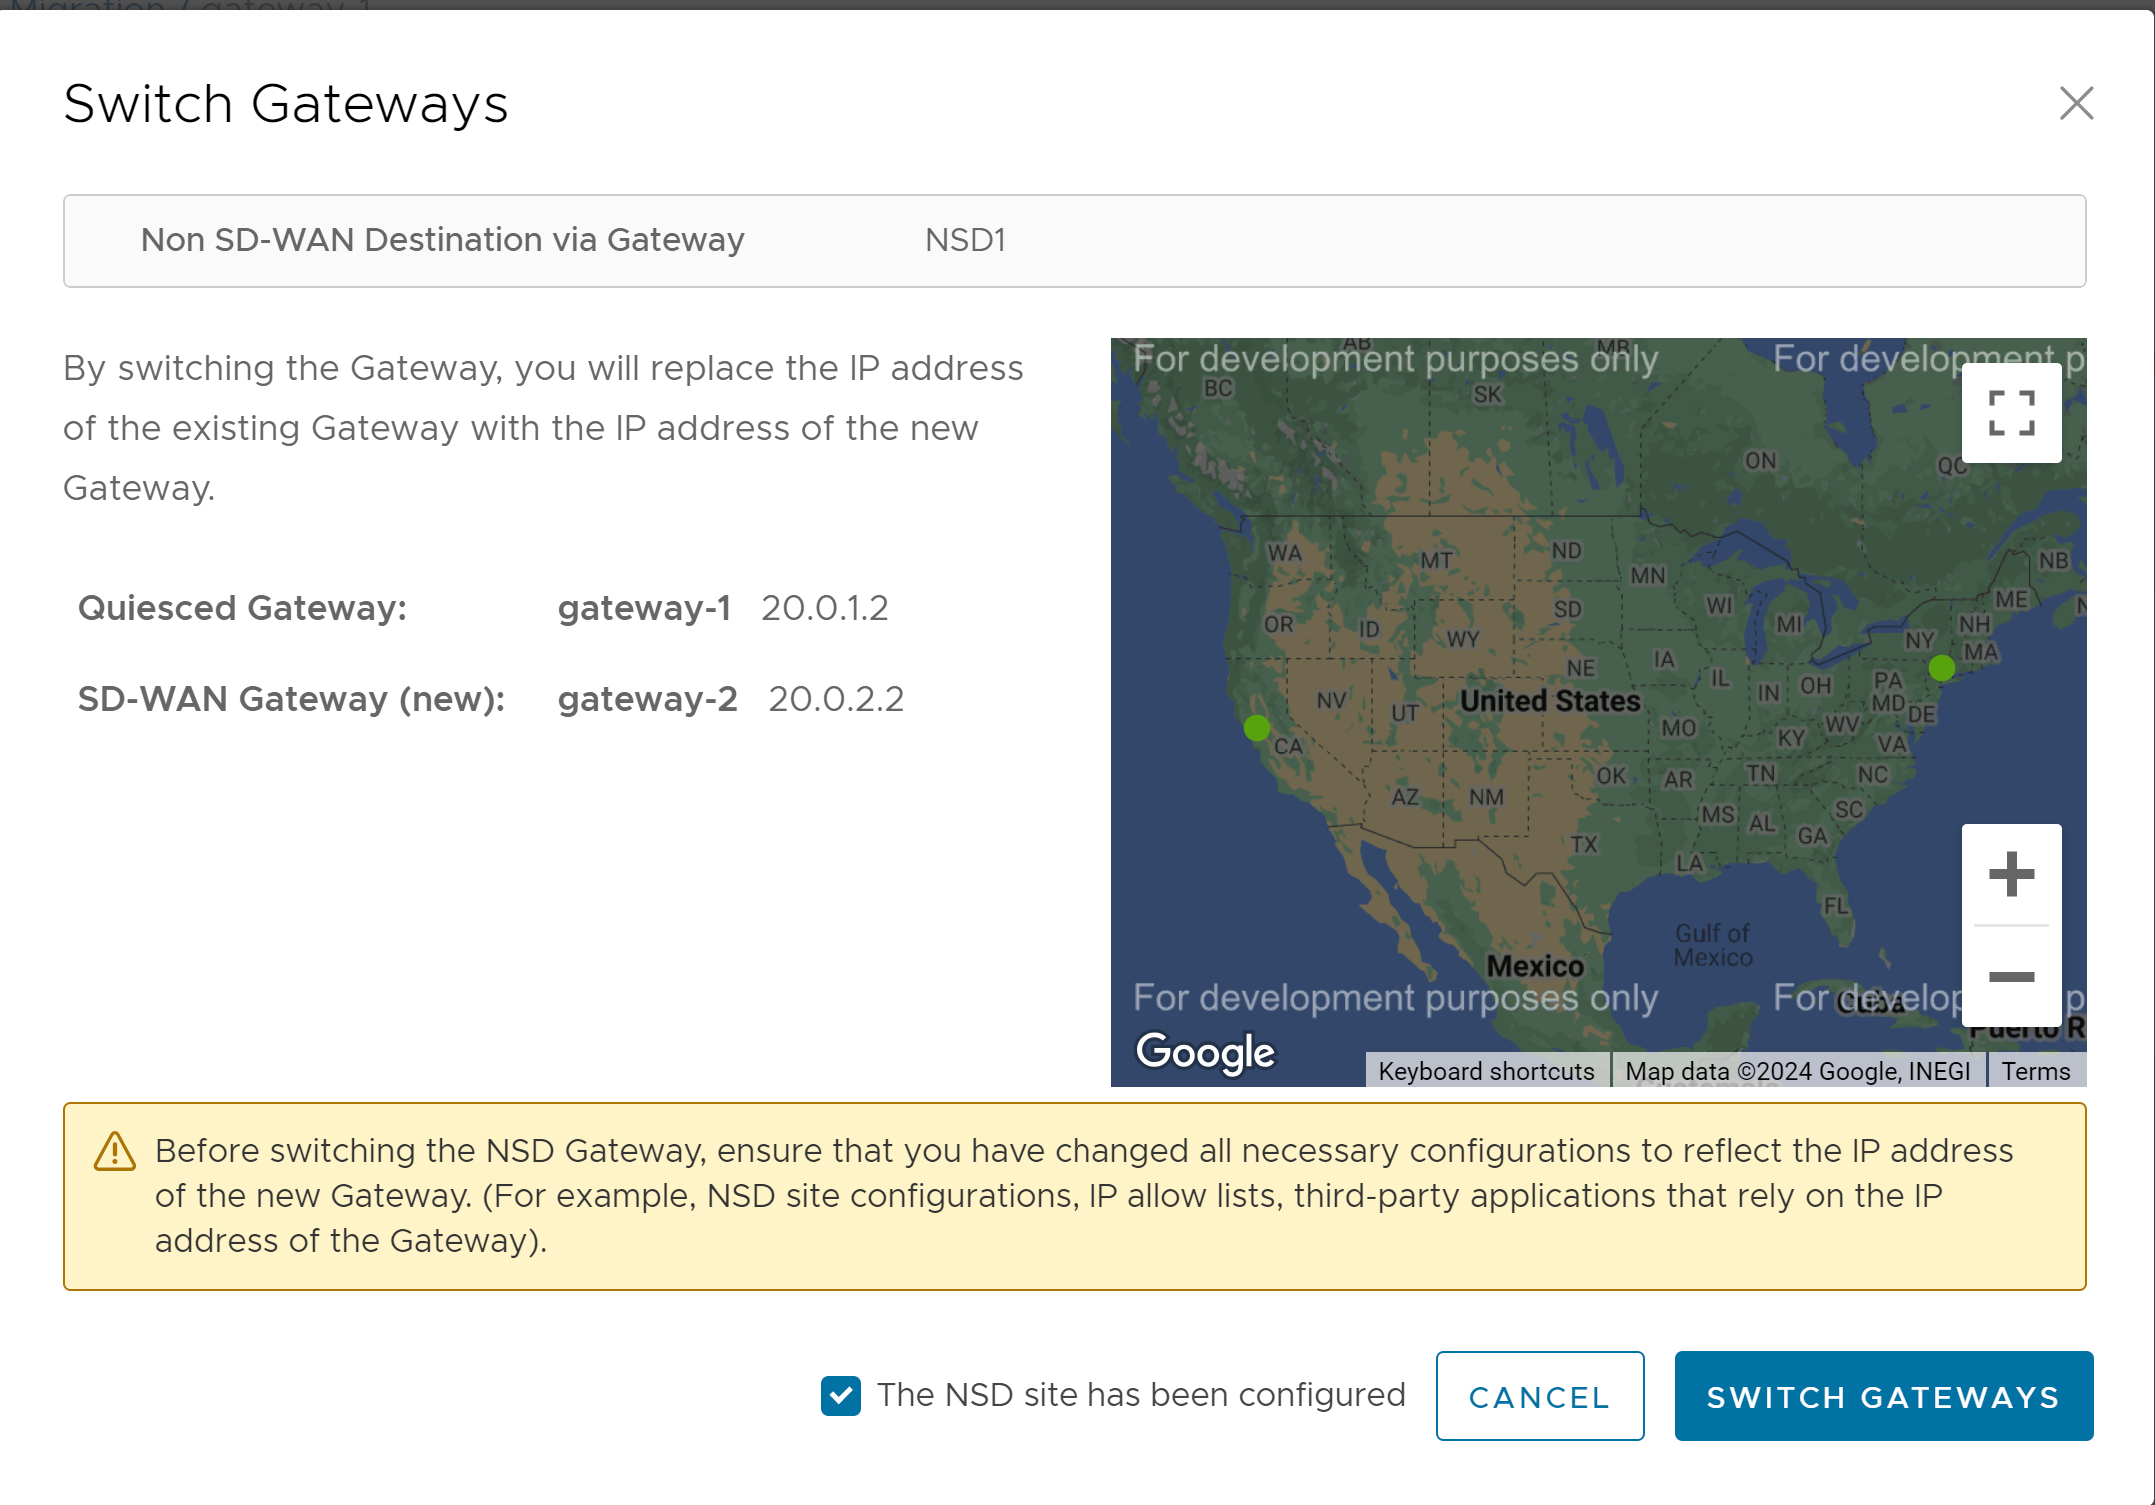
- In the Switch Gateway pop-up window, select the The NSD site has been configured check box to confirm that you have made the required changes to the remote-end NSD configuration.
 Note: This confirmation is not applicable for NSDs configured automatically.
 - Click Switch Gateway.
It may take few minutes to verify the tunnel status. The IP address of the quiesced Gateway is replaced with the IP address of the new Gateway so that the traffic switches to the new Gateway. The Migration Status changes to "NSD Tunnels are up and running" as shown in the following screenshot. If the Switch Gateway action fails, see What to do When Switch Gateway Action Fails.
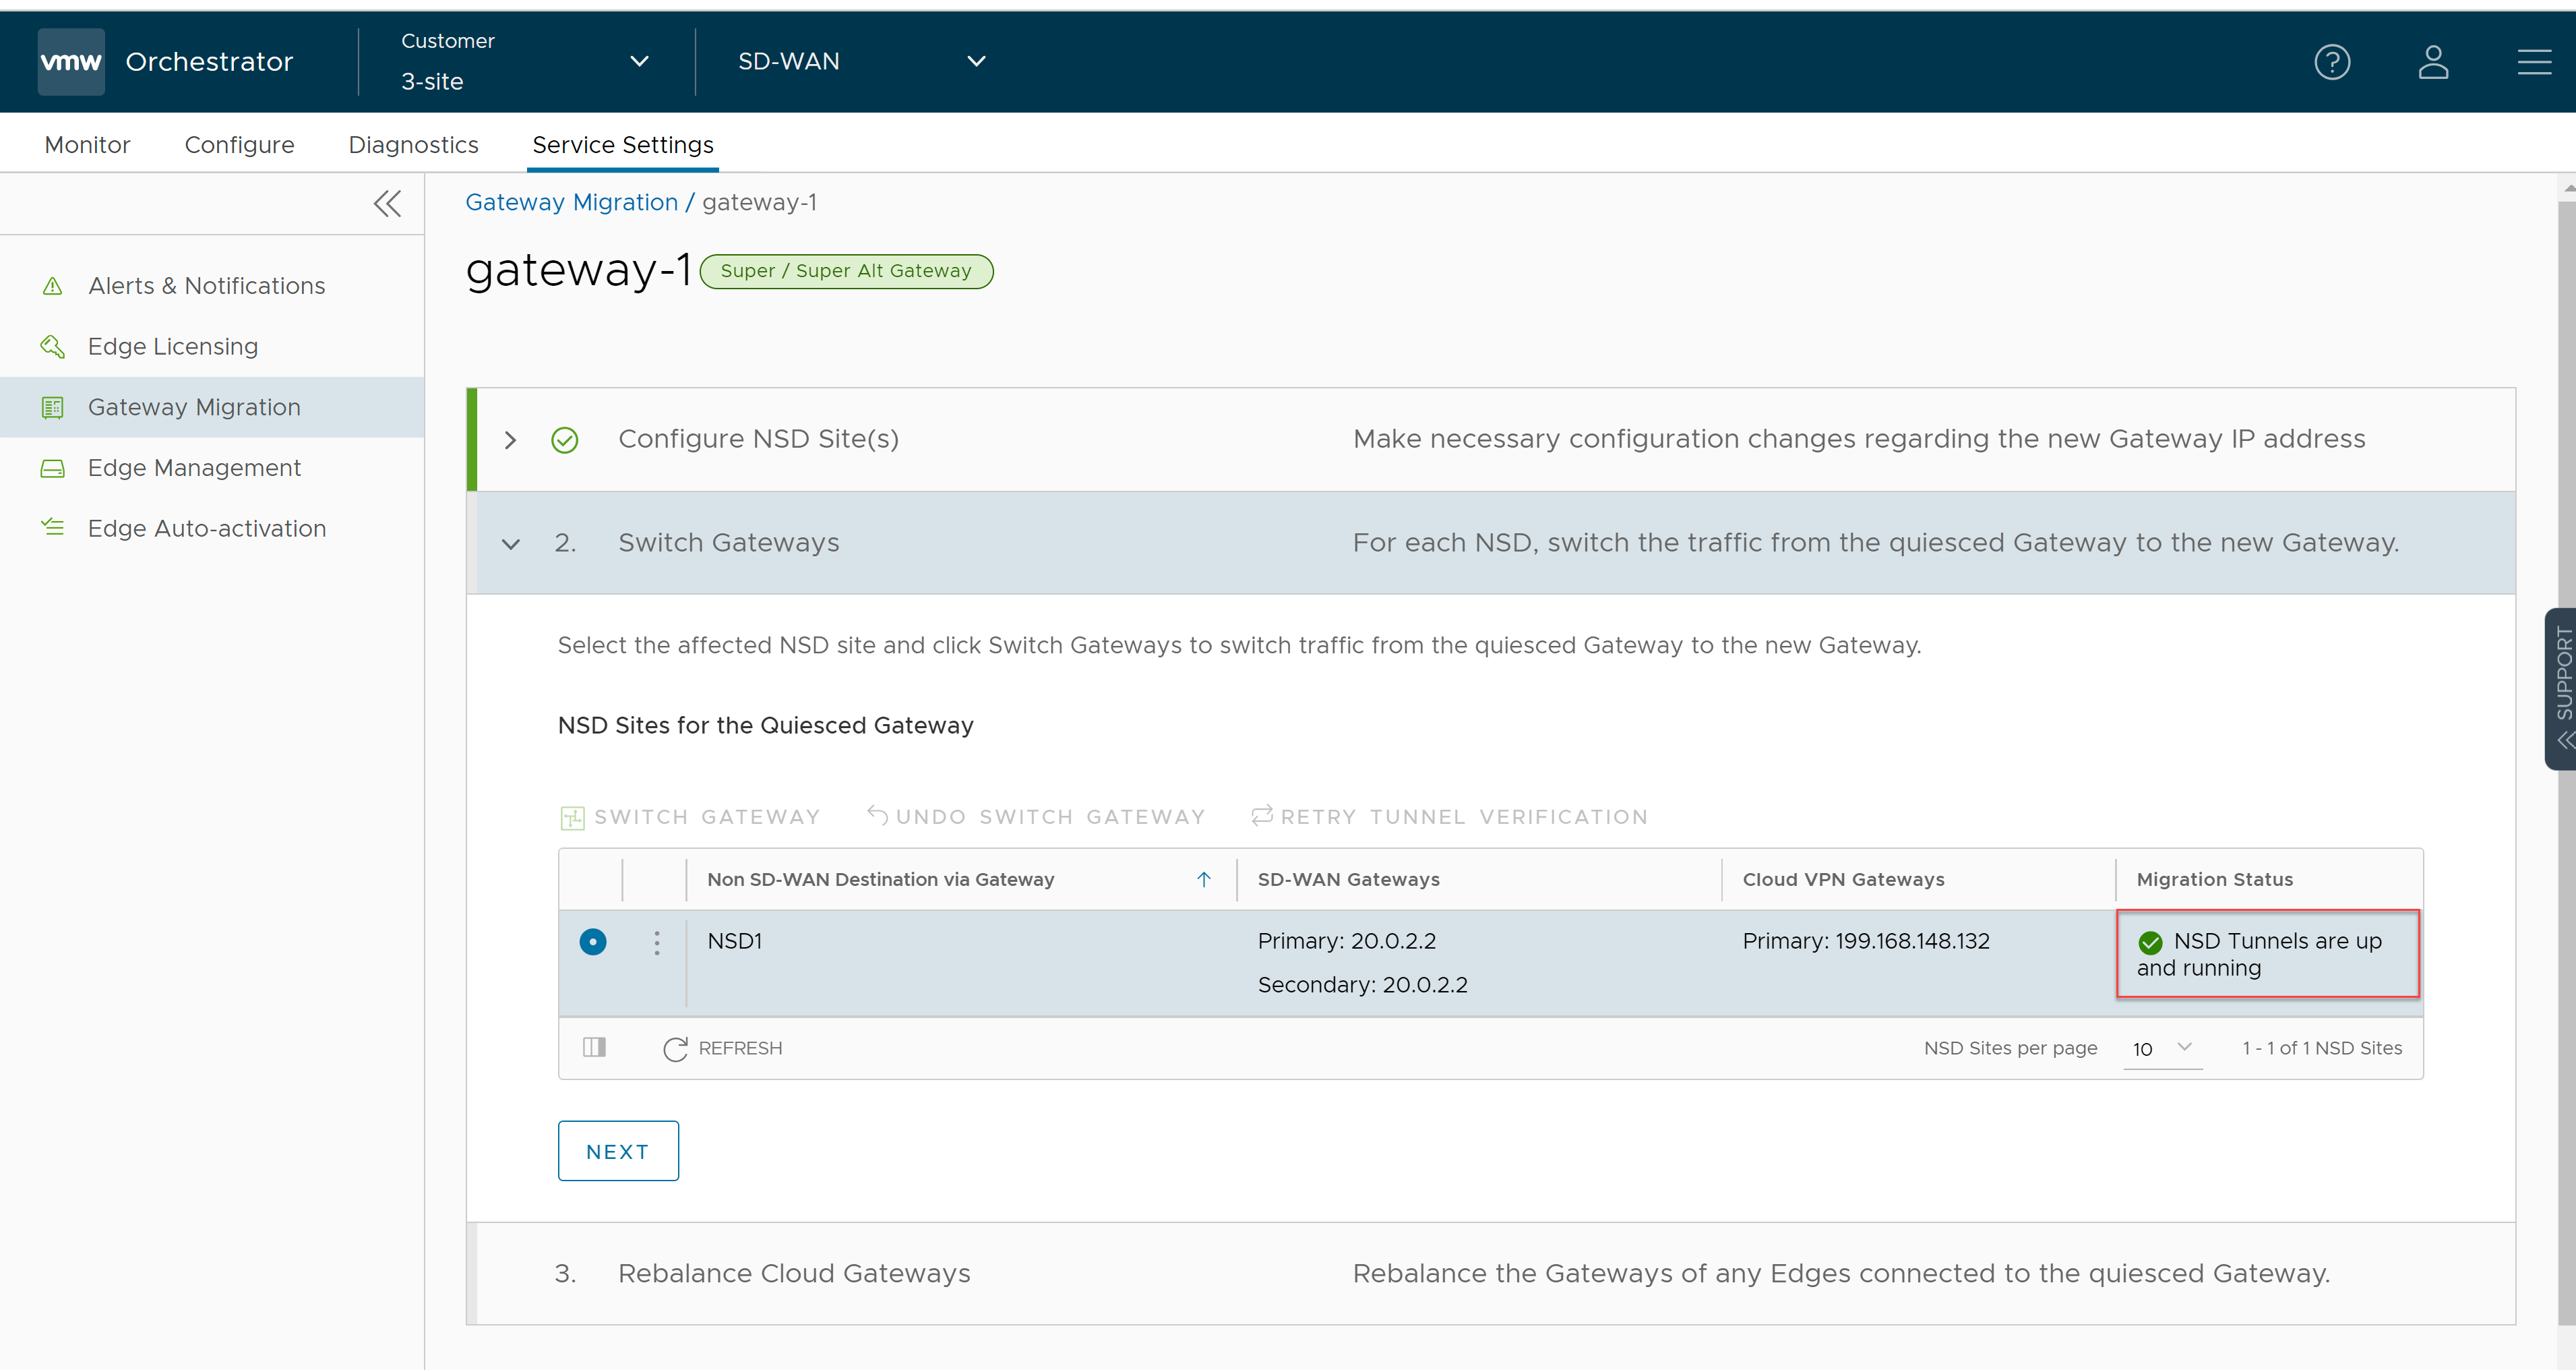
- Click Next.
Note: The Switch Gateway option is not available for Gateways with Data Plane role that are not attached to any NSDs.
- In the Switch Gateway pop-up window, select the The NSD site has been configured check box to confirm that you have made the required changes to the remote-end NSD configuration.
- Rebalance Cloud Gateways (Primary or Secondary or Super Gateways) of all Edges or the required Edges that are connected to the quiesced Gateway so that the Edges get reassigned to the new Gateway. You can rebalance Gateways from the page as well.
Figure 1. Rebalance All Connected Edges - Super Gateway 
When rebalancing Super Gateways, all the Edges connected to the quiesced Gateway will be rebalanced. Rebalancing of selected Edges is not allowed.
Figure 2. Rebalance All Connected Edges - Primary or Secondary Gateway 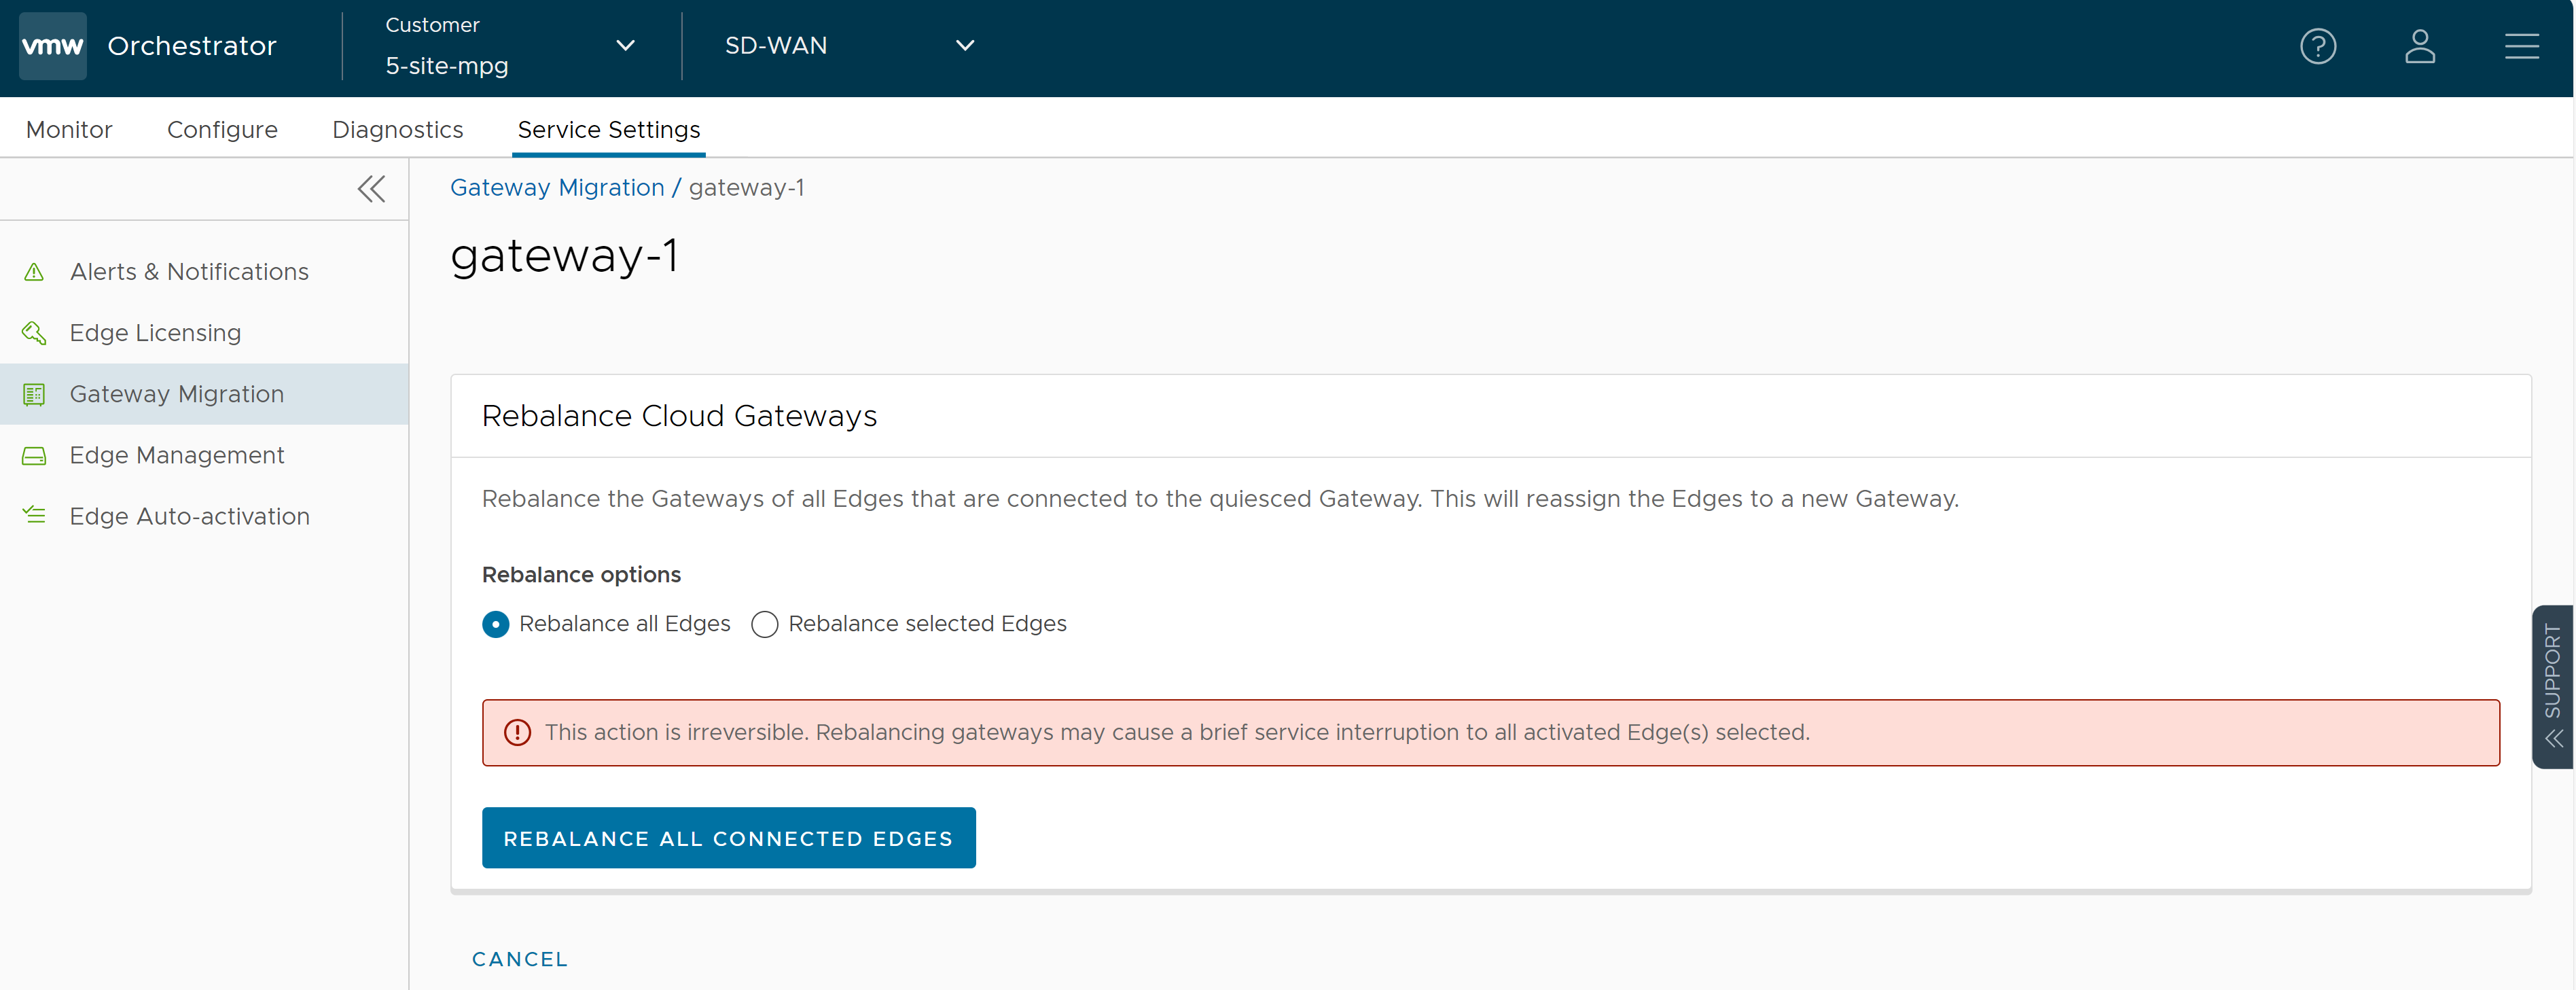
Figure 3. Rebalance Selected Edges - Primary or Secondary Gateway 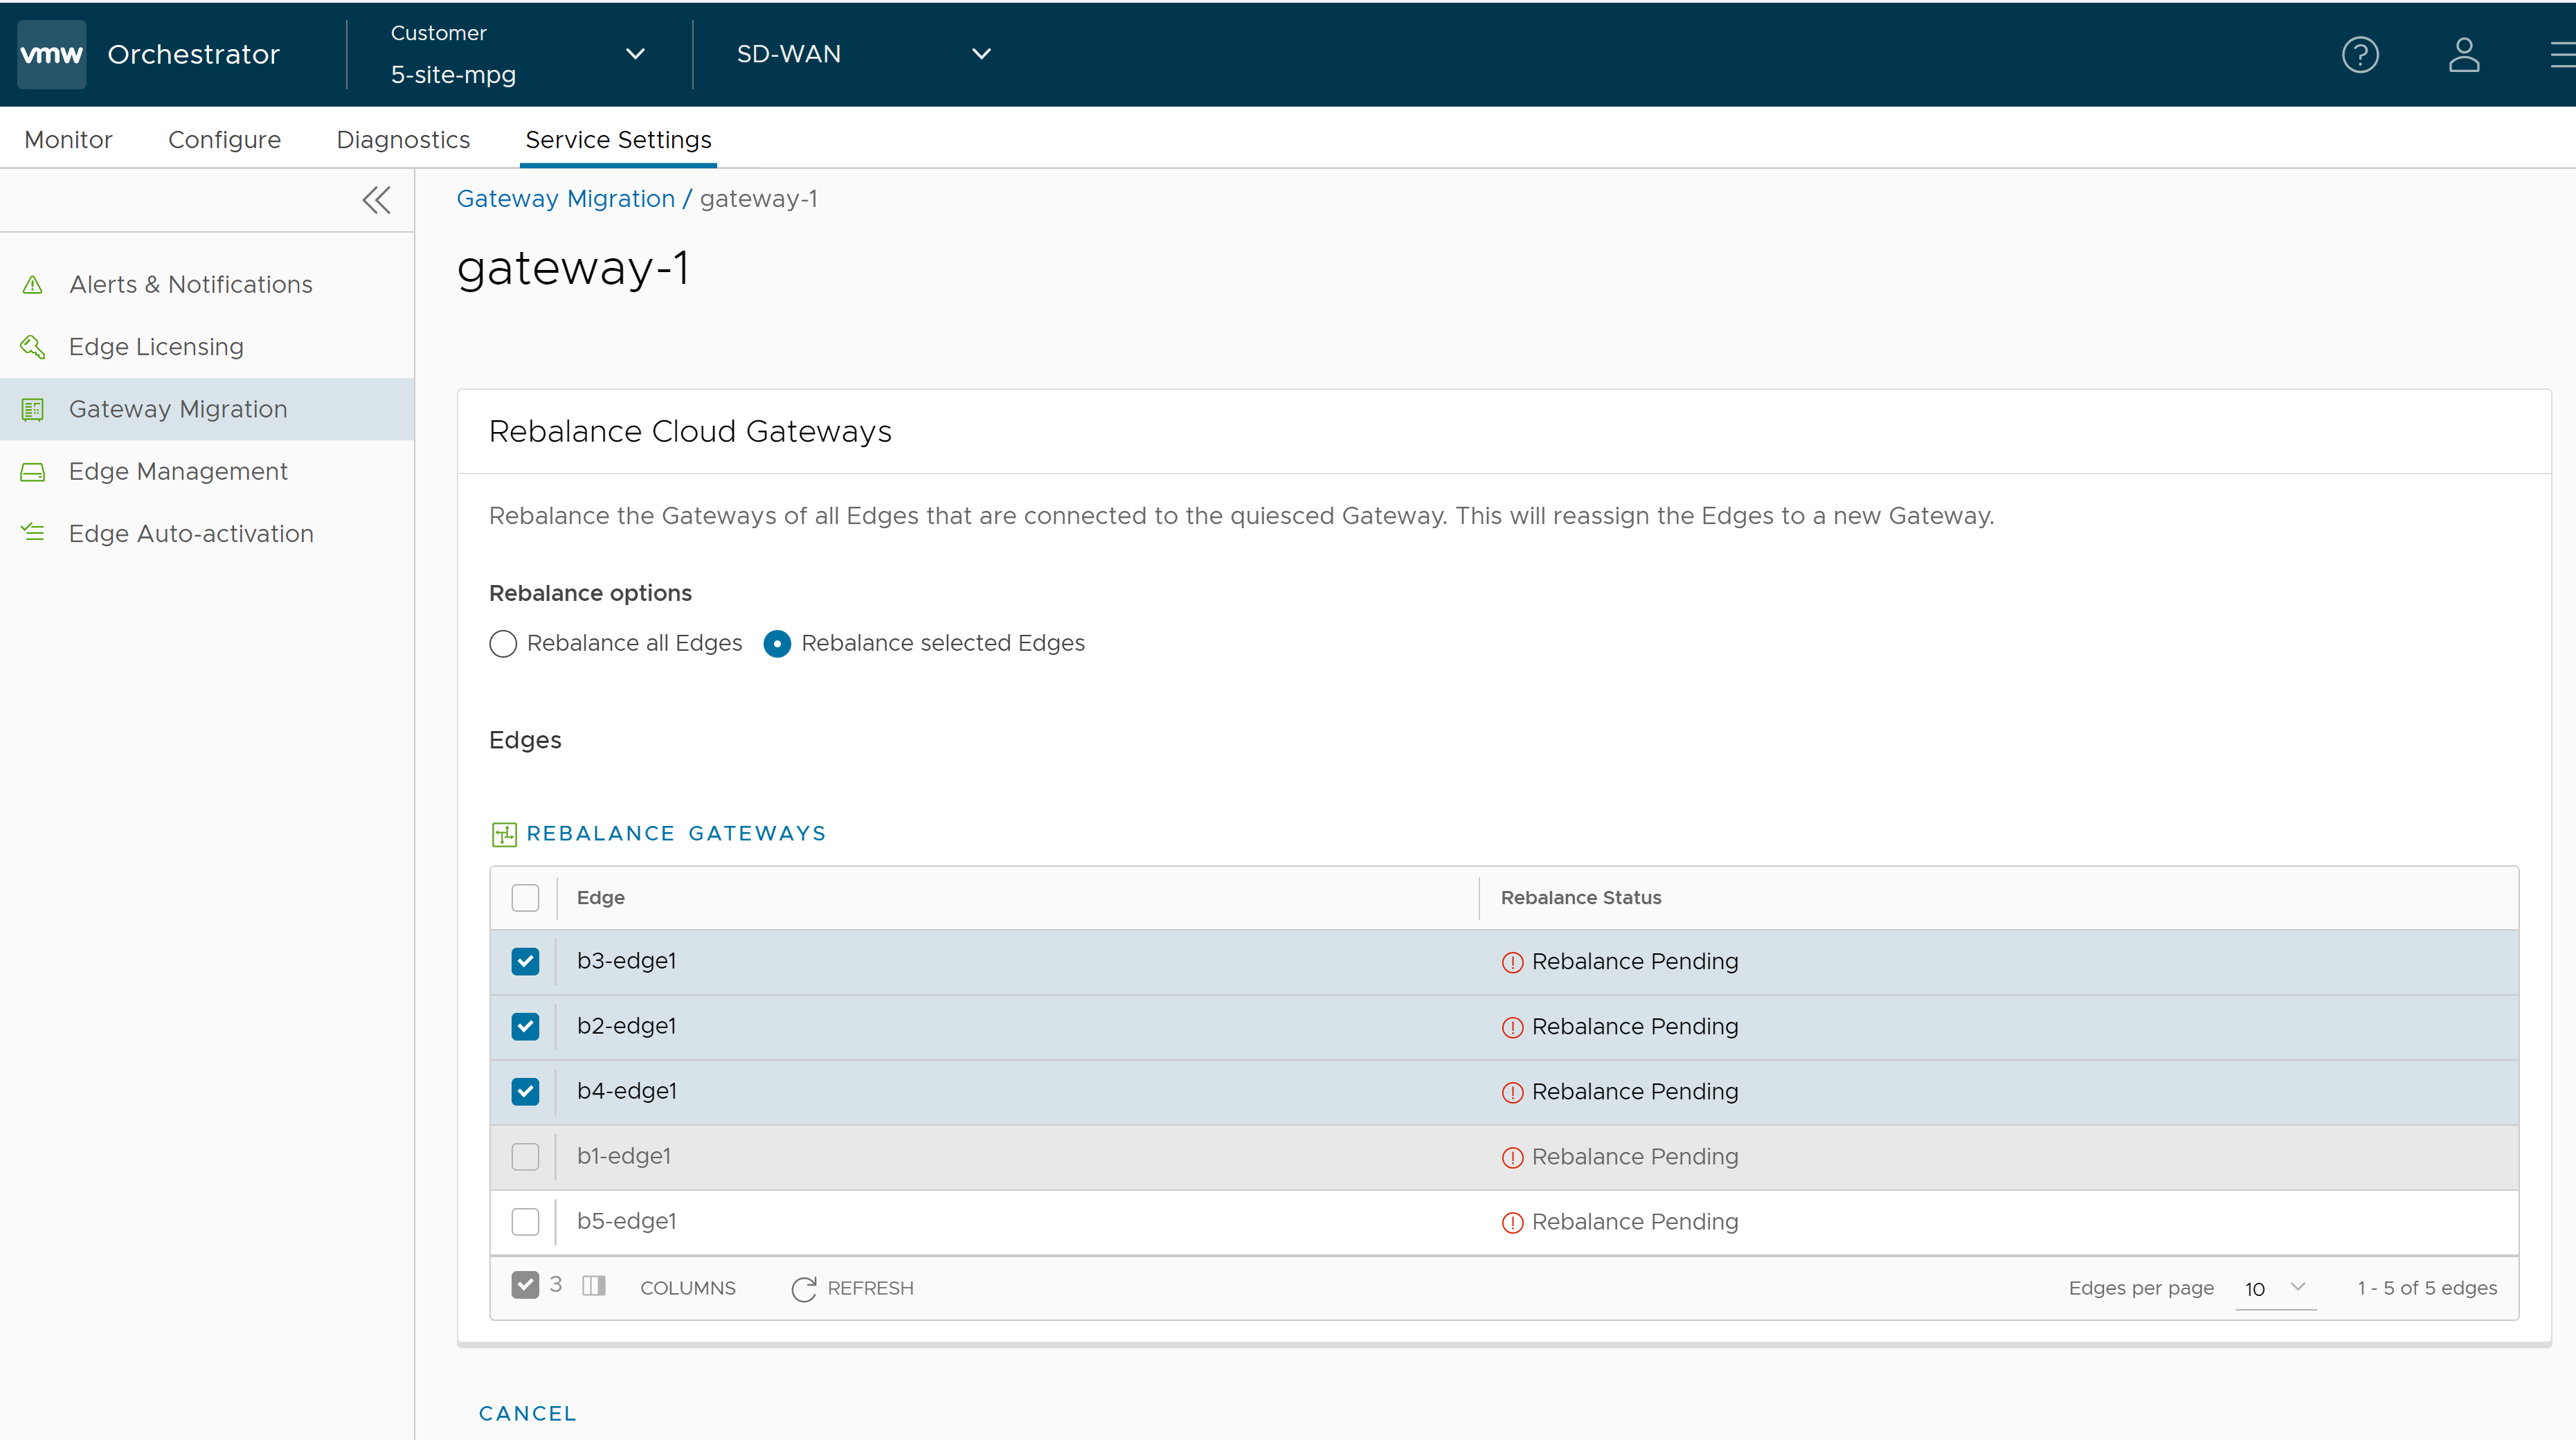 Select the Edges that are connected to the quiesced Gateway and click Rebalance Gateways to reassign Edges to the new Gateway.
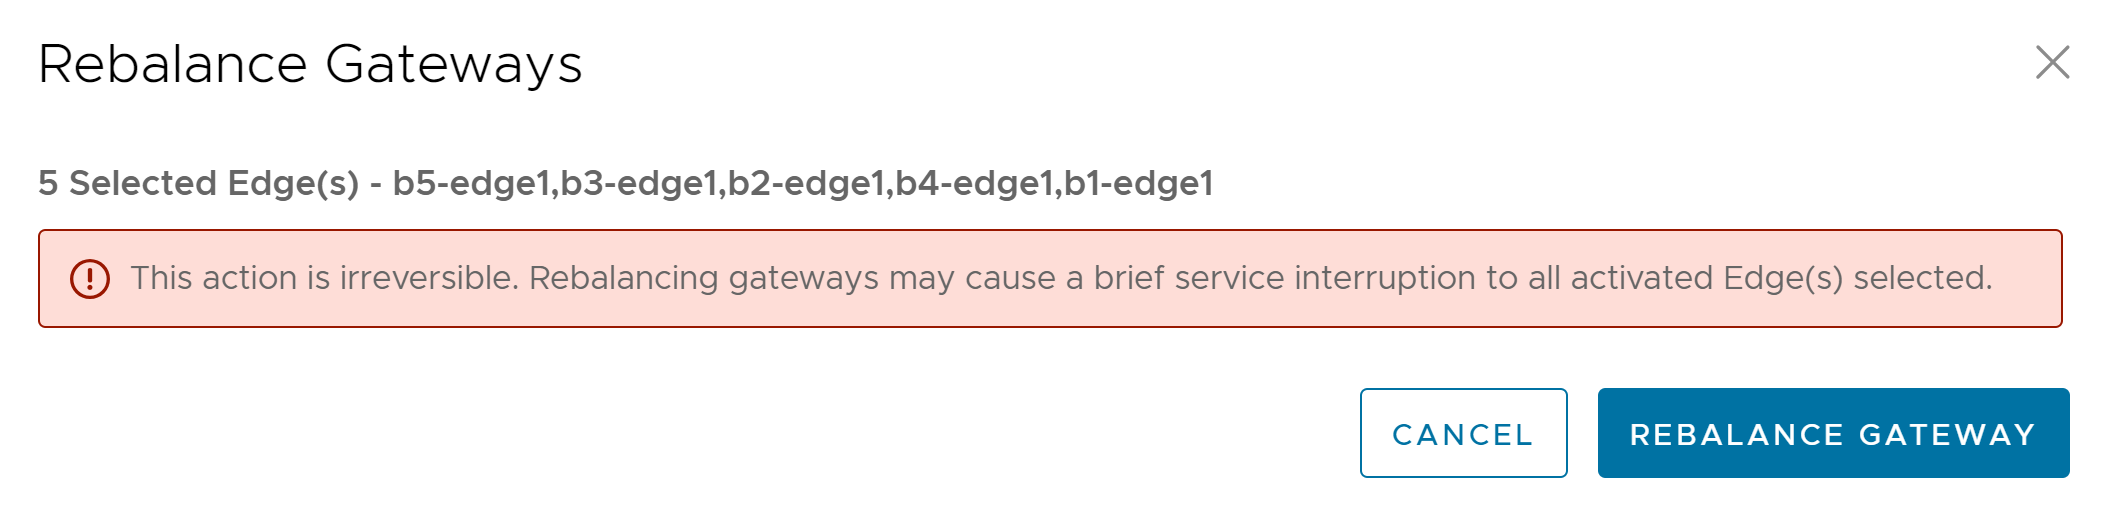
- Click Rebalance Gateway to complete the Gateway migration. The Edges connected to the quiesced Gateway are migrated to the new Gateway.

Results

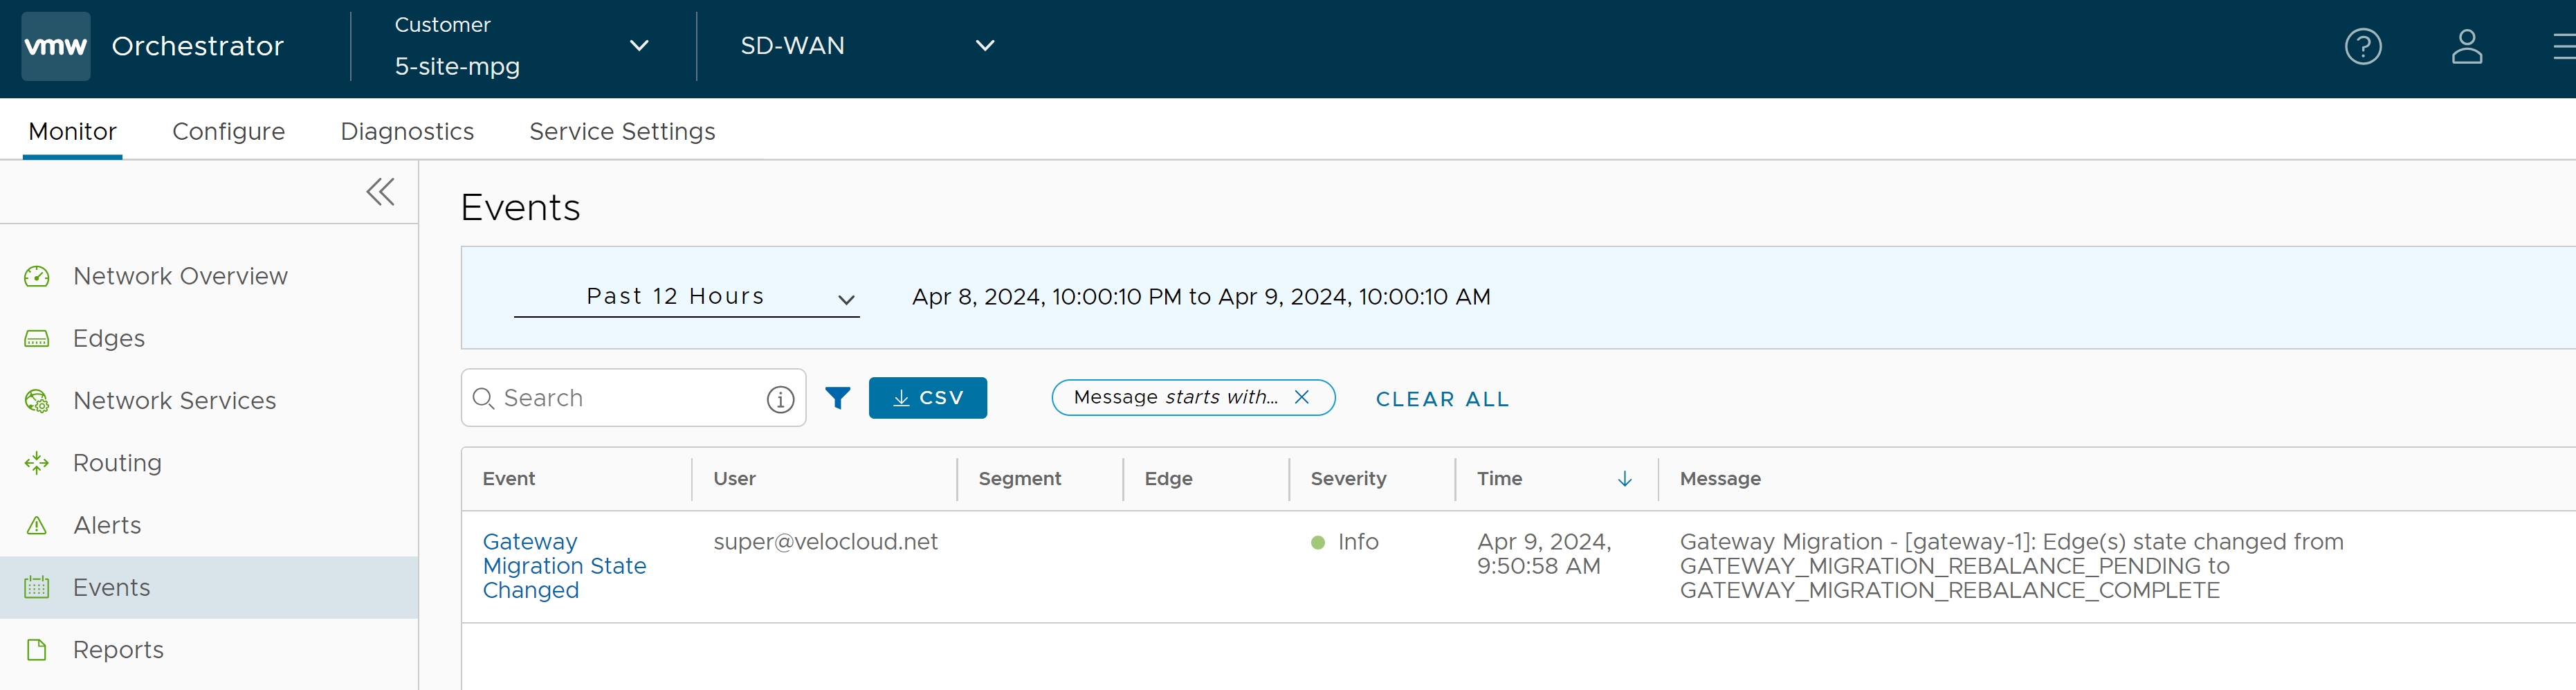
The Gateways that have been migrated remain in this page until the Migration Deadline assigned for the quiesced Gateway. After the Migration Deadline, you can view the history of migration events in the page.