


Elastic IP Addresses (EIPs) are public IP address resources that you can purchase and hold independently. You can create an EIP or reinstate a released EIP through the console. This topic describes how to create an EIP and bind it to the secondary (public) interface.
Prerequisites
- Ensure you have an AliCloud account and login information.
- Ensure you have an Elastic Network Interface (ENI) to assign the Elastic IP. For steps to create ENI, see Create an Elastic Network Interface.
Procedure
- To associate the EIP instance to a secondary (public) Elastic Network Interface (ENI) of the Edge, click Bind under the Actions column. The Bind Elastic IP Address page appears.
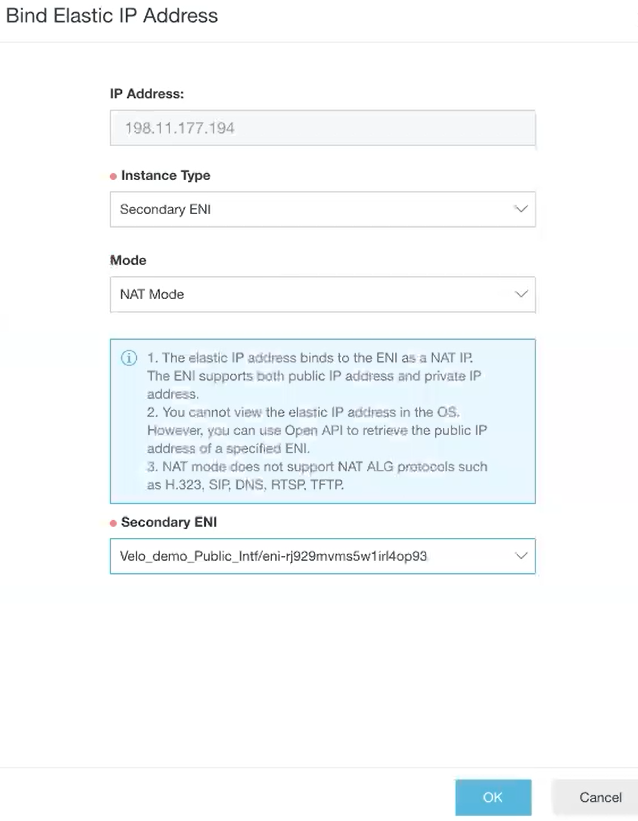
- From the Instance Type drop-down menu, select secondary ENI.
- From the Secondary ENI drop-down menu, select the interface to which you want to bind the EIP.
- Click OK.
