


Perform initial configuration of the Skyline Collector.
To configure VMware Skyline Collector, you perform an initial configuration of the Skyline Collector that registers with the Cloud Service Organization.
Open a web-browser, and enter the FQDN/IP address of the Skyline Collector in the address bar.
A browser security warning may appear when accessing the Skyline Collector. The warning is expected behavior.
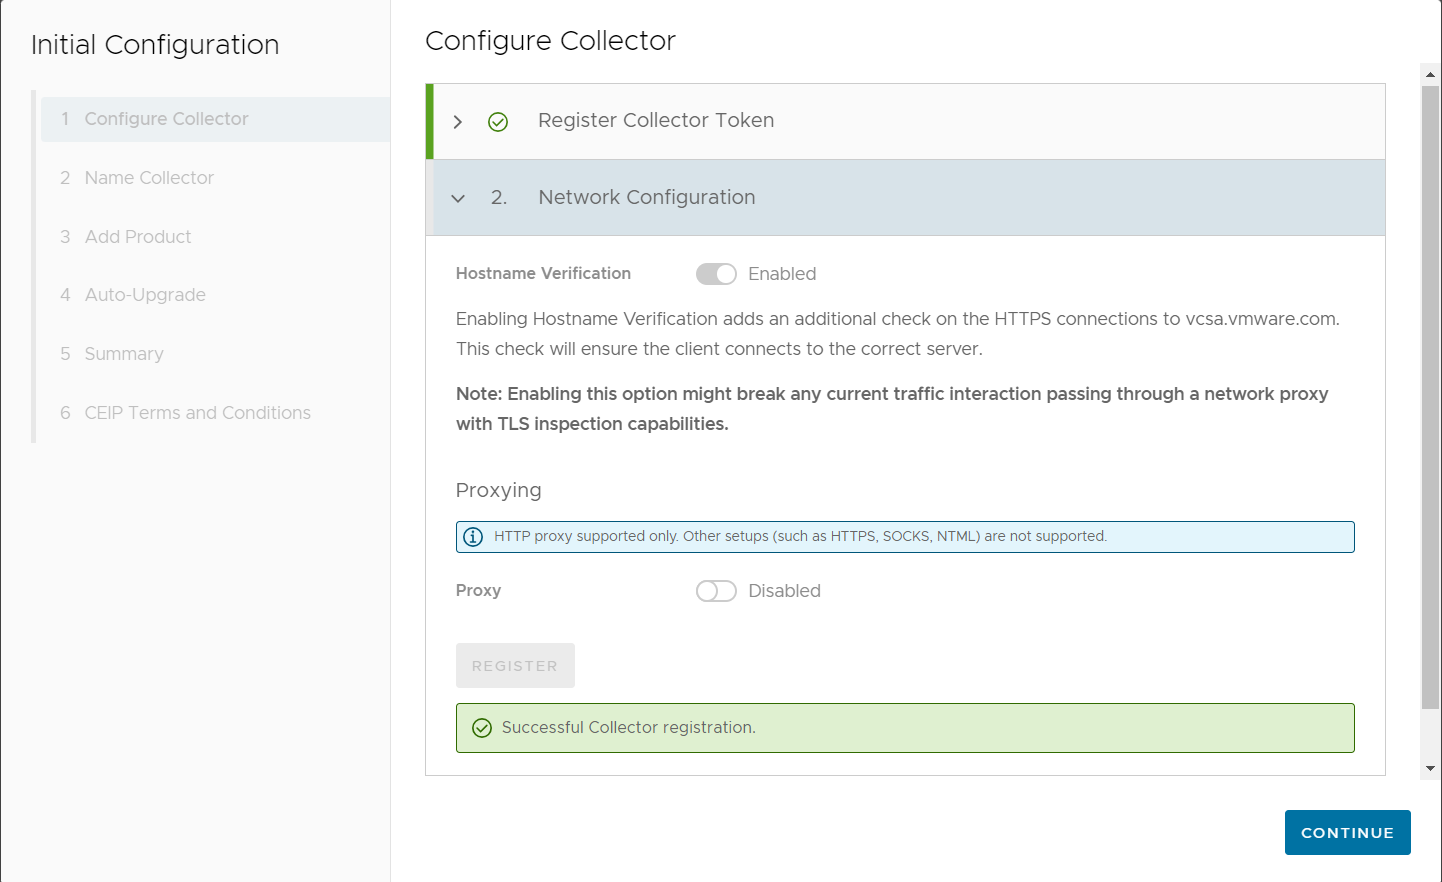
Register and Configure Network Settings for Collector
Register the Collector to Cloud Service Organization and set up hostname verification and a proxy for Skyline Collector communication with VMware.
Hostname Verification verifies that the Skyline Collector is connecting to VMware (vcsa.vmware.com), by looking at the 'dnsName' and 'subjectAltName'. Hostname Verification ensures your product usage data is being sent to VMware.
Also, the Skyline Collector supports a proxy for accessing the Internet.
To configure the Skyline Collector, perform the following steps:
Procedure
- Enter the registration token that you have copied from the Skyline Advisor onboarding setup or from Skyline Advisor Dashboard >Add Collector > Collector Setup to associate your Skyline Collector to your Organization. Click Next.

- Under Network Configuration, to activate or deactivate the hostname verification, follow these steps:
Option Description Activate Hostname Verification
To activate hostname verification, toggle the switch to the right. The switch states Enabled, and turns Green[
 ].
].Deactivate Hostname Verification
To deactivate hostname verification, toggle the switch to the left. The switch states Disabled (Not Recommended), and turns gray [
 ].
]. - To configure a Proxy for the Skyline Collector, follow these steps:
Option Description Activate Proxy
To activate a Proxy, toggle the switch to the right. The switch states Enabled, and turns Green[
]. Follow the given steps to complete the Proxy configuration.Deactivate Proxy
To deactivate a Proxy, toggle the switch to the left. The switch states Disabled, and turns gray [
]. No further action is needed.- Enter the Proxy IP Address.
- Enter the Proxy Port Number.
- If necessary to authenticate to the Proxy, toggle the Authentication switch to the right. The switch states Enabled, and turns Green[].
The Skyline Collector supports basic access authentication.
The Skyline Collector does not support NTLM access authentication.
- Enter the Proxy Username.
- Enter the Proxy Password.
- Click Continue.
Results
The Skyline Collector is now registered with your Cloud Services Organization.
Name Collector
For easy identification, enter a friendly name for your Skyline Collector.
To add a name for your Skyline Collector:
Procedure
- Click Continue.

Add Product
Add at least one product to your Skyline Collector.
To add vSphere to the Skyline Collector, follow these steps:
Prerequisites
The following permissions are required for the account used to add the vCenter Server to the Skyline Collector. These permissions are sufficient for both collecting product usage data, and transferring support bundles with Log Assist.
VMware vSphere
vCenter Server Read-Only role
RoleGlobal.Diagnostics ****
Global.Health
Global.Licenses
Global.Settings
Host profile.View
Storage views.View ***
For detailed instructions for how to create a user account with the given permissions, see Knowledge Base Article 59661.
You must assign the required permission to a user account. Assigning the required permission to a group, and using a user account within that group to vCenter Server in the Skyline Collector fails the privileges check within the Skyline Advisor.
If you have enabled, ESXi Host Encryption, or vSAN Encryption, the Cryptographic operations > Direct Access permission is required to allow the successful transfer of encrypted support bundles.
This permission does not apply to Virtual Machine Encryption.
Procedure
- On the Add Product page, click Add next to the vCenter Server.
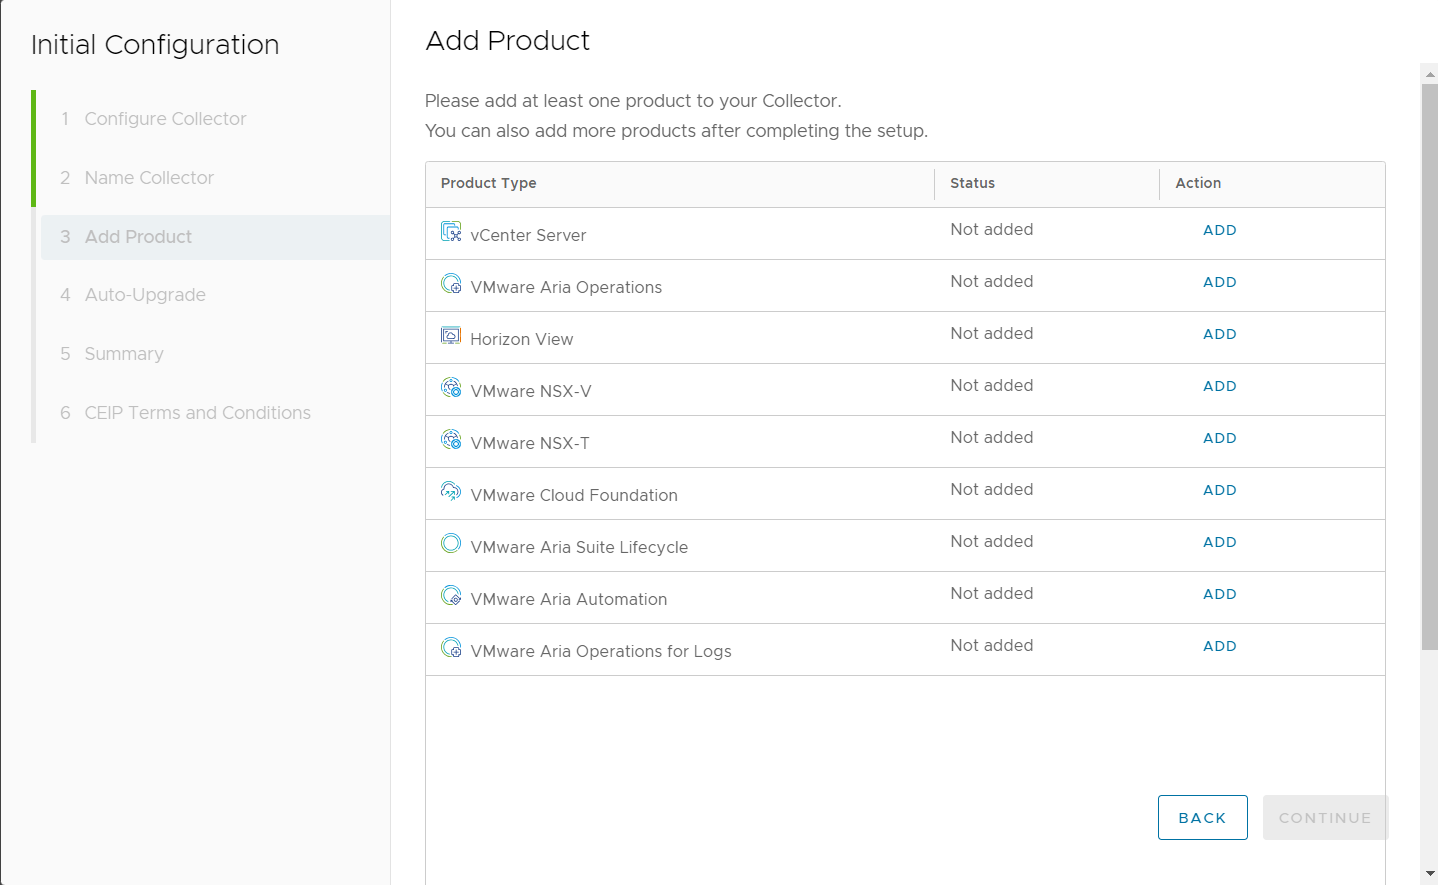
- To complete adding the vCenter Server to the Skyline Collector, click Add.

Note:The close X icon in the Add Product pop-up can move out of view when configuring a product. If this happens, scroll up the pop-up until you see the X icon to close it.
The Configured Products section at the bottom displays the configured products of the currently selected product type (e.g., vCenter). It does not display the configured products for all supported product types.
- Close the pop up window. To add another product, click Add. If you want to add other products later, click Continue to proceed.

You can add more products to the Skyline Collector after completing the setup.
Auto-Upgrade
Choose whether to enable the Skyline Collector to automatically upgrade when new versions of the Skyline Collector are available.
When a new version of the Skyline Collector becomes available, there are two options for upgrading your Skyline Collector.
1. Manually upgrade your Skyline Collector. For manual upgrade, see Update Skyline Collector.
2. Automatically upgrade your Skyline Collector by enabling Auto-Upgrade within the Skyline Collector.
Enabling Auto-Upgrade means you no-longer have to complete the manual process of checking for, and upgrading your Skyline Collector.
Prerequisites
The Skyline Collector must communicate with vapp-updates.vmware.com.
Procedure
- To Enable Auto-Upgrade, toggle the switch to the right. The switch states Yes, and turns green [].
- Using the dropdown menu, pick a day of the week for the Skyline Collector to check for and install updates, if available.
- Using the dropdown menu, pick a time of the day for the Skyline Collector to check for and install updates, if available.
- Click Save to save your settings.
- Click Continue.

Results
If enabled, your Skyline Collector will check for updates on the day/time that you have chosen. If an update is available, your Skyline Collector will automatically be upgraded.
What to do next
You have successfully completed all your task. Review the tasks on the Summary page, then click Continue.
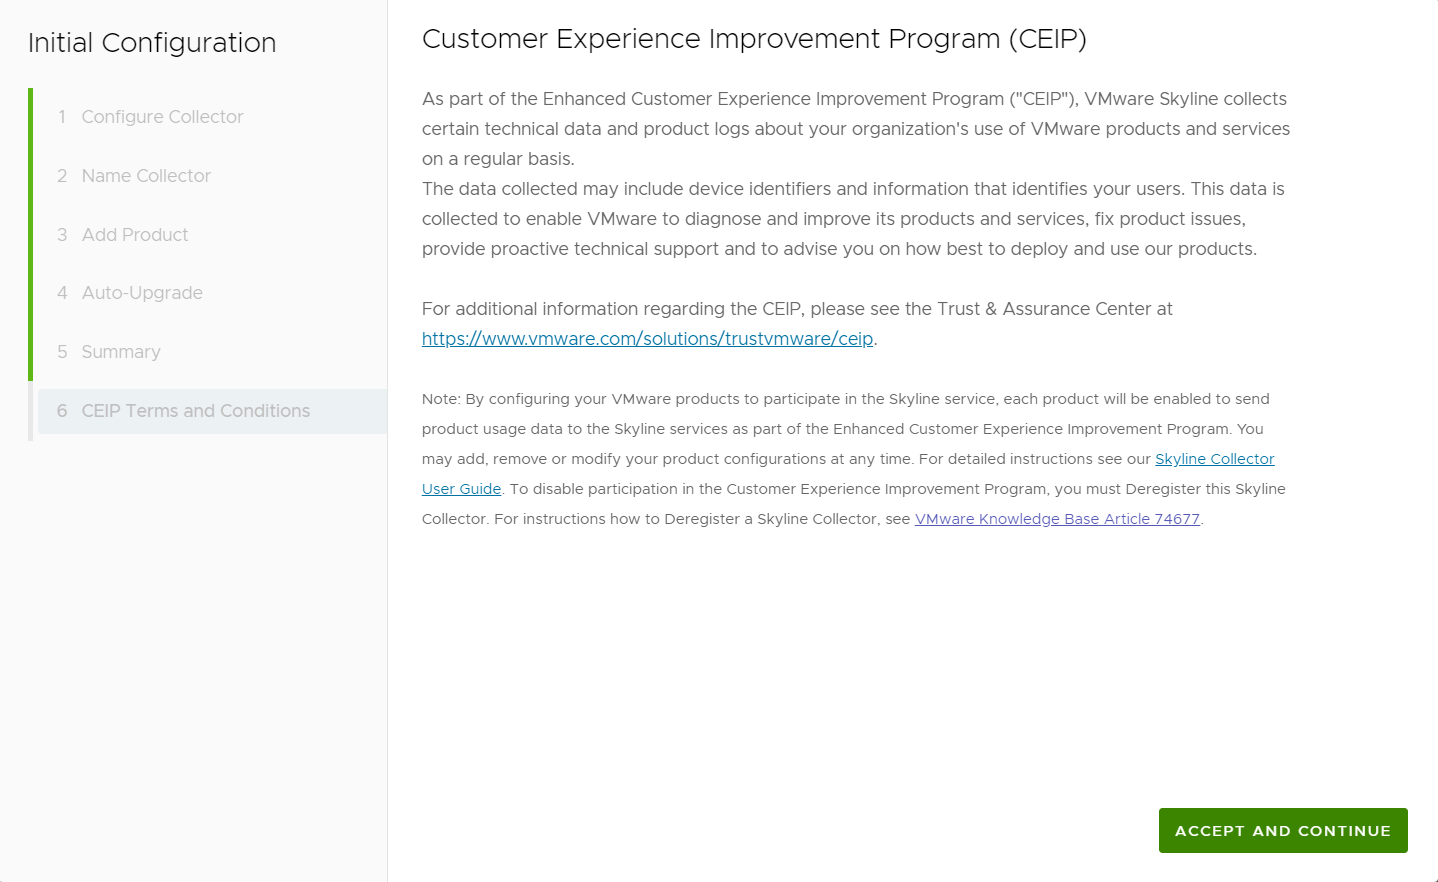
Customer Experience Improvement Program
Agree to participate in the Customer Experience Improvement Program Enhanced participation level.
As part of the Enhanced Customer Experience Improvement Program (CEIP), VMware collects technical information about our customer's use of such products for the following purposes given, such as to improve VMware products and services, and advise our customers on how best to deploy and use our products and services. The data collected through this Customer Experience Improvement Program (CEIP) is separate from the configuration, performance, usage, and consumption data that we collect and use to facilitate delivery of our products and services (such as tracking entitlements, providing infrastructure related support, monitoring the performance, integrity and stability of the infrastructure, and preventing or addressing service or technical issues) (Operational Data).
For additional information regarding the CEIP, see the Trust & Assurance Center at https://www.vmware.com/solutions/trustvmware/ceip.
Note: By configuring your VMware products to participate in the Skyline service, each product will be enabled to send product usage data to the Skyline services as part of the Customer Experience Improvement Program. You may add, remove, or modify your product configurations at any time. For detailed instructions, see our Skyline Collector User Guide. To disable participation in the Customer Experience Improvement Program, you must Deregister the Skyline Collector. For instructions how to Deregister the collector, see Knowledge Base (KB) article 74677.
Procedure
- ♦Review the Customer Experience Improvement Program (CEIP). If you Agree to participate, click Accept and Continue.
Results
You have successfully configured the Skyline Collector.
What to do next
You are on the Skyline Collector Dashboard. You can view the overall status of the Collector.
Go back to the Skyline Advisor Onboarding wizard, and perform the following steps:
Click Verify to check for successful Skyline Collector setup and onboarding.
Click Continue to Skyline Advisor to proceed and access Skyline Advisor Pro.
