


To save a console remotely:
-
Select File > Save As > Save Remote As. This displays the Save Remote Console dialog box, as shown in Save Remote Console dialog box.
Figure 1. Save Remote Console dialog box 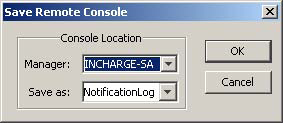
-
Select a location to save the console. Choose a Manager.
-
The Save as field lists the names of existing remote consoles. For a previously saved console, the name displays in the field. You can also specify another name without the extension .iccon.
If a remote console name appears in the field, the existing console might be part of your user profile. Contact your administrator to see if you should overwrite the existing console.
-
In the Select Domains to Reattach dialog box, select one or more Managers that the saved console will automatically attach to when the console is opened. (To select multiple managers, press the Ctrl or Shift key while making your selections.)
-
Click OK. To use the customized console, you must open it from a running console (File > Open > Open Remote).
-
(Optional) To share the console with other users, in a UNIX shell, copy the console file from the BASEDIR/smarts/local/consoles/<userid> directory or the BASEDIR/smarts/local/consoles/<user_profile> directory to the BASEDIR/smarts/local/consoles directory on the remote host.
Note:Write permission to the remote host directory is required for the copy operation.
