


Network Level Permissions provide the access required to change device configurations, run Auto Discovery, access the Scheduler, Approve jobs, and other permissions.
Networks must be assigned to a user or group in this area for access to the devices in the network. Permissions can be assigned per Network.
To ease management, default Network Permissions apply to every Network assigned to the user or group. Default Network Permission can be overridden on a network with the proper permissions.
For each network, the user or group must be assigned permissions based on the tasks to be completed in the network. For example, a user has access to three networks:
-
In Network A, the user has the ability to Create, Edit, and View workspaces for the network.
-
In Network B, the user cannot complete any of those tasks, but is able to Schedule and Approve jobs.
-
In Network C, the user can complete all tasks .
Whether you are setting permissions for a single user or a group of users, the steps are the same. Settings for a single user are set in the System Users module, in Set Permissions. Settings for a group are set in the System Group module, in Set Permissions.
The Network Permissions function allows you to complete the following actions for the user or group:
-
Associate users or groups to manage networks
To associate a user or group to networks,
-
From the menu bar, access Tools -> System Administration. The System Administration window opens.
-
In the navigation pane, expand Global -> User Management.
-
Select System Users or System Groups . The right pane contains all available user/groups.
-
Selecting a user/group, then click Permissions. The Access Control Administration - [User ID] window opens.
-
In the tree menu, select Network Permissions. The right pane populates with any networks currently associated with the user/group.
-
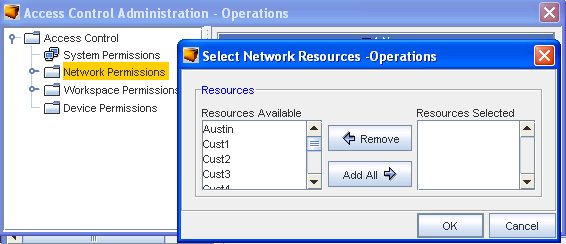
At the bottom of the window, click Manage. The Select Network Resources - [User ID] window opens.
-
The Resources Available column is a list of all system networks. Select the networks to which the user or group will have permissions.
Note: A sequence of networks can be selected by holding down the Shift-key while clicking networks. Or, multiple, non-sequential networks can be selected by holding the Ctrl key while clicking network. -
When you have finished selecting networks, click Add or Add all .
-
If you are removing permissions to a network, in the Selected Resources column, select the networks to which the user will no longer be associated, then click Remove All.
-
Once you have completed selecting the networks for the user, click OK. The Select Network Resources - [User ID] window closes.
You can now proceed with assigning network permissions for the user or group.
Setting Network Permissions
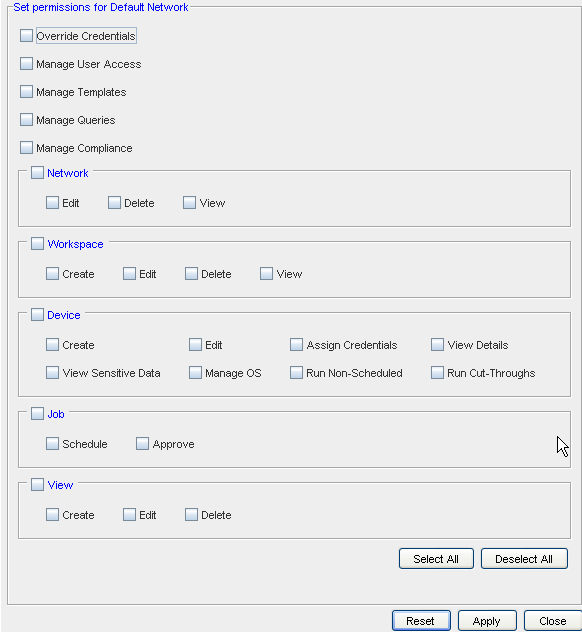
The Network Permissions window contains specific permissions for the Network, related Workspaces, Templates Devices, Jobs, and Views. Each area is segmented into specific permissions.
To set network permissions for a user,
-
After selecting a user/group, click Permissions.... The Access Control Administration - [User ID] window opens.
-
In the tree menu, select Network Permissions. Available networks display in the right pane. Expand Network Permissions, and select the network for which permissions will be set. The right pane populates and will look like the following:
-
Select the areas for which the user are to have access.
-
If the user/group does not require one or more of the included task permissions, click that related check box to de-select the option.
-
Repeat steps 3 and 4 for each area to which the user/group requires access.
