


To edit (customize) an existing Attributed test, you must first locate the test you want to edit.
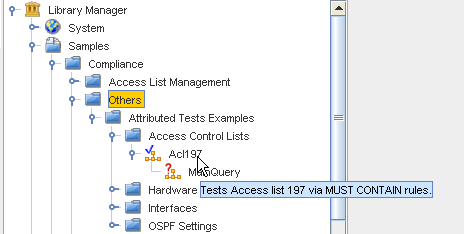
To view the Library Manager navigation tree, select Automation Library from Tools on the menu bar.
-
Click the Library Manager, and expand the view to show the System, and the listing of Networks within your application.
-
Click Samples, Compliance, then click Others.
-
Click the Attributed Tests Examples category.
-
Once the category is opened, select an Attributed Test from the list of examples.
-
Right-click the example, and select Copy from the options.
-
Select a location to copy to the test to, then click OK.

The test you selected is now displayed in the destination you selected.
-
Right-click the test name, then select Edit from the options.
-
The Editor is now open, where you can go through each of the tabs, and either add to, change, or delete the existing information.
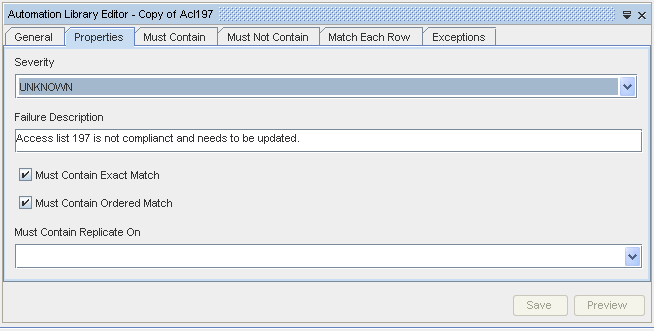
See Creating a New Attributed Test for additional information.
-
Once you have made all your edits to this existing test - to make it customized - click Save to save all your changes, then close the editor.
-
To Run the test, double-click on the test name. The test results are displayed.
