


Once you have selected the devices and opened the Interface Editor window , you can select filter attributes, determine which devices and interfaces will be affected by the Configlet, and enter Reference Variables and templates.
-
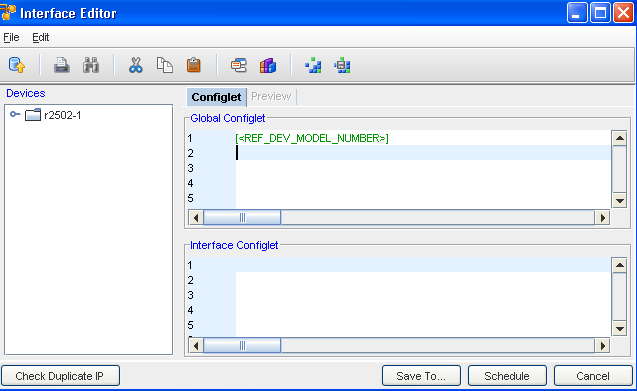
In the Interfaces Configlet content area, enter the configlet that will affect the interfaces in the Devices column.
-
If creating a Configlet that will affect a device (in its entirety, not just its interfaces) in the Global Configlet content area, enter a Configlet.
-
Use the Ref Var
 icon to insert an existing reference variable.
 -
To use a template when creating an interface or Global Configlet, click the respective Template
 icon. The Select Item window opens.
 -
By default, the Select Item window opens to the network specific templates, but you also can choose System and Module templates.
-
Navigate to the folder location of the template. Select the template.
-
Click Select Item . The Select Item window closes. The selected template is inserted into the Configlet.
-
You can also Load a Collection of Device Interfaces
 , and then save the Collection of Device Interfaces
  using the appropriate icons.
 Now, you can select to Schedule the Interface Editor window .
-
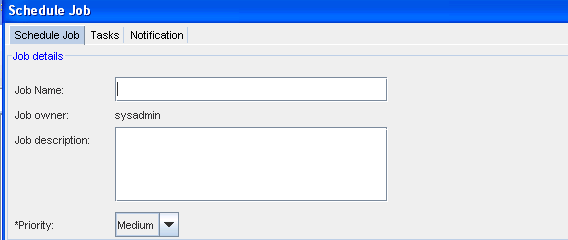
When you are ready to schedule, click the Schedule Job tab.
-
Enter the Job Name . You can also enter a Description.
-
From the drop-down list, select a Priority level.
-
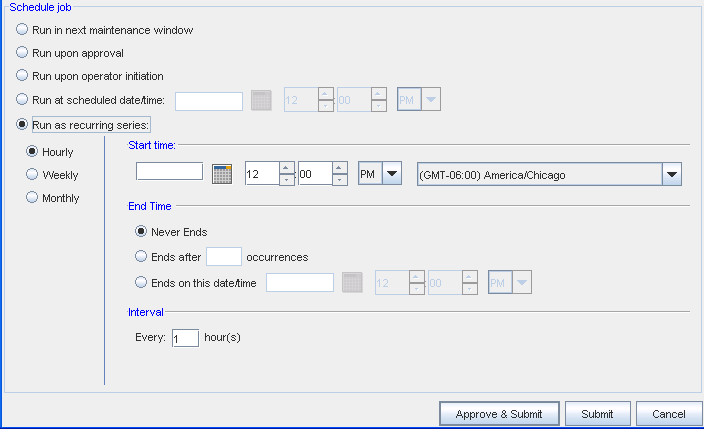
At the Schedule job section, by default, all jobs are scheduled to Run upon approval . All selections in the following example are displayed as being active in the schedule for viewing purposes only. With adequate permission, you can click the Submit button located at the bottom of the window.
Note that you can select to have the job Run in the next maintenance window.
-
If you select the Run upon operator initiation option, and Submit the job for approval, this keeps the job in a pending state after approval . After this, any user, with Schedule permissions, can then execute this job.
-
To set a specific time, select Run at scheduled date/time . The related date and time fields activate.
-
Enter a date. For assistance, use the Calendar icon to open a monthly calendar.
-
Select the time. The hour, minute and AM/PM setting must be designated.
-
If this option is okay, click Submit.
-
To set a recurring schedule, select Run as recurring series . The recurring setting options activate.
-
Set the recurring options: Frequency, Start and End Times, and Time Interval. The job is sent to the Schedule Manager, and the Schedule Job window closes.
You can also work with the Tasks window.
-
-
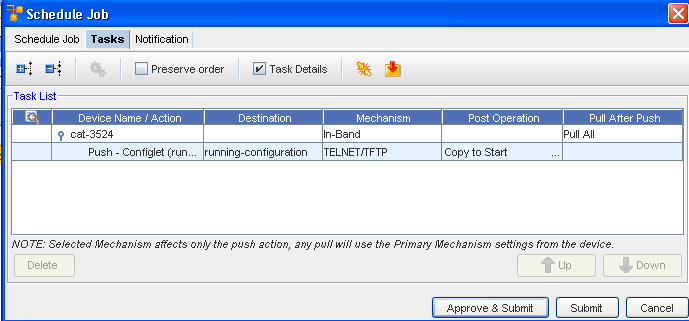
In the Schedule Job window, click the Tasks tab. You can view the tables in either an expanded or collapsed view.

-
You can access the Task / Global window.

-
You can Preserve the order the tasks are currently listed in, and also access the Task Details.
-
You can check to see if there is a conflicting job, or you can access the Command Editor and add Commands.
The Notification tab can also be accessed.
