


A policy is a set of user-define guidelines for any device configuration changes. These guidelines can only be defined by a user with Manage Compliance privileges.
A Policy must be selected, and then applied to a resource. Whenever a new or changed device configuration is pulled or pushed into the system, the configuration is run against the Policy for a compliance check .
Note: With Multi-Config, Compliance Policies now incorporate Standards and Tests targeted on specific configuration files.
- Open Tools->Automation Library .
- Expand the Library Manager.

- Right-click on System (or a folder name), then select New, then Policy.
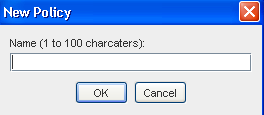
- Enter a Policy Name, then click Ok.
- With the Automation Library Policy Editor displayed, begin creating the Policy using the tabs in the Editor (General, Standards, Areas, and Notifications).
Note: You can use the Policy Tasks to take you through the list of activities you must complete to create a policy. For more information on using the Policy Tasks, go to Policy Tasks - Quick Complete.
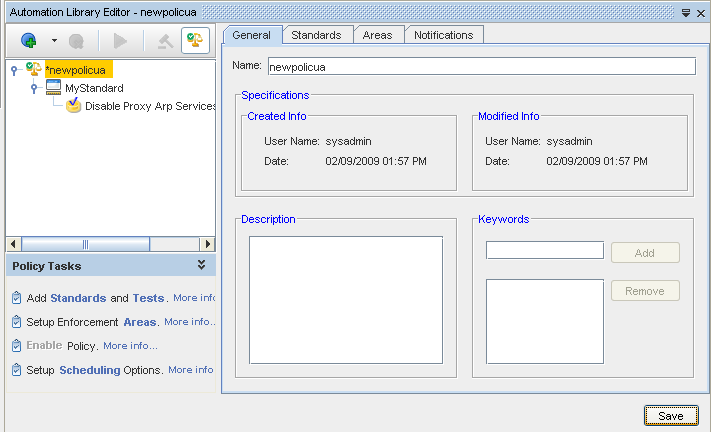
At the General tab,
- Here you can enter a Description to make this policy distinctive.
- You can also enter keywords by entering a keyword, then clicking the Add button in the Keywords section. Continue on to the Standards tab.
At the Standards tab,
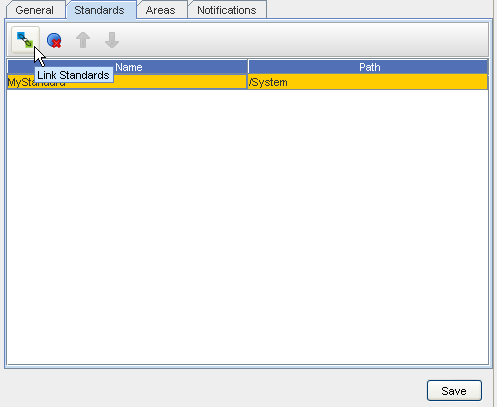
- Go to the Standards tab, and enter the information needed for the Policy. Click Link Standard to link a Standard from the selections (under System) that display in the Link Standards window.
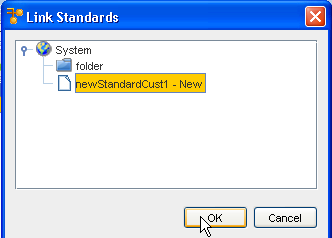
- Click Ok.
At the Areas tab,
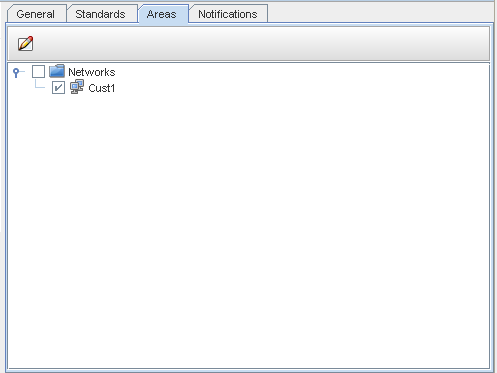
- At the Areas tab, select the Edit icon in the toolbar to launch a popup field, where you can set or modify areas this policy affects, or make your selection from what is displayed in the panel.
- Click Save.
At the Notifications tab,
From this tab you can Automatically Schedule the jobs to push remedies generated by Compliance tests to any non-Compliant devices.
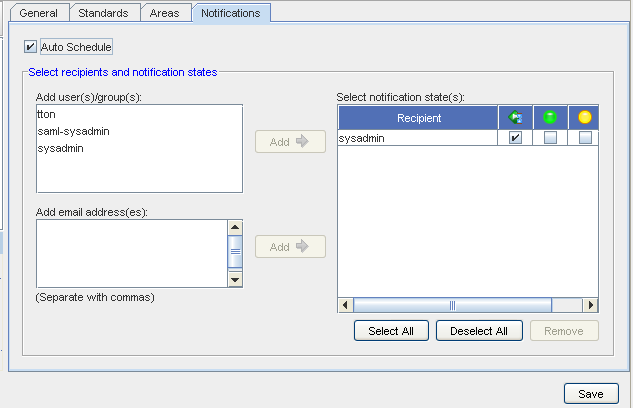
- In the top portion of the tab, click within the Auto Schedule check box. Select Auto-Schedule for remedy jobs to be scheduled by the application.
- In the Select recipients and notification states section of the window, you can add the users to the Select Notification states by first highlighting the user name, then clicking the Add button.
- At the Add email adress(es) section, you can enter in as many email address as you need to ensure the notification of the job is sent to those who need to have this information. Once you add an email address, click the Add button. This moves the email names you have entered into the Recipient section.
- At the Select notification state(s) section, place a check mark into each appropriate notification check box. You can also Use the Select All or Deselect All buttons for notification. You can also double-click a row to select all the check boxes within that row.
- Once your list of recipients and their notification states are selected, click Ok.
