


Backup and Restore Etcd Deployments on Kubernetes
Introduction
etcd is a reliable and efficient key-value store, most commonly used for data storage in distributed systems. It offers a simple interface for reading and writing data and is available under an open source license.
VMware Tanzu Application Catalog (Tanzu Application Catalog) offers an etcd Helm chart that enables quick and easy deployment of an etcd cluster on Kubernetes. This Helm chart is compliant with current best practices and is suitable for use in production environments, with built-in features for role-based access control (RBAC), horizontal scaling, disaster recovery and TLS.
Of course, the true business value of an etcd cluster comes not from the cluster itself, but from the data that resides within it. It is critical to protect this data, by backing it up regularly and ensuring that it can be easily restored as needed. Data backup and restore procedures are also important for other scenarios, such as off-site data migration/data analysis or application load testing.
This guide walks you through two different approaches you can follow when backing up and restoring Tanzu Application Catalog etcd Helm chart deployments on Kubernetes:
- Back up the data from the source deployment and restore it in a new deployment using etcd's built-in backup/restore tools.
- Back up the persistent volumes from the source deployment and attach them to a new deployment using Velero, a Kubernetes backup/restore tool.
Assumptions and prerequisites
This guide makes the following assumptions:
You have two separate Kubernetes clusters - a source cluster and a destination cluster - with
kubectland Helm v3 installed. This guide uses Google Kubernetes Engine (GKE) clusters but you can also use any other Kubernetes provider. Learn how to installkubectland Helm v3.x.You have configured Helm to use the Tanzu Application Catalog chart repository following the instructions for Tanzu Application Catalog or the instructions for VMware Tanzu Application Catalog for Tanzu Advanced.
You have previously deployed the Tanzu Application Catalog etcd Helm chart on the source cluster and added some data to it. Example command sequences to perform these tasks are shown below, where the PASSWORD placeholder refers to the etcd administrator password. Replace the REPOSITORY placeholder with a reference to your Tanzu Application Catalog chart repository.
helm install etcd REPOSITORY/etcd \
  --set auth.rbac.rootPassword=PASSWORD \
  --set statefulset.replicaCount=3
export POD_NAME=$(kubectl get pods --namespace default -l "app.kubernetes.io/name=etcd,app.kubernetes.io/instance=etcd" -o jsonpath="{.items[0].metadata.name}")
kubectl exec -it $POD_NAME -- etcdctl --user root:PASSWORD put /message1 foo
kubectl exec -it $POD_NAME -- etcdctl --user root:PASSWORD put /message2 bar
Method 1: Backup and restore data using etcd's built-in tools
This method involves using etcd's etcdctl tool to create a snapshot of the data in the source cluster and the Tanzu Application Catalog's Helm chart's recovery features to create a new cluster using the data from the snapshot.
Step 1: Create a data snapshot
The first step is to back up the data in the etcd deployment on the source cluster. Follow these steps:
Forward the etcd service port and place the process in the background:
kubectl port-forward --namespace default svc/etcd 2379:2379 &Create a directory for the backup files and make it the current working directory:
mkdir etcd-backup
chmod o+w etcd-backup
cd etcd-backup
Use the
etcdctltool to create a snapshot of the etcd cluster and save it to the current directory. If this tool is not installed on your system, use Tanzu Application Catalog's etcd Docker image to perform the backup, as shown below (replace the example container registry shown with your Tanzu Application Catalog container registry). Replace the PASSWORD placeholder with the administrator password set at deployment-time and the REGISTRY placeholder with a reference to your Tanzu Application Catalog container registry.docker run -it --env ALLOW_NONE_AUTHENTICATION=yes --rm --network host -v $(pwd):/backup REGISTRY/etcd etcdctl --user root:PASSWORD --endpoints http://127.0.0.1:2379 snapshot save /backup/mybackupHere, the
--netparameter lets the Docker container use the host's network stack and thereby gain access to the forwarded port. Theetcdctlcommand connects to the etcd service and creates a snapshot in the/backupdirectory, which is mapped to the current directory (etcd-backup/) on the Docker host with the-vparameter. Finally, the--rmparameter deletes the container after theetcdctlcommand completes execution.Stop the service port forwarding by terminating the corresponding background process.
Adjust the permissions of the backup file to make it world-readable:
sudo chmod -R 644 mybackup
At the end of this step, the backup directory should contain a file named mybackup, which is a snapshot of the data from the etcd deployment.
Step 2: Copy the snapshot to a PVC
The etcd cluster can be restored from the snapshot created in the previous step. There are different ways to do this; one simple approach is to make the snapshot available to the pods using a Kubernetes PersistentVolumeClaim (PVC). Therefore, the next step is to create a PVC and copy the snapshot file into it. Further, since each node of the restored cluster will access the PVC, it is important to create the PVC using a storage class that supports ReadWriteMany access, such as NFS.
Begin by installing the NFS Server Provisioner. The easiest way to get this running on any platform is with the stable Helm chart. Use the command below, remembering to adjust the storage size to reflect your cluster's settings:
helm repo add stable https://charts.helm.sh/stable
helm install nfs stable/nfs-server-provisioner \
  --set persistence.enabled=true,persistence.size=5Gi
Create a Kubernetes manifest file named
etcd.yamlto configure an NFS-backed PVC and a pod that uses it, as below. Replace the REGISTRY placeholder with a reference to your Tanzu Application Catalog container registry.## etcd.yaml kind: PersistentVolumeClaim apiVersion: v1 metadata: name: etcd-backup-pvc spec: accessModes: - ReadWriteMany resources: requests: storage: 2Gi storageClassName: nfs --- apiVersion: v1 kind: Pod metadata: name: etcd-backup-pod spec: volumes: - name: etcd-backup persistentVolumeClaim: claimName: etcd-backup-pvc containers: - name: inspector image: REGISTRY/tac-shell:latest command: - sleep - infinity volumeMounts: - mountPath: "/backup" name: etcd-backupApply the manifest to the Kubernetes cluster:
kubectl apply -f etcd.yamlThis will create a pod named
etcd-backup-podwith an attached PVC namedetcd-backup-pvc. The PVC will be mounted at the/backupmount point of the pod.Copy the snapshot to the PVC using the mount point:
kubectl cp mybackup etcd-backup-pod:/backup/mybackupVerify that the snapshot exists in the PVC, by connecting to the pod command-line shell and inspecting the
/backupdirectory:kubectl exec -it etcd-backup-pod -- ls -al /backupThe command output should display a directory listing containing the snapshot file, as shown below:

Delete the pod, as it is not longer required:
kubectl delete pod etcd-backup-pod
Step 3: Restore the snapshot in a new cluster
The next step is to create an empty etcd deployment on the destination cluster and restore the data snapshot into it. The Tanzu Application Catalog etcd Helm chart provides built-in capabilities to do this, via its startFromSnapshot.* parameters.
Create a new etcd deployment. Replace the PASSWORD placeholder with the same password used in the original deployment and replace the REPOSITORY placeholder with a reference to your Tanzu Application Catalog chart repository.
helm install etcd-new REPOSITORY/etcd \
  --set startFromSnapshot.enabled=true \
  --set startFromSnapshot.existingClaim=etcd-backup-pvc \
  --set startFromSnapshot.snapshotFilename=mybackup \
  --set auth.rbac.rootPassword=PASSWORD \
  --set statefulset.replicaCount=3
This command creates a new etcd cluster and initializes it using an existing data snapshot. The
startFromSnapshot.existingClaimandstartFromSnapshot.snapshotFilenamedefine the source PVC and source filename for the snapshot respectively.NOTE: It is important to create the new deployment on the destination cluster using the same credentials as the original deployment on the source cluster.
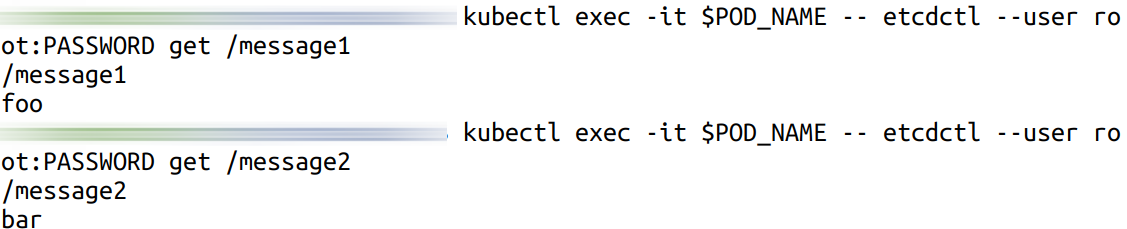
Connect to the new deployment and confirm that your data has been successfully restored. Replace the PASSWORD placeholder with the administrator password set at deployment-time.
export POD_NAME=$(kubectl get pods --namespace default -l "app.kubernetes.io/name=etcd,app.kubernetes.io/instance=etcd-new" -o jsonpath="{.items[0].metadata.name}")
kubectl exec -it $POD_NAME -- etcdctl --user root:PASSWORD get /message1
kubectl exec -it $POD_NAME -- etcdctl --user root:PASSWORD get /message2
Here is an example of what you should see:
NOTETanzu Application Catalog's etcd Helm chart also supports auto disaster recovery by periodically snapshotting the keyspace. If the cluster permanently loses more than (N-1)/2 members, it tries to recover the cluster from a previous snapshot. Learn more about this feature.
Method 2: Back up and restore persistent data volumes
This method involves copying the persistent data volumes for the etcd nodes and reusing them in a new deployment with Velero, an open source Kubernetes backup/restore tool. This method is only suitable when:
- The Kubernetes provider is supported by Velero.
- Both clusters are on the same Kubernetes provider, as this is a requirement of Velero's native support for migrating persistent volumes.
- The restored deployment on the destination cluster will have the same name, namespace, topology and credentials as the original deployment on the source cluster.
NOTEFor persistent volume migration across cloud providers with Velero, you have the option of using Velero's Restic integration. This integration is not covered in this guide.
Step 1: Install Velero on the source cluster
Velero is an open source tool that makes it easy to backup and restore Kubernetes resources. It can be used to back up an entire cluster or specific resources such as persistent volumes.
Modify your context to reflect the source cluster (if not already done).
Follow the Velero plugin setup instructions for your cloud provider. For example, if you are using Google Cloud Platform (as this guide does), follow the GCP plugin setup instructions to create a service account and storage bucket and obtain a credentials file.
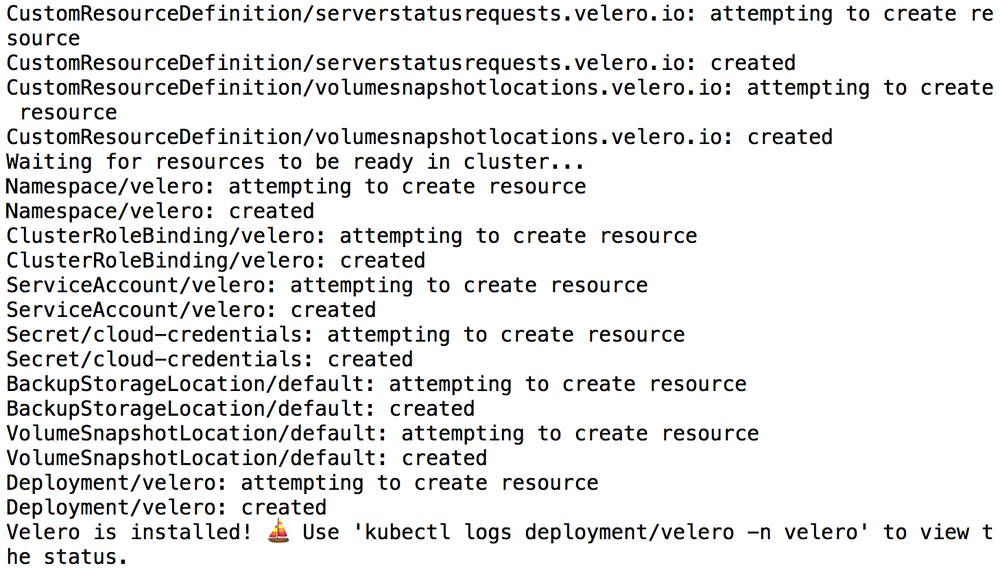
Then, install Velero on the source cluster by executing the command below, remembering to replace the BUCKET-NAME placeholder with the name of your storage bucket and the SECRET-FILENAME placeholder with the path to your credentials file:
velero install --provider gcp --plugins velero/velero-plugin-for-gcp:v1.0.0 --bucket BUCKET-NAME --secret-file SECRET-FILENAMEYou should see output similar to the screenshot below as Velero is installed:
Confirm that the Velero deployment is successful by checking for a running pod using the command below:
kubectl get pods -n velero
Step 2: Back up the etcd deployment on the source cluster
Next, back up the persistent volumes using Velero.
Create a backup of the volumes in the running etcd deployment on the source cluster. This backup will contain all the node volumes.
velero backup create etcd-backup --include-resources pvc,pv --selector app.kubernetes.io/instance=etcdExecute the command below to view the contents of the backup and confirm that it contains all the required resources:
velero backup describe etcd-backup --detailsTo avoid the backup data being overwritten, switch the bucket to read-only access:
kubectl patch backupstoragelocation default -n velero --type merge --patch '{"spec":{"accessMode":"ReadOnly"}}'
Step 3: Restore the etcd deployment on the destination cluster
You can now restore the persistent volumes and integrate them with a new etcd deployment on the destination cluster.
Modify your context to reflect the destination cluster.
Install Velero on the destination cluster as described in Step 1. Remember to use the same values for the BUCKET-NAME and SECRET-FILENAME placeholders as you did originally, so that Velero is able to access the previously-saved backups.
velero install --provider gcp --plugins velero/velero-plugin-for-gcp:v1.0.0 --bucket BUCKET-NAME --secret-file SECRET-FILENAMEConfirm that the Velero deployment is successful by checking for a running pod using the command below:
kubectl get pods -n veleroRestore the persistent volumes in the same namespace as the source cluster using Velero.
velero restore create --from-backup etcd-backupConfirm that the persistent volumes have been restored:
kubectl get pvc --namespace defaultCreate a new etcd deployment. Use the same deployment name, credentials and other parameters as the original deployment. Replace the PASSWORD placeholder with the same database password used in the original release and the REPOSITORY placeholder with a reference to your Tanzu Application Catalog chart repository.
helm install etcd REPOSITORY/etcd \ --set auth.rbac.rootPassword=PASSWORD \ --set statefulset.replicaCount=3NOTE: It is important to create the new deployment on the destination cluster using the same namespace, deployment name, credentials and number of replicas as the original deployment on the source cluster.
This will create a new deployment that uses the original volumes (and hence the original data).
Connect to the new deployment and confirm that your original data is intact:
export POD_NAME=$(kubectl get pods --namespace default -l "app.kubernetes.io/name=etcd,app.kubernetes.io/instance=etcd" -o jsonpath="{.items[0].metadata.name}")
kubectl exec -it $POD_NAME -- etcdctl --user root:PASSWORD get /message1
kubectl exec -it $POD_NAME -- etcdctl --user root:PASSWORD get /message2
Here is an example of what you should see:
Useful links
- Tanzu Application Catalog etcd Helm chart
- etcd client application
etcdctl - Velero documentation
