


Overview of Application Single Sign-On
This topic tells you about concepts important to getting started with Application Single Sign-On (commonly called AppSSO).
Use this topic to learn how to:
- Set up your first authorization server.
- Provision a ClientRegistration.
- Deploy an application that uses the provisioned ClientRegistration to enable SSO.
After completing these steps, you can proceed with securing a Workload.
Prerequisites
You must install AppSSO on your Tanzu Application Platform cluster. For more information, see Install AppSSO.
Key concepts
At the core of AppSSO is the concept of an Authorization Server, outlined by the AuthServer custom resource. Service Operators create those resources to provision running Authorization Servers, which are OpenID Connect Providers. They issue ID Tokens to Client applications, which contain identity information about the end user such as email, first name, last name and so on.
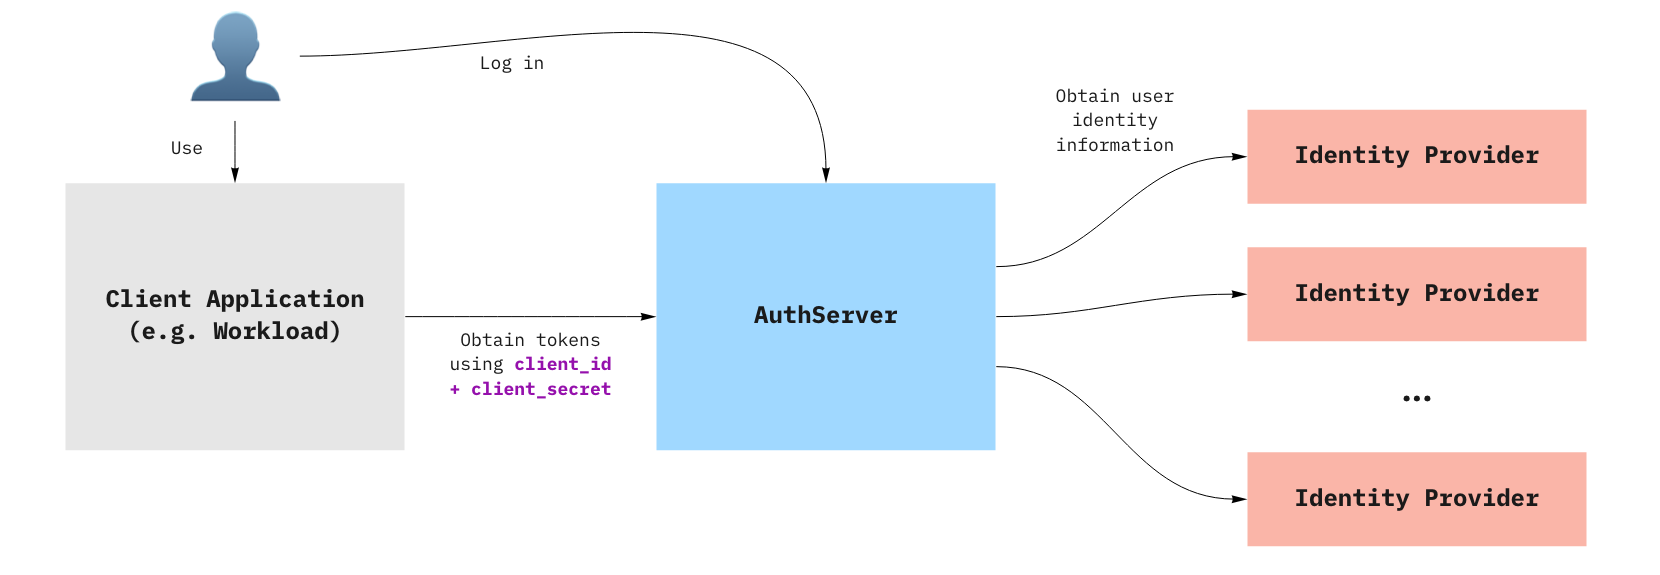
When a Client application uses an AuthServer to authenticate an End-User, the typical steps are:
- The End-User visits the Client application
- The Client application redirects the End-User to the AuthServer, with an OAuth2 request
- The End-User logs in with the AuthServer, usually using an external Identity Provider (e.g. Google, Azure AD)
- Identity Providers are set up by Service Operators
- AuthServers may use various protocols to obtain identity information about the user, such as OpenID Connect, SAML or LDAP, which may involve additional redirects
- The AuthServer redirects the End-User to the Client application with an authorization code
- The Client application exchanges with the AuthServer for an
id_token- The Client application does not know how the identity information was obtained by the AuthServer, it only gets identity information in the form of an ID Token.
ID Tokens are JSON Web Tokens containing standard Claims about the identity of the user (e.g. name, email, etc) and about the token itself (e.g. “expires at”, “audience”, etc.). Here is an example of an id_token as issued by an Authorization Server:
{
	"iss": "https://appsso.example.com",
	"sub": "213435498y",
	"aud": "my-client",
	"nonce": "fkg0-90_mg",
	"exp": 1656929172,
	"iat": 1656928872,
	"name": "Jane Doe",
	"given_name": "Jane",
	"family_name": "Doe",
	"email": "[email protected]",
	"roles": [
		"developer",
		"org-user"
	]
}
roles claim can only be part of an id_token when user roles are mapped and ‘roles’ scope is requested. For more information about mapping for OpenID Connect, LDAP and SAML, see:
- OpenID external groups mapping
- LDAP external groups mapping
- SAML (experimental) external groups mapping
ID Tokens are signed by the AuthServer, using Token Signature Keys. Client applications may verify their validity using the AuthServer’s public keys.
Next steps
