


Use these instructions to install the Isolation Segment tile, which allows you to isolate deployment workloads into dedicated resource pools called isolation segments.
Installing the tile installs a single isolation segment. However, you can install multiple isolation segments using the Replicator tool shown in Step 4.
After installing the tile, you must follow the procedure in Register an Isolation Segment in Managing Isolation Segments to create the isolation segment in the Cloud Controller database (CCDB). The topic also includes information about managing an isolation segment.
For more information about how isolation segments work, see Isolation Segments in TAS for VMs Security.
Step 1: (Optional) Configure Routing
By default, the VMware Tanzu Application Service for VMs (TAS for VMs) Gorouter handles traffic for your isolation segment. However, you can deploy a dedicated Gorouter for your isolation segment instead. For information about configuring and managing routing for isolation segments, see Routing for Isolation Segments.
To deploy a dedicated Gorouter:
-
Add a load balancer in front of the TAS for VMs Gorouter. The steps to do this depend on your IaaS, but the setup of the load balancer must mirror the setup of the load balancer for the TAS for VMs Gorouter that you configured in the TAS for VMs tile.
-
Create a wildcard DNS entry for traffic routed to any app in the isolation segment. For example,
*.iso.example.com. -
Attach the wildcard DNS entry to the load balancer you created.
Step 2: Install the Tile
To install the Isolation Segment tile:
-
Download the product file from the Isolation Segment page of VMware Tanzu Network.
-
Go to your Ops Manager URL in a browser to log in to the Ops Manager Installation Dashboard.
-
Click Import a Product and select the downloaded product file.
-
Under Isolation Segment in the left column, click the + icon.
Step 3: Configure the Tile
Click the orange Isolation Segment tile to start the configuration process.
Assign AZs and networks
In the Assign AZ and Networks pane, you assign jobs to your Availability Zones (AZs) and networks.
To configure the Assign AZ and Networks pane:
-
Select Assign AZs and Networks.
-
Select an AZ for your singleton jobs, and one or more AZs to balance other jobs in.
-
Select a network. This network does not need to be the same network where you deployed TAS for VMs. For most deployments, operators can create unique networks in which to deploy the Isolation Segment tile. These networks can maintain network reach with the Diego components because the Diego Cells can reach the Diego Brain and Diego Database VMs.
-
Click Save.
Configure Networking
In the Networking pane, you configure security and routing services for your IaaS.To configure the Networking pane:
- Select Networking.
- (Optional) Under Gorouter IPs, enter one or more static IP addresses for the Gorouters that handle this isolation segment. These IP addresses must be within the subnet CIDR block that you defined in the Ops Manager network configuration for your isolation segment. If you have a load balancer, configure it to point to these IP addresses.
Note: Entering the static IP addresses is not necessary for deployments running on a public IaaS such as AWS, GCP, or Azure because users specify the IaaS load balancer in the Resource Config pane of the Isolation Segment tile.
- If you want to use HAProxy for this isolation segment, enter at least one address in the HAProxy IPs field. You should specify more than one IP address for high availability. Then configure your load balancer to forward requests for the domains you have set up for your deployment to these IP addresses. For more information, see Configuring SSL/TLS Termination at HAProxy.
Note: If you rely on HAProxy for a feature in TAS for VMs and you want isolated networking for this isolation segment, you may want to deploy the HAProxy provided by the Isolation Segment tile.
- Under Certificates and private keys for the Gorouter and HAProxy, you must provide at least one certificate and private key name and certificate key pair for the Gorouter and HAProxy. The Gorouter and HAProxy are enabled to receive TLS communication by default. You can configure multiple certificates for the Gorouter and HAProxy.
Note: When providing custom certificates, enter them in this order:
wildcard,Intermediate,CA. For more information, see Creating a .pem File for SSL Certificate Installations in the DigiCert documentation.- Click Add to add a name for the certificate chain and its private key pair. This certificate is the default used by the Gorouter and HAProxy. You can either provide a certificate signed by a Certificate Authority (CA) or click on the Generate RSA Certificate link to generate a certificate generated by the Ops Manager CA. For the values to use, see Providing a Certificate for Your TLS Termination Point.
Note: If you configured Ops Manager Front End without a certificate, you can use this new certificate to complete Ops Manager configuration. To configure your Ops Manager Front End certificate, see Configure Front End in Preparing to Deploy Ops Manager on GCP.
- If you want to configure multiple certificates for the Gorouter and HAProxy, click Add and fill in the appropriate fields for each additional certificate key pair. For details about generating certificates in Ops Manager for your wildcard system domains, see Providing a Certificate for Your TLS Termination Point.
Note: Ensure that you add any certificates that you generate in this pane to your infrastructure load balancer.
- Click Add to add a name for the certificate chain and its private key pair. This certificate is the default used by the Gorouter and HAProxy. You can either provide a certificate signed by a Certificate Authority (CA) or click on the Generate RSA Certificate link to generate a certificate generated by the Ops Manager CA. For the values to use, see Providing a Certificate for Your TLS Termination Point.
- (Optional) When validating requests using mutual TLS to back ends and route services, the Gorouter trusts multiple CAs by default. You can use the following fields to configure which CA certificates Gorouter trusts:
- For backwards compatibility with older versions of Isolation Segment:
- Under Certificate Authorities trusted by the Gorouter for client requests, select Trust certs provided in "Certificate Authorities trusted by the Gorouter for back ends and route services".
- If you want the Gorouter to trust a particular set of CAs only:
- Under Certificate Authorities trusted by the Gorouter for client requests, select Only trust the following Certificate Authorities.
- Enter the CAs in the field that appears. When this option is selected, the Gorouter only trusts the provided CAs for client requests. It does not trust any well-known CAs that are provided with the stemcell.
- For backwards compatibility with older versions of Isolation Segment:
- Under TLS versions, select the range of TLS versions to use in Gorouter communications. The Gorouter supports TLS v1.2 to TLS v1.3 by default. If you need to accommodate clients that use an older version of TLS, select a lower minimum version. For a list of TLS ciphers supported by the Gorouter, see TLS cipher suite support in Securing traffic into TAS for VMs.
- (Optional) Under Load balancing algorithm, select either Round-robin or Least-connection as your load balancing algorithm for the Gorouter. Round-robin is selected by default, and VMware recommends this option for most use cases. Some use cases, such as those where apps have long-lived connections, might benefit from the least-connection algorithm. For more information, see Router balancing algorithm in HTTP Routing.
- Configure Logging of client IPs in the Gorouter. The Log client IPs option is set by default. To comply with the General Data Protection Regulation (GDPR), select one of these options To deactivate logging of client IP addresses:
- If your load balancer exposes its own source IP address, select Disable logging of X-Forwarded-For header only.
- If your load balancer exposes the source IP of the originating client, select Disable logging of both source IP and X-Forwarded-For header.
- Under TLS termination point, configure how TAS for VMs handles
x-forwarded-client-cert(XFCC) HTTP headers based on where TLS is terminated for the first time in your deployment. The table below indicates which option to choose based on your deployment configuration:
For a description of the behavior of each configuration option, see Forward Client Certificate to Apps in HTTP Routing.Deployment Configuration TLS Option Additional Notes - The load balancer is terminating TLS, and
- The load balancer is configured to put the client certificate from a mutual authentication TLS handshake into the X-Forwarded-Client-Cert HTTP header
Infrastructure load balancer Both HAProxy and the Gorouter forward the XFCC header when included in the request. - The load balancer is configured to pass through the TLS handshake through TCP to the instances of HAProxy, and
- HAProxy instance count is more than
0
HAProxy HAProxy sets the XFCC header with the client certificate received in the TLS handshake. The Gorouter forwards the header. Breaking Change: If you select the The Gorouter does not request client certificates option in the Gorouter behavior for client certificate validation field, the XFCC header cannot be delivered to apps.
- The load balancer is configured to pass through the TLS handshake through TCP to instances of the Gorouter
Gorouter The Gorouter strips the XFCC header if it is included in the request and forwards the client certificate received in the TLS handshake in a new XFCC header.
If you have deployed instances of HAProxy, app traffic bypasses those instances in this configuration. If you have also configured your load balancer to route requests for SSH directly to the Diego Brain, consider reducing HAProxy instances to0.Breaking Change: If you select the The Gorouter does not request client certificates option in the Gorouter behavior for client certificate validation field, the XFCC header cannot be delivered to apps.
- To configure HAProxy to handle client certificates, select one of the following options in the HAProxy behavior for client certificate validation field:
- HAProxy does not request client certificates: This option requires mutual authentication, which makes it incompatible with TLS termination point option HAProxy. HAProxy does not request client certificates, so the client does not provide them and no validation occurs. This is the default configuration.
- HAProxy requests but does not require client certificates: The HAProxy requests client certificates in TLS handshakes and validates them when presented, but does not require them. This option is required if you want to enable mutual TLS app identity verification and TLS is terminated for the first time at HAProxy.
Caution: Upon upgrade, TAS for VMs fails to receive requests if your load balancer is configured to present a client certificate in the TLS handshake with HAProxy but HAProxy has not been configured with the certificate authority used to sign it. To mitigate this issue, select HAProxy does not request client certificates or configure the HAProxy with the appropriate CA.
- To configure Gorouter behavior for handling client certificates, select one of the following options in the Gorouter behavior for client certificate validation field:
- The Gorouter does not request client certificates: Client certificates are not requested, so the client does not provide them and validation of client certificates does not occur. This option is incompatible with the TLS termination point options HAProxy and Gorouter because these options require mutual authentication.
- The Gorouter requests but does not require client certificates: The Gorouter requests client certificates in TLS handshakes and validates them when presented, but does not require them. This is the default configuration.
- The Gorouter requires client certificates: The Gorouter validates that the client certificate is signed by a Certificate Authority that the Gorouter trusts. If the Gorouter cannot validate the client certificate, the TLS handshake fails.
Requests to the platform fail upon upgrade if your load balancer is configured with client certificates and the Gorouter is not configured with the appropriate CA. To mitigate this issue, select The Gorouter does not request client certificates.
- In the TLS cipher suites for the Gorouter field, review the TLS cipher suites for TLS handshakes between the Gorouter and front end clients such as load balancers or HAProxy. The default value for this field is
ECDHE-RSA-AES128-GCM-SHA256:TLS_ECDHE_RSA_WITH_AES_256_GCM_SHA384.
To modify the default configuration, use an ordered, colon-separated list of Golang-supported TLS cipher suites in the OpenSSL format. This field does not apply to TLS v1.3. For TLS v1.3, the Gorouter only uses a set of default ciphers, and this is not configurable.
Verify that the ciphers are supported by any clients or front end components that initiate TLS handshakes with the Gorouter. For a list of TLS ciphers supported by the Gorouter, see TLS Cipher Suite Support in Securing Traffic into TAS for VMs.
Verify that every client participating in TLS handshakes with the Gorouter has at least one cipher suite in common with the Gorouter.Important Specify cipher suites that are supported by the versions configured under Select the range of TLS versions supported by the Gorouter. For example, TLS v1.3 does not support configuring cipher suites. If you select TLSv1.3 only, you cannot configure cipher suites for the Gorouter.
AWS Classic Load Balancers do not support the TAS for VMs default cipher suites. For more information about configuring your AWS load balancers and Gorouter, see TLS Cipher suite support by AWS load balancers in Securing traffic into TAS for VMs. - In the TLS cipher suites for HAProxy field, review the TLS cipher suites for TLS handshakes between HAProxy and front end clients such as load balancers and the Gorouter. The default value for this field is:
DHE-RSA-AES128-GCM-SHA256:DHE-RSA-AES256-GCM-SHA384:ECDHE-RSA-AES128-GCM-SHA256:ECDHE-RSA-AES256-GCM-SHA384
To modify the default configuration, use an ordered, colon-separated list of TLS cipher suites in the OpenSSL format. Operators should verify that the ciphers are supported by any clients or front end components that initiate TLS handshakes with HAProxy.
Verify that every client participating in TLS handshakes with HAProxy has at least one cipher suite in common with HAProxy.Note: Specify cipher suites that are supported by the versions configured in the Minimum version of TLS supported by the Gorouter and HAProxy field.
- Under HAProxy forwards all requests to the Gorouter over TLS, select Enable or Disable based on your deployment layout.
- To enable communication between HAProxy and the Gorouter:
- Verify that Enable is selected.
- In the Certificate authority for HAProxy back end field, provide the CA that signed the certificate you configured in the Certificates and private keys for the Gorouter and HAProxy field.
Note: If you used the Generate RSA Certificate link to generate a certificate, then the CA to specify is the Ops Manager CA, which you can locate at the
/api/v0/certificate_authoritiesendpoint in the Ops Manager API. - Make sure that the Gorouter and HAProxy have TLS cipher suites in common in the TLS cipher suites for the Gorouter and TLS cipher suites for HAProxy fields.
For more information, see Terminating TLS at the Load Balancer and Gorouter in Securing Traffic into TAS for VMs, Providing a Certificate for Your TLS Termination Point, and Using the Ops Manager API.
- To use non-encrypted communication between HAProxy and the Gorouter:
- Select Disable.
- If you are not using HAProxy, set the number of HAProxy job instances to
0in the Resource Config pane. For more information, see Scale Down and Deactivate Resources.
For more information, see Terminating TLS at the Gorouter Only and Terminating TLS at the Load Balancer Only in Securing Traffic into TAS for VMs.
- To enable communication between HAProxy and the Gorouter:
- (Optional) To force browsers to use HTTPS when making requests to HAProxy, select Enable under HAProxy support for HSTS and complete these optional configuration steps:
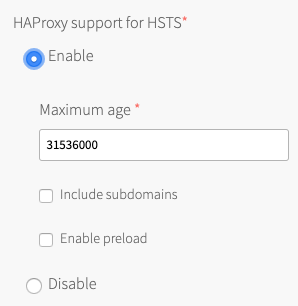
- Enter a Maximum age in seconds for the HSTS request. HAProxy forces HTTPS requests from browsers for the duration of this setting. The maximum age is one year, or 31536000 seconds.
- Enable the Include subdomains check box to force browsers to use HTTPS requests for all component subdomains.
- Select the Enable preload check box to force instances of Google Chrome, Firefox, and Safari that access your HAProxy to refer to their built-in lists of known hosts that require HTTPS, of which HAProxy is one. This ensures that the first contact a browser has with your HAProxy is an HTTPS request, even if the browser has not yet received an HSTS header from HAProxy.
- (Optional) If you want the Gorouter to reject any unencrypted traffic, select the Reject HTTP requests check box. When this check box is selected, the Gorouter does not listen on port
80. - (Optional) To configure the Gorouter to only generate secure cookies, select the Do not use insecure cookies check box.
- (Optional) To deactivate the addition of Zipkin tracing headers on the Gorouter, deselect the Enable Zipkin tracing headers on the Gorouter check box. Zipkin tracing headers are enabled by default. For more information about using Zipkin trace logging headers, see HTTP headers for zipkin tracing in HTTP routing.
- (Optional) To activate the addition of W3C tracing headers on the Gorouter, select the Add W3C tracing headers check box. W3C tracing headers are disabled by default. Specify W3C tracing tenant ID name in W3C tenant ID field. If specified, the tracestate identifier will be "tenant-id@gorouter" where "tenant-id" is the value specified. If not specified, the tracestate identifier will be "gorouter." For more information about using W3C trace logging headers, see HTTP headers for W3C tracing in HTTP routing.
- (Optional) The Allow the Gorouter to write access logs locally check box is selected by default. VMware recommends deselecting this check box for high-traffic deployments, since logs might not be rotated fast enough and can fill up the disk.
- (Optional) By default, the Gorouter does not accept PROXY requests. To configure the Gorouter to accept PROXY requests, select the Accept PROXY requests check box. When you select this check box, client-side load balancers that stop TLS but do not support HTTP can pass along information from the originating client using the PROXY protocol. Configuring this option might impact Gorouter performance. For more information about configuring the Gorouter to accept PROXY requests, see the About HTTP header forwarding sections in Securing Traffic into TAS for VMs.
- Bypass security checks for route service lookup has potential security concerns, but may be needed for backwards compatibility. For more information, see Route Services.
- (Optional) If you want to limit the number of app connections to the back end, enter a value in the Maximum connections per back end field. You can use this field to prevent a poorly behaving app from all the connections and impacting other apps. No value or a value of
0sets no limit.
To determine a value to configure in this field, review the highest number of concurrent connections that instances of the most popular apps in your deployment have received. You can determine the number of concurrent connections for an app by reviewing thehttpStartStopevent metrics emitted for each app request. If your deployment uses App Metrics, you can also find this information in your App Metrics deployment. For more information, see the App Metrics documentation. - Under Keep-alive connections, select one of the following options:
- Allow: The Gorouter maintains TCP connections after receiving an HTTP response. This option is selected by default.
- Do not allow: The Gorouter closes TCP connections after receiving an HTTP response.
- (Optional) To accommodate larger uploads over connections with high latency, increase the number of seconds in the Back end request timeout and idle timeout for the Gorouter field.
- (Optional) Increase the value of Load balancer unhealthy threshold to specify the amount of time, in seconds, that the Gorouter continues to accept connections before shutting down. During this period, health checks may report the Gorouter as unhealthy, which causes load balancers to failover to other Gorouters. Set this value to an amount greater than or equal to the maximum time it takes your load balancer to consider a Gorouter instance unhealthy, given repeated failed health checks.
- (Optional) Modify the value of Load balancer healthy threshold. This field specifies the amount of time, in seconds, to wait until declaring the Gorouter instance started. This allows an external load balancer time to register the Gorouter instance as healthy.
- (Optional) If app developers in your organization want certain HTTP headers on HTTP Requests to appear in their app logs with information from the Gorouter, specify them in the HTTP headers to log field with a comma-separated list. For example, to support app developers that deploy Spring apps to TAS for VMs, you can enter Spring-specific HTTP headers.
- (Optional) If app developers in your organization want certain HTTP headers on HTTP Requests to appear in their app logs with information from the Gorouter, specify them in the HTTP headers to log field with a comma-separated list. For example, to support app developers that deploy Spring apps to TAS for VMs, you can enter Spring-specific HTTP headers. The Gorouter always logs the following HTTP request headers: * `Referer` * `User-Agent` * `X-Forwarded-For` * `X-Forwarded-Proto` * `X-Vcap-Request-ID` For **Maximum request header size**, enter the maximum total size (in KB) that all headers in a request to the Gorouter might have combined, including header keys, header values, and all values in the request line. Configuring this field allows TAS for VMs to prevent denial-of-service attacks from requests with large headers. Requests with headers that exceed this limit cause a `431` status code. Enter a value between `1` and `1024`. VMware recommends configuring a limit of `48`. To account for backwards compatibility, you can configure a higher limit, if required. Configuring this field does not limit the size of the request body.
- If you expect requests larger than the default maximum of 16.384 KB, enter a new value in bytes for HAProxy request maximum buffer size. You may need to do this, for example, to support apps that embed a large cookie or query string values in headers. Requests larger than the maximum value result in a gateway error.
- If your TAS for VMs deployment uses HAProxy and you want it to receive traffic only from specific sources, configure these fields:
- HAProxy protected domains: Enter a comma-separated list of domains to protect from unknown source requests.
- (Optional) HAProxy trusted CIDRs: Enter a space-separated list of CIDRs to limit which IP addresses from the HAProxy protected domains can send traffic to TAS for VMs.
- For DNS search domains, enter DNS search domains as a comma-separated list. Your containers append these search domains to hostnames to resolve them into full domain names.
- The Enable Silk policy enforcement checkbox is selected by default. To deactivate Silk network policy enforcement between apps, deselect the checkbox. Deactivating network policy enforcement allows all apps to send network traffic to all other apps in the foundation despite no policy specifically allowing it.
- (Optional) In the Sticky session cookies field, enter one or more sticky session cookie names. The default cookie name is
JSESSIONID. Some apps require a different cookie name. For example, Spring WebFlux requiresSESSIONfor the cookie name. Gorouter uses these cookies to support session affinity, or sticky sessions. For more information, see Session Affinity in HTTP Routing. - (Optional) For additional security, enter headers that you want the Gorouter to remove from app responses in Remove specified HTTP response headers.
- Click Save.
Configure app containers
In the App Containers pane, you enable microservice frameworks, private Docker registries, and other services that support your apps at the container level.
To configure the App Containers pane:
-
Select App Containers.
-
Choose how the Gorouter verifies app identity to enable encryption and prevent misrouting under Gorouter app identity verification:
- The Gorouter uses TLS to verify app identity: Enables the Gorouter to verify app identity using TLS. This is the default option.
- The Gorouter and apps use mutual TLS to verify each other’s identity: Enables your apps and the Gorouter to verify each other’s identity using mutual TLS (mTLS). This option deactivates TCP routing because app containers accept incoming communication only from the Gorouter.
For more information, see Preventing Misrouting in HTTP Routing.
-
(Optional) You can configure TAS for VMs to run app instances in Docker containers by provided a comma-separated list of their IP address ranges in the Private Docker insecure registry allow list field. For more information, see Using Docker Registries.
-
Select your preference for disk cleanup scheduling. If you select Clean up disk space once usage fills disk, enter a value in MB for Reserved disk space for other jobs. This is the amount of space the garbage collection algorithm must keep free for other jobs. For more information about the configuration options and how to configure a reserved amount, see Configuring Diego Cell Disk Cleanup Scheduling.
-
The Enable containerd delegation check box governs whether or not Garden delegates container create and destroy operations to the containerd tool. By default, this option is enabled and Garden uses containerd. Deactivate this option by disabling the check box. For more information about the containerd tool, see containerd.
-
Under NFSv3 volume services, select Allow or Do not allow. NFS volume services allow app developers to bind existing NFS volumes to their apps for shared file access. For more information, see Enabling Volume Services.
Note In a fresh installation, NFSv3 volume services are enabled by default. In an upgrade, NFSv3 volume services is set to the same setting as it was in the previous deployment.
-
(Optional) To configure LDAP for NFSv3 volume services:
- For LDAP service account user, enter the username of the service account in LDAP that manages volume services.
- For LDAP service account password, enter the password for the service account.
- For LDAP server host, enter the hostname or IP address of the LDAP server.
- For LDAP server port, enter the LDAP server port number. If you do not specify a port number, Ops Manager uses 389.
- For LDAP user search base, enter the location in the LDAP directory tree from which any LDAP user search begins. The typical LDAP search base matches your domain name.
For example, a domain namedcloud.example.comtypically uses the following LDAP user search base:ou=Users,dc=example,dc=com. - (Optional) For LDAP server CA certificate, you can enter a certificate if your LDAP server supports TLS and you want to enable TLS connections from the NFS driver to your LDAP server. Paste in the root certificate from your CA certificate or your self-signed certificate.
Note: UAA can only parse one certificate entered into this field. If you enter multiple certificates, UAA only uses the first one you entered and ignores the rest. You only need to include one root certificate or self-signed certificate.
-
(Optional) To limit the number of log lines each app instance in your isolation segment can generate per second, select Enable under App log rate limit (beta) and enter the Maximum app log lines per second. At minimum, VMware recommends using the default limit of
100. This feature is deactivated by default. Disabling this feature may cause an app instance to overload the Loggregator Agent with logs, which may result in the Loggregator Agent dropping logs for other app instances. Otherwise, it may report inaccurate app metrics in the cf CLI or increase the CPU usage on the Diego Cell VM. If you configure a log rate limit, you can monitor theAppInstanceExceededLogRateLimitCountmetric for the number of app instances that exceed the log rate limit. -
Click Save.
Configure system logging
In the System Logging pane, you can configure system logging in TAS for VMs to forward log messages from TAS for VMs component VMs to an external service. VMware recommends forwarding logs to an external service for use in troubleshooting. If you do not fill these fields, platform logs are not forwarded but remain available on the component VMs and for download through Ops Manager.
To configure the System Logging pane:
-
Select System Logging.
-
Select an option under Configure syslog for system components?. No is selected by default. This setting only affects Diego Cell, Gorouter, and HAProxy components within the isolation segment. This setting does not affect shared TAS for VMs system components.
-
To use syslog, select Yes.
-
Enter the address of your external syslog aggregation service in the Address field. The address can be a hostname or IP address.
-
Enter a port number in the Port field.
-
Select a protocol from the Transport protocol menu. This is the protocol the system uses to transmit logs to syslog.
-
(Optional) To transmit logs over TLS, select the Enable TLS check box.
-
Enter a Permitted peer.
-
Paste the certificate for your TLS certificate authority (CA) in the TLS CA certificate field.
-
(Optional) Enable the Use TCP for file forwarding local transport check box to transmit logs over TCP. This prevents log truncation, but may cause performance issues.
-
(Optional) The Do not forward debug logs check box is enabled by default. To forward
DEBUGsyslog messages to an external service, deselect the check box.ImportantSome Isolation Segment components generate a high volume of
DEBUGsyslog messages. Enabling the Do not forward debug logs check box prevents TAS for VMs components from forwarding theDEBUGsyslog messages to external services. However, Isolation Segment still writes the messages to the local disk. -
(Optional) To specify a custom syslog rule, enter it in the Custom rsyslog configuration field in RainerScript syntax. For more information about customizing syslog rules, see Customizing Syslog Rules. For more information about RainerScript, see the RainerScript documentation.
-
Click Save.
Configure Advanced Features
The Advanced Features pane includes new capabilities that might have certain constraints. Although these features are fully supported, VMware recommends caution when using them in production environments.
Do not deploy Diego Cells
If you intend to deploy Diego Cells only through one or more isolation segment deployments, use this option to remove all Diego Cells from the TAS for VMs deployment. You might wish to do this to completely separate updates to Diego Cells from updates to the rest of the TAS for VMs deployment.
Important At least one isolation segment must deploy non-isolated Diego cell VMs so that the TAS for VMs installation has the shared Diego cells that are necessary to host system components that run as apps. Do not deploy app-based system components or run smoke-test errands until the non-isolated Diego cells in these isolation segment deployments are present.
Diego Cell Memory and Disk Overcommit
If your apps do not use the full allocation of disk space and memory set in the Resource Config tab, you might want use this feature. These fields control the amount to overcommit disk and memory resources to each Diego Cell VM.
For example, you might want to use the overcommit if your apps use a small amount of disk and memory capacity compared to the amounts set in the Resource Config settings for Diego Cell.
Note: Due to the risk of app failure and the deployment-specific nature of disk and memory use, VMware has no recommendation for how much, if any, memory or disk space to overcommit.
To enable overcommit:
-
Select Advanced Features.
-
Enter in MB the total desired amount of Diego Cell memory in the Diego Cell memory capacity field. See the Diego Cell row in the Resource Config tab for the current Diego Cell memory capacity settings that this field overrides.
-
Enter in MB the total desired amount of Diego Cell disk capacity in the Diego Cell disk capacity field. See the Diego Cell row in the Resource Config tab for the current Diego Cell disk capacity settings that this field overrides.
-
Click Save.
Note: Entries made to each of these two fields set the total amount of resources allocated, not the overage.
App Graceful Shutdown Period
If your apps require a longer period of time to finish in-flight jobs and gracefully shut down, you can increase the graceful shutdown period. By default, this graceful shutdown period is set to 10 seconds.
When TAS for VMs requests a shutdown of an app, the processes in the container have a period of time to gracefully shut down before the processes are forcefully terminated. For more information, see Shutdown in App Container Lifecycle.
If you significantly increase the value of the graceful shutdown period, platform upgrades and updates might become slower. This is because each Diego Cell uses the graceful shutdown period when it is cleaning up evacuated app instances and waits for each app to gracefully shut down.
VMware recommends using isolation segments to separate apps that have different shutdown requirements to ensure Diego Cell update times are reliable.
Note: You must ensure that App graceful shutdown period has the same value in all environments that have deployed apps. This is to avoid unexpected behavior.
To increase the app graceful shutdown period:
-
Select Advanced Features.
-
Enter an integer in the App graceful shutdown period field. This value is the period of time in seconds the platform should wait for an app instance to exit after it is signaled to gracefully shut down. The default and minimum value is
10. -
Click Save.
SMB Volume Services
Enabling SMB volume services allows developers to bind existing SMB shares to their apps for shared file access.
To enable SMB volume services:
-
Select Advanced Features.
-
Select the Enable SMB volume services checkbox.
-
Click Save.
-
In the Errands pane of the TAS for VMs tile, set the SMB Broker Errand to On.
-
Click Save.
For more information about SMB volume services, see Enabling volume services.
Configure compute and networking Isolation
In the Compute and Networking Isolation pane, you can activate or deactivate compute isolation and configure Gorouter sharding for isolation segments.
Compute isolation is when an app runs on compute resources, such as clusters, resource pools, and servers, that are isolated from other resources by a network partition or firewall.
Networking isolation, or Gorouter sharding, is when traffic to an app instance uses a dedicated route that is isolated from routes used by other app instances by a network partition or firewall rule.
In the Isolation Segment tile, you cannot deactivate compute isolation and enable networking isolation at the same time. This is because networking isolation configures the route by which traffic goes to the Isolation Segment tile. Both compute and networking isolation are enabled by default.
Options for configuring compute and networking isolation
The table below describes the ways VMware recommends configuring the Compute and Networking Isolation pane and the Gorouter isolation segment request handling property in the Networking pane of the TAS for VMs tile:
| Use case | Compute isolation | Gorouter sharding mode | Gorouters reject requests for isolation segments (TAS for VMs tile) | Other requirements | Scaling recommendations |
|---|---|---|---|---|---|
| Use compute isolation and network isolation | Enabled | Isolation segment only | Reject requests for all isolation segments | Isolation Segment has its own load balancer and uses a different domain from TAS for VMs | Apps in the isolation segment can have their own Diego Cells and Gorouters. |
| Use compute isolation and extra Isolation Segment Gorouters | Enabled | Isolation segment only | Accept requests for all isolation segments | Isolation Segment has its own load balancer and uses the same domain as TAS for VMs | Apps in the isolation segment can have their own Diego Cells and Gorouters. |
| Use compute isolation only | Enabled | No isolation segment | Accept requests for all isolation segments | Isolation Segment uses TAS for VMs load balancer and domain | Scale Isolation Segment Gorouters to 0. |
| Use network isolation in some cases | See other rows for guidance | See other rows for guidance | Accept requests for some isolation segments | See other rows for guidance | See other rows for guidance |
The use cases from the previous table are described here:
-
Use compute isolation and network isolation: The most common use case is to enable compute isolation, networking isolation, and the Gorouters reject requests for isolation segments check box in the Networking pane of the TAS for VMs tile. This configuration routes traffic between an isolation segment and a block of compute resources that is dedicated solely to that isolation segment. It also ensures that no traffic is routed through the TAS for VMs Gorouters.
-
Use compute isolation and extra Isolation Segment Gorouters: To configure traffic for your isolated apps to pass through the Gorouters for both Isolation Segment and TAS for VMs, activate compute isolation and networking isolation, and deactivate the Gorouters reject requests for isolation segments check box in TAS for VMs. You can also use either the same apps domain you configured in the Domains pane of the TAS for VMs tile, or a different domain that you configure with the DNS for the load balancer for the Isolation Segment Gorouters. This configuration is useful if you want to configure isolated compute resources for your apps but do not have additional networking restrictions.
-
Use compute isolation only: To configure the TAS for VMs load balancer and apps domain route requests from your isolated apps, you can enable compute isolation, deactivate networking isolation, and deactivate the Gorouters reject requests for isolation segments check box in TAS for VMs. This configuration enables you to move Diego Cells out of TAS for VMs and into isolation segments, so you can upgrade TAS for VMs first and your Isolation Segment tiles as time permits. This allows you to upgrade a large foundation in pieces, making it easier to upgrade within scheduled maintenance windows. This configuration is useful if your foundation has additional compute resource blocks, but no additional Gorouters for Isolation Segment configured in the Resource Config pane.
-
Use network isolation in some cases: For this use case, select “Accept some” for the Gorouter isolation segment request handling radio button in the Networking pane of the TAS for VMs tile. Then provide a comma-separated list of Isolation Segment names that Gorouters accept traffic to. See other cases for guidance on how to configure each Isolation Segment.
Caution: If you configure the Compute and Networking Isolation pane and the Gorouters reject requests for isolation segments check box in the TAS for VMs tile in a manner other than the use cases described previously, the smoke tests fail. To deploy the tile anyway, you must deactivate the Smoke Test errand in the Errands pane of the TAS for VMs tile. VMware does not recommend disabling smoke tests. To configure the Smoke Test errand, see Configure Errands.
Configure compute and networking isolation pane
To configure the Compute and Networking Isolation pane:
-
Select Compute and Networking Isolation.
-
Under Compute isolation, activate or deactivate compute isolation:
- To deactivate compute isolation, select Disable. Select this option if you do not require compute isolation and you are deploying the Isolation Segment tile for the purpose of making upgrades more manageable. For example, if you have a TAS for VMs tile with a large volume of Diego Cells. This approach helps separate the upgrade of the TAS for VMs control plane from the upgrade of the Diego Cells. Further, it splits the upgrade of the Diego Cells into smaller groups.
- To activate compute isolation, select Enable and enter a placement tag for your Diego Cells in the Segment name field. This placement tag identifies the Diego Cells that run in your isolation segment and must be unique across your Ops Manager deployment. You use this placement tag when following the steps in Register an Isolation Segment in Managing Isolation Segments to create the isolation segment in the CCDB.
Note: If you deactivate compute isolation, you must set Gorouter sharding mode to No isolation segment. Otherwise, the Isolation Segment tile fails to schedule the apps in your isolation segment.
-
Under Gorouter sharding mode, activate or deactivate networking isolation by selecting a sharding mode. For more information, see Sharding Gorouters for Isolation Segments in Routing for Isolation Segments.
- Isolation segment only: The Gorouters for the TAS for VMs tile acknowledge requests only for apps deployed within the Diego Cells of the tile. All other requests fail.
- No isolation segment: The Gorouters for the TAS for VMs tile reject requests for any isolation segment. Choose this option to add a group of Gorouters for the TAS for VMs tile, such as when you want a private point of entry for the system domain or to configure a group of Gorouters to receive requests from your corporate intranet.
Configure smoke tests
In the Smoke Tests pane, you specify the org and space where smoke tests are run. In the org and space that you specify, the Smoke Test errand pushes the app to a Ops Manager org. The app runs basic functionality tests against both the TAS for VMs and Isolation Segment tiles after an installation or update.
The Smoke Test errand verifies that your deployment can:
-
Push, scale, and delete apps
-
Create and delete orgs and spaces
The Smoke Test errand is on by default. You can turn off the Smoke Test errand in the Errands pane. For more information, see Configure Errands.
To configure the Smoke Tests pane:
-
Select Smoke Tests.
-
(Optional) In Domain, enter the name of the apps domain that Isolation Segment uses when pushing an app to run smoke tests.
- To configure routing from the isolation segment to either the TAS for VMs or Isolation Segment Gorouters, enter the apps domain you configured in the Domains pane of the TAS for VMs tile.
- To configure separate routing for the isolation segment, enter a different apps domain.
-
If you have a shared apps domain, select A temporary space within the system org, which creates a temporary space within the system org for running smoke tests and deletes the space afterwards. Otherwise, select A specified org and space and complete these fields to configure where Isolation Segment pushes an app to run smoke tests:
- For Org, enter the org Isolation Segment uses when pushing an app to run smoke tests.
- For Space, enter the space Isolation Segment uses when pushing an app to run smoke tests.
-
Click Save.
Caution: If you configure the Compute and Networking Isolation pane and the Gorouters reject requests for isolation segments check box in the TAS for VMs tile in a manner other than the use cases described in Options for Configuring Compute and Networking Isolation, the smoke tests fail.
Configure Errands
Errands are scripts that Ops Manager runs automatically when it installs or uninstalls a product, such as a new version of TAS for VMs. There are two types of errands: post-deploy errands run after the product is installed, and pre-delete errands run before the product in uninstalled.
By default, Ops Manager always runs all errands.
In the Errands pane, you can select On to always run an errand or Off to never run it.
For more information about how Ops Manager manages errands, see Managing Errands in Ops Manager.
- You configure the Compute and Networking Isolation pane and the Gorouter isolation segment request handling check box in the TAS for VMs tile in a manner other than the use cases described in Options for Configuring Compute and Networking Isolation. Otherwise, apps fail to schedule in Isolation Segment.
- Both the V2 and V1 Firehoses are deactivated in TAS for VMs. Otherwise, the deploy fails.
Configure Resources
In the Resource Config pane, you must associate load balancers with the VMs in your deployment to enable traffic.
To configure the Resource Config pane:
-
Select Resource Config.
-
If you are using a dedicated Gorouter for your isolation segment:
NoteThe configuration settings available in Resource Config vary depending on your IaaS.
- If you have the Load Balancers column in your Resource Config:
- Enter the wildcard DNS entry attached to your load balancer into the Router row under Load Balancers.
- If you do not have the Load Balancers column in your Resource Config:
- Go to the Networking pane.
- Specify Gorouter IPs.
- Attach the IP addresses to your load balancer manually.
- If you have the Load Balancers column in your Resource Config:
After tile configuration
After you configure the Isolation Segment tile:
-
Register the isolation segment in the CCDB by following the procedure in Register an Isolation Segment in Managing Isolation Segments.
Note: If you run smoke tests as a post-deploy errand in the Isolation Segment tile, the smoke tests check if your isolation segment in registered in the Cloud Controller database (CCDB). If not, the smoke tests register it in the CCDB. This eliminates the need to manually register the isolation segment with the
cf create-isolation-segmentcommand. For more information about running smoke tests, see Configure Smoke Tests. -
Return to the Ops Manager Installation Dashboard.
-
Click Review Pending Changes, then Apply Changes to deploy the tile.
After the tile finishes deploying, see Managing Isolation Segments for more information about managing an isolation segment.
Step 4: Copy the tile (optional)
To create multiple isolation segments, you can copy the Isolation Segment tile with the Replicator tool.
To create multiple isolation segments:
-
Download the Replicator tool from the Isolation Segment page of VMware Tanzu Network.
-
Go to the directory where you downloaded the Replicator tool.
-
Replicate the tile by running:
./replicator \
      --name "TILE-NAME" \
      --path /PATH/TO/ORIGINAL.pivotal \
      --output /PATH/TO/COPY.pivotal
Where:
TILE-NAMEis a unique name you provide for the new Isolation Segment tile. The name must be ten characters or less and only contain alphanumeric characters, dashes, underscores, and spaces./PATH/TO/ORIGINAL.pivotalis the absolute path to the original Isolation Segment tile you downloaded from VMware Tanzu Network./PATH/TO/COPY.pivotalis the absolute path for the copy that the Replicator tool produces.
-
Follow the procedures in this topic using the new
.pivotalfile, starting with Step 1.
Upgrading Replicated Tiles
For information about upgrading replicated Isolation Segment tiles, see Upgrading Replicated Tiles in Upgrading TAS for VMs and Other Ops Manager Products.
