


This topic explains how to manually integrate Cloud Native Storage (CNS) with VMware Tanzu Kubernetes Grid Integrated Edition (TKGI) on vSphere using the vSphere Container Storage Interface (CSI) driver. This integration enables TKGI clusters to use external container storage.
This topic provides procedures for installing CSI on a TKGI cluster, verifying the installation and resizing PersistentVolumes.
Note: CSI can only be installed on a Linux TKGI cluster.
Overview
Cloud Native Storage (CNS) provides comprehensive data management for stateful, containerized apps, enabling apps to survive restarts and outages. Stateful containers can use vSphere storage primitives such as standard volume, PersistentVolume, and dynamic provisioning, independent of VM and container lifecycle.
vSphere storage backs the volumes, and you can set a storage policy directly on the volumes. After you create the volumes, you can use the vSphere client to review the volumes and their backing virtual disks, and monitor their storage policy compliance.
For more information, see Getting Started with VMware Cloud Native Storage.
To create PersistentVolumes using CNS on vSphere, see:
- Prerequisites for using the vSphere CSI Driver with TKGI
- Install the vSphere CSI Driver on a TKGI Cluster
- Create a vSphere Storage Class
To resize a PersistentVolume, see:
To upgrade the vSphere CSI driver, see:
vSphere CSI Driver Supported Features and Requirements
The vSphere CSI Driver supports different features depending on driver version, environment and storage type.
TKGI supports only the following vSphere CSI Driver features:
- Enhanced Object Health in UI for vSAN Datastores
- Dynamic Block PV support*
- Dynamic Virtual Volume (vVOL) PV support
- Static PV Provisioning
- Kubernetes Multi-node Control Plane support
- Encryption support via VMcrypt*
-
Dynamic File PV support*
*For information on the usage limitations and environment and version requirements of these vSphere CSI Driver features, see Compatibility Matrices for vSphere Container Storage Plug-in in the VMware vSphere Container Storage Plug-in documentation.
For information on the vCenter, datastore, and cluster types supported by the vSphere CSI Driver, see vSphere Functionality Supported by vSphere Container Storage Plug-in in the VMware vSphere Container Storage Plug-in documentation.
For information on the scaling limitations of the vSphere CSI Driver, see Configuration Maximums for vSphere Container Storage Plug-in in the VMware vSphere Container Storage Plug-in documentation.
Prerequisites for Using the vSphere CSI Driver with TKGI
Before you use the vSphere CSI Driver, your environment must meet the following requirements:
- A Linux TKGI cluster. CSI on a Windows TKGI cluster is not supported.
- The vSphere CSI Driver must be a compatible version: The vSphere CSI Driver you use must be compatible with the Kubernetes version installed with TKGI. For more information see Compatibility Matrix for vSphere Container Storage Plug-in in the vSphere CSI Driver documentation.
Note: VMware recommends using vSphere CSI Driver v2.4 or later with TKGI v1.13.
For instructions on how to upgrade the vSphere CSI Driver version, see Upgrade the vSphere CSI Driver on a TKGI Cluster below. - The vSphere CSI Driver requirements have been met: For more information, see Prerequisites for Installing the vSphere Container Storage Plug-in.
- Plan Configuration: The Allow Privileged setting must be enabled in the TKGI tile for the plans you use with the vSphere CSI Driver. To enable this setting, see Installing TKGI on vSphere.
- The following must have access to your vCenter:
- Cluster control plane nodes.
- Cluster worker nodes. You must enable this access in order for vSphere CSI Driver components on worker nodes to provision disks.
- All Pods that are running vSphere CSI Driver components.
- vSphere v7.0 or vSphere v6.7U3: vSphere must be vSphere v7.0 or later or vSphere v6.7U3 or later.
Install the vSphere CSI Driver on a TKGI Cluster
This section provides procedures for manually installing CSI on a TKGI cluster. Installing CSI on a TKGI cluster requires a number of steps:
Create a TKGI Cluster
To create a TKGI-provisioned Kubernetes cluster:
-
Create a cluster using TKGI create-cluster:
tkgi create-cluster CLUSTER-NAME --external-hostname EXTERNAL-HOSTNAME  \
--plan PLAN-NAME --num-nodes 3 --network-profile single-tier-profile
Where:
CLUSTER-NAMEis the name you want to apply to your new cluster.
Note: Use only lowercacse characters when naming your cluster if you manage your clusters with Tanzu Mission Control (TMC). Clusters with names that include an uppercase character cannot be attached to TMC.
EXTERNAL-HOSTNAMEis the address from which to access Kubernetes API.PLAN-NAMEis the name of the plan to base the new cluster on. To provide the ability to resize the cluster’s PersistentVolume chose a plan where Allow Privileged is selected. For more information, see Plans in Installing Tanzu Kubernetes Grid Integrated Edition on vSphere with NSX-T.
tkgi create-cluster tkgi-cluster-5-shared-t1 --external-hostname tkgi-cluster-5-shared-t1 --plan large --num-nodes 3 --network-profile single-tier-profile -
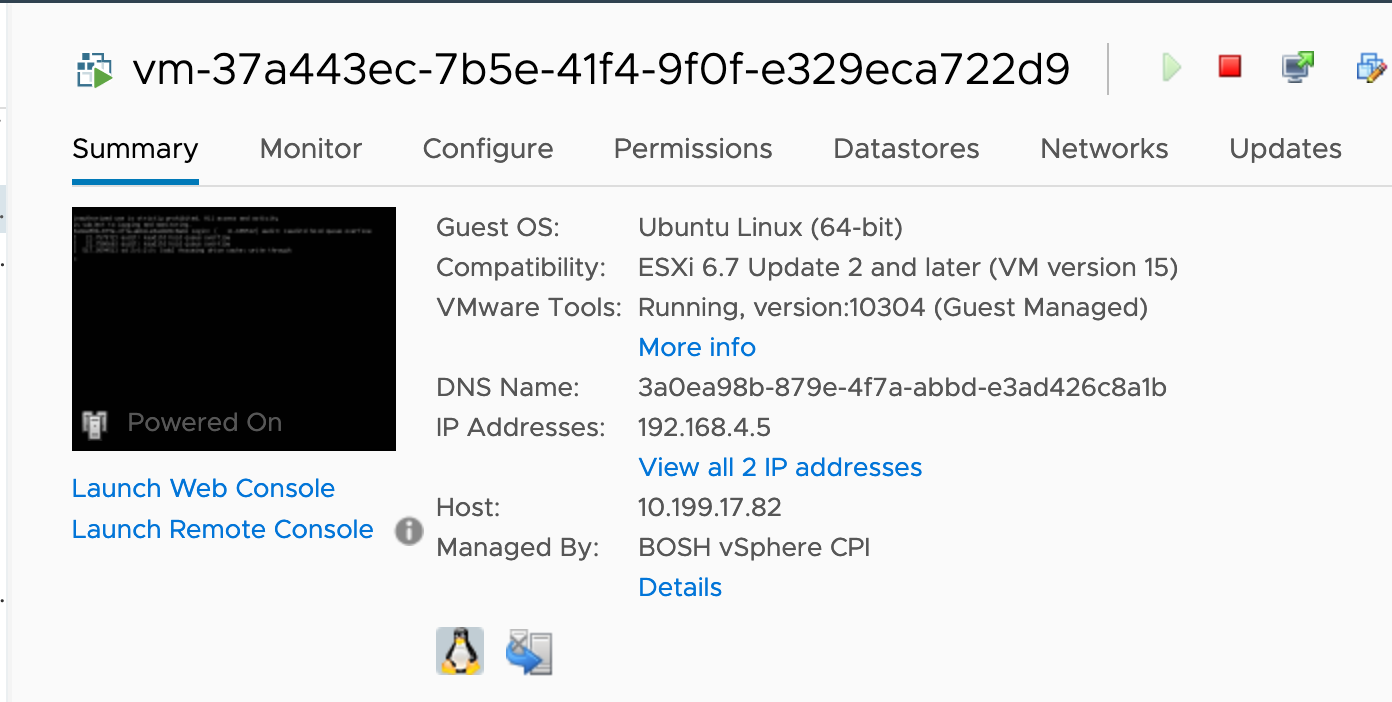
Confirm that all of the VMs in the Kubernetes cluster have hardware compatible with VMware version 15.
Customize Your CSI Driver Configuration
You must customize your vSphere CSI Driver configuration files before manually deploying the vSphere CSI Driver.
Note: For vSphere CSI Driver v2.3.0 and later a single vsphere-csi-driver.yaml manifest file is used instead of the separate vsphere-csi-controller-deployment.yaml and vsphere-csi-node-ds.yaml manifest files used in prior versions.
To download and customize the vSphere CSI Driver configuration files:
-
Download the compatible vSphere CSI Driver manifest files from the kubernetes-sigs/vsphere-csi-driver GitHub repository. For example, download the v2.4 drivers from https://github.com/kubernetes-sigs/vsphere-csi-driver/tree/v2.4.0/manifests/vanilla.
-
Modify the vSphere CSI Driver
vsphere-csi-driver.yamlconfiguration file:-
Remove the following nodeselector from the
vsphere-csi-controllerDeployment section:nodeSelector: node-role.kubernetes.io/master: "" - In the
vsphere-csi-nodeDaemonSet section, replace all occurrences of/var/lib/kubeletwith/var/vcap/data/kubelet.
-
Install the vSphere CSI Driver
To install the vSphere CSI Driver:
- Complete the pre-installation configuration steps in Deploy the vSphere Container Storage Plug-in on a Native Kubernetes Cluster:
- Make copies of your customized
csi-vsphere.confconfiguration file and customize a copy for each of your Kubernetes clusters:- Configure the
cluster-idvalue. If you deploy the vSphere CSI Driver to multiple Kubernetes clusters, you must use a uniquecluster-idvalue in each cluster. You can use the cluster’s UUID as thecluster-idvalue. The cluster’s UUID is in the information returned by runningpks cluster CLUSTER-NAME.
- Configure the
- Complete the installation and verification steps:
Create a vSphere Storage Class
To create a vSphere Storage Class:
- Open vCenter.
-
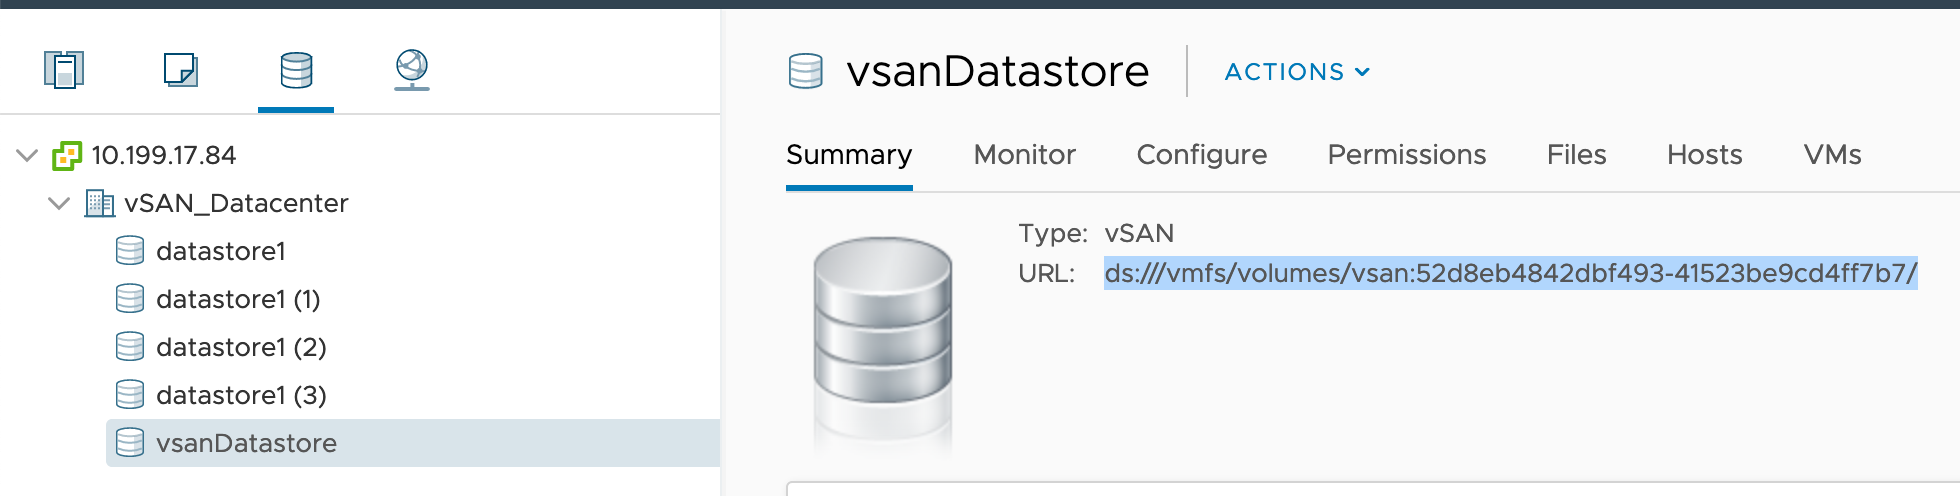
Open the vSAN Datastore Summary pane.
-
Determine the
datastoreurlvalue for your Datastore. -
Create the following YAML:
apiVersion: storage.k8s.io/v1
kind: StorageClass
metadata:
  name: demo-sts-storageclass
  annotations:
      storageclass.kubernetes.io/is-default-class: "true"
provisioner: csi.vsphere.vmware.com
allowVolumeExpansion: ALLOW-EXPANSION
parameters:
  datastoreurl: "DATASTORE-URL"
Where:
ALLOW-EXPANSIONdefines whether the cluster’s PersistentVolume size is either resizable or static. Set totruefor resizable andfalsefor static size.DATASTORE-URLis the URL to your Datastore. For a non-vSAN datastore, thedatastoreurlvalue looks likeds:///vmfs/volumes/5e66e525-8e46bd39-c184-005056ae28de/.
For example:
apiVersion: storage.k8s.io/v1
kind: StorageClass
metadata:
  name: demo-sts-storageclass
  annotations:
      storageclass.kubernetes.io/is-default-class: "true"
provisioner: csi.vsphere.vmware.com
allowVolumeExpansion: true
parameters:
  datastoreurl: "ds:///vmfs/volumes/vsan:52d8eb4842dbf493-41523be9cd4ff7b7/"
Resize a PersistentVolume
PersistentVolumes created using the CNS StorageClass procedures above can be resized. CNS supports PersistentVolume resizing of only off-line volumes.
To resize a PersistentVolume:
- Stop all pods connected to the PersistentVolume.
-
Wait until all pods have stopped. To determine if the pods have stopped running:
kubectl get statefulset -n NAMESPACEWhere
NAMESPACEis the namespace the PersistentVolume is in.
For example:kubectl get statefulset -n csi-namespace NAME READY AGE postgres-wl 0/0 15m kubectl get pods -n csi-namespace No resources found in csi-resize-test namespace. kubectl get pvc -n csi-namespace NAME STATUS VOLUME CAPACITY ACCESS MODES STORAGECLASS AGE postgredb-postgres-wl-0 Bound pvc-c22811a5-0650-4492-a7f0-0d21a4971c5a 1Gi RWO postgres-sc-csi-resize 15m -
Wait until all pods have stopped.
-
Edit the PersistentVolume:
kubectl edit pvc STATEFUL-SET-NAME -n NAMESPACEWhere:
STATEFUL-SET-NAMEis the name of the Pod with the PersistentVolume you are resizing.NAMESPACEis the namespace the Pod is in.
For example:
kubectl edit pvc postgredb-postgres-wl-0 -n csi-namespace spec: accessModes: - ReadWriteOnce resources: requests: storage: 1Gi storageClassName: postgres-sc-csi-resize volumeMode: Filesystem volumeName: pvc-c22811a5-0650-4492-a7f0-0d21a4971c5a -
Modify the storage size.
Note: Kubernetes does not support shrinking of PersistentVolumes.
-
Restart the Pod using
kubectl scale:kubectl scale statefulset STATEFUL-SET-NAME -n NAMESPACE --replicas=1Where:
STATEFUL-SET-NAMEis the name of the Pod with the PersistentVolume you are resizing.NAMESPACEis the namespace the Pod is in.
For example:
kubectl scale statefulset postgres-wl -n csi-namespace --replicas=1 -
Confirm the Pod is running:
kubectl get statefulset -n NAMESPACE
kubectl get pods -n NAMESPACE
kubectl get pvc -n NAMESPACE
kubectl get pv | grep STATEFUL-SET-NAME
Where:
STATEFUL-SET-NAMEis the name of the Pod with the PersistentVolume you are resizing.NAMESPACEis the namespace the Pod is in.
For example:
kubectl get statefulset -n csi-namespace NAME READY AGE postgres-wl 1/1 24m kubectl get pods -n csi-namespace NAME READY STATUS RESTARTS AGE postgres-wl-0 2/2 Running 0 49s kubectl get pvc -n csi-namespace NAME STATUS VOLUME CAPACITY ACCESS MODES STORAGECLASS AGE postgredb-postgres-wl-0 Bound pvc-c22811a5-0650-4492-a7f0-0d21a4971c5a 5Gi RWO postgres-sc-csi-resize 24m kubectl get pv | grep test pvc-c22811a5-0650-4492-a7f0-0d21a4971c5a 5Gi RWO Delete Bound csi-namespace/postgredb-postgres-wl-0 postgres-sc-csi-resize 23m -
Confirm the Pod’s PersistentVolume has been resized:
kubectl exec -it STATEFUL-SET-NAME -n NAMESPACE -- shWhere:
STATEFUL-SET-NAMEis the name of the Pod with the PersistentVolume you are resizing.NAMESPACEis the namespace the Pod is in.
For example:
kubectl  exec -it postgres-wl-0 -n csi-namespace -- sh

# df -h
Filesystem      Size  Used Avail Use% Mounted on
overlay          30G  1.8G   27G   7% /
tmpfs            64M     0   64M   0% /dev
tmpfs           7.9G     0  7.9G   0% /sys/fs/cgroup
/dev/sdb2        48G  3.1G   42G   7% /etc/hosts
/dev/sdc1        30G  1.8G   27G   7% /etc/hostname
shm              64M  8.0K   64M   1% /dev/shm
/dev/sdd        4.9G  847M  3.9G  18% /var/lib/postgresql/data
tmpfs           7.9G   12K  7.9G   1% /run/secrets/kubernetes.io/serviceaccount
For more information about resizing PersistentVolumes, see Resizing Persistent Volumes using Kubernetes in the Kubernetes documentation.
Upgrade the vSphere CSI Driver on a TKGI Cluster
If your TKGI cluster is using a vSphere CSI Driver earlier than the currently supported versions, you must upgrade the CSI driver on the cluster.
To upgrade the vSphere CSI Driver installed on your clusters:
- Review the prerequisites for the vSphere CSI Driver version you are installing. For more information, see Prerequisites for using the vSphere CSI Driver with TKGI above.
- Review the configuration requirements for the vSphere CSI Driver version you are installing. For more information, see Install the vSphere CSI Driver above.
- Follow the steps in Upgrade vSphere Container Storage Plug-in.
