


This topic describes how to deploy and configure NSX Data Center v3.0 NSX Edge Nodes for use with VMware Tanzu Kubernetes Grid Integrated Edition (TKGI) on vSphere.
Prerequisites
Before completing this section, make sure you have completed the following sections:
- NSX-T Installation Prerequisites
- Install and Configure the NSX-T Manager Hosts
- Generate and Register the NSX-T TLS Certificate and Private Key
- Create an IP Pool for VTEP
- Configure Transport Zones
- Configure vSphere Networking for ESXi Hosts
Deploy NSX-T Edge Nodes
In this section you deploy two NSX-T Edge Nodes.
NSX Edge Nodes provide the bridge between the virtual network environment implemented using NSX-T and the physical network. Edge Nodes for Tanzu Kubernetes Grid Integrated Edition run load balancers for TKGI API traffic, Kubernetes load balancer services, and ingress controllers. See Load Balancers in Tanzu Kubernetes Grid Integrated Edition for more information.
In NSX-T, a load balancer is deployed on the Edge Nodes as a virtual server. The following virtual servers are required for Tanzu Kubernetes Grid Integrated Edition:
- 1 TCP Layer 4 virtual server for each Kubernetes service of type:
LoadBalancer - 2 Layer 7 global virtual servers for Kubernetes pod ingress resources (HTTP and HTTPS)
- 1 global virtual server for the TKGI API
The number of virtual servers that can be run depends on the size of the load balancer which depends on the size of the Edge Node.
The default size of the load balancer deployed by NSX-T for a Kubernetes cluster is small. Tanzu Kubernetes Grid Integrated Edition supports only the medium, large and larger VM Edge Node form factors and the bare metal Edge Node. Customize the size of the load balancer using Network Profiles.
For this installation, we use the Large VM form factor for the Edge Node. See VMware Configuration Maximums for more information.
Install and Configure Edge Node 1
Deploy the Edge Node 1 VM using the NSX-T Manager interface.
-
From your browser, log in with admin privileges to NSX Manager at
https://NSX-MANAGER-IP-ADDRESS. -
In NSX Manager, go to System > Fabric > Nodes > Edge Transport Nodes.
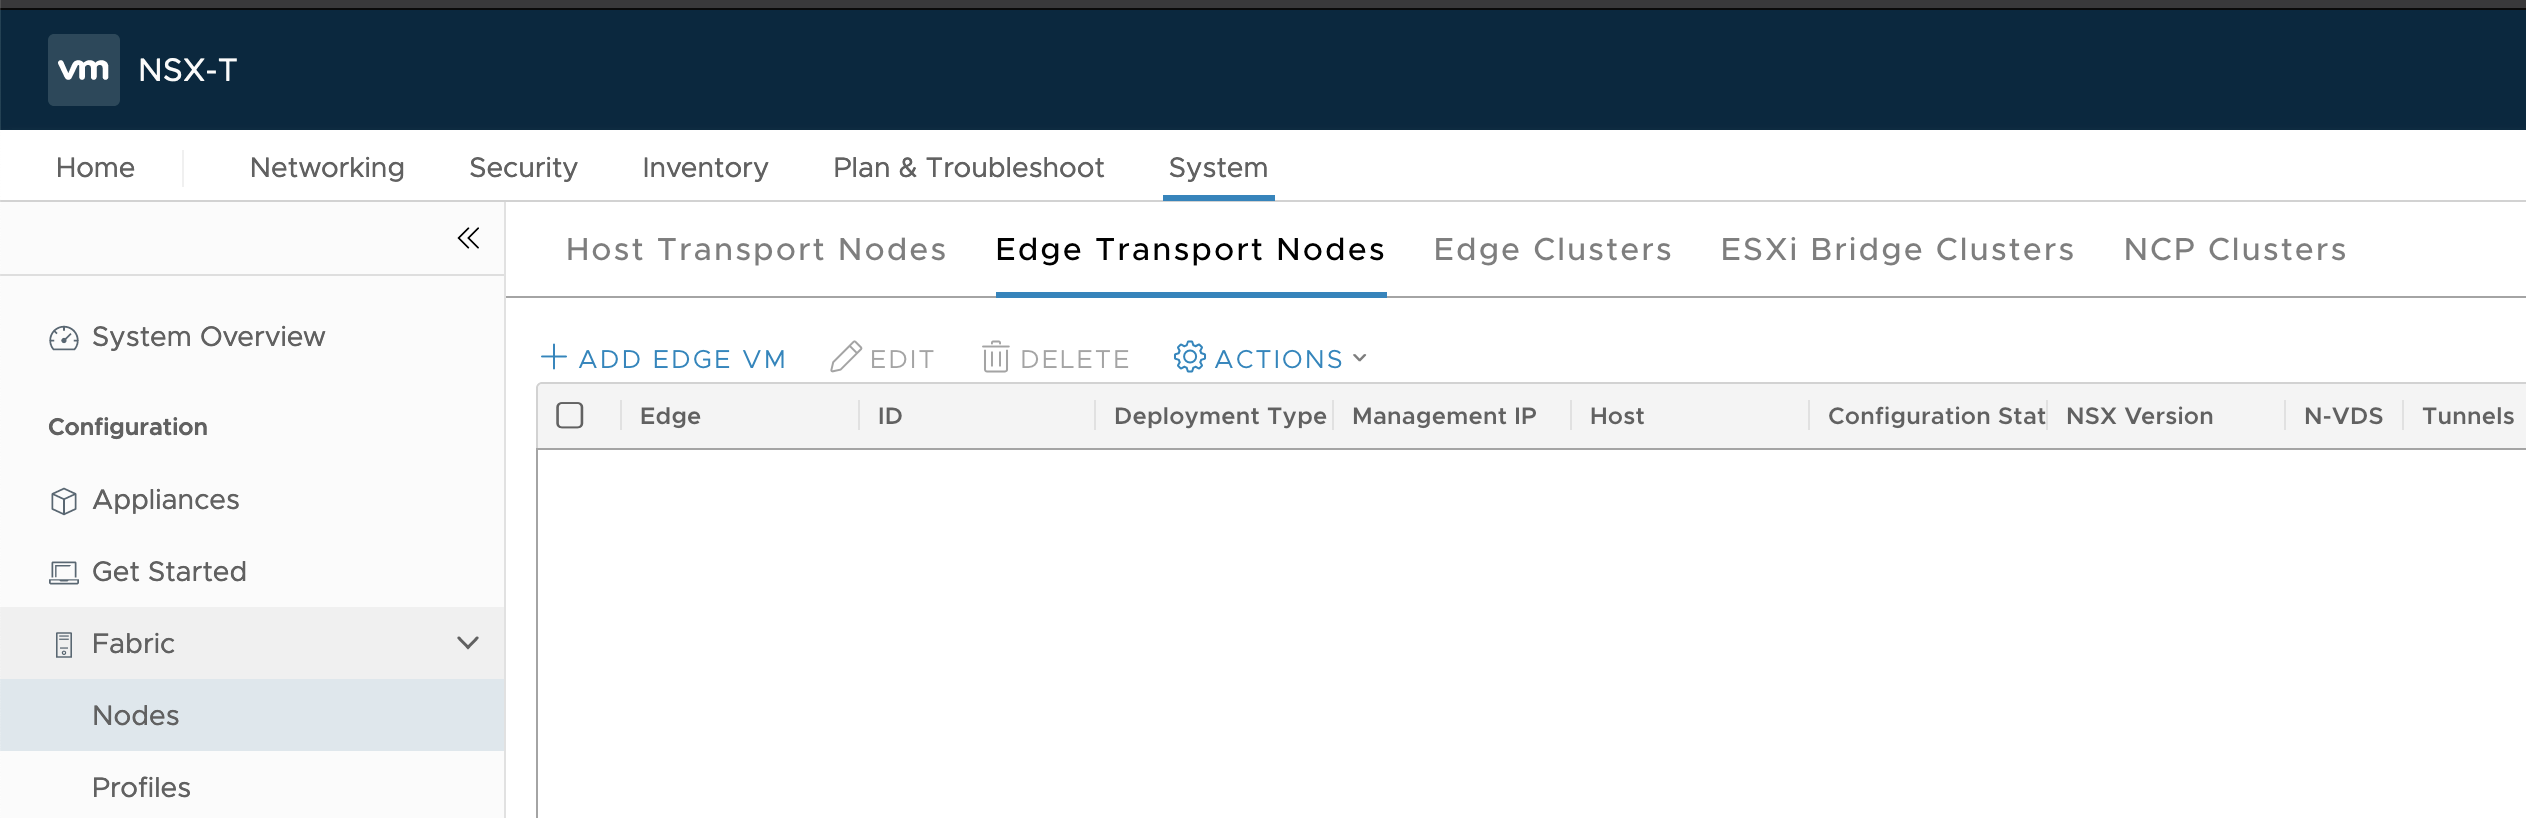
-
Click Add Edge VM.
-
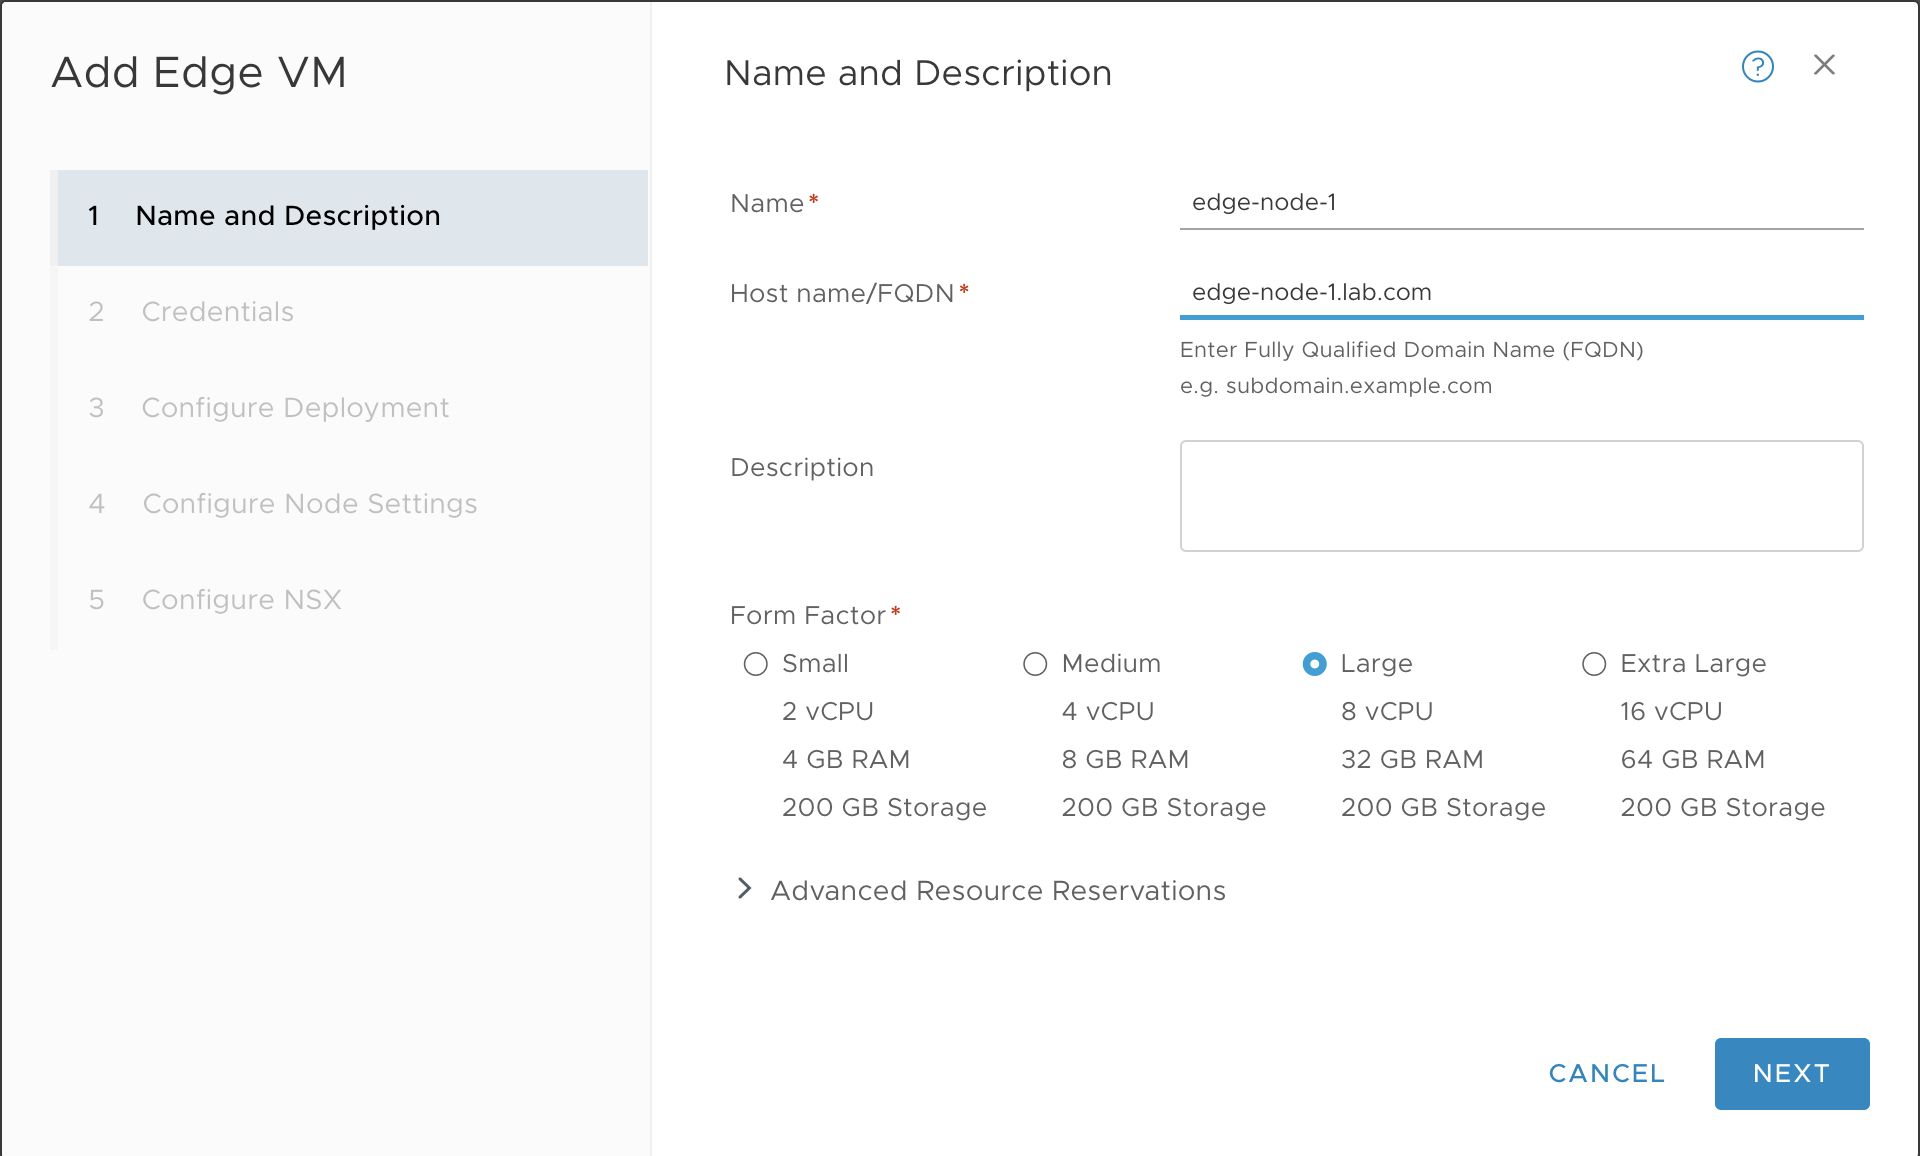
Configure the Edge VM as follows:
- Name:
edge-node-1 - Host name/FQDN:
edge-node-1.lab.com - Form Factor: Large
- Name:
-
Configure Credentials as follows:
- CLI User Name:
admin - CLI Password: Enter a strong password for the
adminuser that complies with the NSX-T requirements. - Enable SSH Login: Yes
- System Root Password: Enter a strong password for the
rootuser that complies with the NSX-T requirements. - Enable Root SSH Login: Yes
- Audit Credentials: Enter an
audituser name and password.
- CLI User Name:
-
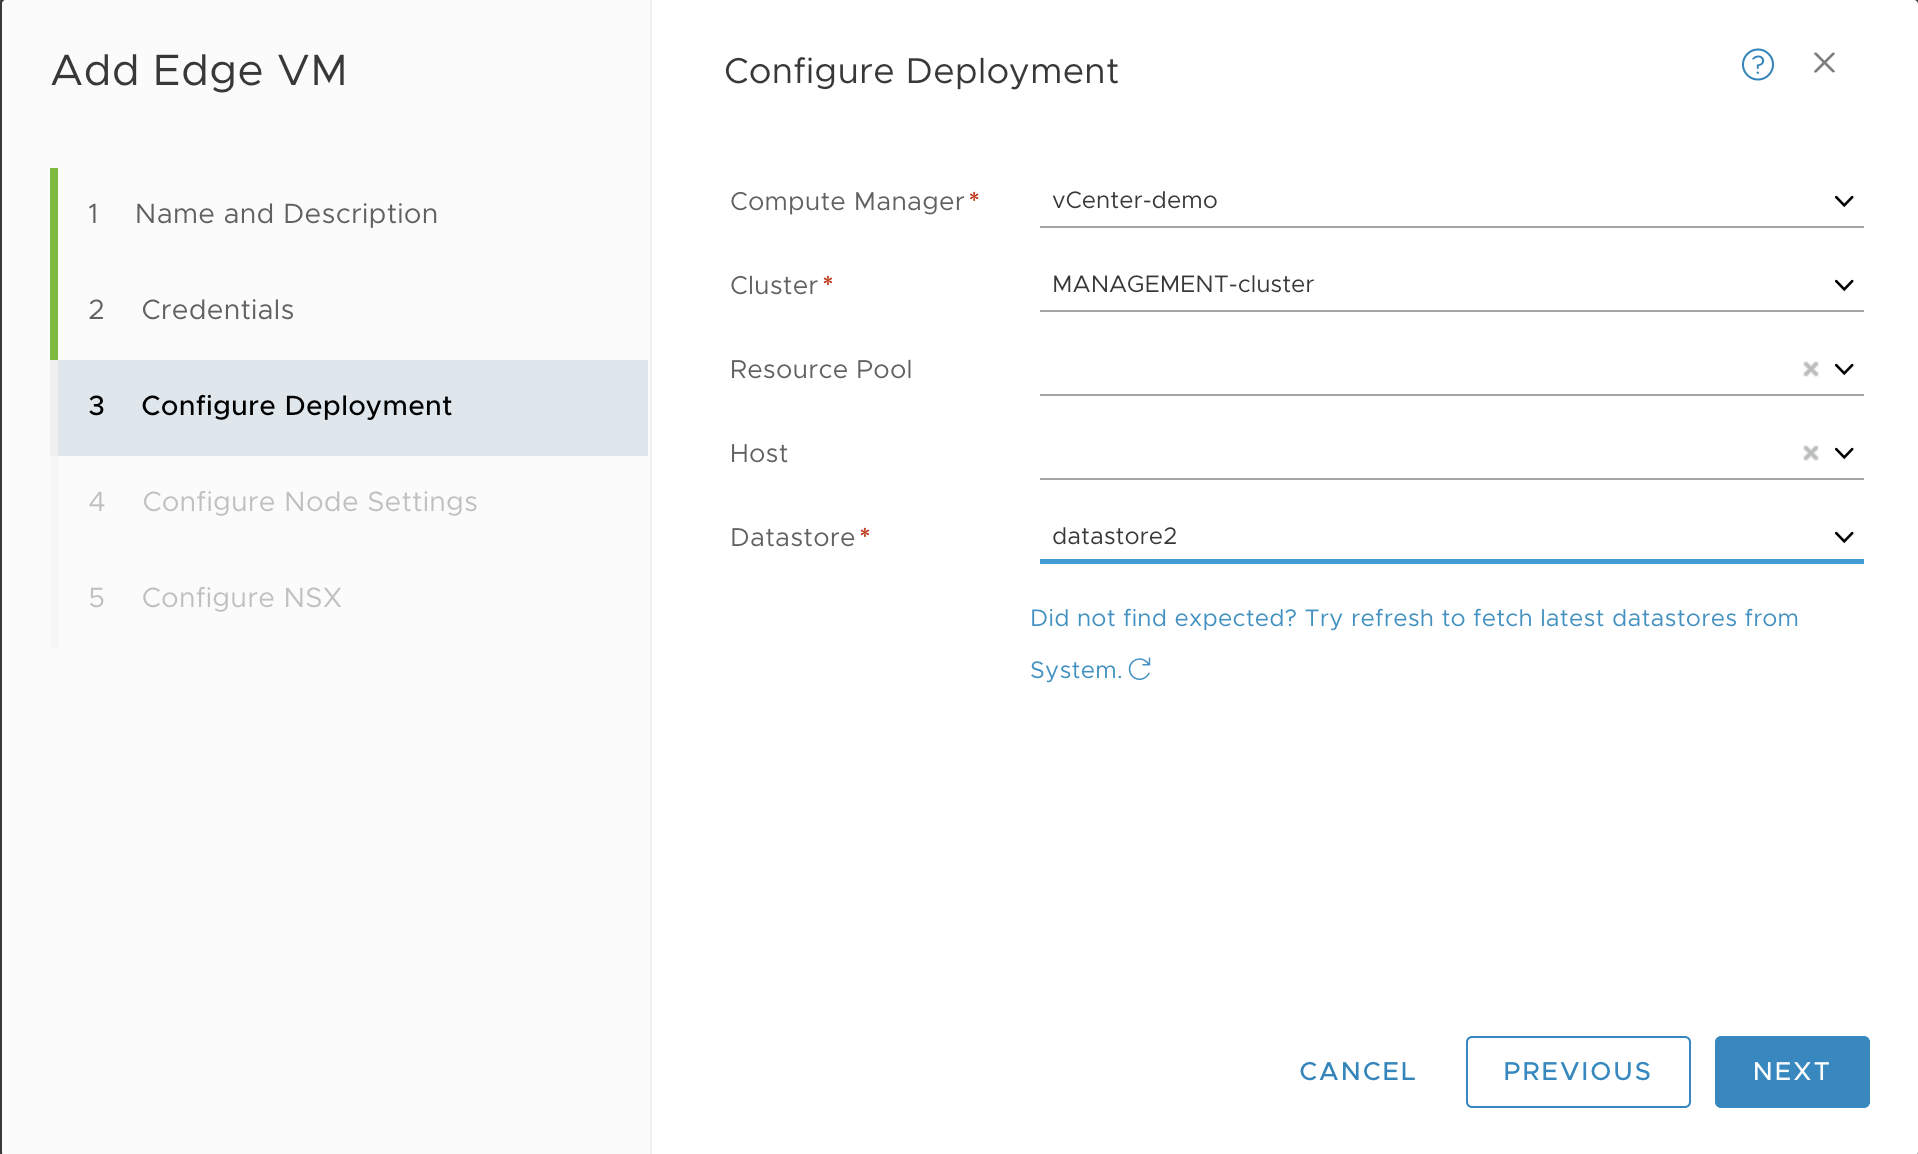
Configure the deployment as follows:
- Compute Manager: vCenter
- Cluster: MANAGEMENT-Cluster
- Datastore: Select the datastore
-
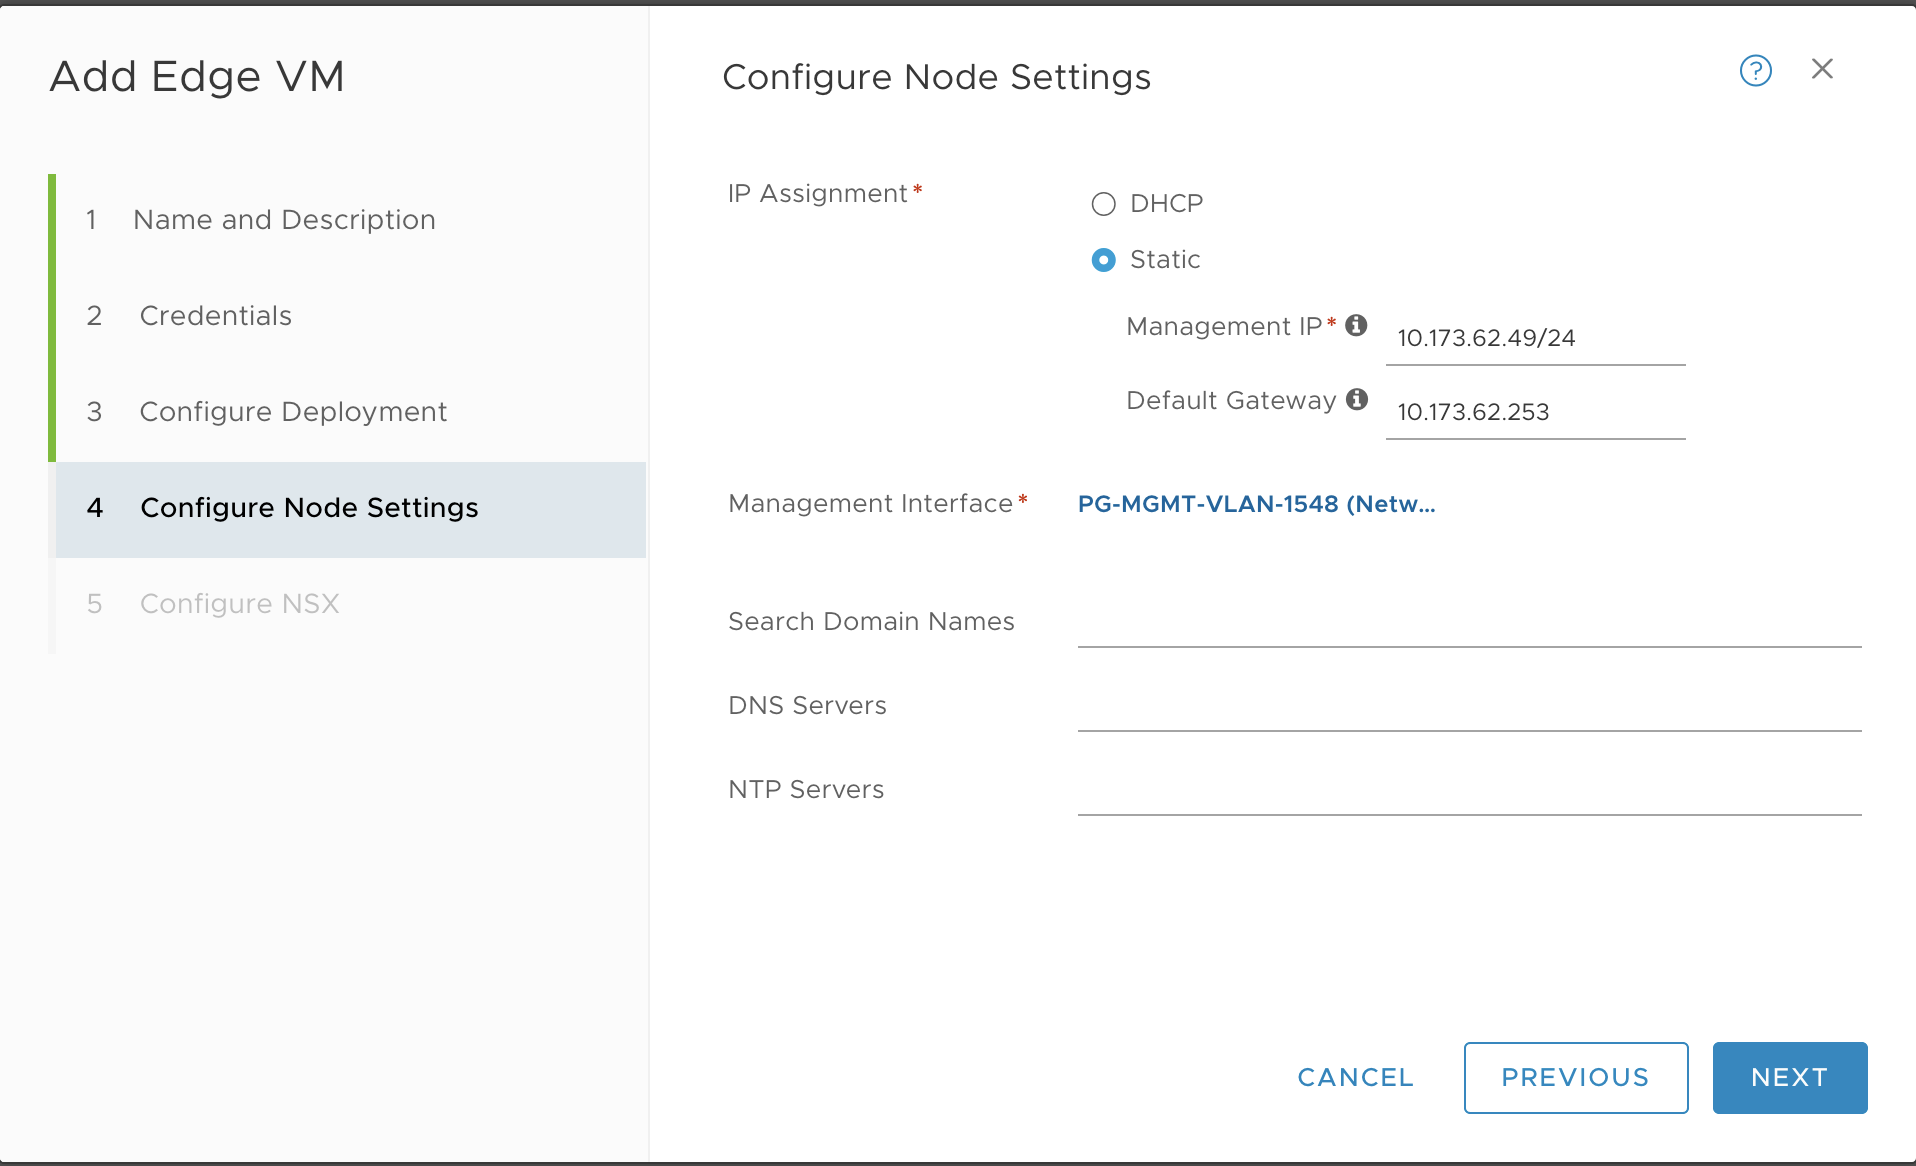
Configure the node settings as follows:
- IP Assignment: Static
- Management IP: 10.173.62.49/24, for example
- Default Gateway: 10.173.62.253, for example
- Management Interface: PG-MGMT-VLAN-1548, for example
Configure the N-VDS Switch or Switches for Edge Node 1
The next step is to configure the N-VDS switch and Transport Zones for NSX Edge Node 1. How you do this differs depending on if you are using the default Transport Zones, which requires a single N-VDS switch, or custom Transport Zones, which require multiple N-VDS switches. Refer to Configuring NSX-T Data Center v3.1 Transport Zones and Edge Node Switches for TKGI.
Complete the Edge Node 1 Installation
-
Click Finish to complete the configuration. The installation begins.
-
In vCenter, use the Recent Tasks panel at the bottom of the page to verify that you see the Edge Node 1 VM being deployed.
-
Once the process completes, use the NSX-T Manager to ensure the Edge Node 1 has deployed successfully.

-
Click the N-VDS link and verify that you see the switch or switches.
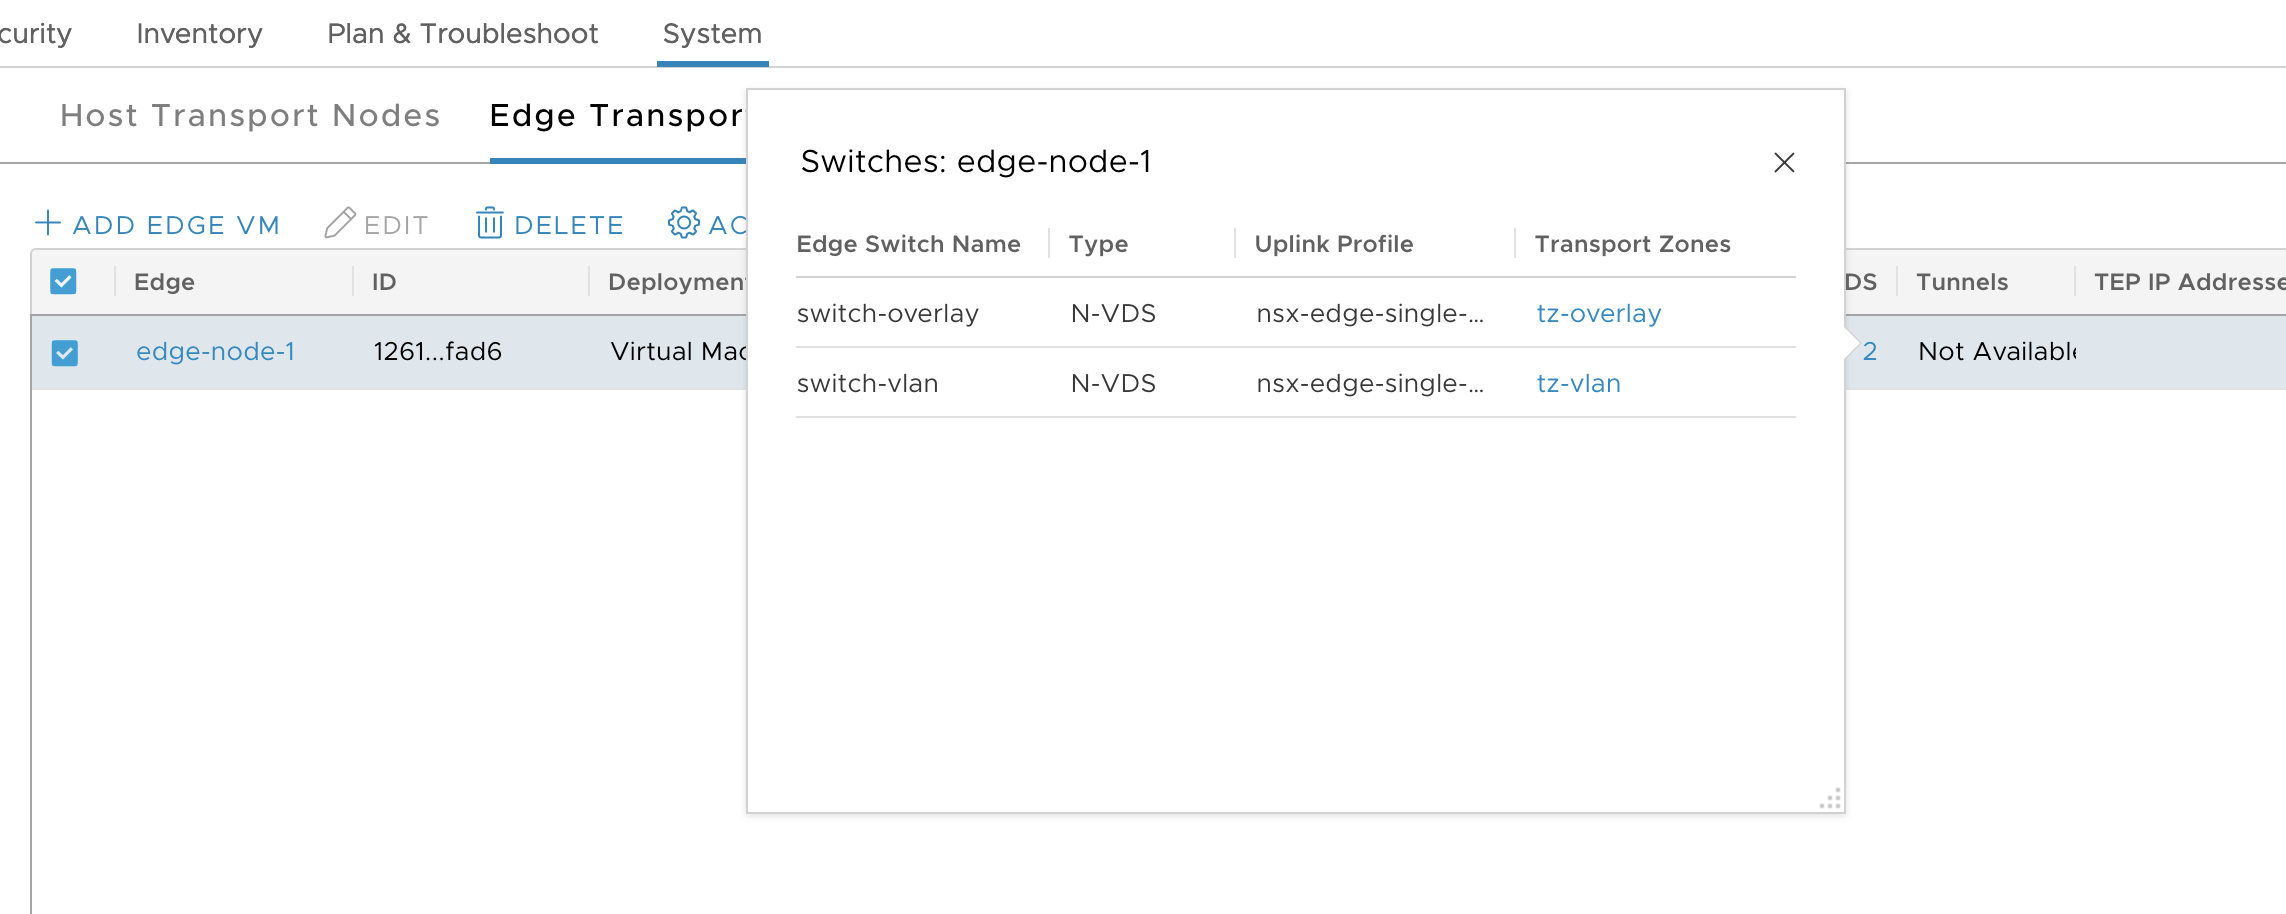
-
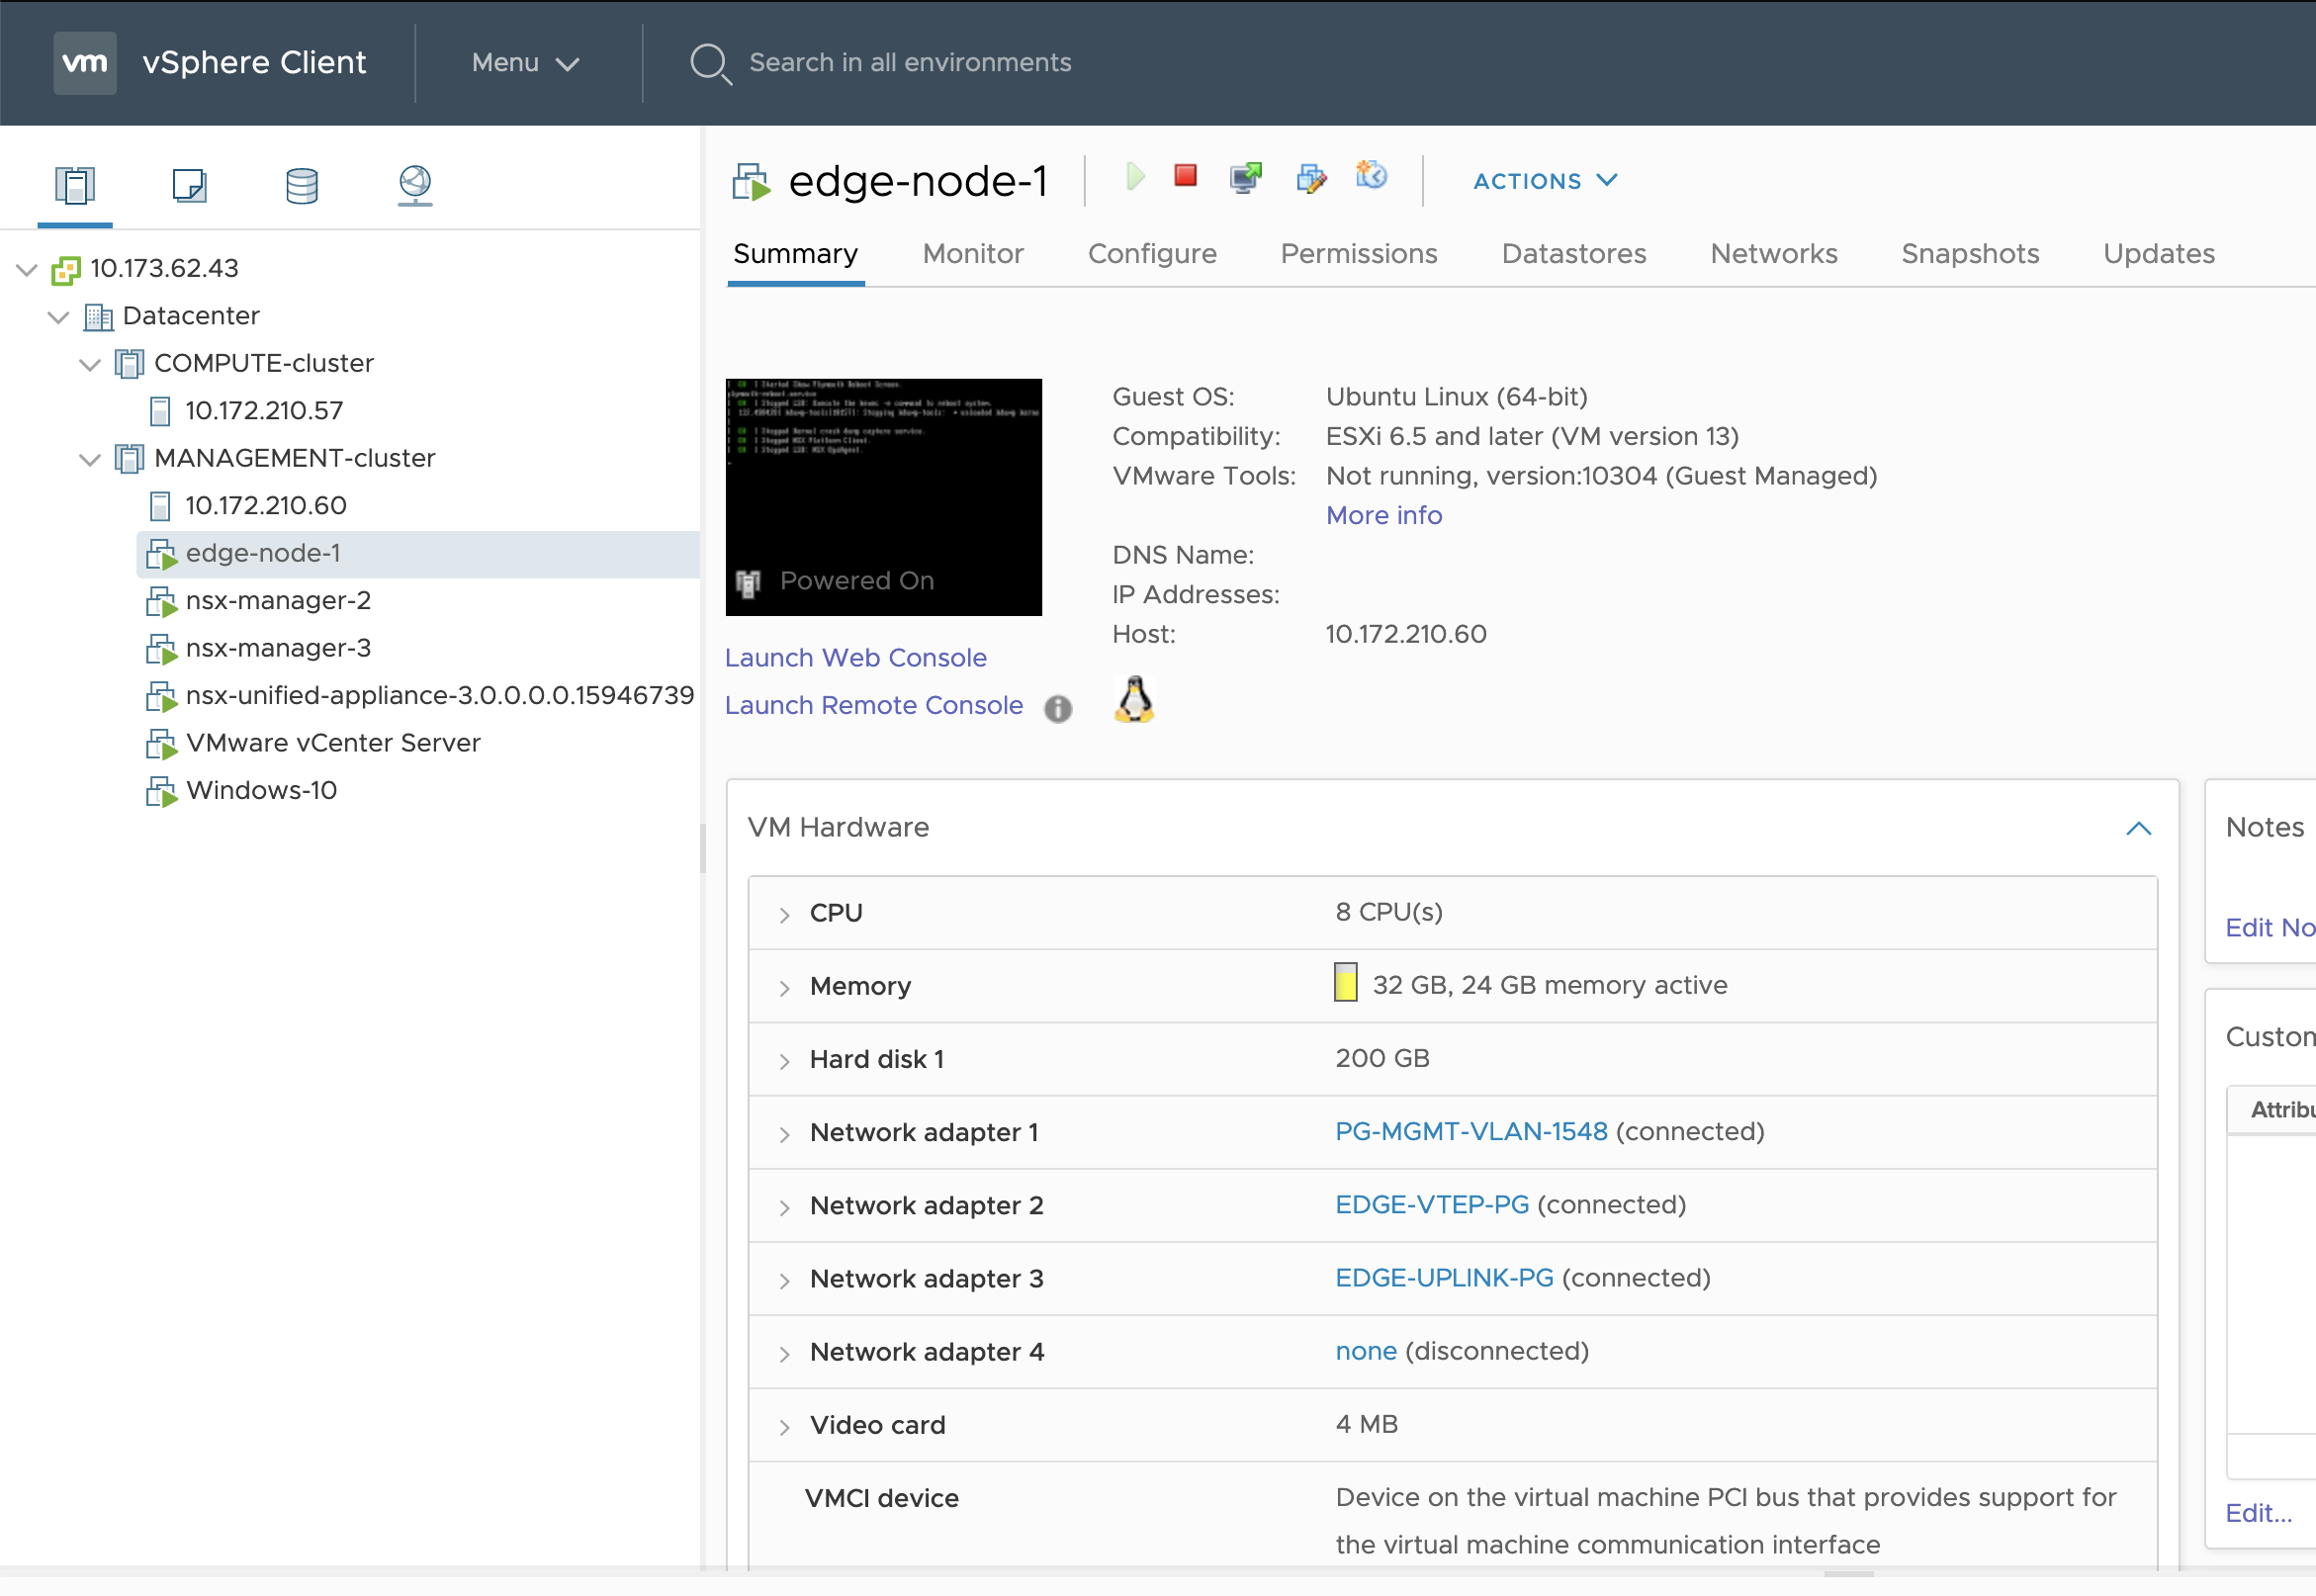
In vCenter verify that the Edge Node is created.
Install and Configure Edge Node 2
Deploy the Edge Node 2 VM using the NSX-T Manager interface.
-
In NSX Manager, go to System > Fabric > Nodes > Edge Transport Nodes.
-
Click Add Edge VM.
-
Configure the Edge VM as follows:
- Name:
edge-node-2 - Host name/FQDN:
edge-node-2.lab.com - Form Factor: Large
- Name:
-
Configure Credentials as follows:
- CLI User Name:
admin - CLI Password: Enter a strong password for the
adminuser that complies with the NSX-T requirements. - Enable SSH Login: Yes
- System Root Password: Enter a strong password for the
rootuser that complies with the NSX-T requirements. - Enable Root SSH Login: Yes
- Audit Credentials: Enter an
audituser name and password.
- CLI User Name:
-
Configure the deployment as follows:
- Compute Manager: vCenter
- Cluster: MANAGEMENT-Cluster
- Datastore: Select the datastore
-
Configure the node settings as follows:
- IP Assignment: Static
- Management IP: 10.173.62.58/24, for example
- Default Gateway: 10.173.62.253, , for example
- Management Interface: PG-MGMT-VLAN-1548, for example
Configure the N-VDS Switch or Switches for Edge Node 2
The next step is to configure the N-VDS switch and transport zones for NSX Edge Node 2. How you do this differs depending on if you are using the default Transport Zones, which requires a single N-VDS switch, or custom Transport Zones, which require multiple N-VDS switches. Refer to Configuring NSX-T Data Center v3.1 Transport Zones and Edge Node Switches for TKGI.
Complete the Installation of Edge Node 2
-
Click Finish to complete the configuration. The installation begins.
-
In vCenter, use the Recent Tasks panel at the bottom of the page to verify that you see the Edge Node 1 VM being deployed.
-
Once the process completes, use the NSX-T Manager to ensure the Edge Node 2 has deployed successfully.
-
Click the N-VDS link and verify that you see the N-VDS switch or swtiches.
-
In vCenter verify that Edge Node 2 is created.
-
In NSX Manager, verify that you see both Edge Nodes.

Next Steps
