


This topic describes how to install Velero for backing up and restoring Tanzu Kubernetes Grid Integrated Edition (TKGI)-provisioned Kubernetes workloads. This topic also describes how to install MinIO for Velero.
Prerequisites
Ensure the following before installing Velero for backing up and restoring TKGI:
- You have read: Tanzu Kubernetes Workload Back Up and Restore Requirements in Backing Up and Restoring Tanzu Kubernetes Workloads Using Velero.
- You have a Linux VM with sufficient storage to store several workload backups. You will install MinIO on this VM. For more information, see Quick start evaluation install with MinIO in the Velero documentation.
- You have a TKGI Client VM (Linux) where CLI tools are installed, such as the TKGI CLI, kubectl, and others. You will install the Velero CLI on this client VM. If you do not have such a VM, you can install the Velero CLI locally but adjust the following installation steps to match your configuration.
- The Kubernetes environment has internet access and can be reached by the client VM. If the environment does not have internet access, refer to Install Velero in an Air-Gapped Environment below.
Deploy an Object Store
To deploy and configure a MinIO Server on a Linux Ubuntu VM as the Velero backend object store:
For more information about MinIO, see the MinIO Quick Start Guide.
Install MinIO
To install MinIO:
-
Install the MinIO app:
wget https://dl.min.io/server/minio/release/linux-amd64/minio -
Grant execute permissions to the MinIO app:
chmod +x minio -
Create a directory where MinIO data will be stored:
mkdir /DATA-MINIO
Start MinIO
To prepare the MinIO server:
-
Start the MinIO server:
./minio server /DATA-MINIOAfter the MinIO server has started, you are provided with the datastore instance endpoint URL, AccessKey, and SecretKey.
-
Record the MinIO server endpoint URL, AccessKey, and SecretKey information for the datastore instance.
Enable MinIO as a Service
To enable MinIO as a service, configure MinIO for automatic startup:
-
Download the
minio.servicescript:curl -O https://raw.githubusercontent.com/minio/minio-service/master/linux-systemd/minio.service -
Edit the
minio.servicescript and add the following value forExecStart:ExecStart=/usr/local/bin/minio server /DATA-MINIO path -
Save the revised script.
-
Configure the MinIO service by running the following commands:
cp minio.service /etc/systemd/system
cp minio /usr/local/bin/
systemctl daemon-reload
systemctl start minio
systemctl status minio
systemctl enable minio
Create MinIO Bucket
To create a MinIO bucket for TKGI workload back up and restore:
-
Browse to the MinIO datastore by opening a browser to the MinIO server endpoint URL recorded from the
minio serveroutput. For example: http://10.199.17.63:9000/minio/login/. -
Log in to the MinIO server and provide the AccessKey and SecretKey. These are the username and password as described in User Management in the MinIO documentation.
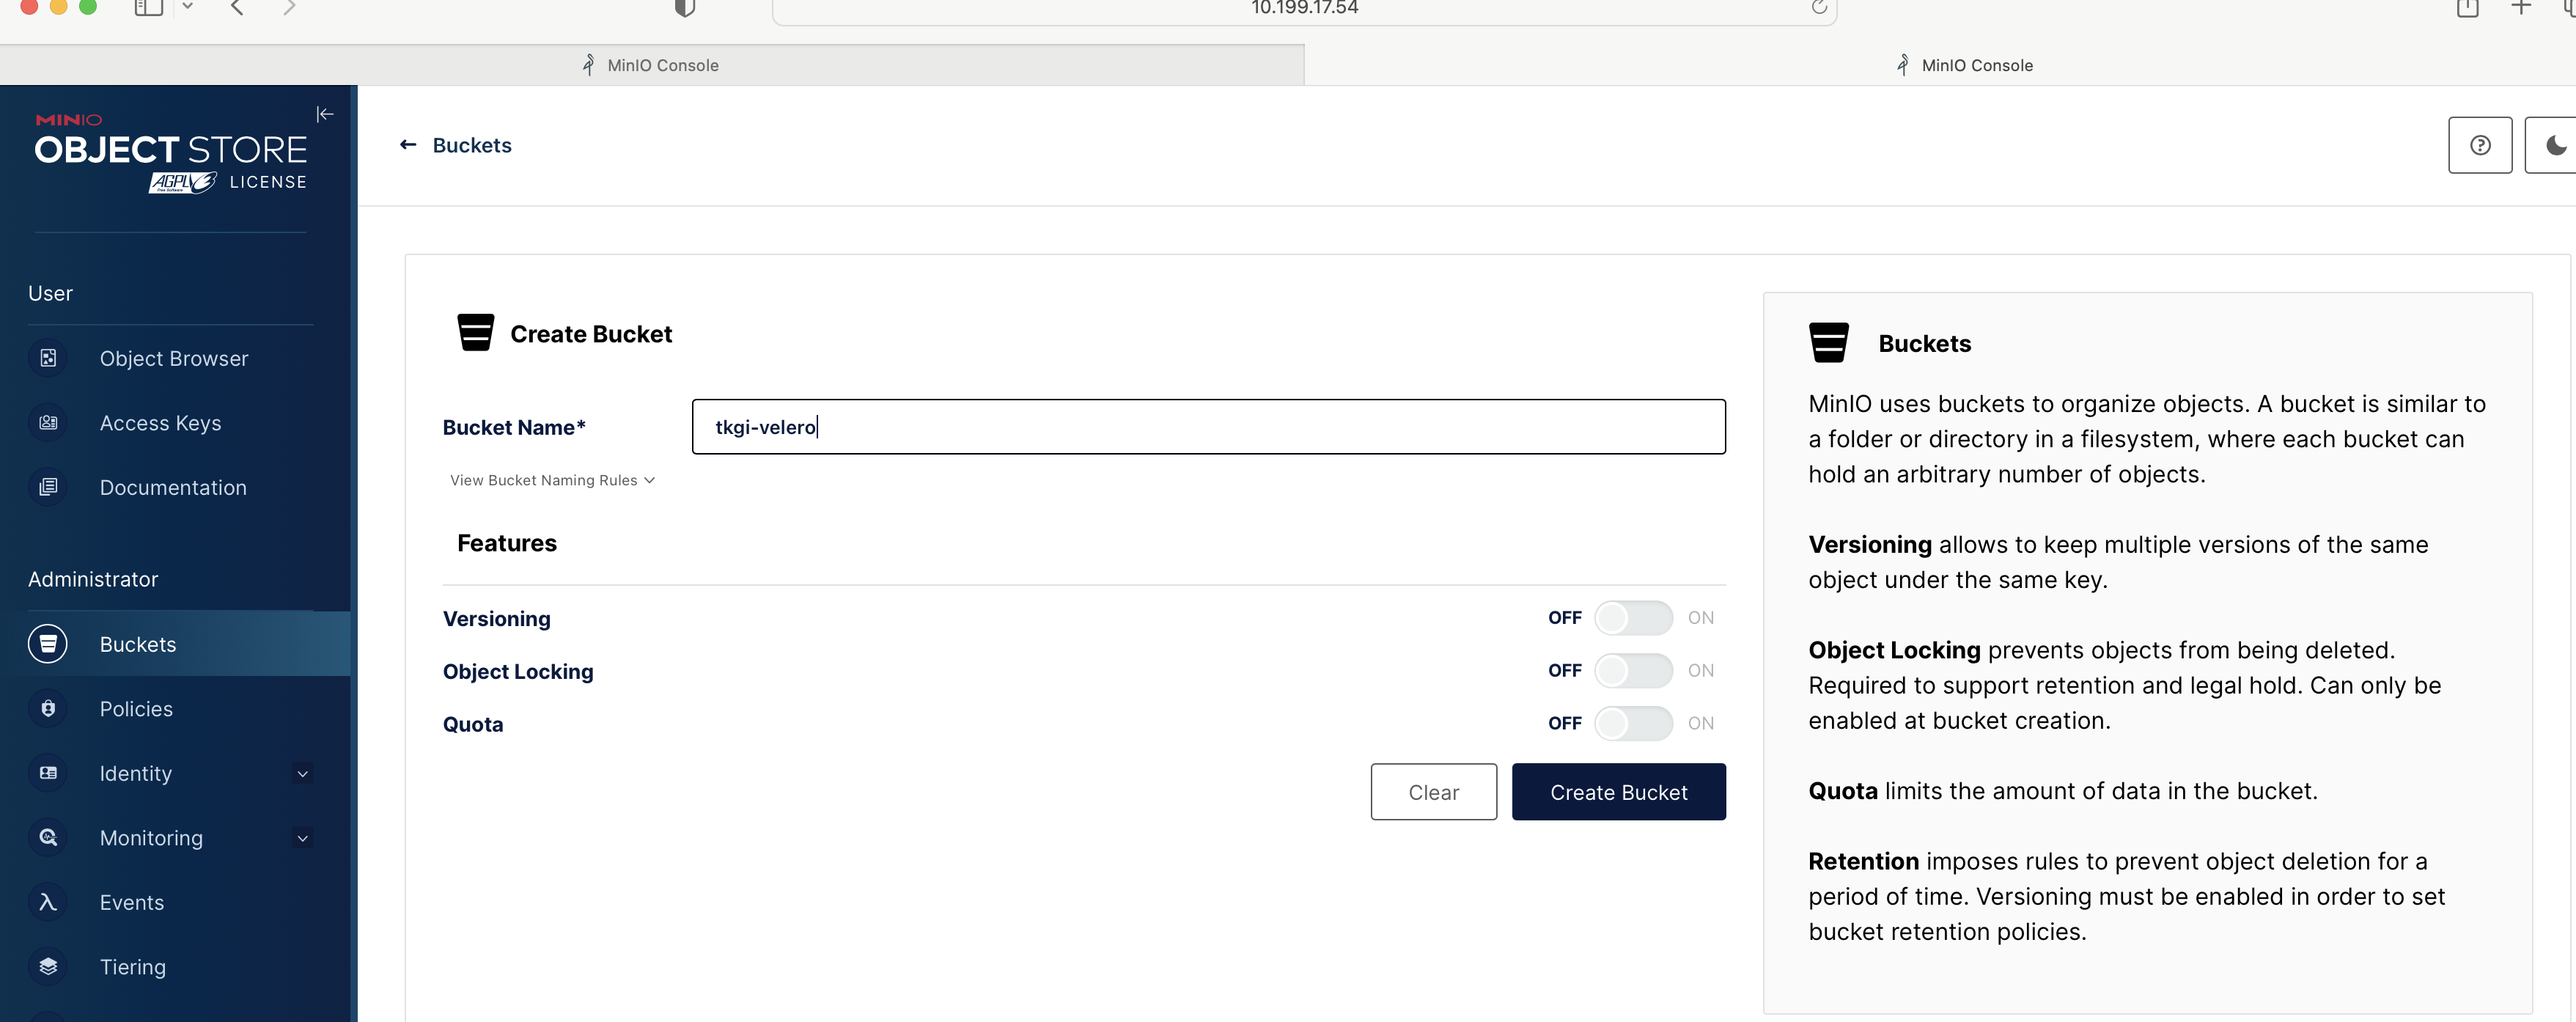
View a larger version of this image. - Select Buckets and click Create a Bucket.

View a larger version of this image. - Enter the bucket name, for example:
tkgi-velero.
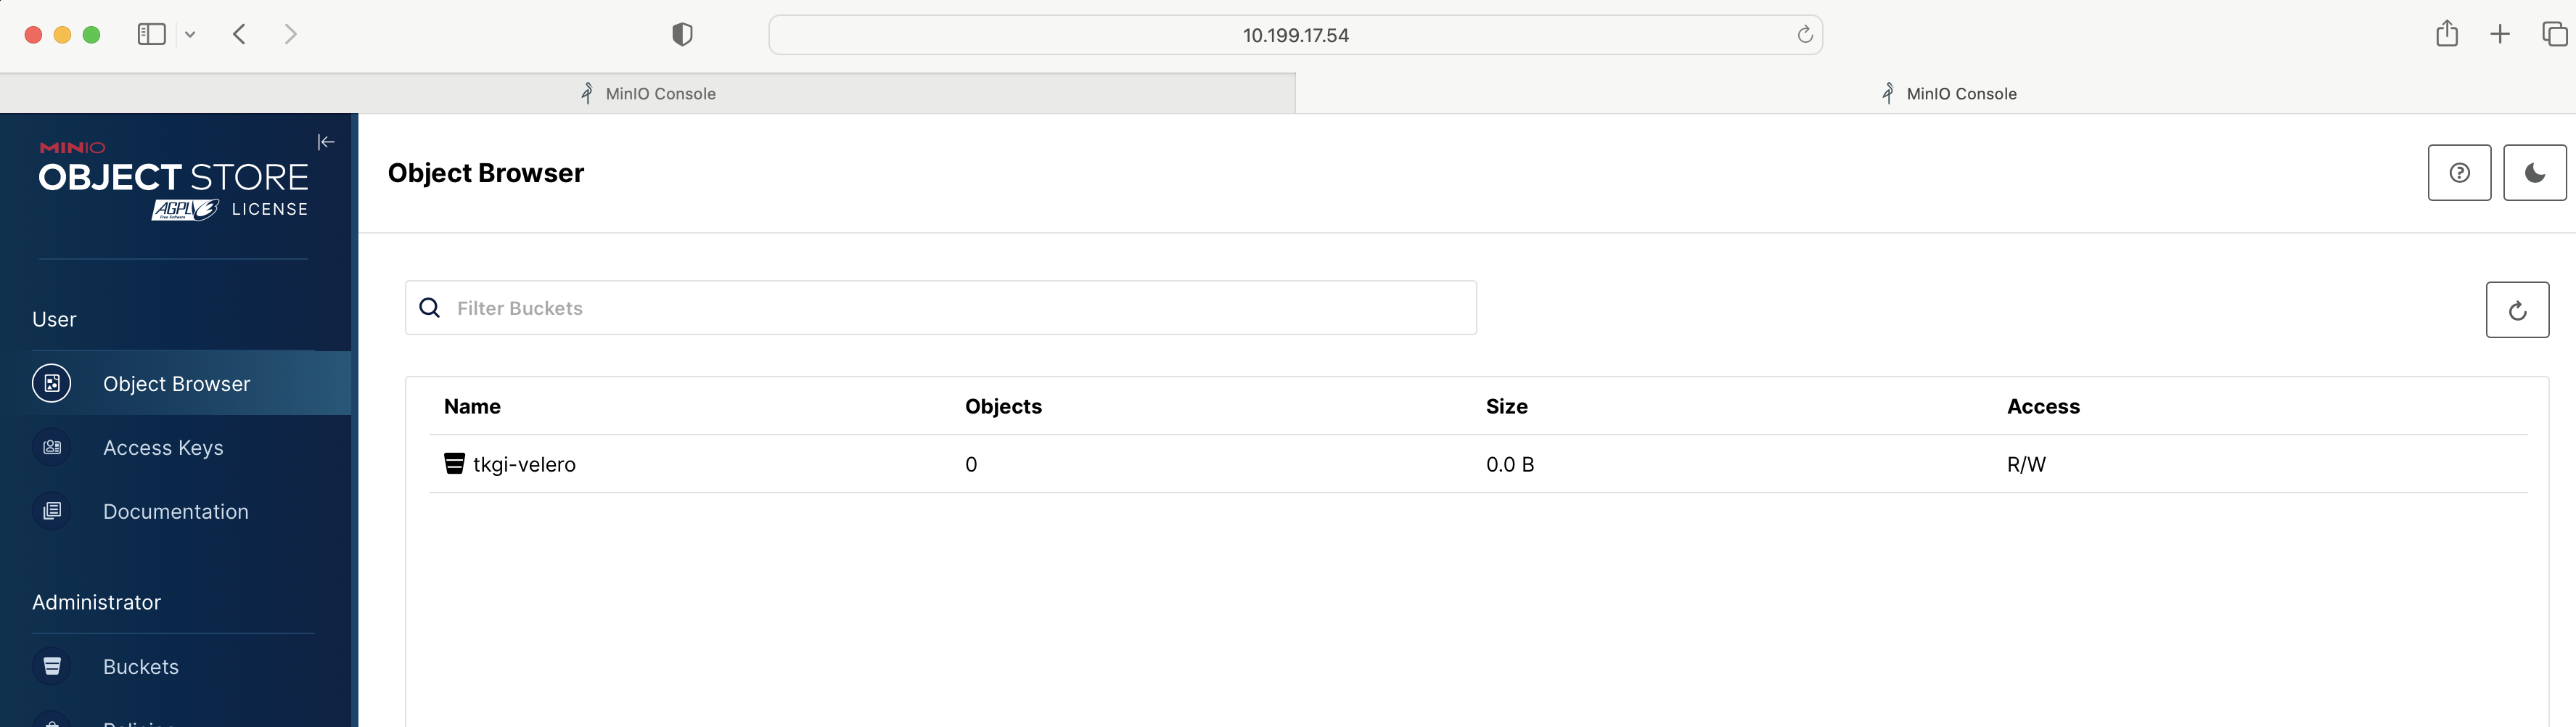
View a larger version of this image. - Under Object Browser, verify that the bucket was created and has Read/Write access.
View a larger version of this image.
Install the Velero CLI on Your Workstation
To install the Velero CLI on your workstation:
Download the Velero CLI Binary
To download the Velero CLI Binary:
-
Download the supported version of the signed Velero binary for your version of TKGI from the TKGI product downloads page at Broadcom Support. For more information about the currently supported Velero versions, see the Product Snapshot section of the Release Notes.
Note: You must use the Velero binary signed by VMware to be eligible for support from VMware.
Install the Velero CLI
To install the Velero CLI on the TKGI client or on your local machine:
- Open a command line and change directory to the Velero CLI download.
-
Unzip the download file:
gunzip velero-linux-v1.11.1+vmware.1.gz -
To check for the Velero binary:
ls -lFor example:
$ ls -l -rwxrwxr-x 1 kubo kubo 69985692 Nov 14 02:55 velero-linux-v1.11.1+vmware.1 -
Grant execute permissions to the Velero CLI:
chmod +x velero-linux-v1.11.1+vmware.1 -
Make the Velero CLI globally available by moving it to the system path:
cp velero-linux-v1.11.1+vmware.1 /usr/local/bin/velero -
Verify the installation:
velero versionFor example:
$ velero version

Client:
    Version: v1.11.1
Install Velero on the Target Kubernetes Cluster
To install the Velero pods on each Kubernetes cluster whose workloads you intend to back up, complete the following:
Prerequisites
The following steps require that:
- You have installed MinIO as your backup object store. For more information, see Deploy an Object Store above.
- Your Kubernetes cluster has internet access.
Set Up the kubectl Context
The Velero CLI context will automatically follow the kubectl context. Before running Velero CLI commands to install Velero on the target cluster, set the kubectl context:
- Retrieve the name of the MinIO bucket. For example,
tkgi-velero. - Get the AccessKey and SecretKey for the MinIO bucket. For example, AccessKey:
0XXNO8JCCGV41QZBV0RQand SecretKey:clZ1bf8Ljkvkmq7fHucrKCkxV39BRbcycGeXQDfx. - Verify
kubectlworks against the cluster. If needed, usetkgi get-credentials. -
Set the context for the target Kubernetes cluster so that the Velero CLI knows which cluster to work on by running:
tkgi get-credentials CLUSTER-NAMEWhere
CLUSTER-NAMEis the name of the cluster. For example:$ tkgi get-credentials cluster-1 Fetching credentials for cluster cluster-1. Password: ******** Context set for cluster cluster-1. You can now switch between clusters by using: $kubectl config use-context <cluster-name>You can also run
kubectl config use-context CLUSTER-NAMEto set context. -
To create a secrets file, create a file named
credentials-minio. Update the file with the MinIO server access credentials that you collected above:[default] aws_access_key_id = ACCESS-KEY aws_secret_access_key = SECRET-KEYWhere:
ACCESS-KEYis the AccessKey that you collected above.SECRET-KEYis the SecretKey that you collected above.
For example:
[default] aws_access_key_id = 0XXNO8JCCGV41QZBV0RQ aws_secret_access_key = clZ1bf8Ljkvkmq7fHucrKCkxV39BRbcycGeXQDfx -
Save the file.
-
Verify that the file is in place:
lsFor example:
$ ls

credentials-minio
Install Velero
To install Velero:
-
Run the following command to install Velero on the target Kubernetes cluster:
velero install --image projects.registry.vmware.com/tkg/velero/velero:v1.11.1_vmware.1
--provider aws \
--plugins projects.registry.vmware.com/tkg/velero/velero-plugin-for-aws:v1.7.1_vmware.1 \
--bucket tkgi-velero \
--secret-file ./credentials-minio \
--use-volume-snapshots=false \
--default-volumes-to-fs-backup \
--use-node-agent \
--backup-location-config \
region=minio,s3ForcePathStyle="true",s3Url=http://10.199.17.63:9000,publicUrl=http://10.199.17.63:9000
For example:
$ velero install --image projects.registry.vmware.com/tkg/velero/velero:v1.11.1_vmware.1 --provider aws --plugins projects.registry.vmware.com/tkg/velero/velero-plugin-for-aws-v1.7.1_vmware.1 \ --bucket tkgi-velero --secret-file ./credentials-minio --use-volume-snapshots=false \ --default-volumes-to-fs-backup \ --use-node-agent \ --backup-location-config \ region=minio,s3ForcePathStyle="true",s3Url=http://10.199.17.63:9000,publicUrl=http://10.199.17.63:9000 CustomResourceDefinition/backups.velero.io: created ... Waiting for resources to be ready in cluster... ... DaemonSet/node-agent: created Velero is installed! Use 'kubectl logs deployment/velero -n velero' to view the status. -
Verify the installation of Velero:
kubectl logs deployment/velero -n velero -
Verify the
veleronamespace:kubectl get nsFor example:
$ kubectl get ns NAME STATUS AGE default Active 13d kube-node-lease Active 13d kube-public Active 13d kube-system Active 13d pks-system Active 13d velero Active 2m38s -
Verify the
veleroandnode-agentpods.kubectl get all -n veleroFor example:
$ kubectl get  all -n velero

NAME                          READY   STATUS             RESTARTS      AGE
pod/node-agent-96zjb          0/1     CrashLoopBackOff   4 (21s ago)   2m5s
pod/node-agent-9r7tn          0/1     CrashLoopBackOff   4 (29s ago)   2m5s
pod/node-agent-bw5pf          0/1     CrashLoopBackOff   4 (27s ago)   2m5s
pod/velero-7d459ffc95-44sps   1/1     Running            0             2m5s
Modify the Host Path
To run the three-pod node-agent DaemonSet on a Kubernetes cluster in TKGI, you must modify the node-agent DaemonSet spec and modify the hostpath property.
To modify the node-agent DaemonSet:
-
Verify the three-pod node-agent DaemonSet:
kubectl get pod -n veleroFor example:
$ kubectl get pod -n velero NAME READY STATUS RESTARTS AGE pod/node-agent-p5bdz 0/1 CrashLoopBackOff 4 3m8s pod/node-agent-rbmnd 0/1 CrashLoopBackOff 4 3m8s pod/node-agent-vcpjm 0/1 CrashLoopBackOff 4 3m8s pod/velero-68f47744f5-lb5df 1/1 Running 0 3m8s -
Run the following command:
kubectl edit daemonset node-agent -n velero -
Change hostPath from
/var/lib/kubelet/podsto/var/vcap/data/kubelet/pods:- hostPath: path: /var/vcap/data/kubelet/pods -
Save the file.
-
To verify the three-pod node-agent DaemonSet:
kubectl get pod -n veleroFor example:
kubectl get pod -n velero

NAME                          READY   STATUS    RESTARTS   AGE
pod/node-agent-6ljm5          1/1     Running   0          23s
pod/node-agent-94cfd          1/1     Running   0          23s
pod/node-agent-brv77          1/1     Running   0          22s
pod/velero-7d459ffc95-44sps   1/1     Running   0          4m24s
Adjust Velero Memory Limits If Necessary
If your Velero back up returns status=InProgress for many hours, increase the limits and requests memory settings.
To increase limits and requests memory settings:
-
Run the following command:
kubectl edit deployment/velero -n velero -
Change the limits and request memory settings from the default of
256Miand128Mito512Miand256Mi:ports: - containerPort: 8085 name: metrics protocol: TCP resources: limits: cpu: "1" memory: 512Mi requests: cpu: 500m memory: 256Mi terminationMessagePath: /dev/termination-log terminationMessagePolicy: File
Install Velero in an Air-Gapped Environment
If you are working in an air-gapped environment, you can install Velero using an internal registry. For more information, see Air-gapped deployments in the Velero documentation.
Prerequisites
- A private container registry is installed and configured. The instructions use Harbor.
- Docker is installed on the workstation or TKGI jump host.
- kubectl context has been set and the MinIO
credentials-miniofile exists. For more information, see Set Up the kubectl Context above.
Procedure
- Open the VMware Velero downloads page for your version of TKGI linked to from the Product Snapshot of the Release Notes.
-
Download the Velero CLI and Velero with restic Docker images for your version of TKGI:
- velero-v1.11.1+vmware.1.gz
- velero-plugin-for-aws-v1.7.1_vmware.1.tar.gz
- velero-restic-restore-helper-v1.11.1+vmware.1.tar.gz
Note: You must use the container images signed by VMware to be eligible for support from VMware.
-
Push the Docker images into the internal registry. Adjust the variables as needed for your registry instance and preferences.
docker login harbor.example.com docker load -i velero-plugin-for-aws-v1.7.1_vmware.1.tar.gz docker tag vmware.io/velero-plugin-for-aws:v1.7.1_vmware.1 docker load -i velero-restic-restore-helper-v1.11.1+vmware.1.tar.gz docker tag projects.registry.vmware.com/tkg/velero/velero-restic-restore-helper:v1.11.1_vmware.1 harbor.example.com/vmware-tanzu/velero-restic-restore-helper:v1.11.1_vmware.1 harbor.example.com/vmware-tanzu/velero-plugin-for-aws:v1.7.1_vmware.1 docker load -i velero-v1.11.1+vmware.1.tar.gz docker tag projects.registry.vmware.com/tkg/velero/velero:v1.11.1_vmware.1 harbor.example.com/vmware-tanzu/velero:v1.11.1_vmware.1 docker push harbor.example.com/vmware-tanzu/velero-plugin-for-aws:v1.7.1_vmware.1 docker push harbor.example.com/vmware-tanzu/velero-restic-restore-helper:v1.11.1_vmware.1 docker push harbor.example.com/vmware-tanzu/velero:v1.11.1_vmware.1 -
Install Velero:
velero install --image harbor.example.com/vmware-tanzu/harbor.example.com/vmware-tanzu/velero:v1.11.1_vmware.1 \
--plugins harbor.example.com/vmware-tanzu/velero-plugin-for-aws:v1.7.1_vmware.1 \
--provider aws --bucket tkgi-velero --secret-file ./credentials-minio \
--use-volume-snapshots=false \
--backup-location-config region=minio,s3ForcePathStyle="true",s3Url=http://20.20.224.27:9000,publicUrl=http://20.20.224.27:9000 --use-node-agent --default-volumes-to-fs-backup
For example:
$ velero install --image harbor.example.com/vmware-tanzu/harbor.example.com/vmware-tanzu/velero:v1.11.1_vmware.1 --plugins harbor.example.com/vmware-tanzu/velero-plugin-for-aws:v1.7.1_vmware.1 --provider aws --bucket tkgi-velero --secret-file ./credentials-minio --use-volume-snapshots=false    --backup-location-config region=minio,s3ForcePathStyle="true",s3Url=http://20.20.224.27:9000,publicUrl=http://20.20.224.27:9000 --use-node-agent --default-volumes-to-fs-backup
Velero is installed! Use 'kubectl logs deployment/velero -n velero' to view the status.
For more information about installing Velero, see On-Premises Environments in the Velero documentation.
-
After installing, configure the restic post-installation settings. Velero v1.10 sets its node-agent to
resticby default:- Customize the restore helper container and make it the init container for the pod during the restore process. You can do this by following Customize Restore Helper Container and using its ConfigMap example in the Velero documentation.
- Modify the host path by editing the restic DaemonSet manifest. Replace
/var/lib/kubelet/podswith/var/vcap/data/kubelet/pods. Verify that the restic pods are running. For more information, see Modify the Host Path above. - (Optional) You can increase the restic timeout for backups 1 TB or larger by editing the Velero deployment manifest and adding
'- --restic-timeout=900m'tospec.template.spec.containers. -
(Optional) Adjust your restic node-agent Pod CPU and memory reserves: Depending on your requirements, you can adjust the CPU and memory reserves and limits for your Velero and restic Pods. For more information, see Adjust Velero Memory Limits (if necessary) above.
restic podresources: limits: cpu: "1" memory: 1Gi requests: cpu: 500m memory: 512Mivelero pod
resources:
limits:
cpu: "1"
memory: 256Mi
requests:
cpu: 500m
memory: 128Mi
