


Install NSX ALB in a VMware Cloud Environment
NSX Advanced Load Balancer, formerly known as Avi Vantage, provides L4+L7 load balancing services to Tanzu Kubernetes Grid deployments on VMware Cloud on AWS, Azure VMware Solution, and Google Cloud VMware Engine. Tanzu Kubernetes Grid (TKG) includes VMware NSX Advanced Load Balancer Essentials Edition.
This topic explains how to install NSX Advanced Load Balancer in the following environments:
- VMware Cloud on AWS
- Prepare Azure VMware Solution
- Prepare Google Cloud VMware Engine
For how to install NSX Advanced Load Balancer in a vSphere environment, see Install and Configure NSX ALB.
Installing NSX Advanced Load Balancer requires steps in the cloud infrastructure, in VMware vCenter, and in NSX Advanced Load Balancer.
Overview of the Steps
Prerequisite: A VMware cloud environment prepared for TKG as described in Prepare to Deploy Management Clusters to a VMware Cloud Environment.
The following provides a high-level overview of the steps. Each link takes you the detailed instructions for the high-level step.
- Install Avi Controller on vCenter Server
- Initial Configuration
- Create Custom Certificate
- Configure Network
- Configure IPAM and Associate with Default-Cloud
- Deploy Service Engine
- What to Do Next
Install Avi Controller on vCenter Server
You install Avi Controller on vCenter Server by downloading and deploying an OVA template. The following instructions provide guidance that are specific to deploying Avi Controller for Tanzu Kubernetes Grid.
- Ensure that your vCenter environment fulfills the prerequisites described in Installing Avi Vantage for VMware vCenter in the Avi Networks documentation.
- Download the Avi Controller OVA.
- Go to the Tanzu Kubernetes Grid downloads page.
- In the VMware NSX Advanced Load Balancer row, click View Group.
- Click the download button.
- In the customer portal, go to Software.
- Click the version number for the version you want to download. For example, 22.1.1.
- Scroll down to VMware.
- Click the download button for Controller OVA and download the Controller OVA.
-
Install the Controller OVA.
- Log in to the vSphere Client.
- In the vSphere Client, right-click an object in the vCenter Server inventory, select Deploy OVF template.
- Select Local File, click the button to upload files, and navigate to the downloaded OVA file on your local machine.
-
Follow the installer prompts to deploy a VM from the OVA template. For instructions, see Deploying Avi Controller OVA in the Avi Networks documentation.
Select the following options in the OVA deployment wizard:
- Provide a name for the Controller VM, for example,
nsx-adv-lb-controllerand the datacenter in which to deploy it. - Select the cluster in which to deploy the Controller VM.
- Review the OVA details, then select a datastore for the VM files. For the disk format, select Thick Provision Lazy Zeroed.
- For the network mapping, select a port group for the Controller to use to communicate with vCenter Server. The network must have access to the management network on which vCenter Server is running.
- If DHCP is available, you can use it for controller management.
- Specify the management IP address, subnet mask, and default gateway. If you use DHCP, you can leave these fields empty.
- Leave the key field in the template empty.
- On the final page of the installer, click Finish to start the deployment.
- Provide a name for the Controller VM, for example,
It takes some time for the deployment to finish.
-
After the OVA deployment finishes, power on the resulting VM.
After you power on the VM, it takes some time for the VM to be ready to use.
NoteSee the Tanzu Kubernetes Grid v2.4 Release Notes for which Avi Controller versions are supported in this release. To upgrade the Avi Controller, see Flexible Upgrades for Avi Vantage.
Initial Configuration
After the VM powers on, log in to the web interface for Avi Controller and follow the wizard to do the initial setup.
- Enter and confirm a password.
- Enter and confirm a backup passphrase.
- For Orchestrator Integration, select No Orchestrator.
- For Tenant Settings, click No.
You can leave all other fields as defaults.
For more information about doing the Avi Controller initial setup, see Performing the Avi Controller Initial Setup in Avi documentation.
Create a Custom Certificate
The default NSX Advanced Load Balancer certificate does not contain the Controller’s IP or FQDN in the Subject Alternate Names (SAN). However, Avi Controller’s certificate must have valid SANs. Therefore, in the Controller UI, create a custom certificate with valid SANs that you will use when you deploy management clusters.
-
Create a custom certificate.
- In the Controller UI, click the menu in the top left corner and go to Templates > Security > SSL/TLS Certificates.
- Click Create and select Controller Certificate.
- Enter the same name in the Name and Common Name text boxes.
- Select Self-Signed.
-
For Subject Alternate Name (SAN), enter either the IP address or FQDN, or both, of the Controller VM.
If you enter only the IP address or only the FQDN, ensure that it matches the value that you use for Controller Host when you configure NSX Advanced Load Balancer settings during management cluster deployment, or specify in the
AVI_CONTROLLERvariable in the management cluster configuration file. - Leave the other fields empty and click Save.
- Add the certificate to use as the SSL certificate.
- In the menu on the top left corner, select Administration.
- Go to Settings > Access Settings.
- Click the edit icon in System Access Settings.
- Delete all of the certificates in SSL/TLS Certificate.
- Use the SSL/TLS Certificate drop-down menu to add the custom certificate that you created.
- Click Save.
-
Export the certificate.
- In the menu in the top left corner, select Templates > Security > SSL/TLS Certificates
- Select the certificate you created and click the download icon to export the certificate.
- In the Export Certificate window, for Certificate, click Copy to clipboard.
- Retain the certificate string for deploying the TKG management cluster using the installer interface, to paste into the UI.
-
Encode the certificate as base64.
Ensure that the encoded string is in one line.
Note
If you use the Tanzu Kubernetes Grid installer UI to deploy a management cluster, you can copy the un-encoded certificate string. The installer automatically encodes the certificate string.
You will need the certificate contents when you deploy management clusters.
Configure Network
Create a network in Avi Controller and map it to the NSX segment that you will use for creating clusters.
- In the Controller UI, click the menu on the top left corner and go to Infrastructure > Networks.
- Click Create.
- In the Edit Network Settings window,
- Enter a name for the segment.
- Select the check box for DHCP Enabled.
- Select the check box for IPv6 Auto Configuration.
- Click + Add Subnet.
- Enter IP Subnet.
- Select the check box for Use Static IP Address for VIPs and SE.
- Click Save.
Configure IPAM and Associate with Default Cloud
In the Controller UI, configure IPAM and associate it with Default-Cloud.
-
Create an IPAM profile.
- In the Controller UI, go to Templates > Profiles > IPAM/DNS Profiles.
-
Click Create and select IPAM Profile.
- Enter a name for the profile, for example,
tkg-ipam-profile. - Leave the Type set to Avi Vantage IPAM.
- Leave Allocate IP in VRF unchecked.
- Click Add Usable Network.
- Select Default-Cloud.
- For Usable Network, select the network where you want the virtual IPs to be allocated. If you are using a flat network topology, this can be the same network (management network) that you selected in the preceding procedure. For a different network topology, select a separate port group network for the virtual IPs.
- Click Add Usable Network to configure additional VIP networks.
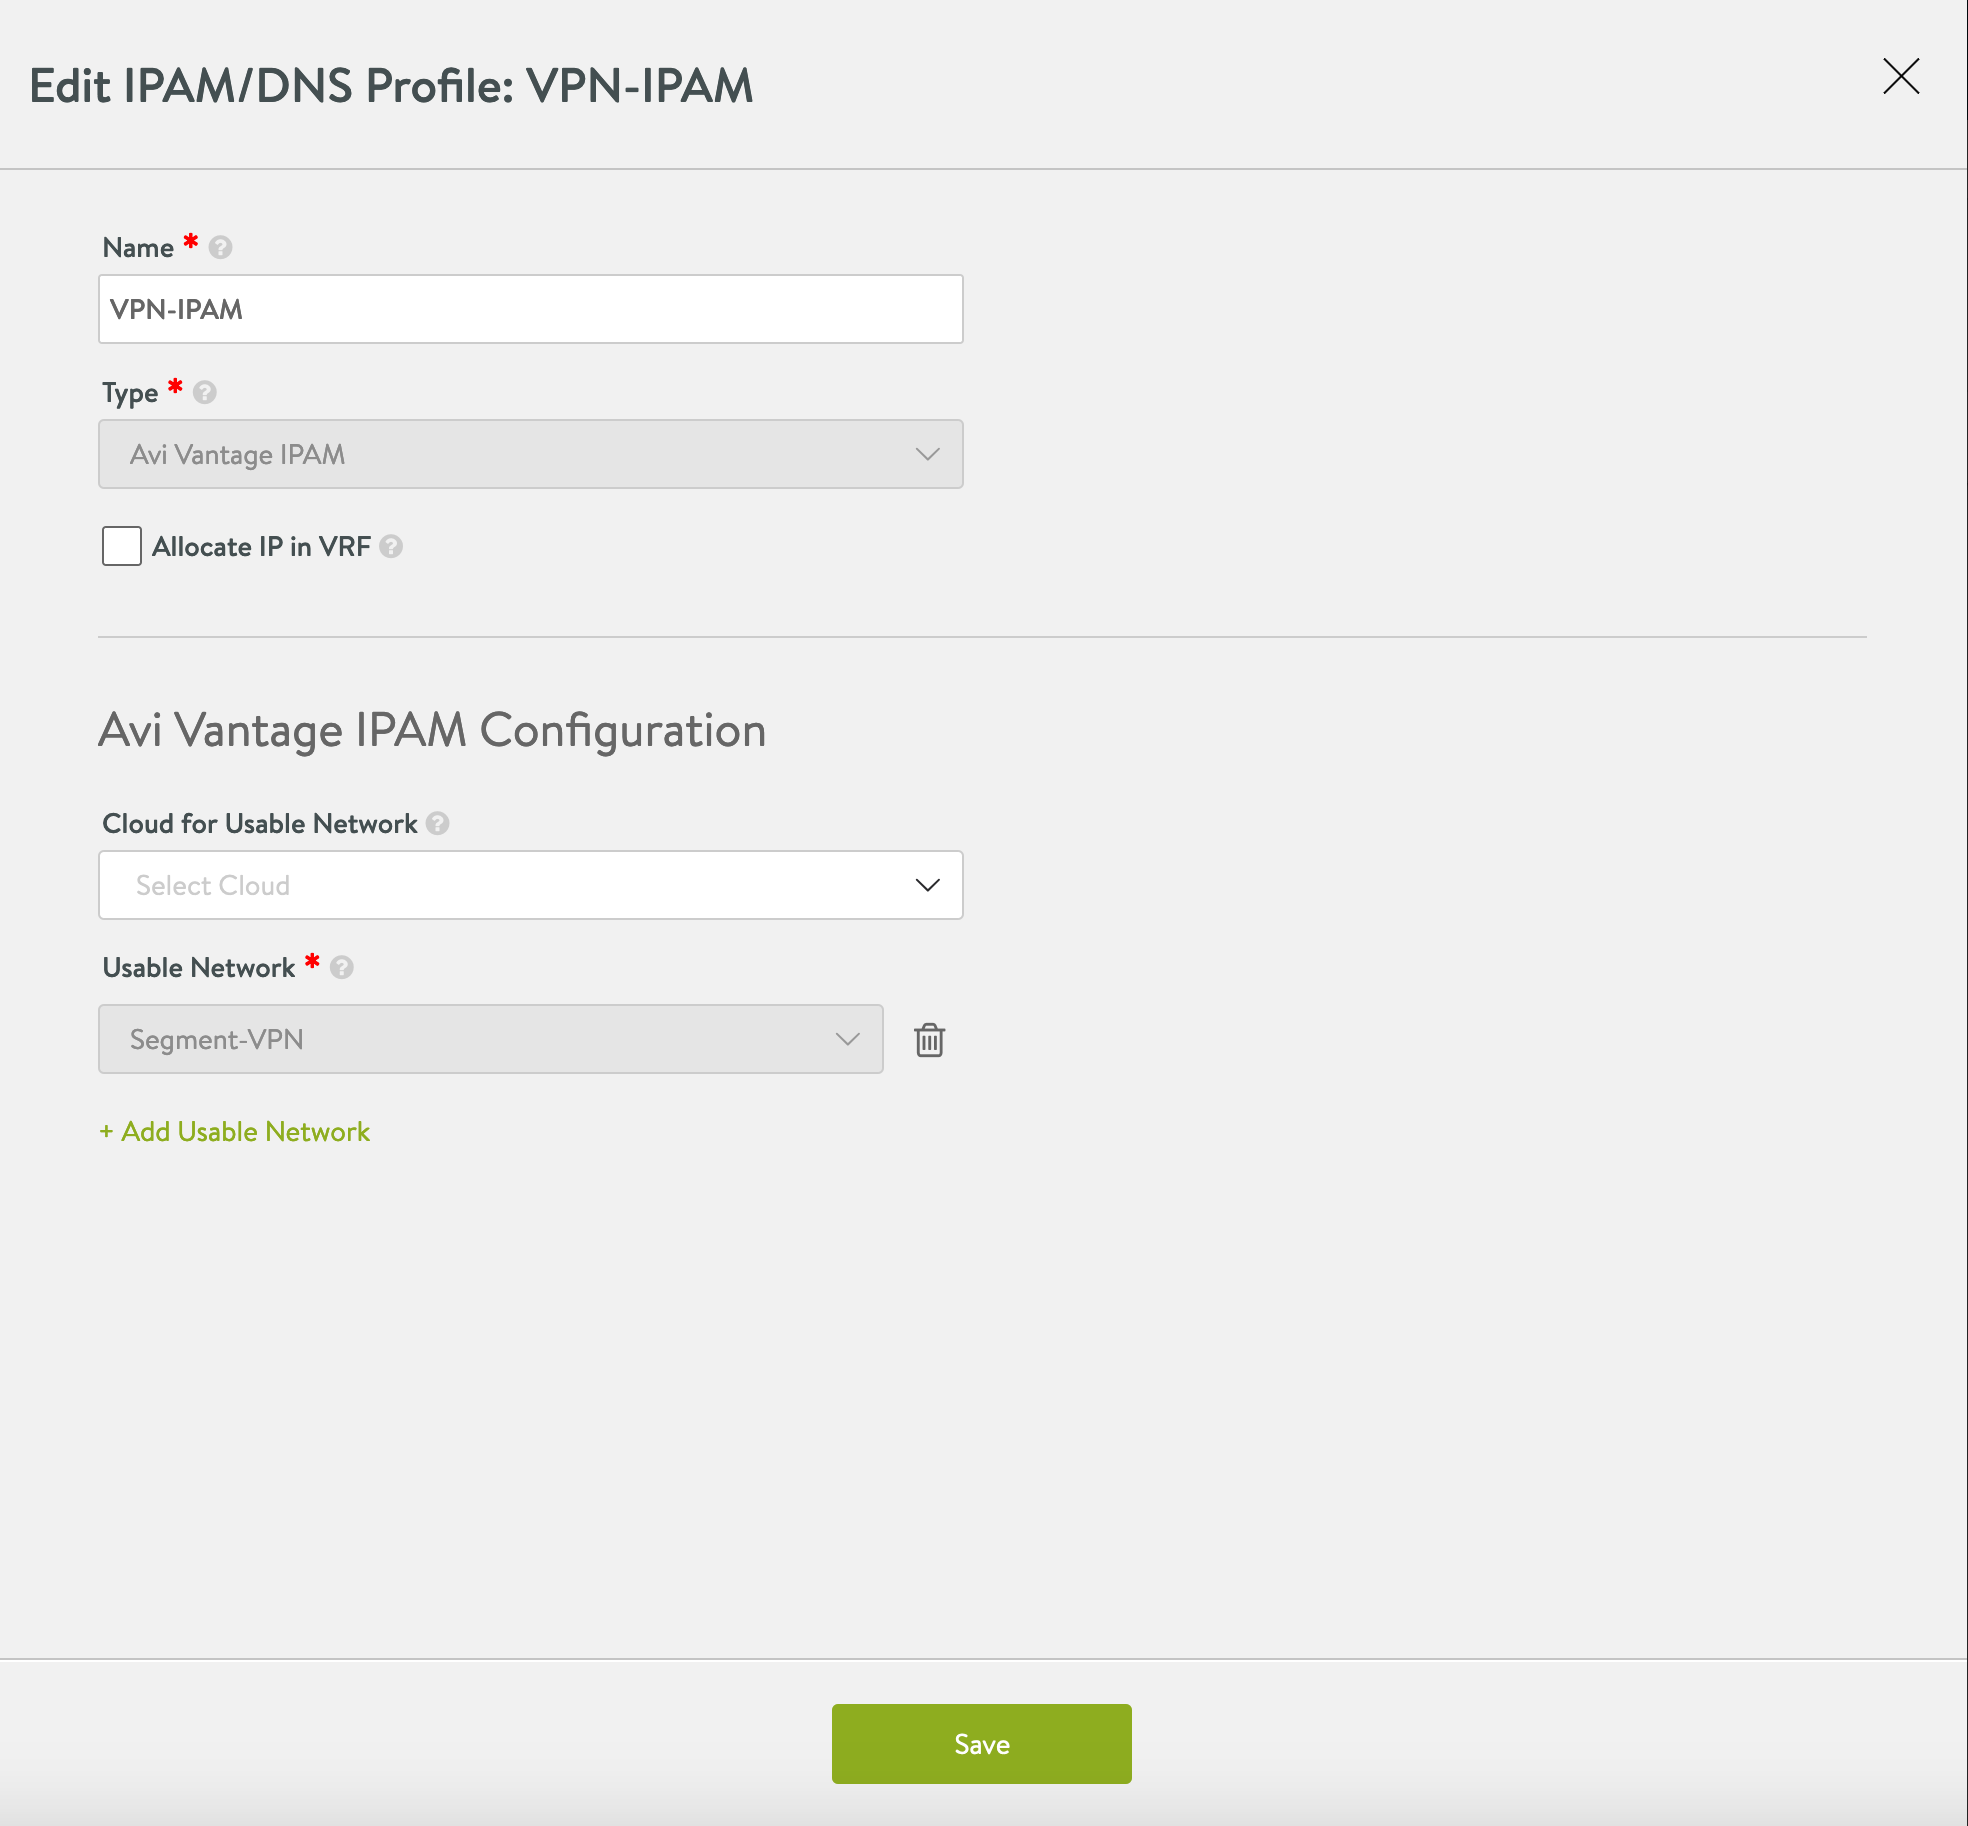
- Enter a name for the profile, for example,
- Click Save.
-
Associate the IPAM profile with Default-Cloud.
- Click the menu in the top left corner and select Infrastructure > Clouds.
- For Default-Cloud, click the edit icon.
-
In the DHCP Settings tab,

- For IPAM Profile, select the IPAM profile you created.
- For Template Service Engine Group, select Default-Group.
- Click Save.
Deploy Service Engine
After you have installed NSX Advanced Load Balancer and set up the Avi Controller, deploy the NSX Advanced Load Balancer Service Engine (SE).
To deploy an SE in a VMware Cloud on AWS deployment, see Avi Vantage Integration with VMware Cloud on AWS.
To deploy an SE in a Azure VMware Solution deployment, see VMware NSX Advanced Load Balancer in Azure VMware Solution.
To deploy an SE in a Google Cloud VMware Engine (GCVE) deployment, see NSX Advanced Load Balancer in Google Cloud VMware Engine.
What to Do Next
- Deploy the Tanzu CLI. See Install the Tanzu CLI and Kubernetes CLI for Use with Standalone Management Clusters.
- Deploy Tanzu Kubernetes Grid management cluster. See Deploying Standalone Management Clusters.
