


This guide describes how you can provision the OpenStack infrastructure and where you need to install VMware Tanzu Operations Manager. Use this topic when Installing Tanzu Operations Manager on OpenStack.
After you complete this procedure, complete all of the steps in Configuring BOSH Director on OpenStack and Configuring TAS for VMs.
Note This document uses Mirantis OpenStack for images and examples. The screenshots of your OpenStack vendor configuration interface might differ.
Step 1: Log in to the OpenStack Horizon dashboard
-
Log in to the OpenStack Horizon dashboard.

-
From the Project drop-down menu, set the active project by selecting the project where you deploy Tanzu Operations Manager.

Step 2: Configure security
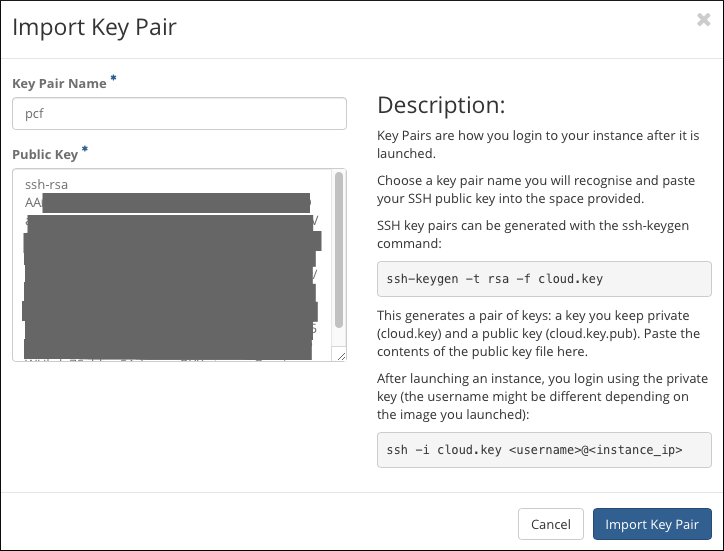
Important If you are using OpenStack Liberty or Mitaka, do not create the key pair with the OpenStack Horizon dashboard. Instead make sure that you generate the SSH key pair manually. For example, use the ssh-keygen command. Then follow this procedure to import that key pair into OpenStack. This is due to an OpenStack bug.
-
In your OpenStack Horizon dashboard, click Project, then Compute, followed by Access & Security.
-
On the Access & Security page, click the Key Pairs tab.
-
Click Import Key Pair.
-
Enter a Key Pair Name.
-
In the Public Key text box, enter the contents of your public key.
-
Click Import Key Pair.
-
In the navigation menu, click Access & Security to refresh the page. The new key pair appears in the list.
-
Click the Security Groups tab, then click Create Security Group and create a group with the following properties:
- Name:
opsmanager - Description:
Tanzu Operations Manager

- Name:
-
The Security Groups tab contains a table of the Security Groups. Select the check box for the
opsmanagerSecurity Group row and click Manage Rules in the Actions column.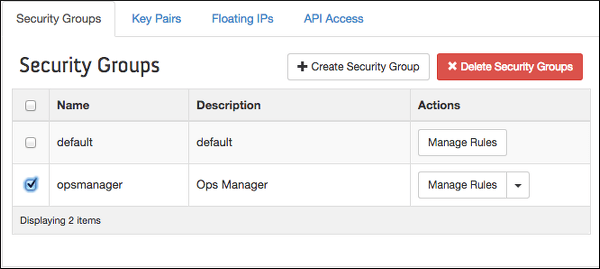
-
On the Access & Security page, add the ingress access rules for HTTP, HTTPS, and SSH as shown in the following table. The rules with
opsmanagerin the Remote column have restricted access to that particular Security Group.Adjust the remote sources as necessary for your own security compliance. VMware recommends limiting remote access to Tanzu Operations Manager to IP ranges within your organization.
Direction Ether Type IP Protocol Port/Port Range Remote Ingress IPv4 TCP 22 (SSH) 0.0.0.0/0 (CIDR) Ingress IPv4 TCP 80 (HTTP) 0.0.0.0/0 (CIDR) Ingress IPv4 TCP 443 (HTTPS) 0.0.0.0/0 (CIDR) Ingress IPv4 TCP 4222 (NATS) opsmanager Ingress IPv4 TCP 6868 (BOSH Agent) opsmanager Ingress IPv4 TCP 8844 (CredHub) opsmanager Ingress IPv4 TCP 8853 (BOSH Health Monitor) opsmanager Ingress IPv4 TCP 25250 (BOSH Blobstore) opsmanager Ingress IPv4 TCP 25555 (BOSH Director) opsmanager Ingress IPv4 TCP 25777 (BOSH Registry) opsmanager Egress IPv4 TCP 1-65535 0.0.0.0/0 (CIDR) -
Do not change the existing default egress access rules. As shown in the image, the Egress rows contain ETHER TYPE
IPv4andIPv6, respectively. Both IP PROTOCOL and PORT RANGE are set toAny.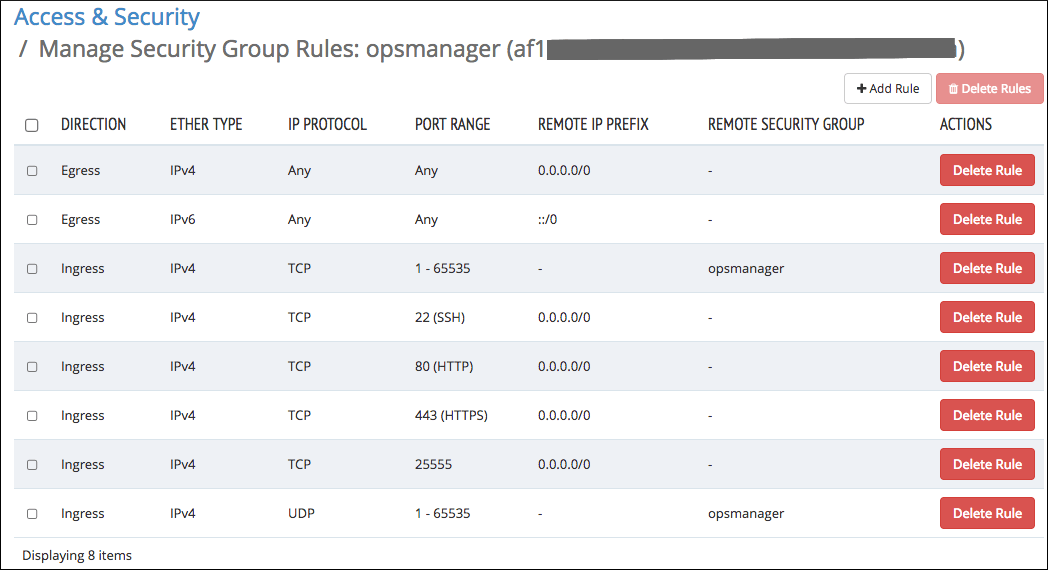
Step 3: Run the CF OpenStack Validator tool (optional)
As an optional but recommended step, you can now run the CF OpenStack Validator tool against your OpenStack tenant to verify support for Tanzu Operations Manager.
-
Follow the directions for running the CF OpenStack Validator Tool.
-
When configuring the CPI version used by the Validator, specify the OpenStack CPI version indicated in the Tanzu Operations Manager Release Notes for the Tanzu Operations Manager release that you are planning to deploy.
Troubleshooting the output of the CF OpenStack Validator tool is beyond the scope of this document.
Step 4: Create Tanzu Operations Manager image
You can create the Tanzu Operations Manager image in OpenStack using the OpenStack Horizon dashboard.
If your Horizon Dashboard does not support file uploads, you must use the Glance CLI client.
To create a Tanzu Operations Manager image in OpenStack, complete the following steps:
-
Download the Tanzu Operations Manager for OpenStack image file from Broadcom Support portal.
-
In the navigation menu, of your OpenStack dashboard, click Project, then Compute, followed by Images.
-
Click Create Image.
-
Complete the Create An Image page with the following information:
- Name: Enter
Tanzu Operations Manager. - Image Source: Select Image File.
- Image File: Click Choose File. Browse to and select the image file that you downloaded from Broadcom Support portal.
- Format: Select Raw.
- Minimum Disk (GB): Enter
80. - Minimum RAM (MB): Enter
8192. - Deselect the Public check box.
-
Select the Protected check box.
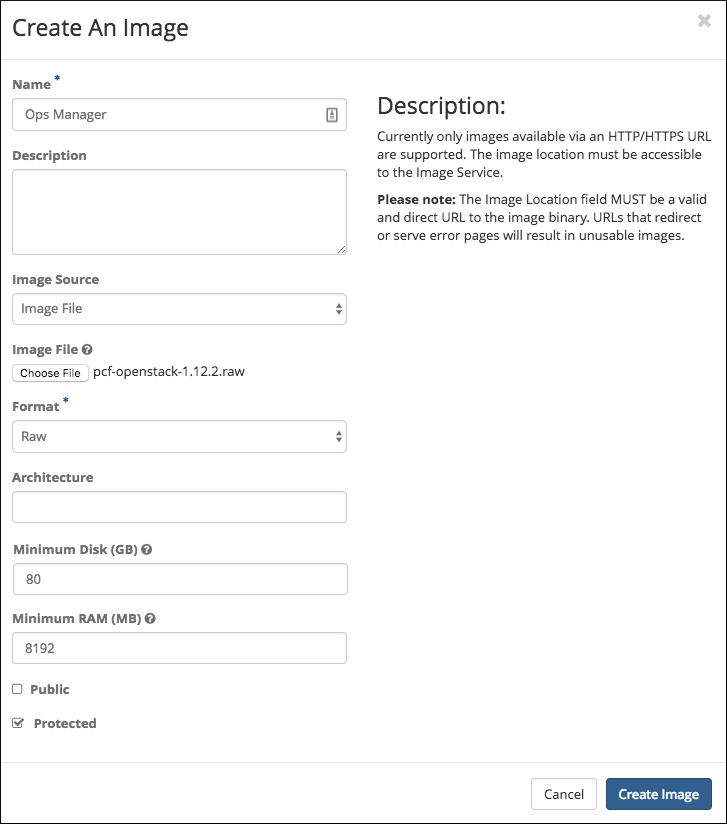
- Name: Enter
-
Click Create Image.
Step 5: Launch Tanzu Operations Manager VM
-
In the navigation menu of your OpenStack dashboard, click Project, then Compute, followed by Images.
-
Select the ‘Ops Manager’ row, and in the Actions column, click Launch.

-
In the Details tab, specify the following values:
- Instance Name: Enter
Tanzu Operations Manager. - Availability Zone: Use the dropdown to select an availability zone. You specify this availability zone in the Complete the Availability Zones Pages step of Configuring Tanzu Operations Manager Director.
-
Count: Do not change from the default value of 1.

- Instance Name: Enter
-
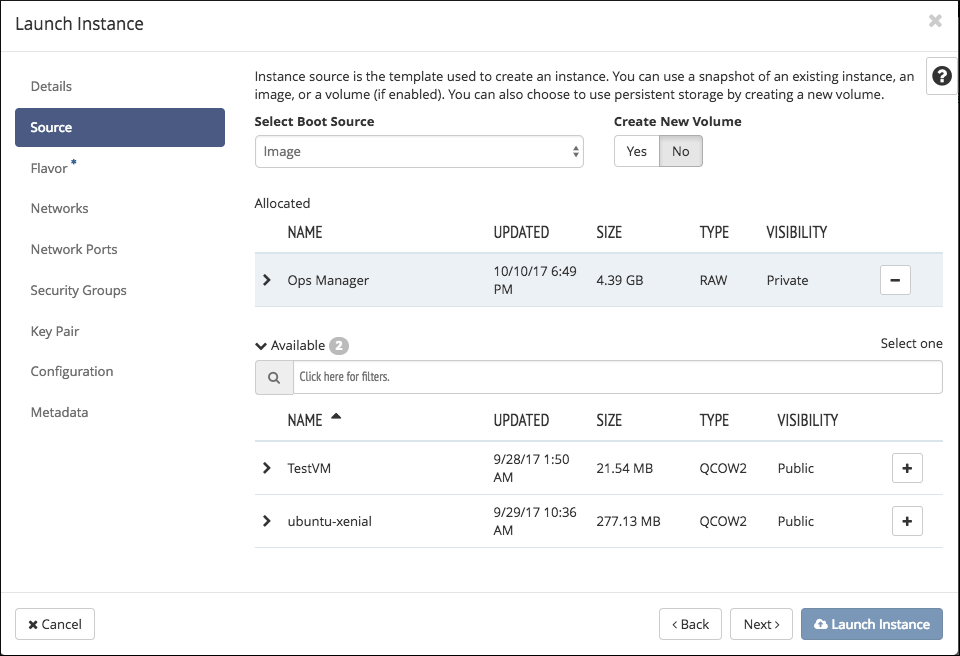
Click the Source tab in the left navigation menu, and specify the following values:
- Select Boot Source: Select Image.
- Create New Volume: Leave No selected.
-
Allocated: Make sure Tanzu Operations Manager is selected.
-
Click the Flavor tab, and configure the OpenStack VM flavors as follows. Do not change the names of the VM flavors.
ID Name Memory_MB Disk Ephemeral VCPUs 1 m1.small 2048 20 0 1 2 m1.medium 4096 40 0 2 3 m1.large 8192 80 0 4 4 m1.xlarge 16384 160 0 8 -
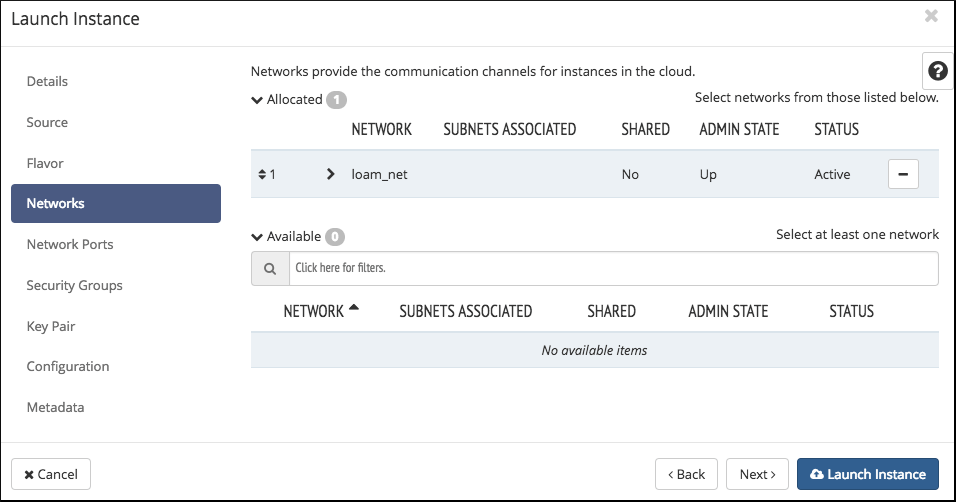
Click the Networks tab, and select a private subnet. You need to add a Floating IP to this network in a later step.
-
Skip the Network Ports tab.
-
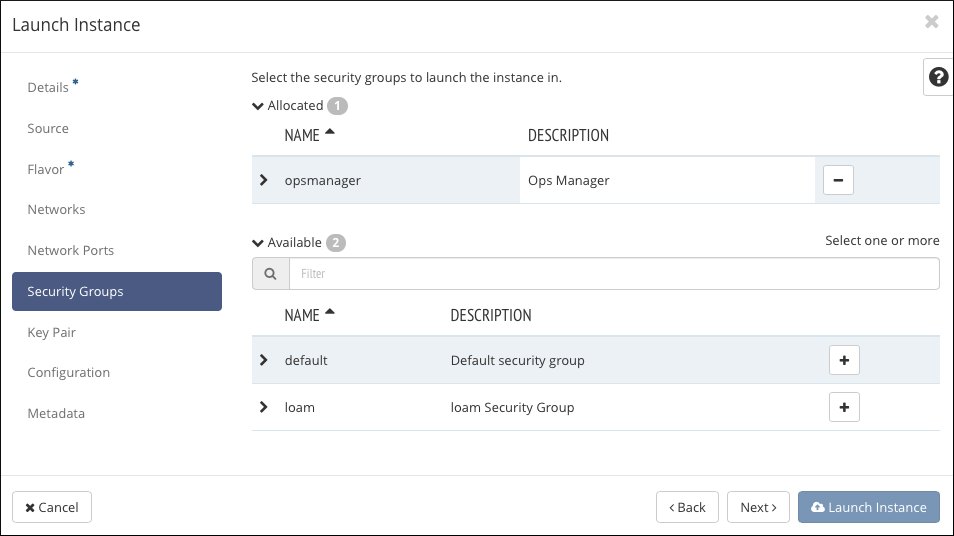
Click the Security Groups tab, and click the opsmanager security group that you created in Step 2: Configure security. Deselect all other Security Groups.
-
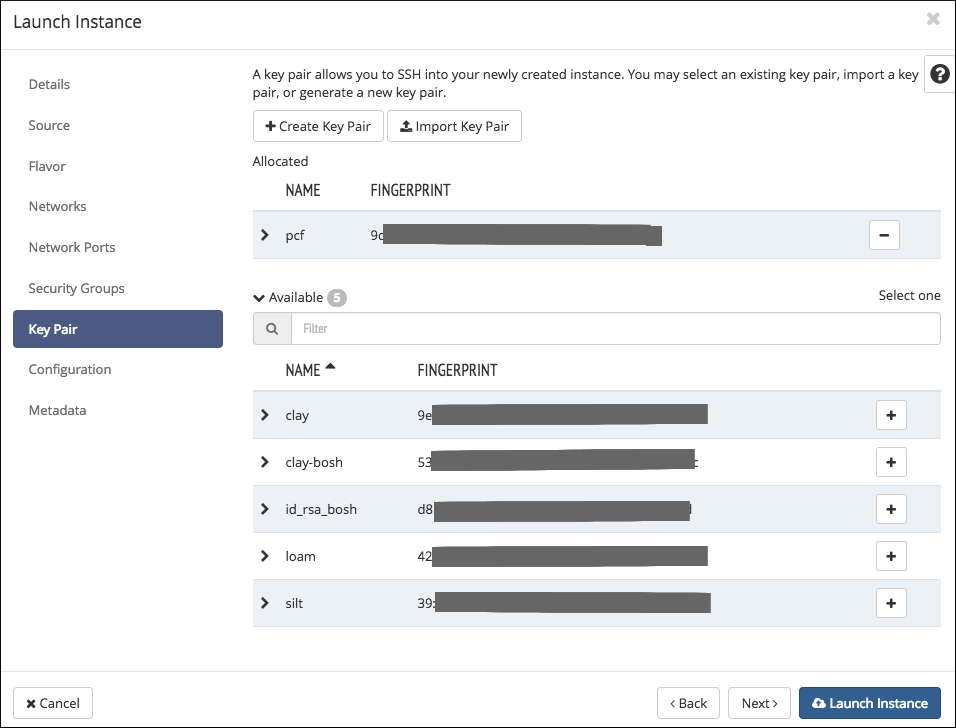
Click the Key Pair tab, and select the key pair that you imported in Step 2: Configure security.
-
Skip the Configuration and Metadata tabs.
-
Click the Launch Instance button. This starts your new Tanzu Operations Manager instance.
Step 6: Associate a floating IP address
-
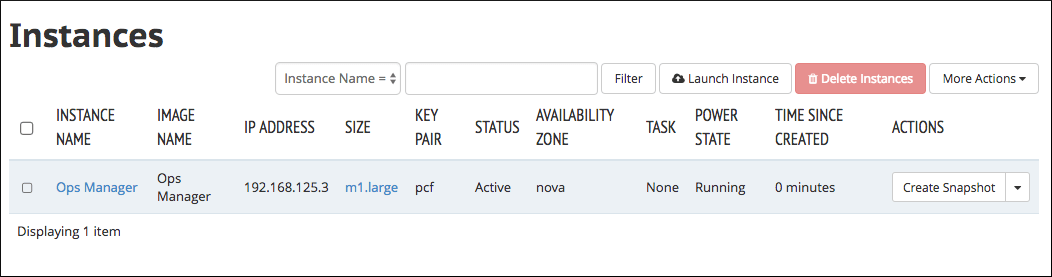
In the navigation of your OpenStack dashboard, click Project, then Compute, followed by Instances. The Instances table appears. You see a row with INSTANCE NAME Tanzu Operations Manager.
-
Wait until the Power State of the Tanzu Operations Manager instance shows as Running.
-
Record the private IP Address of the Tanzu Operations Manager instance from the row.
You must provide this IP Address when you complete Step 6: Complete the Create Networks page in Tanzu Operations Manager.
-
Select the Tanzu Operations Manager row by clicking the check box in the left-most column.
-
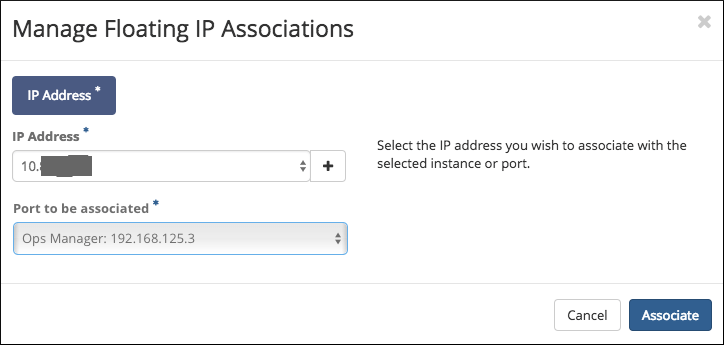
In the Actions column, use the drop-down menu to select Associate Floating IP. The Manage Floating IP Associations screen appears.

-
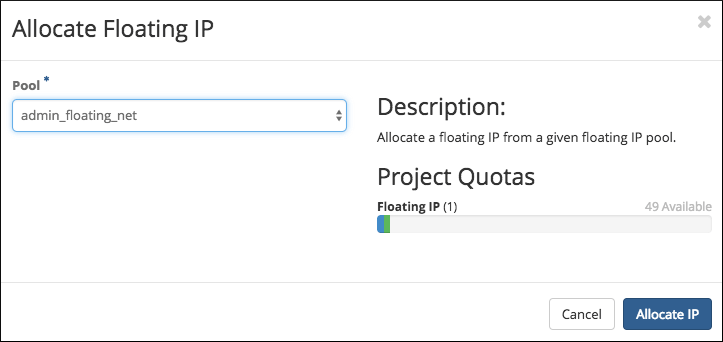
Beside IP Address, click the plus button (+). The Allocate Floating IP screen appears.
-
In the Pool drop-down menu, select an IP Pool and click Allocate IP.
-
In the Port to be associated drop-down menu, select your Tanzu Operations Manager instance.
-
Click Associate.
Step 7: Add Blob storage
-
In the navigation of your OpenStack dashboard, click Project, then Object Store, followed by Containers.
-
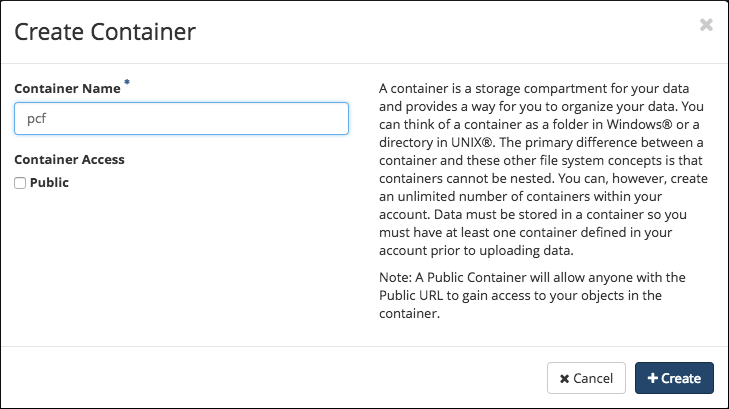
Click Create Container. Create a container with the following properties:
- Container Name: Enter
pcf. -
Container Access: Leave the public check box unselected.
- Container Name: Enter
-
Click Create.
Step 8: Download credentials for S3 Blob storage
-
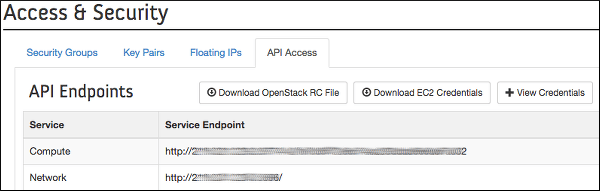
In the left navigation menu on the OpenStack dashboard, click Project, then Compute, then Access & Security. Click the API Access tab.
-
Click Download EC2 Credentials.
-
Unzip the downloaded credentials file.
-
If you select S3 Compatible Blobstore in your BOSH Director Config, you need the contents of this file to complete the configuration.
Step 9: Create a DNS entry
Create a DNS entry for the floating IP address that you assigned to Tanzu Operations Manager in Step 6: Associate a floating IP address.
You must use this fully qualified domain name when you log into Tanzu Operations Manager for the first time.
Step 10: Configure BOSH Director for OpenStack
After you complete this procedure, then complete all of the steps in the Configuring BOSH Director on OpenStack and Configuring TAS for VMs.
