


This topic describes how you can configure BOSH Director after you deploy VMware Tanzu Operations Manager on OpenStack. Use this topic when Installing Tanzu Operations Manager on OpenStack.
-
Before you begin this procedure, ensure that you have successfully completed all steps in Provisioning the OpenStack infrastructure.
-
After you complete this procedure, follow the instructions in Configuring TAS for VMs.
You can also complete the procedures in this topic using the Tanzu Operations Manager API. For more information, see Using the Tanzu Operations Manager API.
Step 1: Log into Tanzu Operations Manager
-
In a web browser, go to the fully qualified domain you created in the Create a DNS entry step of Provisioning the OpenStack Infrastructure.
-
Log in to Tanzu Operations Manager. To log in, see Log in to Tanzu Operations Manager for the first time.
Step 2: OpenStack Configs page
-
In your OpenStack dashboard, click Project, then Compute, followed by Access & Security. Click the API Access tab.
-
In the SERVICE column, find the Identity row. Record the Service Endpoint in this row. You need this Service Endpoint as the Authentication URL for Tanzu Operations Manager in a later step.

-
In the Tanzu Operations Manager Installation Dashboard, click the BOSH Director tile.
-
Select OpenStack Configs.
-
Complete the OpenStack Management Console Config page with the following information:
- Name: Enter a unique name for the OpenStack config.
- Authentication URL: Enter the Service Endpoint for the Identity service that you recorded in a previous step.
-
Keystone Version: Choose a Keystone version, either v2 or v3.
- If you choose v3, enter the OpenStack Keystone domain to authenticate against in the Domain field. For more information about Keystone domains in OpenStack, see Domains in the OpenStack documentation.

-
Username: Enter your OpenStack Horizon username. The
PrimaryProjectfor the user must be the project you are using to deploy Tanzu Operations Manager. For more information, see Manage projects and users in the OpenStack documentation. - Password: Enter your OpenStack Horizon password.
- Tenant: Enter your OpenStack tenant name.
-
Region: Enter
RegionOne, or another region if recommended by your OpenStack administrator.
-
Select OpenStack Network Type: Select either Nova, the legacy OpenStack networking model, or Neutron, the newer networking model.
- Ignore Server Availability Zone: Ensure that the check box is not selected.
- Security Group Name: Enter
opsmanager. You created this Security Group in the Configure Security step of Provisioning the OpenStack Infrastructure. -
Key Pair Name: Enter the name of the key pair that you created in the Configure Security step of Provisioning the OpenStack Infrastructure.

-
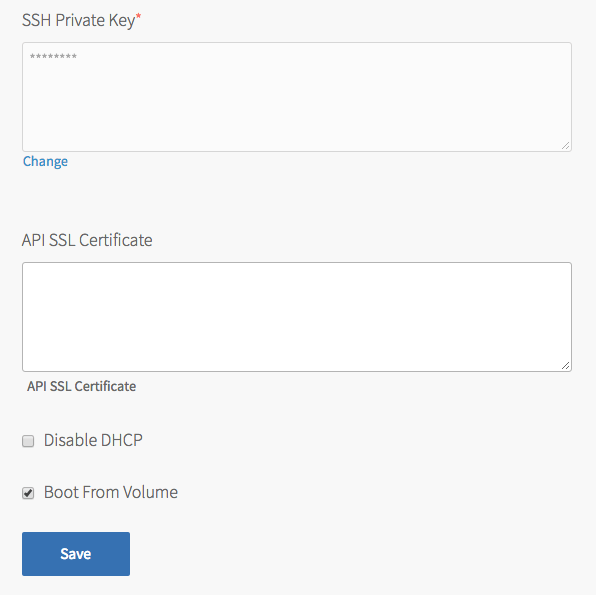
SSH Private Key: In a text editor, open the key pair file that you downloaded in the Configure Security step of Provisioning the OpenStack Infrastructure. Copy and paste the contents of the key pair file into the field.
- (Optional) API SSL Certificate: If you configured API SSL termination in your OpenStack Dashboard, enter your API SSL Certificate.
- Disable DHCP: Do not select the check box unless your configuration requires it.
-
Boot From Volume: Select the check box to boot VMs from a Cinder volume.
-
Click Save.
-
(Optional) Click Add OpenStack Config to configure additional data centers. Click Save for each additional OpenStack config to add it successfully. For more information, see Managing Multiple Data Centers.
Step 3: Advanced Config page (optional)
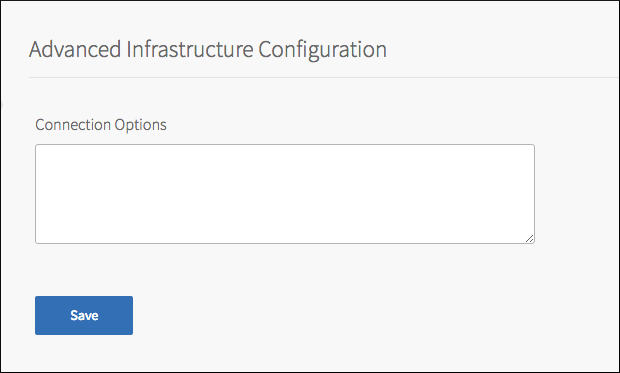
This is an advanced option. Most users leave this field blank.
-
In Tanzu Operations Manager, select Advanced Infrastructure Config.
-
If your OpenStack environment requires specific connection options, enter them in the Connection Options text box in JSON format. For example:
'connection_options' => { 'read_timeout' => 200 }Your connection options apply to all of your OpenStack configs.
-
Click Save.
Step 4: Director Config page
To configure the Director Config pane:
-
Click Director Config.

-
Enter one or more NTP servers in the NTP Servers (comma delimited) text box. For example,
us.pool.ntp.org.- The NTP server configuration updates only after VM recreation. If you modify the value of this field, select the Recreate VMs deployed by the BOSH Director check box to re-create your BOSH Director-deployed VMs and update the NTP server configuration. If you have any service tiles installed, ensure that the Recreate All Service Instances errand runs for each service tile.
-
Leave the Bosh HM Forwarder IP Address text box blank. BOSH-reported component metrics are available in Loggregator Firehose by default. If you continue to use the BOSH HM Forwarder to consume these component metrics, you might receive duplicate data.
-
Select the Enable VM Resurrector Plugin check box to enable the BOSH Resurrector functionality and increase your runtime availability.
-
If you want to collect detailed metrics from BOSH-managed VMs, select the Enable System Metrics check box. For a list of metrics that the System Metrics Agent collects from BOSH-managed VMs, see System Metrics Agent on GitHub. When you select this check box, ensure that the System Metrics Scraper is able to connect on port
53035to all BOSH-managed VMs. -
Select Enable Post Deploy Scripts to run a post deployment script after deployment. This script allows the job to execute additional commands against a deployment.
If you intend to install VMware Tanzu Kubernetes Grid Integrated Edition (TKGI), you must enable post-deploy scripts.
-
Click Recreate VMs deployed by the BOSH Director to force BOSH to recreate BOSH-deployed VMs on the next deployment. This process does not recreate the BOSH Director VM or destroy any persistent disk data. This check box is cleared automatically after a successful redeployment.
-
Select Recreate BOSH Director VMs to force the BOSH Director VM to be recreated on the next deploy. This process does not destroy any persistent disk data. This check box is cleared automatically after a successful redeployment.
-
Select Recreate All Persistent Disks to force BOSH to migrate and recreate persistent disks for the BOSH Director and all tiles. This process does not destroy any persistent disk data. This check box is cleared automatically after a successful redeployment.
-
Select Enable bosh deploy retries to instruct Tanzu Operations Manager to retry failed BOSH operations up to five times.
-
Select Skip Director Drain Lifecycle to prevent drain scripts from running when the BOSH Director is recreated.
-
Select Store BOSH Job Credentials on tmpfs (beta) to store credentials for BOSH jobs on temporary file storage (tmpfs) memory, rather than on disk. You must re-create all BOSH-deployed VMs for this setting to take effect.
-
Select Keep Unreachable Director VMs to preserve BOSH Director VMs after a failed deployment for troubleshooting purposes.
-
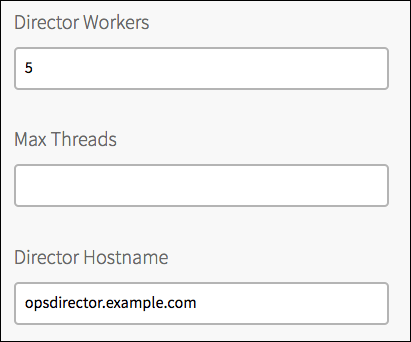
(Optional) Modify the Director Workers value, which sets the number of workers available to run BOSH Director tasks. The value in this text box defaults to
5. -
(Optional) Max Threads sets the maximum number of threads that the BOSH Director can run simultaneously. VMware recommends that you leave the text box blank to use the default value, unless doing so results in rate limiting or errors on your IaaS.
-
(Optional) To add a custom URL for your BOSH Director, enter a valid hostname in the Director Hostname text box. You can also use this text box to configure a load balancer in front of your BOSH Director. For more information, see How to set up a Load Balancer in front of Tanzu Operations Manager Director.
-
(Optional) To set a custom banner that users see when you log in to the BOSH Director using SSH, enter text in the Custom SSH Banner text box.
-
(Optional) Enter your comma-separated custom Identification Tags. For example,
iaas:foundation1, hello:world. You can use the tags to identify your foundation when viewing VMs or disks from your IaaS. -
For Certificate Duration Overrides, you can choose whether certificates generated within Tanzu Operations Manager and CredHub use the default duration specified for the certificate, or a custom duration value that you specify.

- Off: Use this option to use default duration for certificates created by all products.
-
On: Use this option to set a value to override the duration for certificates created by all products. If a product creates a certificate with a longer duration than the value you set, the longer duration is used.
- CA Certificate Duration (days): Enter the number of days for which CA certificates are valid.
- Leaf Certificate Duration (days): Enter the number of days for which leaf certificates are valid. This value must be less than or equal to the CA certificate duration.
After you set a certificate duration override, you must take additional steps to apply the setting to all certificates. For more information, see Overriding Duration for Certificates.
-
Select HM Pager Duty Plugin to enable Health Monitor integration with PagerDuty.
- Service Key: Enter your API service key from PagerDuty.
- HTTP Proxy: Enter an HTTP proxy for use with PagerDuty.

-
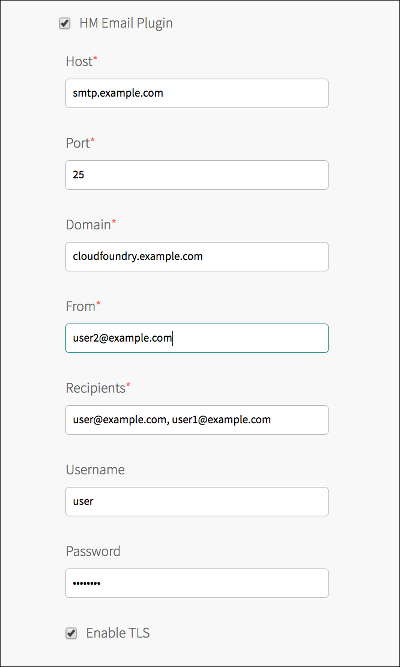
Select HM Email Plugin to enable Health Monitor integration with email.
- Host: Enter your email host name.
- Port: Enter your email port number.
- Domain: Enter your domain.
- From: Enter the address for the sender.
- Recipients: Enter a comma-separated list of addresses of intended recipients.
- Username: Enter the user name for your email server.
- Password: Enter the password for your email server.
- Enable TLS: Select this check box to enable Transport Layer Security to the email host.
-
For CredHub Encryption Provider, you can choose whether BOSH CredHub stores its encryption key internally on the BOSH Director and CredHub VM, or in an external hardware security module (HSM). The HSM option is more secure.
Before configuring an HSM encryption provider in the Director Config pane, you must follow the procedures and collect information described in Preparing CredHub HSMs for configuration.
After you deploy Tanzu Operations Manager with an HSM encryption provider, you cannot change BOSH CredHub to store encryption keys internally.
- Internal: Use this option for internal CredHub key storage. This option is selected by default and requires no additional configuration.
-
Luna HSM: Use this option to use a SafeNet Luna HSM as your permanent CredHub encryption provider, and fill in the following fields:
If you use multiple HSM hosts, you must use the Tanzu Operations Manager API to set or update the HSM configuration. For more information, see Updating a staged director's properties in the Tanzu Operations Manager API documentation.
- Encryption Key Name: Any name to identify the key that the HSM uses to encrypt and decrypt the CredHub data. Changing this key name after you deploy Tanzu Operations Manager can cause service downtime.
- Provider Partition: The partition that stores your encryption key. Changing this partition after you deploy Tanzu Operations Manager could cause service downtime. For this value and the ones that follow, use values gathered in Preparing CredHub HSMs for configuration.
- Provider Partition Password
- Partition Serial Number
- Provider Client Certificate: The certificate that validates the identity of the HSM when CredHub connects as a client.
- Provider Client Certificate Private Key
- HSM Host Address
- HSM Port Address: If you do not know your port address, enter
1792. - HSM Certificate: The certificate that the HSM presents to CredHub to establish a two-way mTLS connection.

-
Click Blobstore Location to configure the blobstore as either an internal server or an external endpoint.
After you deploy the BOSH Director, only Tanzu Operations Manager users in Advanced Mode can change the blobstore location. For more information, see Tanzu Operations Manager Fields That Lock On Deploy.
-
Internal: Use this option for an internal blobstore. No additional configuration is required.
-
S3 Compatible Blobstore: Use this option for an external S3-compatible endpoint. To create an S3 bucket, follow the procedures in Sign up for Amazon S3 and Creating a Bucket in the AWS documentation. When you have created an S3 bucket, configure the following fields:
-
S3 Endpoint:
- If you are using a public S3 endpoint:
- Locate the endpoint for your region. To find the endpoint, see the Amazon Simple Storage Service (S3) table in Regions and Endpoints in the AWS documentation.
- Construct a URL using your region’s endpoint. For example, if you are using the
us-west-2region, the URL you create would behttps://s3.us-west-2.amazonaws.com. Enter this URL into the S3 Endpoint field.
-
If you are using a non-public S3-compatible endpoint (Tanzu Operations Manager v2.10.19 or earlier):
- Enter the URL for the non-public endpoint.
-
SSH into the Tanzu Operations Manager VM by running:
ssh ubuntu@OPS-MANAGER-FQDNWhere
OPS-MANAGER-FQDNis the fully-qualified domain name (FQDN) of your Tanzu Operations Manager deployment. -
Copy the custom public CA certificate you used to sign the S3 endpoint into the
/etc/ssl/certsdirectory on the Tanzu Operations Manager VM. -
On the Tanzu Operations Manager VM, import the custom CA certificate into the Tanzu Operations Manager VM truststore by running:
sudo update-ca-certificates -f -v -
Add this custom CA certificate into the Trusted Certificates field in the Security page. For instructions, see Security Page.
- If you are using a non-public S3-compatible endpoint (Tanzu Operations Manager v2.10.20 or later:
- Enter the URL for the non-public endpoint.
- Add the custom public CA certificate you used to sign the S3 endpoint to the Trusted Certificates field on the Director Config page.
- If you are using a public S3 endpoint:
-
Bucket Name: Enter the name of the S3 bucket.
- URL Style: Click either path-style or domain-style to specify the URL style for the S3-compatible blobstore. By default, the blobstore uses domain-style URLs.
AWS ends support for path-style URLs for all S3 buckets created after September 30, 2020. For more information, see Support for Virtual-Hosted-Style URLs for AWS S3 Blobstores.
- Access Key and Secret Key: Enter the keys you generated when creating your S3 bucket.
- Enable signed URLs: Select this check box to configure BOSH VMs to generate short lived, pre-signed URLs for communication between the BOSH Agent and blobstore. If you enable this feature, BOSH Agents do not use credentials to communicate with the blobstore, and VM disks do not store blobstore credentials. This feature is only available for BOSH VMs that use Xenial stemcell line 621 or later.
- Select V2 Signature or V4 Signature. If you select V4 Signature, enter your Region. AWS recommends using Signature Version 4 (V4). For more information about AWS S3 Signatures, see Authenticating Requests in the AWS documentation.
- S3 Backup Strategy: To configure whether and how to back up the BOSH Director’s S3 blobstore, select one of the following options:
- No backups
- Use a versioned bucket: This option uses blobstore bucket versioning to save backups. It requires an S3 blobstore that supports versioning.
- Copy into an additional bucket: This option saves blobstore backups to a separate bucket, which is useful with blobstores that do not support versioning. This option requires you to configure the Backup Bucket Region and Backup Bucket Name fields.
-
-
GCS Blobstore: Use this option for an external Google Cloud Storage (GCS) endpoint.
To create a GCS bucket, follow the procedures in Creating Storage Buckets in the GCS documentation. To create a GCS bucket, you must have a GCS account. When you have created a GCS bucket, configure the following fields:
- Bucket Name: Enter the name of your GCS bucket.
- Storage Class: Use this storage class for your GCS bucket. For more information, see Storage Classes in the GCP documentation.
- Service Account Key: Follow the steps in Set up IAM Service Accounts in Preparing to Deploy Tanzu Operations Manager on GCP to download a JSON file with a private key. Enter the contents of the JSON file into the text box.
- GCS Backup Strategy: To configure whether and how to back up the BOSH Director’s GCS blobstore, click one of the following options:
- No backups
- Copy into an additional bucket: This option saves blobstore backups to a bucket separate from the blobstore itself, and requires you to configure the Backup Bucket Region and Backup Bucket Name text boxes.

-
-
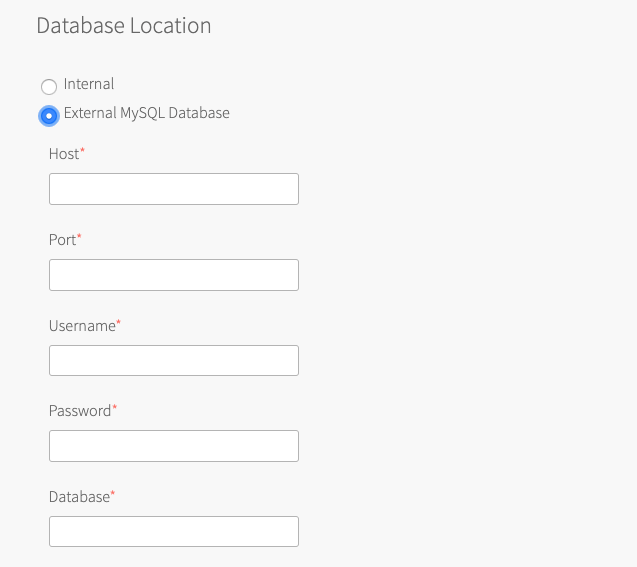
Click Database Location. By default, Tanzu Operations Manager deploys and manages an Internal database for you. If you choose to use an External MySQL Database, complete the associated fields with information obtained from your external MySQL Database provider: Host, Port, Username, Password, and Database.
Note Use of an External MySQL Database applies only to the BOSH Director. UAA and CredHub do not use these settings and continue to use the Postgres database co-located with the BOSH Director.
After you deploy the BOSH Director, you cannot change the Database Location from an External MySQL Database to an Internal database or from an Internal database to an External MySQL Database.
In addition, if you selected the Enable TLS for Director Database check box, you can complete the following optional fields:
- Enable TLS: Select this check box to enable TLS communication between the BOSH Director and the database.
- TLS CA: Enter the Certificate Authority for the TLS Certificate.
- TLS Certificate: Enter the client certificate for mutual TLS connections to the database.
- TLS Private Key: Enter the client private key for mutual TLS connections to the database.
- Advanced DB Connection Options: This text box accepts a JSON-formatted options string. It can be left blank unless directed by Broadcom Support.
-
Click Save.
Step 5: Create Availability Zones page
-
In Tanzu Operations Manager, select Create Availability Zones.

-
In Name text box, enter the name of the availability zone that you selected in the Launch Tanzu Operations Manager VM step of Provisioning the OpenStack Infrastructure.
-
(Optional) Using the IaaS Configuration drop-down menu, select an OpenStack config name. The default is set to your first OpenStack config.
-
In OpenStack Availability Zone, enter the OpenStack AZ of your OpenStack environment. Many OpenStack environments default to
nova. -
Click Add for each additional OpenStack config you created in Step 2: OpenStack Configs page. Give each AZ a unique Name and an IaaS Configuration with a different OpenStack config.
-
Click Save.
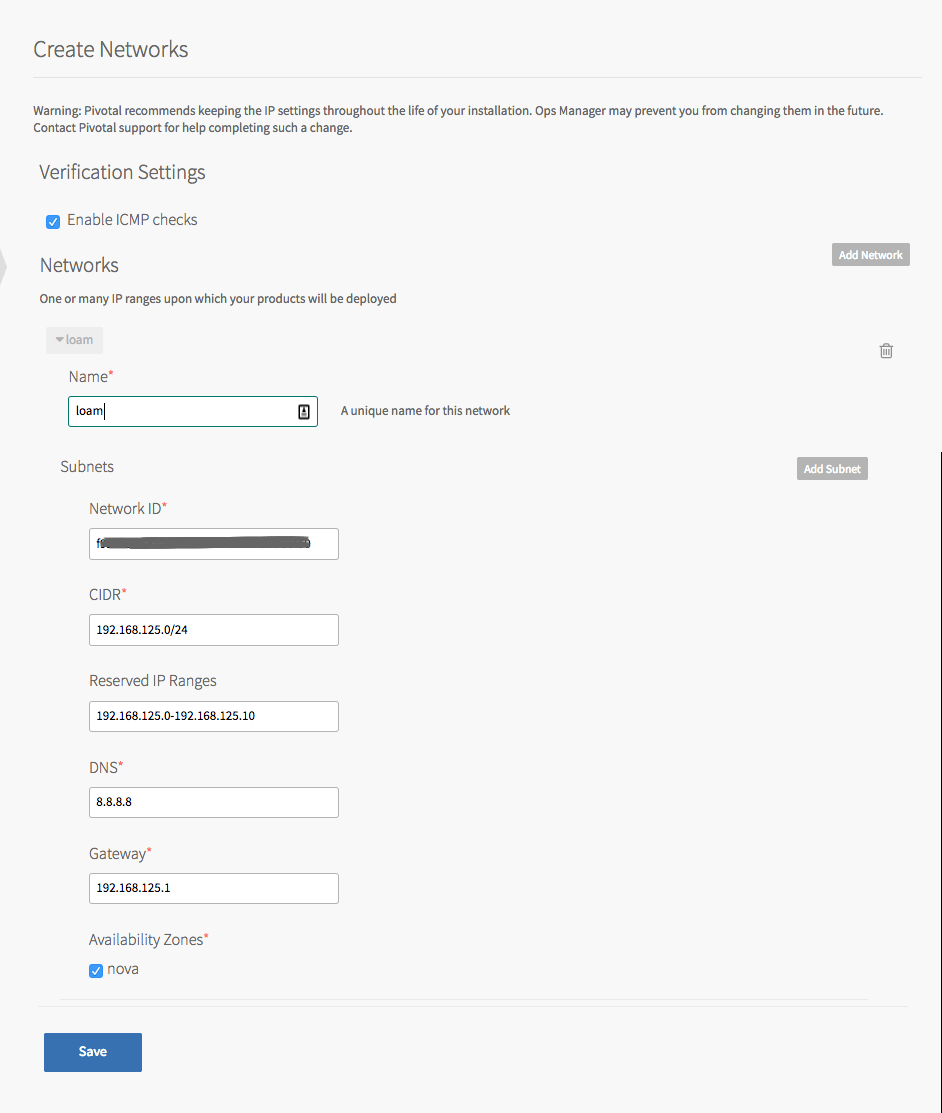
Step 6: Create Networks page
-
In the OpenStack dashboard, click Project, then Network, then Networks.
-
Click the name of the network that contains the private subnet where you deployed the Tanzu Operations Manager VM. The OpenStack Network Detail page displays your network settings. In the Subnets table, the row for your subnet contains the NETWORK ADDRESS and the GATEWAY IP.

-
In Tanzu Operations Manager, clickCreate Networks.
-
Click Enable ICMP checks to enable ICMP on your networks. Tanzu Operations Manager uses ICMP checks to confirm that components within your network are reachable. Review the Configure Security step of Deploying BOSH and Tanzu Operations Manager to OpenStack to ensure you have configured ICMP in your Security Group.
-
Use the following steps to create one or more Tanzu Operations Manager networks using information from your OpenStack network:
- Click Add Network.
- In Name, enter a unique name for the network.
- Click Add Subnet to create one or more subnets for the network.
- For Network ID, use the ID from the OpenStack page.
- For CIDR, use the Network Address from the OpenStack page.
- For Reserved IP Ranges, use the first 10 IP addresses of the Network Address range, and the private IP address of the Tanzu Operations Manager instance that you recorded in the Associate a Floating IP Address step of Provisioning the OpenStack Infrastructure.
- For DNS, enter one or more Domain Name Servers.
- For Gateway, use the Gateway IP from the OpenStack page.
- For Availability Zones, select which Availability Zones to use with the network.
- Click Save.After you deploy Tanzu Operations Manager, you add subnets with overlapping Availability Zones to expand your network. For more information about configuring additional subnets, see Expanding Your Network with Additional Subnets.
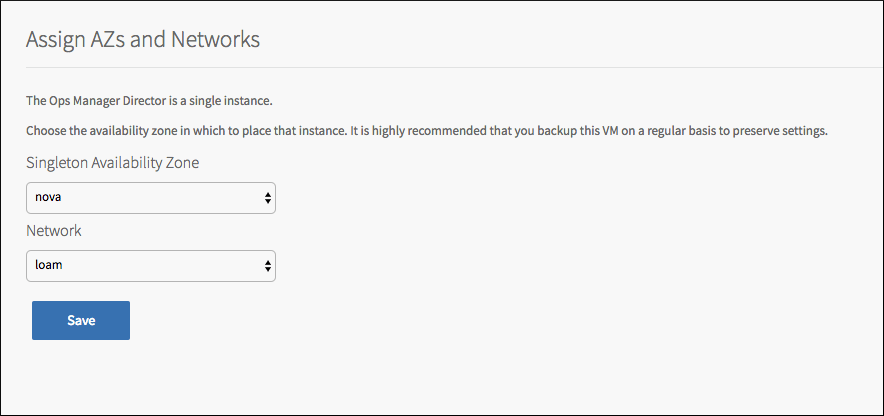
Step 7: Assign AZs and Networks page
-
Click Assign Availability Zones.
-
From the Singleton Availability Zone drop-down menu, select the availability zone that you created in a previous step. The BOSH Director installs in this Availability Zone.
-
From the Network drop-down menu, select the network you created in a previous step. BOSH Director installs in this network.
-
Click Save.
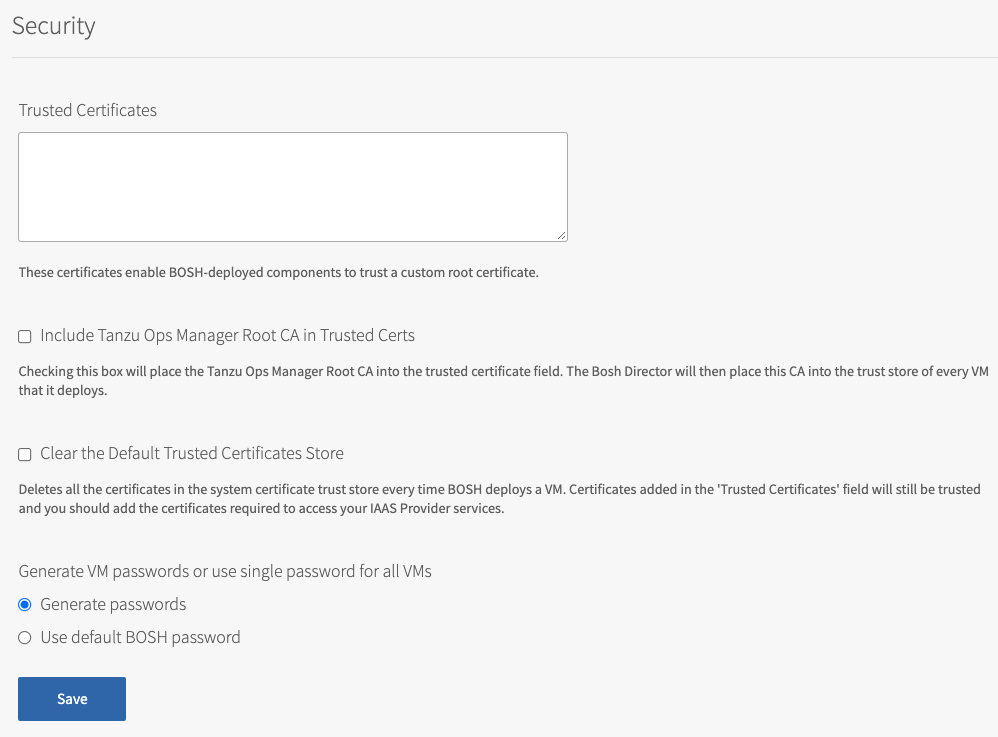
Step 8: Security page
-
Click Security.
-
In Trusted Certificates, paste in your custom certificate authority (CA) certificates to insert into your organization’s certificate trust chain. This feature enables all BOSH-deployed components in your deployment to trust custom root certificates. If you want to use Docker registries to run TAS for VMs app instances in Docker containers, enter the certificate for your private Docker registry in this text box. For more information about running app instances in TAS for VMs using Docker registries, see Using Docker Registries.
To enter multiple certificates, paste in your certificates one after the other. For example, format your certificates as shown in the following example:
-----BEGIN CERTIFICATE-----
ABCDEFGH12345678ABCDEFGH12345678ABCDEFGH12345678AB
EFGH12345678ABCDEFGH12345678ABCDEFGH12345678ABCDEF
GH12345678ABCDEFGH12345678ABCDEFGH12345678...
------END CERTIFICATE------
-----BEGIN CERTIFICATE-----
BCDEFGH12345678ABCDEFGH12345678ABCDEFGH12345678ABB
EFGH12345678ABCDEFGH12345678ABCDEFGH12345678ABCDEF
GH12345678ABCDEFGH12345678ABCDEFGH12345678...
------END CERTIFICATE------
-----BEGIN CERTIFICATE-----
CDEFGH12345678ABCDEFGH12345678ABCDEFGH12345678ABBB
EFGH12345678ABCDEFGH12345678ABCDEFGH12345678ABCDEF
GH12345678ABCDEFGH12345678ABCDEFGH12345678...
------END CERTIFICATE------
If you want to use Docker registries to run TAS for VMs app instances in Docker containers, enter the certificate for your private Docker registry in this text box. For more information about running app instances in TAS for VMs using Docker registries, see Using Docker Registries.
-
To include both the Tanzu Operations Manager root CA and the certificates pasted into Trusted Certificates in the
trusted_certsfield in the BOSH director manifest, select the Include Tanzu Ops Manager Root CA in Trusted Certs check box. BOSH Director includes this CA in the trust store of every VM that it deploys.
If you are using Tanzu Operations Manager to generate certificates for either a load balancer or router, then you must select this check box. -
To clear the default trusted certificates from all BOSH-deployed Linux VMs, select the Clear the Default Trusted Certificates Store check box. You must provide your own trusted certificates when selecting this check box because all TLS communication fails if trusted certificates are not available.
This option is available in Ops Manager v2.10.21 and higher.
-
Select Generate passwords or Use default BOSH password. VMware recommends that you use the Generate passwords option for greater security.
-
Click Save. To view your saved BOSH Director password, click the Credentials tab.
Step 9: BOSH DNS Config page
The BOSH DNS Config pane enables you to configure DNS for BOSH Director by adding excluded recursors, a recursor timeout, and handlers.
The text boxes in the BOSH DNS Config pane are:
-
Excluded Recursors: Exclude recursor addresses, which are URL redirects, so that they are not contacted by the BOSH DNS server. For more information about how the BOSH DNS release selects recursors, see Recursors in Native DNS Support in the BOSH documentation.
-
Recursor Timeout: Specify a timeout for the BOSH DNS server to contact any connected recursor addresses. The time limit includes dialing, writing, and reading from the recursor. If any of these actions exceeds the time limit, the action fails.
-
Handlers: Specify recursor addresses that apply to specific domains. For example, you can use handlers to forward all requests to a domain to a private DNS for resolution. For more information about using handlers, see Additional handlers in Native DNS Support in the BOSH documentation.
To add excluded recursors, a recursor timeout, or handlers to the BOSH DNS release:
-
Click BOSH DNS Config.
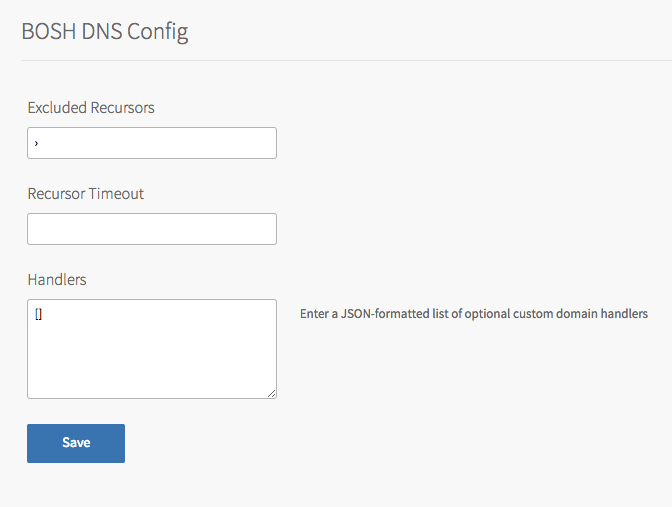
-
(Optional) In Excluded Recursors, enter a list of prohibited recursor addresses.
-
(Optional) In Recursor Timeout, enter a time limit for contacting the connected recursors.
This time limit must include one of the Go parse duration time units. For example, entering
5ssets the timeout limit to five seconds. For more information about supported time units, see func ParseDuration in the Go Programming Language documentation. -
(Optional) In Handlers, enter an array of custom domain handlers in JSON format. For example:
[ { "cache": { "enabled": true }, "domain": "example.com", "source": { "type": "http", "url": "http://example.endpoint.local" } } ] -
Click Save.
Step 10: Syslog page
-
Select Syslog.
-
(Optional) To send BOSH Director system logs to a remote server, select Yes.
-
In Address, enter the IP address or DNS name for the remote server.
-
In Port, enter the port number that the remote server listens on.
-
From the Transport Protocol drop-down menu, select TCP or UDP. This selection determines which transport protocol is used to send the logs to the remote server.
-
(Optional) Select the Enable TLS check box to send encrypted logs to remote server with TLS. After you select the checkbox:
- In Permitted Peer, enter either the name or SHA1 fingerprint of the remote peer.
-
In SSL Certificate, enter the SSL certificate for the remote server.
Note VMware strongly recommends that you enable TLS encryption when you are forwarding logs. Logs can contain sensitive information, such as cloud provider credentials.
-
(Optional) In Environment identifier, enter a string. This is a human-readable identifier that is included in each log entry.
-
(Optional) In Queue Size, enter an integer. This value specifies the number of log messages held in the buffer. The default value is 100,000.
-
(Optional) Select the Forward Debug Logs check box to forward the logs to an external source. This option is deselected by default. If you select it, you may generate a large amount of log data.
-
(Optional) In the Custom rsyslog Configuration field, enter configuration details for
rsyslog. This field requires the rainerscript syntax. -
Click Save.
Step 11: Resource Config page
-
Click Resource Config.

-
Adjust any values as necessary for your deployment. Foir example, increasing the persistent disk size. Select Automatic from the drop-down menu to provision the amount of persistent disk predefined by the job. If the persistent disk field reads None, the job does not require persistent disk space. The editable values for each job are:
- INSTANCES
- VM TYPE
- PERSISTENT DISK TYPE
For the BOSH Director job, select a VM type with at least 8 GB memory.
If you set a field to Automatic and the recommended resource allocation changes in a future version, Tanzu Operations Manager automatically uses the updated recommended allocation.
-
(Optional) To define floating IP addresses for the BOSH Director job:
- Click the icon next to the BOSH Director job name to see the FLOATING IPs field.
- Enter a floating IP address range under FLOATING IPs. The number of IP addresses in the range that you provide must match the number of job instances.
-
Click Save.
Step 12: Add custom VM extensions (optional)
Use the Tanzu Operations Manager API to add custom properties to your VMs; associated security groups and load balancers, for example. For more information, see Managing custom VM extensions.
Step 13: Complete BOSH Director installation
-
Click the Tanzu Operations Manager Installation Dashboard link to return to the Installation Dashboard.
-
Click Review Pending Changes, then click Apply Changes. If the following ICMP error message appears, click Ignore errors and start the install. The errors you can ignore are:
- Cannot reach gateway with IP 10.0.16.0 (Ignorable if CMP is deactivated)
-
Cannot reach DNS with IP 10.0.0.2 (Ignorable if CMP is deactivated)

-
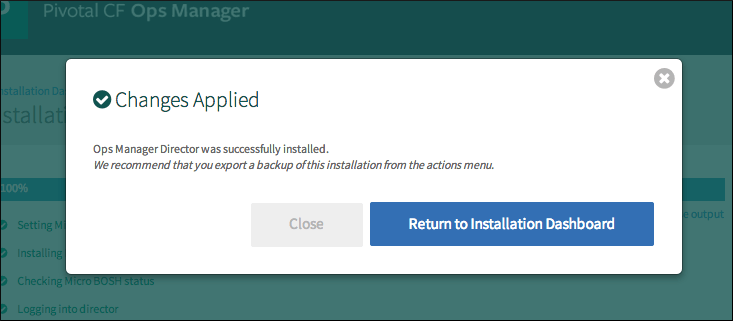
BOSH Director installation begins. When the installation process is complete, a Changes Applied message appears.
-
After you complete this procedure, follow the instructions in Configuring TAS for VMs.
Next steps
