


Create an application environment using Spaces
This topic tells you how to create an example application environment that uses Spaces. The application environment is also called a Space. You create the Space with Traits and Profiles that you installed in Setting up the infrastructure to create an application environment.
A Space is an an application-focused abstraction available in Tanzu Application Engine. For more information about Spaces, see What is a Space.
After you create the Space, you can deploy an example application called Where for Dinner? to the Space.
Before you begin
Before you create a Space, fulfill the following prerequisites.
-
Followed the Set up the infrastructure to create an application environment to create:
- A Project in your organization.
- An AWS EKS cluster that is a member of the Tanzu provided:
Runcluster group to provide the features needed to run the example applicationall-regions.tanzu.vmware.comAvailability Target that automatically containers all clusters- AWS Route 53 credentials for GSLB
-
(Optional) If you use Tanzu CLI then you must:
- Install Tanzu CLI v1.4.0 or later. Tanzu CLI is required for CLI procedures.
- Install the Tanzu CLI
platform-engineerplug-in group by running:
tanzu plugin install --group vmware-tanzu/platform-engineer- Log in to Tanzu CLI by running:
tanzu loginFor more information about using
tanzu login, and creating and managing contexts by usingtanzu context, see Create and Manage CLI Contexts.
Overview of steps to create a Space
The following provides an overview of the steps for creating a Space:
Create custom networking Profile
Each project that is created within Tanzu Platform for Kubernetes contains four default Profiles. We will use the spring-dev.tanzu.vmware.com Profile with the default configuration, but we will need to create a custom Profile that enables networking functionality because it will have environment specific ingress configuration. For this guide, we will only configure the Profile to have the configuration for AWS Route 53 to create a GSLB for the application.
- UI-based steps
-
To create a networking Profile in Tanzu Platform hub:
- In Tanzu Platform hub, set the project context to your project.
- On the left navigation pane, expand Application Spaces.
- Click Profiles.
- Click Create Profile.
- Select Step by Step.
- For Profile Name, enter
my-custom-networkingand click Next. -
In the Traits screen, select the following Traits:
multicloud-cert-manager.tanzu.vmware.commulticloud-ingress.tanzu.vmware.com
-
Expand the configuration for multicloud-ingress.tanzu.vmware.com
-
Override the following values and click Next.
Field Values Description Example Gslb DNS ZoneId The AWS generated ID for the route 53 hosted zone you wish to have records created in. Z011649351E6CH9XAVJF1 Gslb Authentication CredsRef The CredentialID of the credential that was created in Create GLSB Role a7193d23e422vza863012555ee8ad9ax Domain The domain name of the Route 53 domain to use tap-demo.net Name The name of the gateway resource that is created. Use the default value. default-gateway -
On the Additional Required Capabilities screen, the Capabilities required by Traits selected above are selected by default, so click Next.
- Review the information on the Summary screen and click Create Profile.
- Tanzu CLI-based steps
-
To create a networking Profile, use the Tanzu CLI to install packages in the cluster group.
-
Ensure that your Project context is set correctly by running these commands:
tanzu project list # to view available Projectstanzu project use # to set Project contextFor more information about creating and managing contexts, see Create and Manage CLI Contexts.
-
Create
my-custom-networking.yamlfile with the following contents:--- apiVersion: spaces.tanzu.vmware.com/v1alpha1 kind: Profile metadata: name: my-custom-networking spec: description: "My custom networking setup" traits: - name: multicloud-cert-manager.tanzu.vmware.com alias: multicloud-cert-manager - name: multicloud-ingress.tanzu.vmware.com alias: multicloud-ingress.tanzu.vmware.com values: inline: multicloud-ingress.tanzu.vmware.com: name: default-gateway domain: <domain> gslb: authentication: credentialRef: <Gslb Authentication CredsRef> dns: zoneId: <Gslb HostedZoneId> listenerTemplates: - namePrefix: https- port: 443 protocol: HTTPS tls: secretRef: prod-certs - namePrefix: http- port: 80 protocol: HTTP tls: secretRef: "" -
Update the placeholders in the
my-custom-networking.yamlfile with the following:Field Values Description Example Gslb HostedZoneId The AWS generated ID for the route 53 domain you wish to have records created in. Z011649351E6CH9XAVJF1 Gslb Authentication CredsRef The CredentialID of the credential that was created in Create GLSB Role a7193d23e422vza863012555ee8ad9ax Domain The domain name of the Route 53 domain to use tap-demo.net -
Run the following command to create the Profile
tanzu deploy --only my-custom-networking.yaml
-
View the created Profile
After you create the Profile, you can view the health of the Profile in Tanzu Platform hub.
- In Tanzu Platform hub, set the Project context to your Project.
- On the left navigation pane, expand Application Spaces.
-
Click Profiles.
On the Profiles page, you will see the
my-custom-networkingProfile. -
On the Profile page, click View Details.
On the Details page, you will see the Capabilities and Traits for the Profile. The Profile will be in a Ready state, and all Traits will be in a Resolved state.
Create a Space in your Project
To create a Space, you specify the Profiles, Availability Targets, Replicas, and Update strategy to match characteristics required for applications deployed to the Space. You can create a Space using Tanzu Platform hub or the Tanzu CLI.
NoteEnsure that the name of the Space is unique in the Project and does not match to the name of any cluster group in the Project. Creating a Space and cluster group with the same name in a Project causes only cluster group roles to be available when setting up access control policies for Spaces. You will not be able to set up access control polices with role bindings for Spaces.
The following information is used when creating a Space:
| Name | Description |
|---|---|
| Profile | The grouping of Traits that defines the Capabilities your application requires |
| Availability Targets | The logical grouping of clusters that the Space will be scheduled to |
| Replicas | The number of clusters within an Availability Target to replicate application resources to |
| Update strategy | The strategy that specifies how updates to the Space will be rolled out to individual clusters and namespaces |
- UI-based steps
-
To create a Space in Tanzu Platform hub:
- In Tanzu Platform hub, set the Project context to your Project.
- On the left navigation pane, expand Application Spaces.
- Click Spaces.
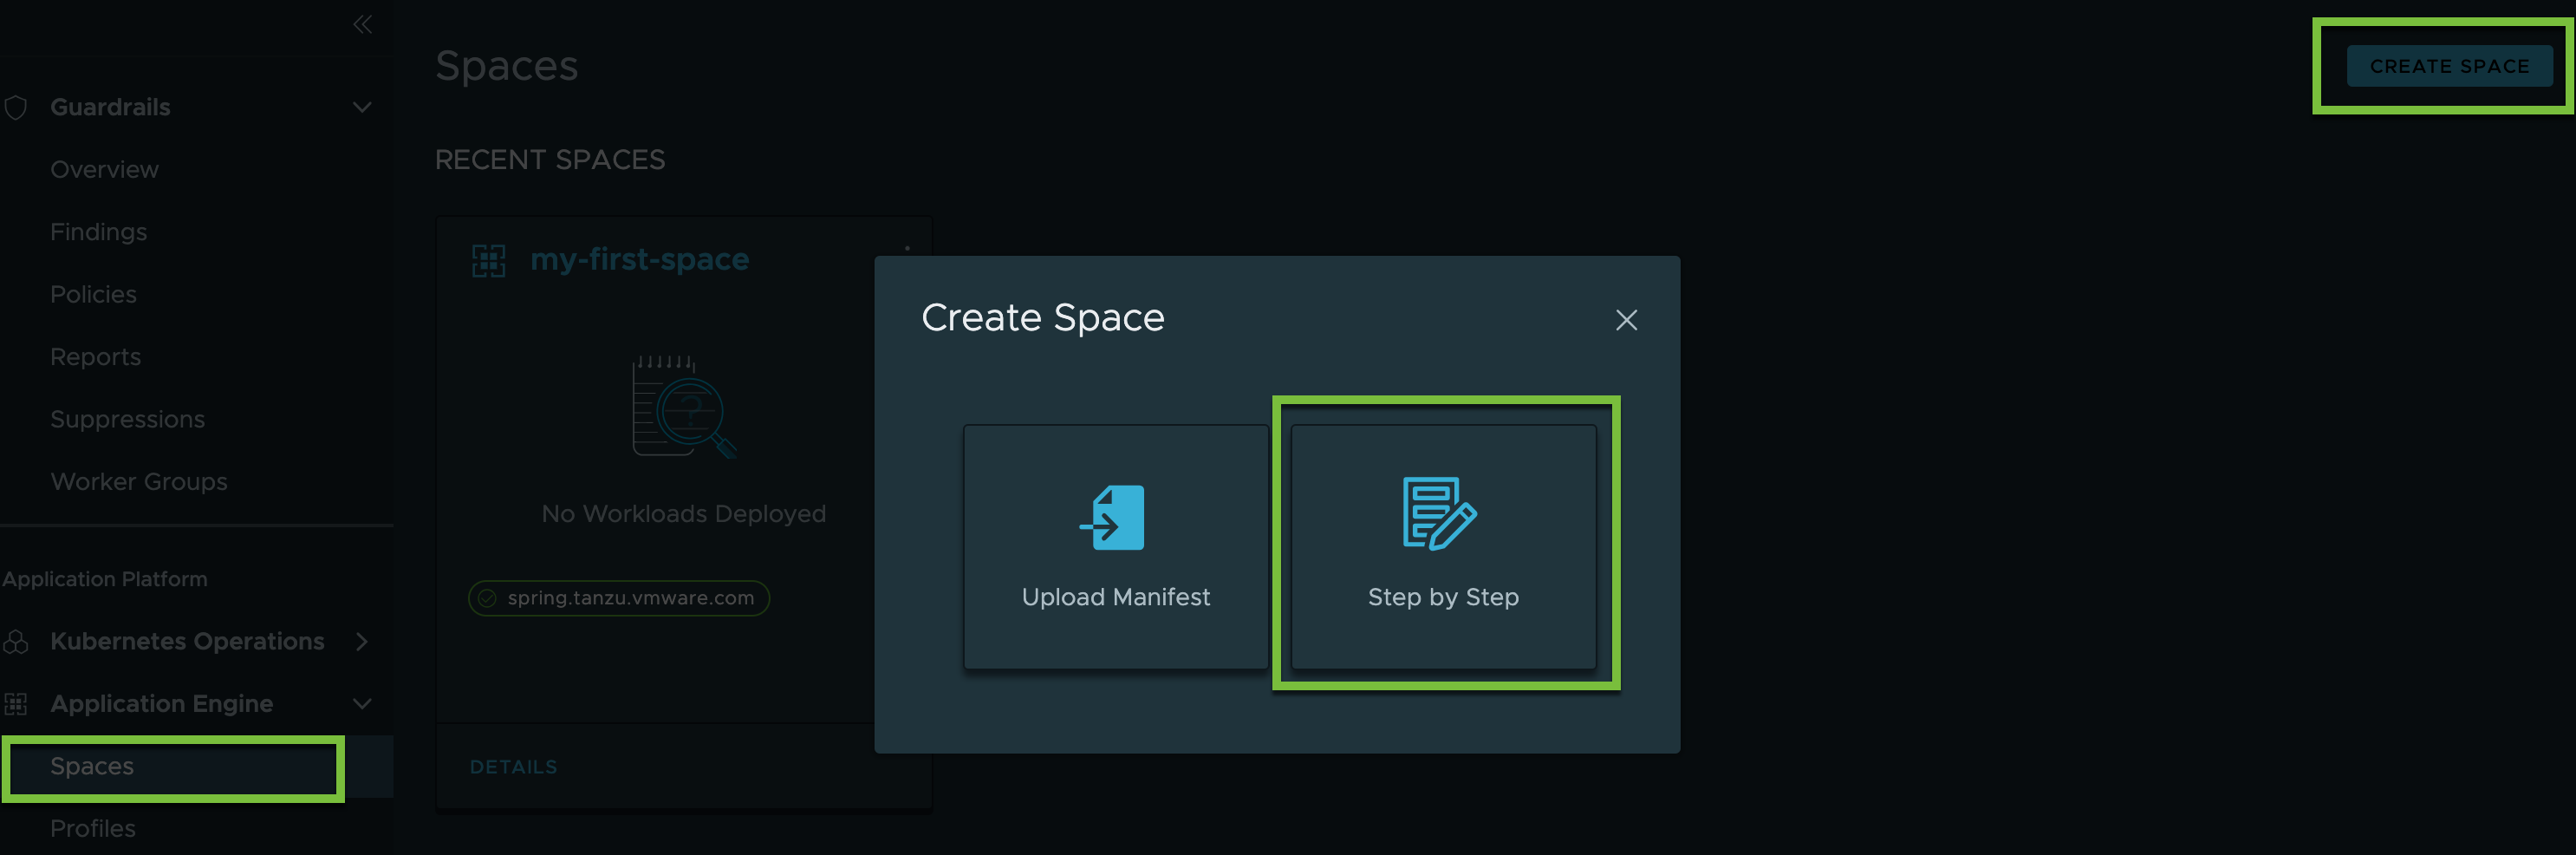
- On the Spaces page, click Create Space.
-
In the dialog box, click Step by Step.
-
Enter a name for your Space. For example,
my-first-space. -
In the Space Profiles drop down, select the
spring-dev.tanzu.vmware.comandmy-custom-networkingProfiles that you created in the Create a Profile step. -
For Availability Targets, click + Add Availability Target.
-
Select the
all-regions.tanzu.vmware.comavailability target. For more information about how to create your own availability target, see How to manage availability targets. -
For Replicas, enter 1. This number must not exceed the number of clusters you added to the availability target.
-
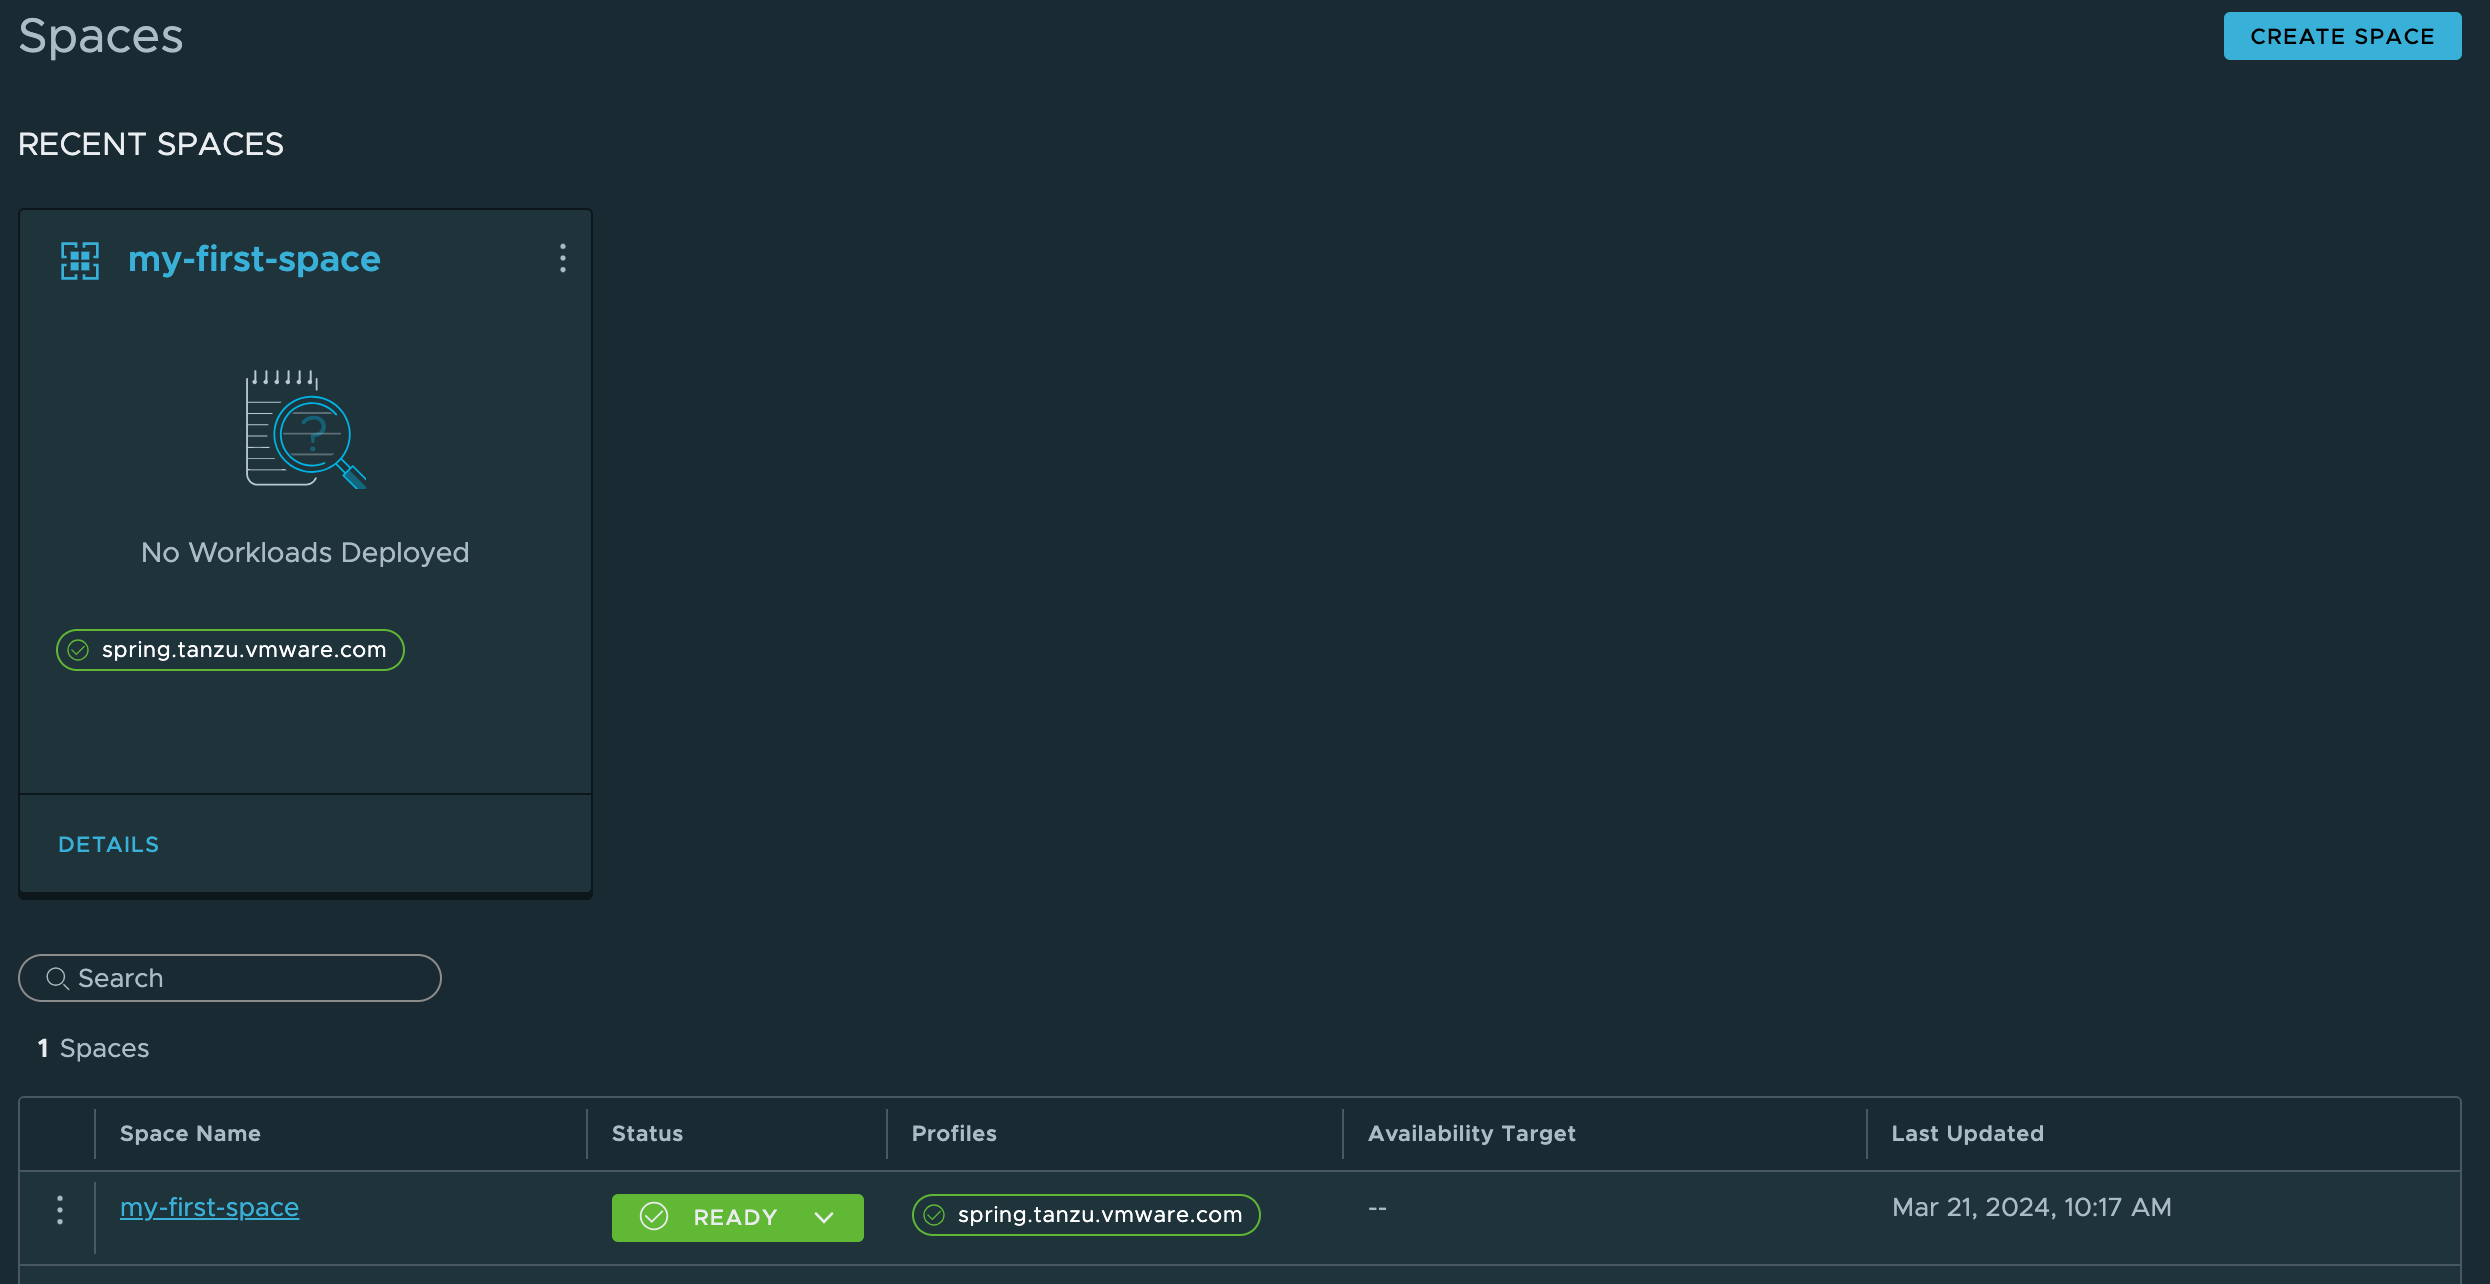
Click Create Space.
If successful, the UI returns you to the Spaces page and your Space will be listed on the page.
- Tanzu CLI-based steps
-
To create a Space using the Tanzu CLI:
-
Set the Project scope, if not done earlier, by running:
tanzu project use -
Create a
space.yamlmanifest file for the Space with the following content:apiVersion: spaces.tanzu.vmware.com/v1alpha1 kind: Space metadata: name: my-first-space spec: template: spec: profiles: - name: spring-dev.tanzu.vmware.com - name: my-custom-networking resources: limits: cpu: 5000m memory: 10Gi availabilityTargets: - name: all-regions.tanzu.vmware.com replicas: 1 updateStrategy: type: RecreateFields Description availability-targetThe names of the Availability Targets to include in the Space. You can provide multiple entries for availability-target, one for each Availability Target.replicasThe number of replicas to replicate application resources to. You can use this to provide extra resiliency to your application. If there are 2 or more clusters, the replicas are evenly distributed to give fault tolerant distribution of the replicas. update-strategyThe strategy that specifies how updates to the Space are rolled out to individual clusters and namespaces. - Recreate: means the old configuration is removed and the new configuration is applied to all the clusters at once. With the recreate strategy, updates cause a brief downtime period.
- RollingUpdate: means the updated configuration is applied to the Space replicas in a rolling fashion. In this strategy, the old configuration of the Space on a replica is replaced with the new configuration, and this process is repeated for each replica until all the replicas have the new configuration. During the rolling updates of Spaces containing a
ContainerAppsworkload, the Space content health is factored in to ensure zero downtime for the user.
resourcesThe resource limits (CPU/Memory) that the Space must be scheduled with. The resource limits configured here are enforced as Space quotas on the target cluster. -
Apply the manifest to create the Space in your Project.
tanzu deploy --only space.yaml -
Enter
Yat the command prompt. -
Verify that the Space has created in your Project by running:
tanzu space get my-first-space
-
What you can do now
tanzu domain-binding create wfd-dev where-for-dinner.dev.corp.com
Your Space is now bound to the domain dev.corp.com with the subdomain where-for-dinner.
What you can do now
| Actions | Steps to follow |
|---|---|
| See the Space in Tanzu Platform | In Tanzu Platform hub, in the left navigation pane, expand Application Spaces and click Spaces |
| Developers can deploy applications to the Space | For information about how to deploy an application to a Space, see Deploying an application to a Space |
