


The document describes how to integrate Tanzu Service Mesh with Avi Global Server Load Balancing (GSLB) to ensure high availability of a customer's application deployed in multiple clusters, which may be located across multiple GSLB sites and regions.
To achieve high availability of an application, Tanzu Service Mesh uses Global Namespace, a platform-neutral abstraction that automatically provides connectivity and security for services across clusters and platforms. Within the global namespace, you map a public service; that is, you specify that a specific front-end service deployed in multiple clusters will be exposed outside.
By integrating with Avi GSLB, Tanzu Service Mesh automatically configures global load balancing for the public service and points Avi GSLB to wherever the service resides regardless of the underlying platform. This ensures high availability of the service across the clusters where it is deployed. Avi GSLB will direct traffic to the optimal service instance on one of the clusters, based on the currently configured load balancing policy. If a service instance is unreachable for some reason (for example, the cluster is down because of a power outage), Avi GSLB automatically routes traffic to a healthy instance.
To integrate with Avi GSLB, you need to install Controller clusters in your environment and provide the appropriate GSLB configuration for each of your tenants in Avi.
As part of the integration, to connect to the GSLB leader site in Avi, you create an Avi integration account in Tanzu Service Mesh.
To make the subdomains you delegated to Avi GSLB available to include in the URL of the public service, you must also create a DNS account in Tanzu Service Mesh, linking the DNS account to the integration account.
Prerequisites
Onboard the clusters where your application is deployed to Tanzu Service Mesh. For information about onboarding a cluster to Tanzu Service Mesh, see Onboard a Cluster to Tanzu Service Mesh.
When mapping services to the global namespace where you want to configure a public service for GSLB, verify that all the services reside in namespaces with the same name. This is required by the current version of Tanzu Service Mesh and will change in the future.
If Avi Kubernetes Operator (AKO) is installed on the onboarded clusters where instances of the public service will be deployed, deactivate the L4Settings.autoFQDN configuration setting during installation. This setting is available starting with AKO version 1.3.3. If this setting is not deactivated, Tanzu Service Mesh will try to resolve the ingress gateway using the local FQDN rather than the external IP address, which will only work if the resolvers on the nodes point to Avi DNS. For information about the L4Settings.autoFQDN setting, see the AKO documentation on GitHub.
Verify that a tenant is created in Avi for each user in your Tanzu Service Mesh organization. For information about creating tenants, see the Avi documentation.
Verify that you own the subdomains that you want to delegate to Avi GSLB and that you can delegate them to Avi GSLB.
Verify that you use Avi version 22.1.2. Tanzu Service Mesh currently does not support later versions of Avi.
Verify that there is connectivity between Tanzu Service Mesh SaaS or any onboarded clusters and the Avi Controllers.
You would need cluster labels to connect Tanzu Service Mesh SaaS and Avi controllers through a proxy.
Verify that there is connectivity between the Controllers on the different GSLB sites.
You are familiar with Avi concepts, such as Controller cluster, site, and virtual service. For more information about Avi concepts, see the Avi documentation.
Procedure
- Designate one of the Controller clusters as the GSLB leader site and then configure GSLB on the leader site. Add the other GSLB sites from the leader site.
To configure GSLB sites, your Avi user account must have System-Admin or Admin privileges.
In the New GSLB Configuration window for the leader site, under GSLB Subdomain, enter the subdomains that you want to delegate to Avi.
For each of the active sites, click Save and Set DNS Virtual Services and then select the name of the DNS virtual service that you configured for the Controller in step 3.
For more information about creating GSLB sites, see the Avi documentation.
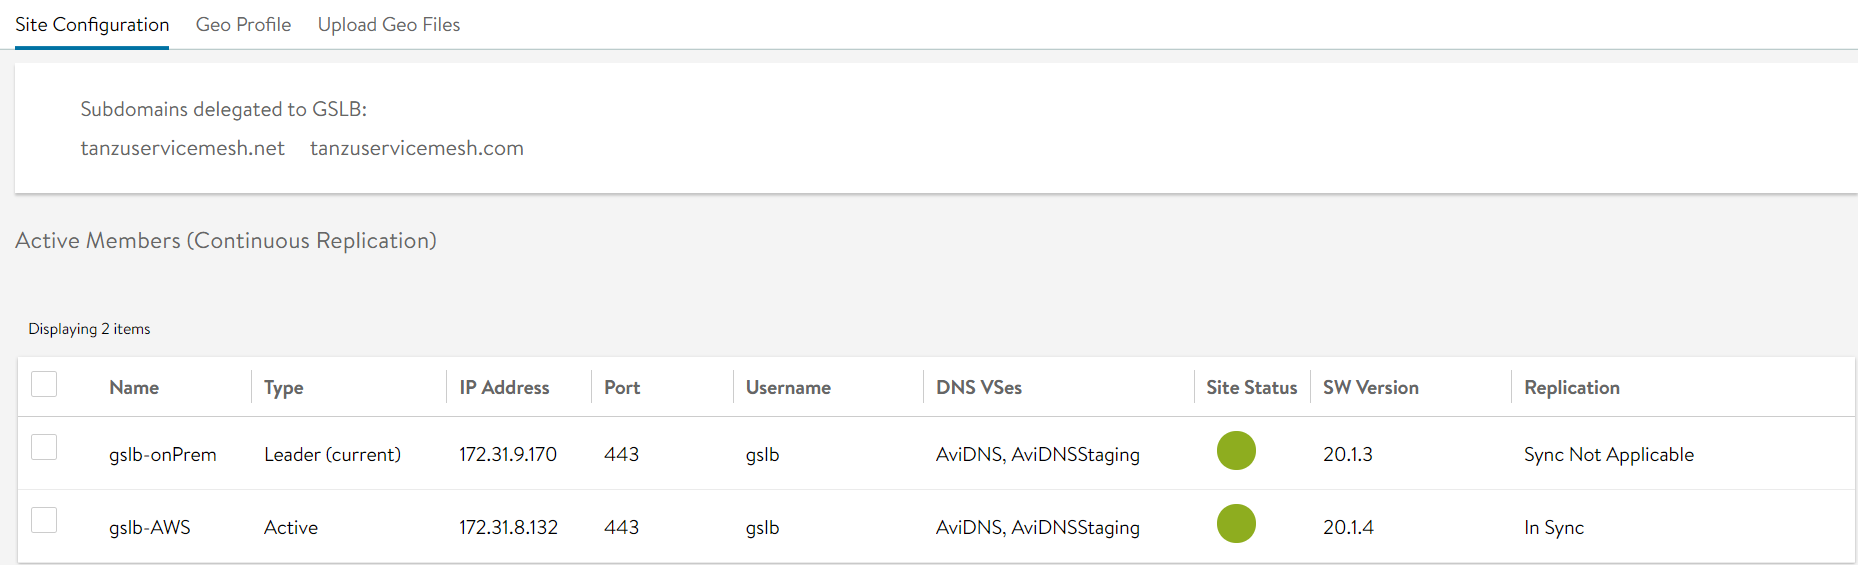
On the Site Configuration page, the leader site has a Type of Leader.
- In Tanzu Service Mesh, create an Avi integration account that points to the Avi GSLB leader site.
- In the navigation pane on the left, click Admin > Integration.
- On the Integrations page, under All Integrations, find the Avi card with the DNS and GSLB labels.
- Select one of the following options.
If you are creating the first Avi integration account, at the bottom of the card, click Configure.
If one or more Avi integration accounts exist and you are creating another account, at the bottom of the card, click Add Account.
- In the New Avi Integration dialog box, provide the following information.
Name. Enter a friendly name for the account.
Description. (Optional) Give a brief description of the account.
Authentication. Choose Authentication Token and enter the access key ID and secret access key, or choose Username & Password and enter your Avi user account information. Tanzu Service Mesh will use these credentials to access the leader site on Avi.
Avi Tenant. Enter the name of the Avi tenant that your Avi user account is associated with.
Connect via a proxy. (Optional) If the Avi controller is behind a private network and cannot be reached directly by the TSM global controller, you would need to proxy your connection through one of the Kubernetes clusters available on TSM. We have implemented WebSockets proxy on all of the client Kubernetes clusters onboarded into TSM for this purpose. In this way, Tanzu Service Mesh can connect to the Avi controller through the client cluster, which should have connectivity to the Avi controller as well. A cluster label must be assigned to the cluster in order to use the proxy. Select the Connect via a proxy check box, and then select the cluster label value. Your cluster will then be able to send and receive traffic bidirectionally.
Important:Cluster labels can be created in two ways:
You can add a label during cluster onboarding by selecting New Workflow > Onboard a cluster > Configure a proxy to connect the cluster > Cluster Labels. Refer to step 4 in Onboarding a Cluster to TSM for more information.
Alternatively, select Home > Cluster Overview, click the three vertical dots on the desired cluster, and then select Edit Cluster. The Labels field allows you to create, modify, or remove cluster labels.
Note:Label Key should be "Proxy Location". Label Value can be customized.
Caution:Deletion of a proxy location label that is in use may cause Avi proxy to stop working.
Controller Address. Specify the IP address or the fully qualified domain name (FQDN) of the Controller cluster on the leader site.
-
Insecure Mode. If you want to use "insecure" mode, select this option and acknowledge the warning. This allows you to still use TLS, but do not require globally trusted certificates.

- Click Save.
- Cluster and inventory information appear under Inventory> Clusters and Nodes > Clusters. When the connection is made through a proxy, cluster labels are specified. Labels can be made visible from the Column Settings if they are not displayed by default. View detailed information by selecting a particular cluster.
- After the integration has been created, you need to add a DNS domain to activate it. Click Admin and select DNS and Domains. In the New DNS Account dialog box, select the name of the Avi integration account that you created in step 4 d as Domain Provider. Once done, go back to Integrations page and verify that the Avi integration is green.

Attention:The account would display red (disconnected) if a DNS domain is not added after Avi Integration.
Caution:DNS for GSLB should be placed exclusively in its own Service Engine group in Avi. No other virtual services (DNS or other application types) should be placed on it.
What to do next
After you have completed these steps, perform these verification steps:
A GSLB service has been automatically created in Avi, based on the public service configuration in the global namespace. To verify the configuration of the GSLB service, perform these steps:
Log in to Avi Admin Console.
Click in the upper-left corner and on the navigation pane, click Applications.
On the top bar, click GSLB Services. Notice that the App Domain Name column contains the domains delegated to Avi.
In the Name column, click the name of the GSLB service.
On the Members Status tab, notice that the Member Name column contains the endpoint of the ingress gateway of each cluster that you added to the global namespace.
Notice that green circles in the Overall Member Status column indicate that the endpoints are healthy.
Verify that Avi DNS responds to a DNS query for the public URL. You can run this command:
dig @AviDNSIP {public_URL}
For example, dig @54.243.229.123 single.avi-servicemesh.biz
For information on changes to be performed when the GSLB leader is changed or elected, see GSLB Configuration Changes From a Follower Site.
For GSLB service health checks to work, you must ensure that there is connectivity from the Avi service engine (SE), which has an Avi DNS service attached to it, to the IP address of the workload cluster’s ingress gateway. If there is no connectivity, the health checks will fail, and Avi will generate an event about the health check endpoint being unreachable.
As a workaround, if the workload clusters are not in the same virtual private cloud (VPC) as the controller and the SEs, attach an Elastic IP address to the SE instances data interface by creating an Elastic IP address in AWS and attaching it to the data interface. You can see the interface ID on the Networking tab for the SE EC2 instance. After you apply this workaround, the health checks should work.
Deleting a cluster could affect the Avi proxy connections.
