


Cluster Deployment
1. Visit the URL, https://<control plane node VM IP>:1081. You can safely accept any certificate errors that occur. When prompted, enter clusteradmin for the username and the password to the VM configured for the Administrative user. See the previous section, VM Deployment for more details.
2. After logging in you will see the deployment UI.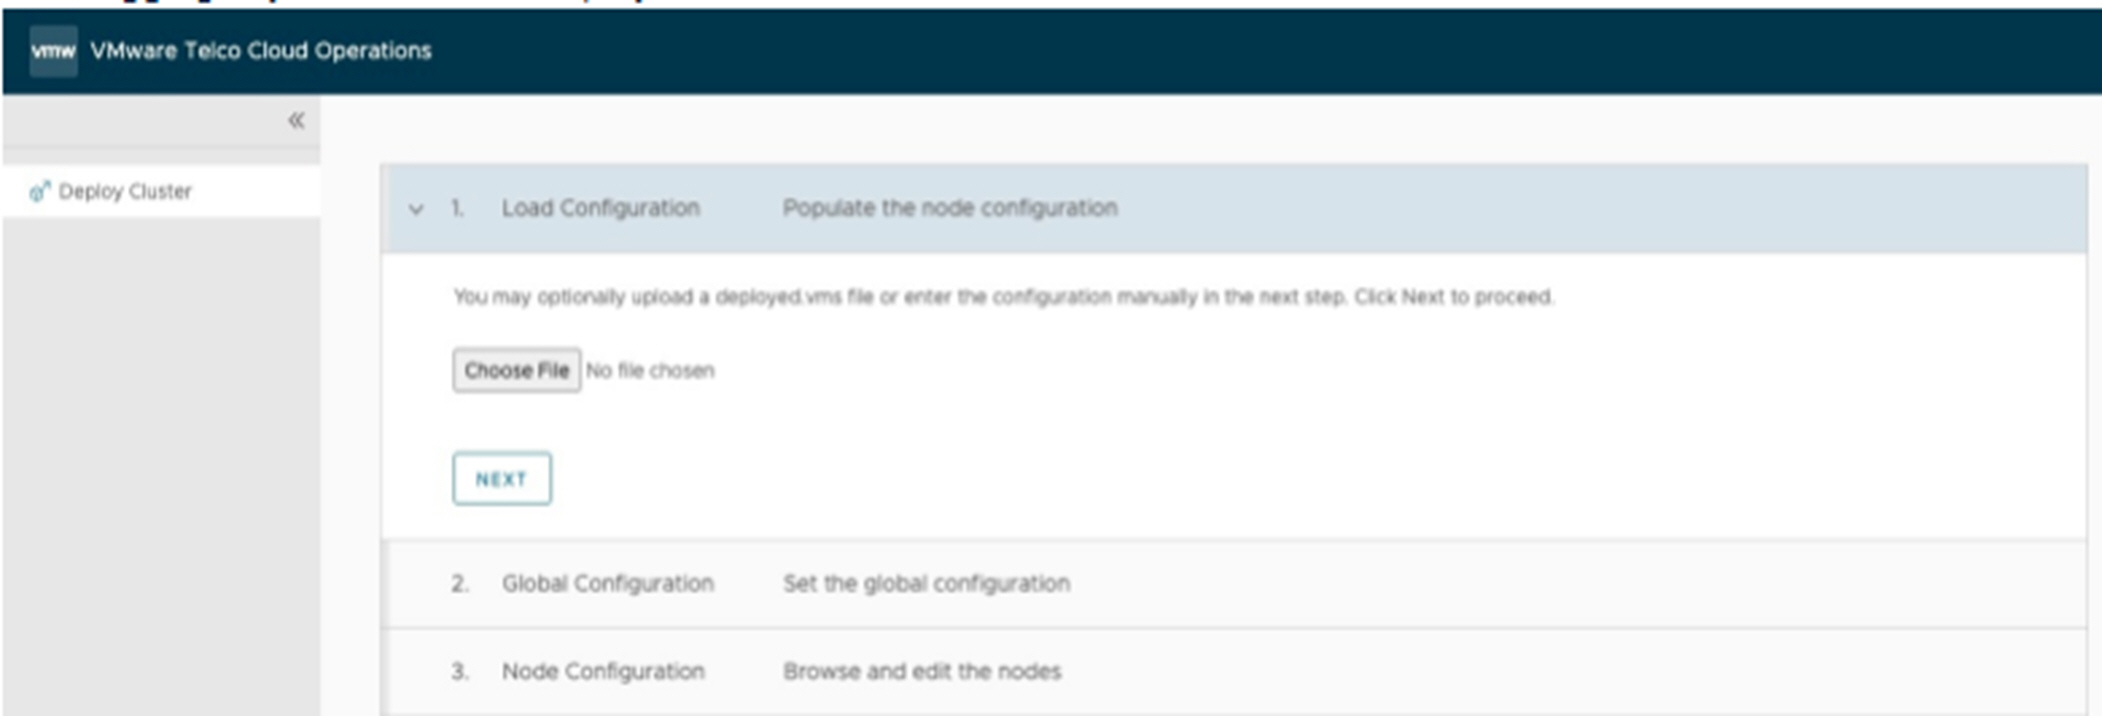
- Manually enter the details for the Global Configuration and the Node Configuration sections (explained below).
or
- By uploading the deployed.vms file that contains the configuration.
To upload the deployed.vms file, click Choose File and in the dialog box, select the deployed.vms file to upload. The UI imports the file and populates all the text boxes in the next sections, such as, Global Configuration and Nodes Configuration.
Because VM Deployment was done manually, you have to enter the following details. Click Next to expand the Global Configuration section.
4. Enter the following details for a Global Configuration. The following details apply to all the nodes that are added in the Node Configuration section.
a. (Required) Choose the footprint from the drop-down. It is important you choose the same footprint for which the VMs deployed have been configured for.
b. Required) Enter the password for the Admin account, for example, clusteradmin. The setting replaces what was entered during the VM deployment.
c. (Optional) Provide the public key for the Admin account.
d. (Required) Enter the Root Password. The setting replaces what was entered during the VM deployment.
e. (Required) Select the root SSH access type. The setting replaces what was entered during the VM deployment.
f. (Optional) Provide the key for the Root user. This is required if you choose without-password as the SSH access type.
g. Keep the default values for Pod CIDR and Service CIDR. The values should be changed only if you cannot use these IP address ranges for services running on these nodes.
h. Click Next.
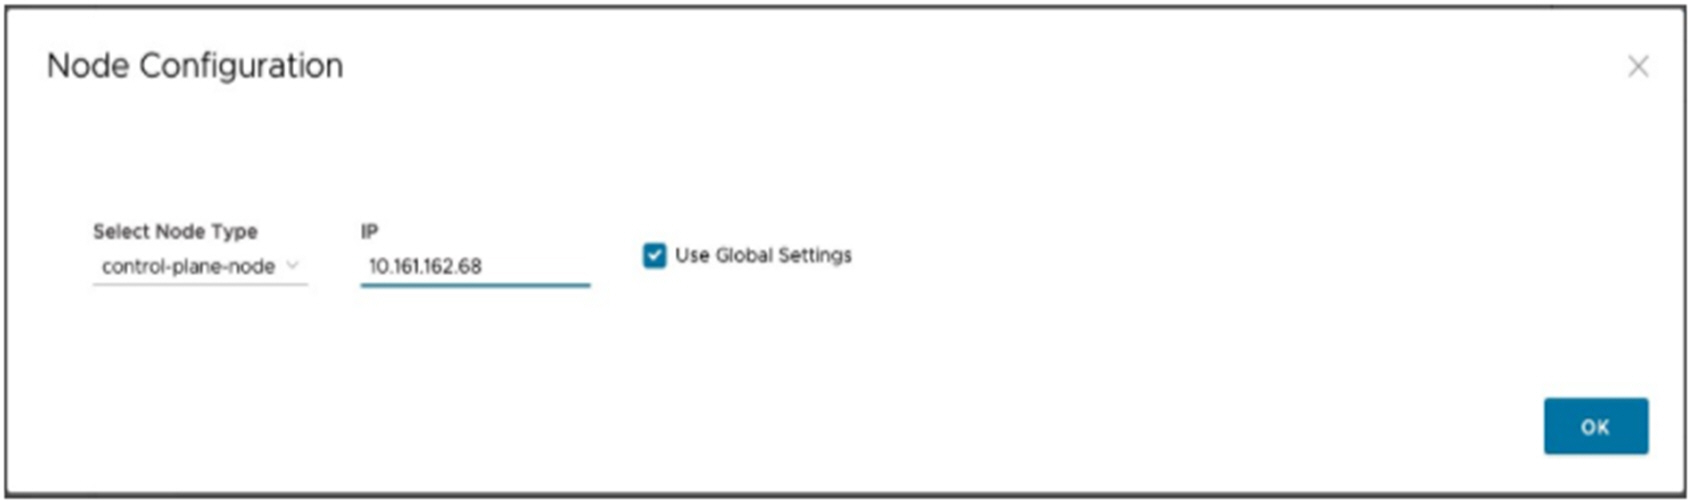
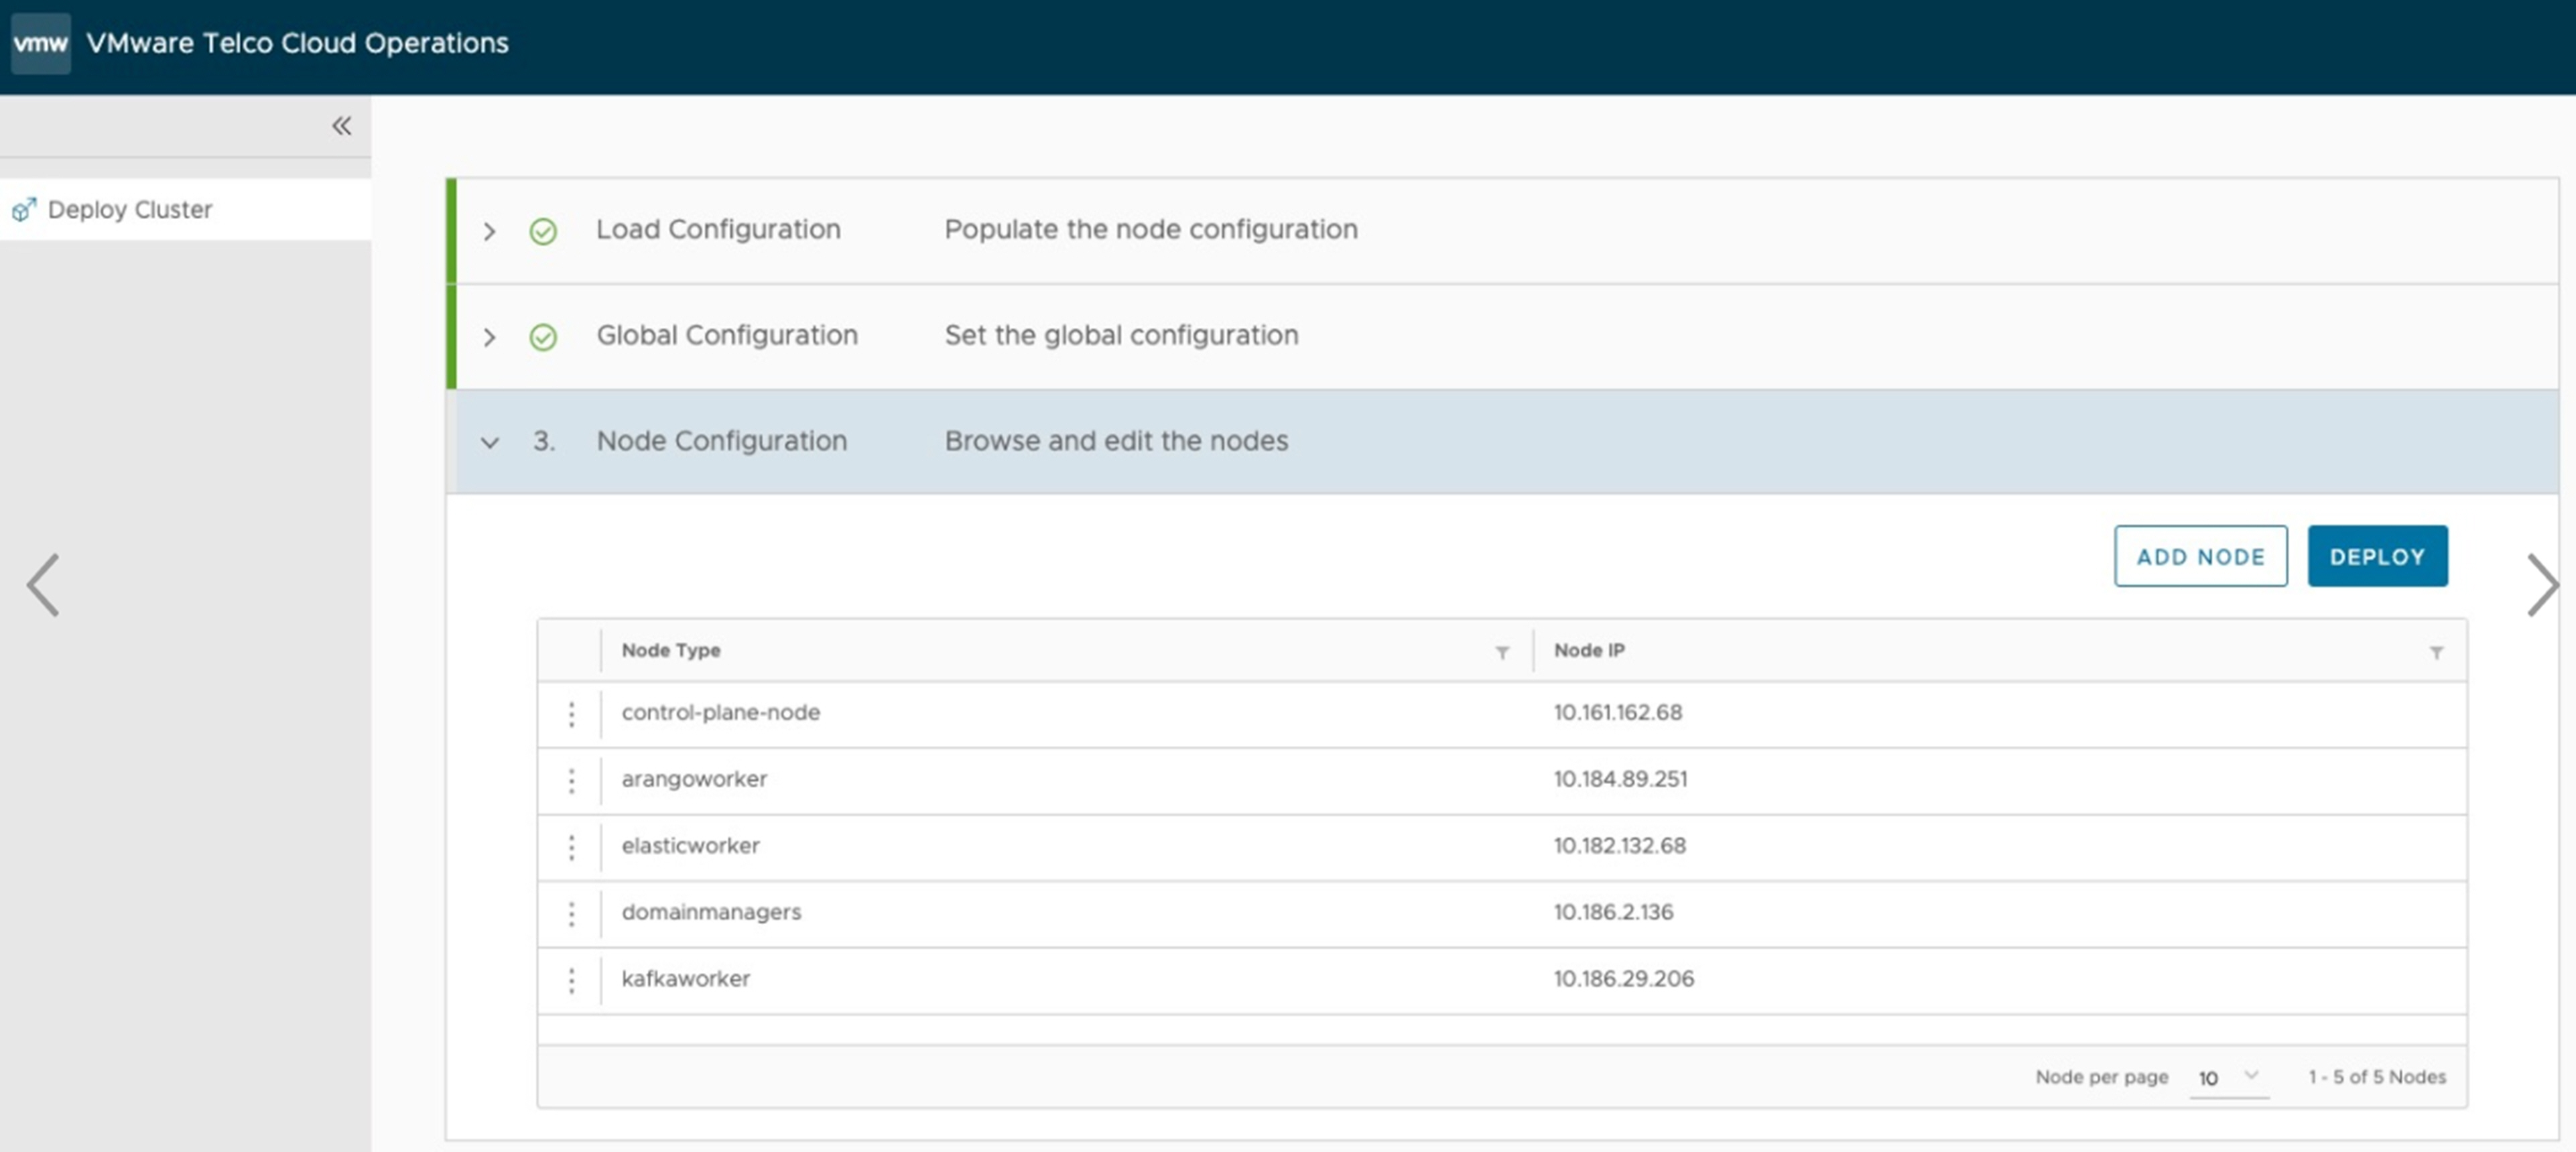
5. Enter the following details for Node Configuration. Click Add Node and select the type of node. Enter the corresponding IP address from the deployed VMs. (Optional) You can clear the Use Global Settings box and enter separate details for the node. The system checks if the IP exists and belongs to the deployed VM. Click Deploy after nodes in the footprint are added.
7. Cluster deployment begins after clicking SUBMIT. A Deployment Status page displays periodically for automatic updates. The Nodes: Ready: section indicates when all of the nodes are and ready. After all service pods start deploying the status is indicated in the Services section. When the deployment finishes, a message indicates a successful installation.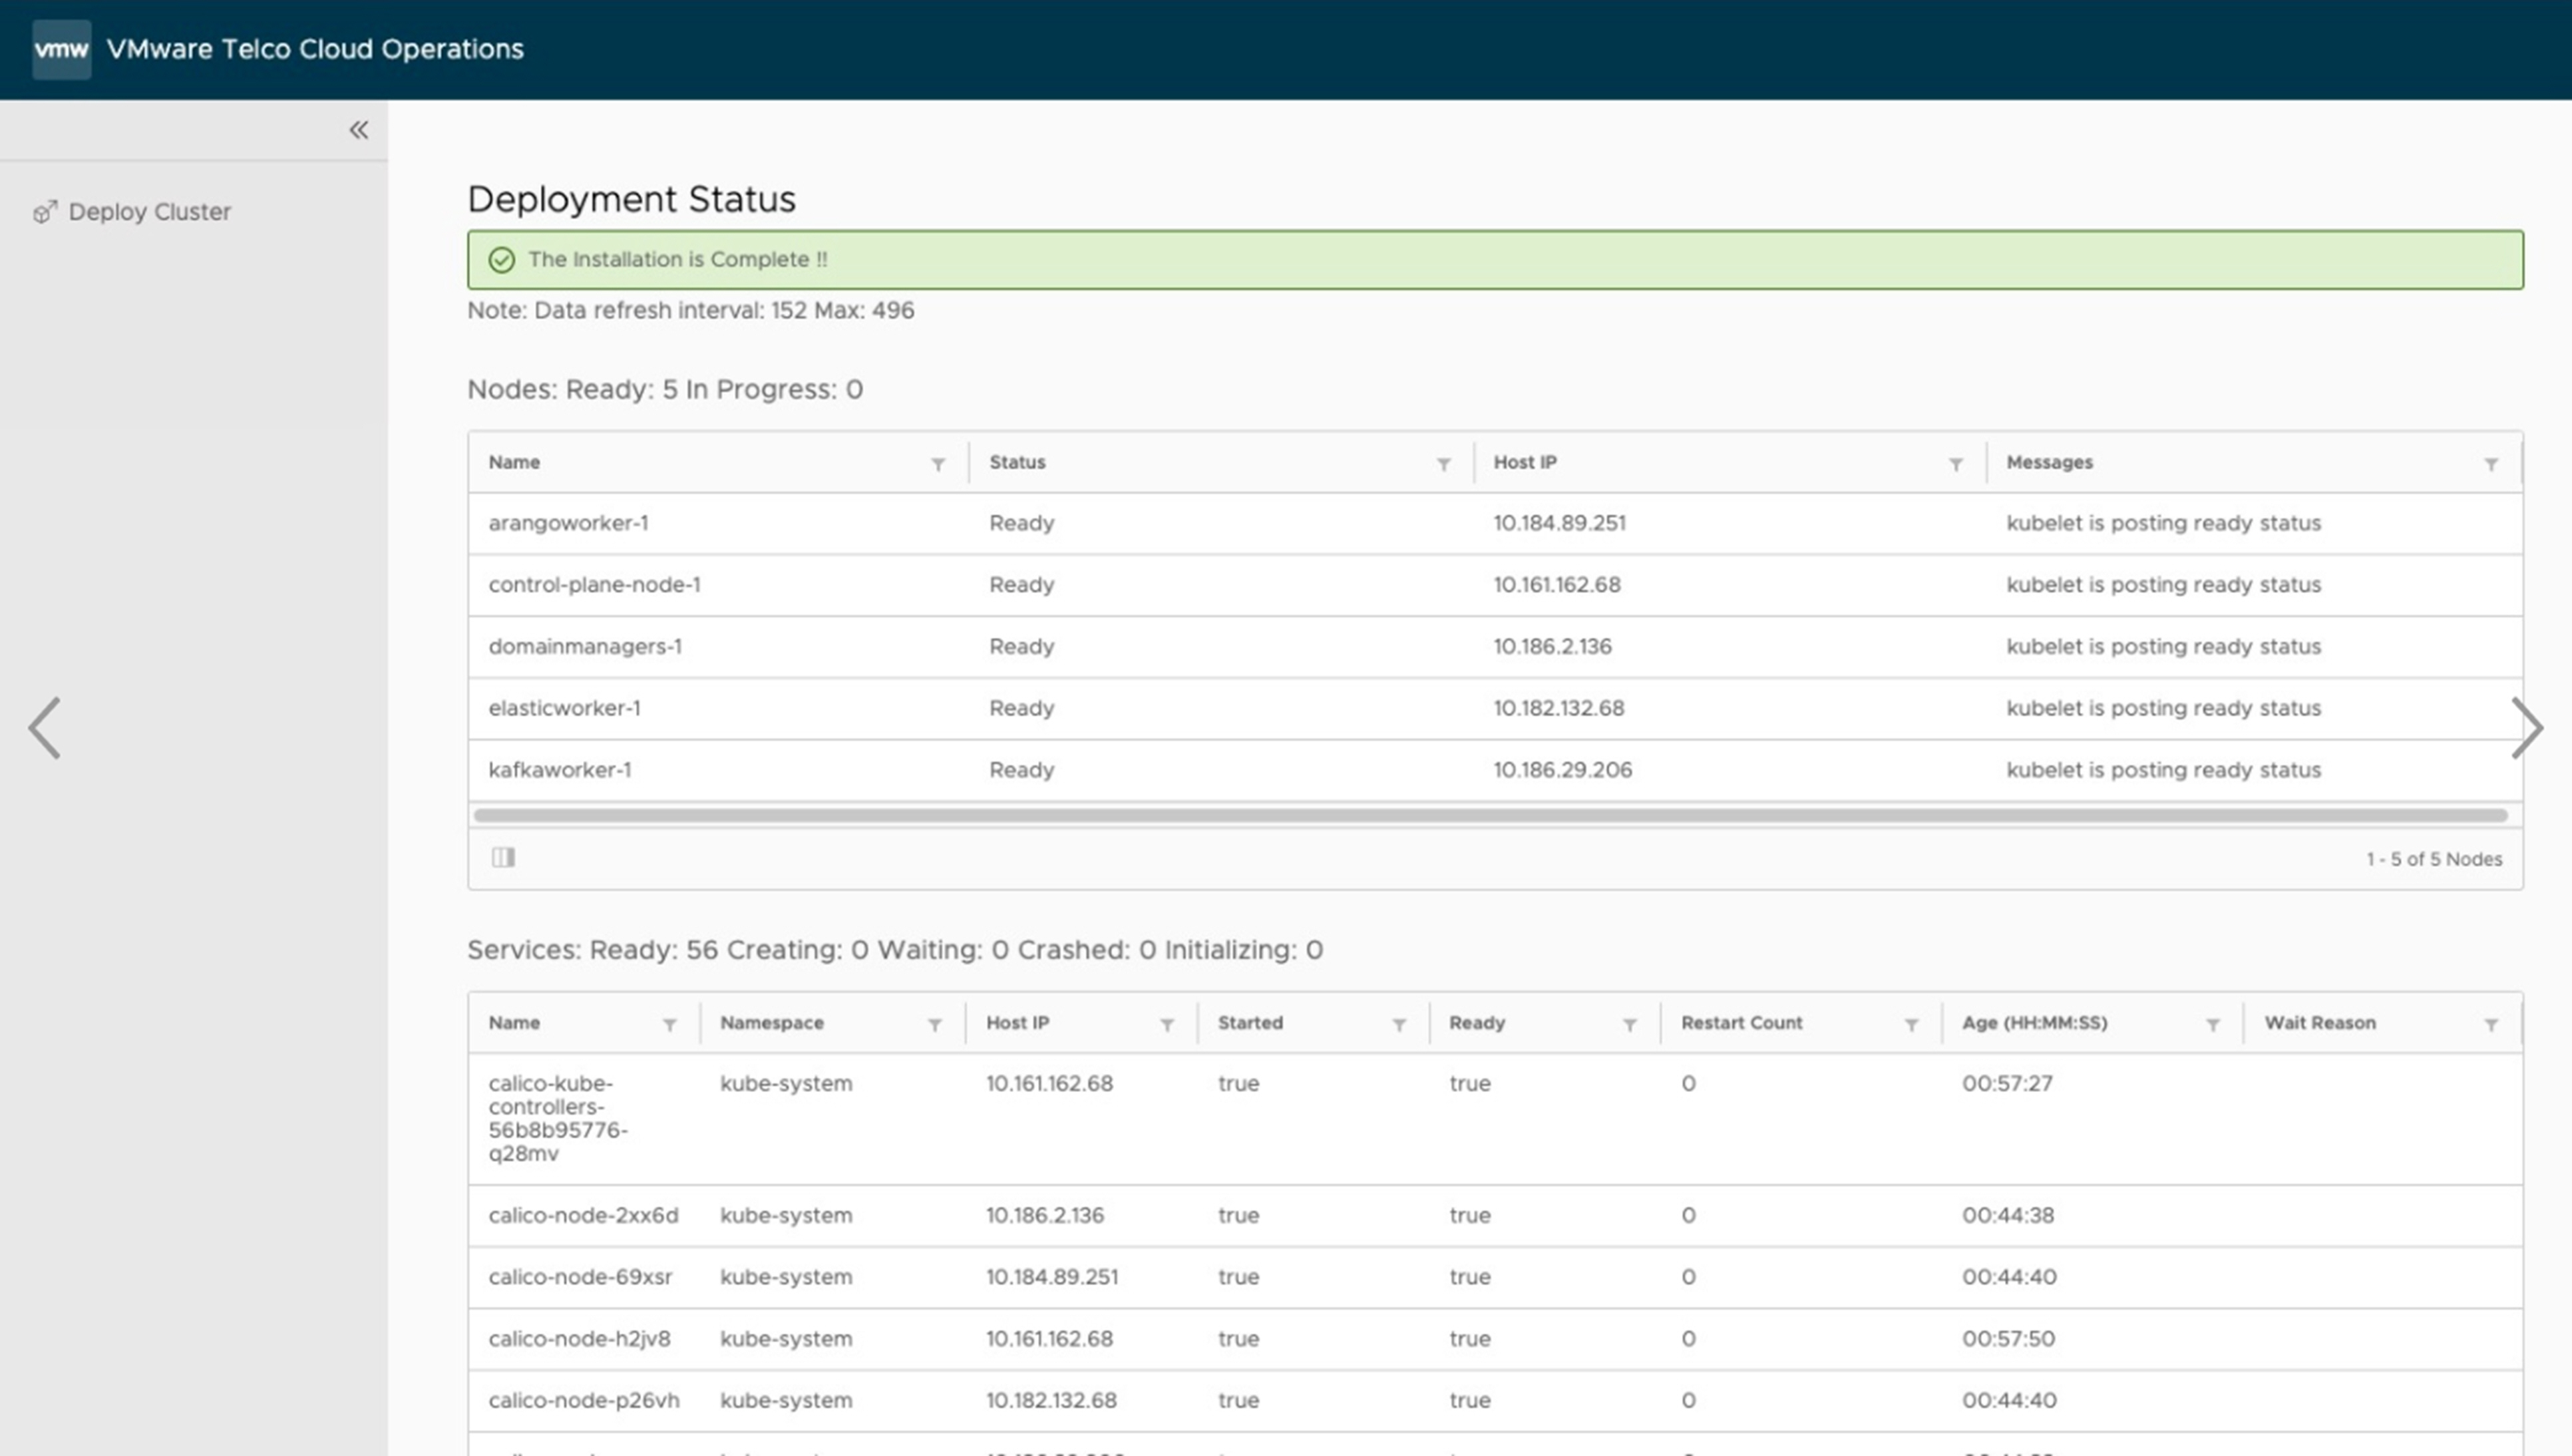
8. Navigate to the VMware Telco Cloud Operations UI at https://<control plane node VM IP>and log in to begin configuring the product. For more information, refer to the VMware Telco Cloud Operations documentation.
