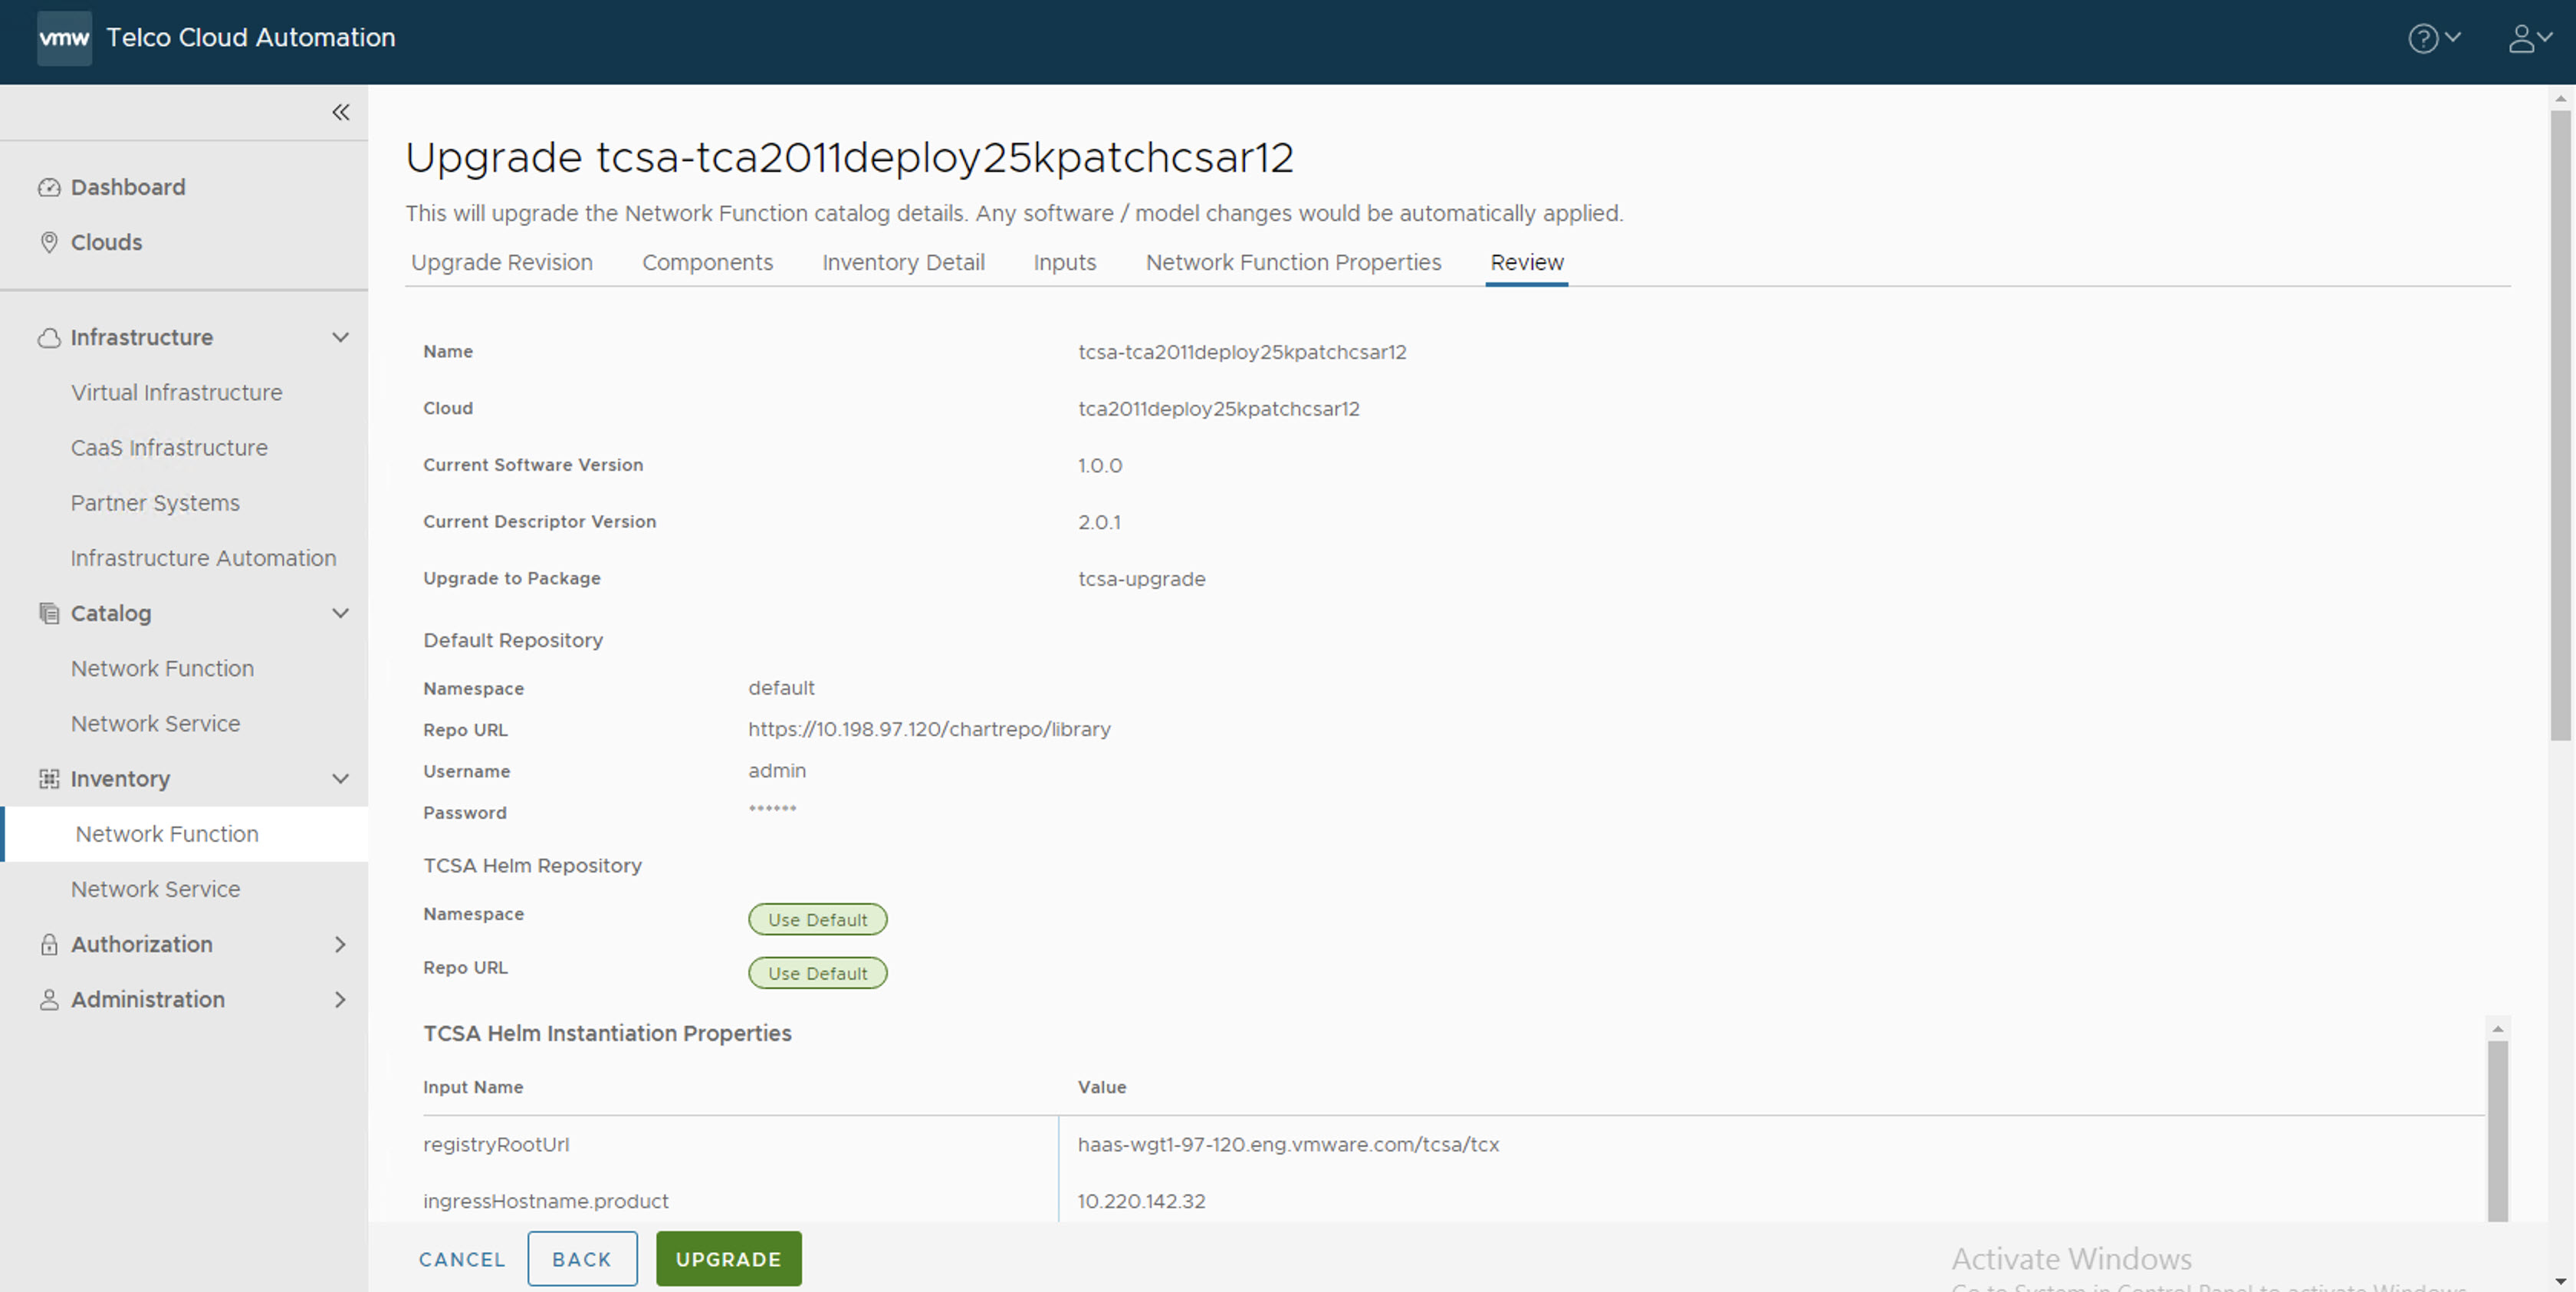
In this section, you can find information on how to upgrade the tcsa CNF.
Procedure
- Run the merge-product-yaml-files.sh script as described in Generate a Single Merged YAML File required for upgrade and copy the resulting merged_yamls.yaml file to your local machine.
Note: Retain the same footprint value used during initial deployment.
- Update the values for the parameters in the merged_yamls.yaml which is generated in step 2 as shown in the following screenshot:
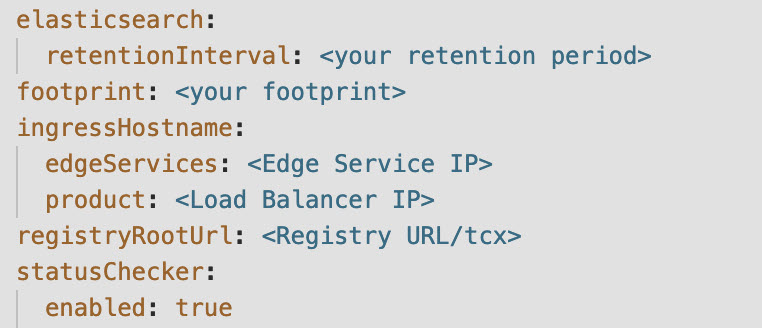 Set them to the same values used during initial VMware Telco Cloud Service Assurance deployment.
- ingressHostname.product=<LoadBalancerIP>
- registryRootUrl=<your-registry-url/your-project-name/tcx>
- Update the statusChecker.enabled parameter. The default value is
true. Set the value asfalse. - Update the retentionInterval value with the same value used during initial CNF instantiation. In the following screenshot, retention interval is set to 1w as an example.

- Update the additionalValuesFile parameter in the merged_yamls.yaml file based on the retention interval value. The following screenshot is an example of a demo footprint.
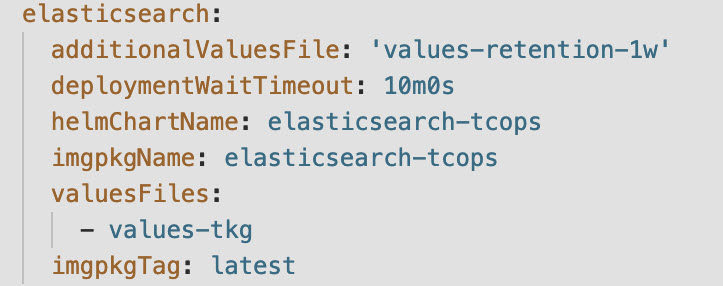
- Update the following parameters in the merged_yamls.yaml file to the required footprint.
- footprint
- appSpecs.adminApi.helmOverrides.productInfo.footPrint
Note: Based on the footprint size of deployment, update the value for footprint.
- Launch VMware Telco Cloud Automation and navigate to Inventory > Network Function.
- To upgrade, select the base version of the
tcsaCNF and click against the vertical ellipsis (⋮) and click Upgrade. - In the Upgrade Revision section, select the version of the
tcsaCNF that you want to upgrade to and click Next.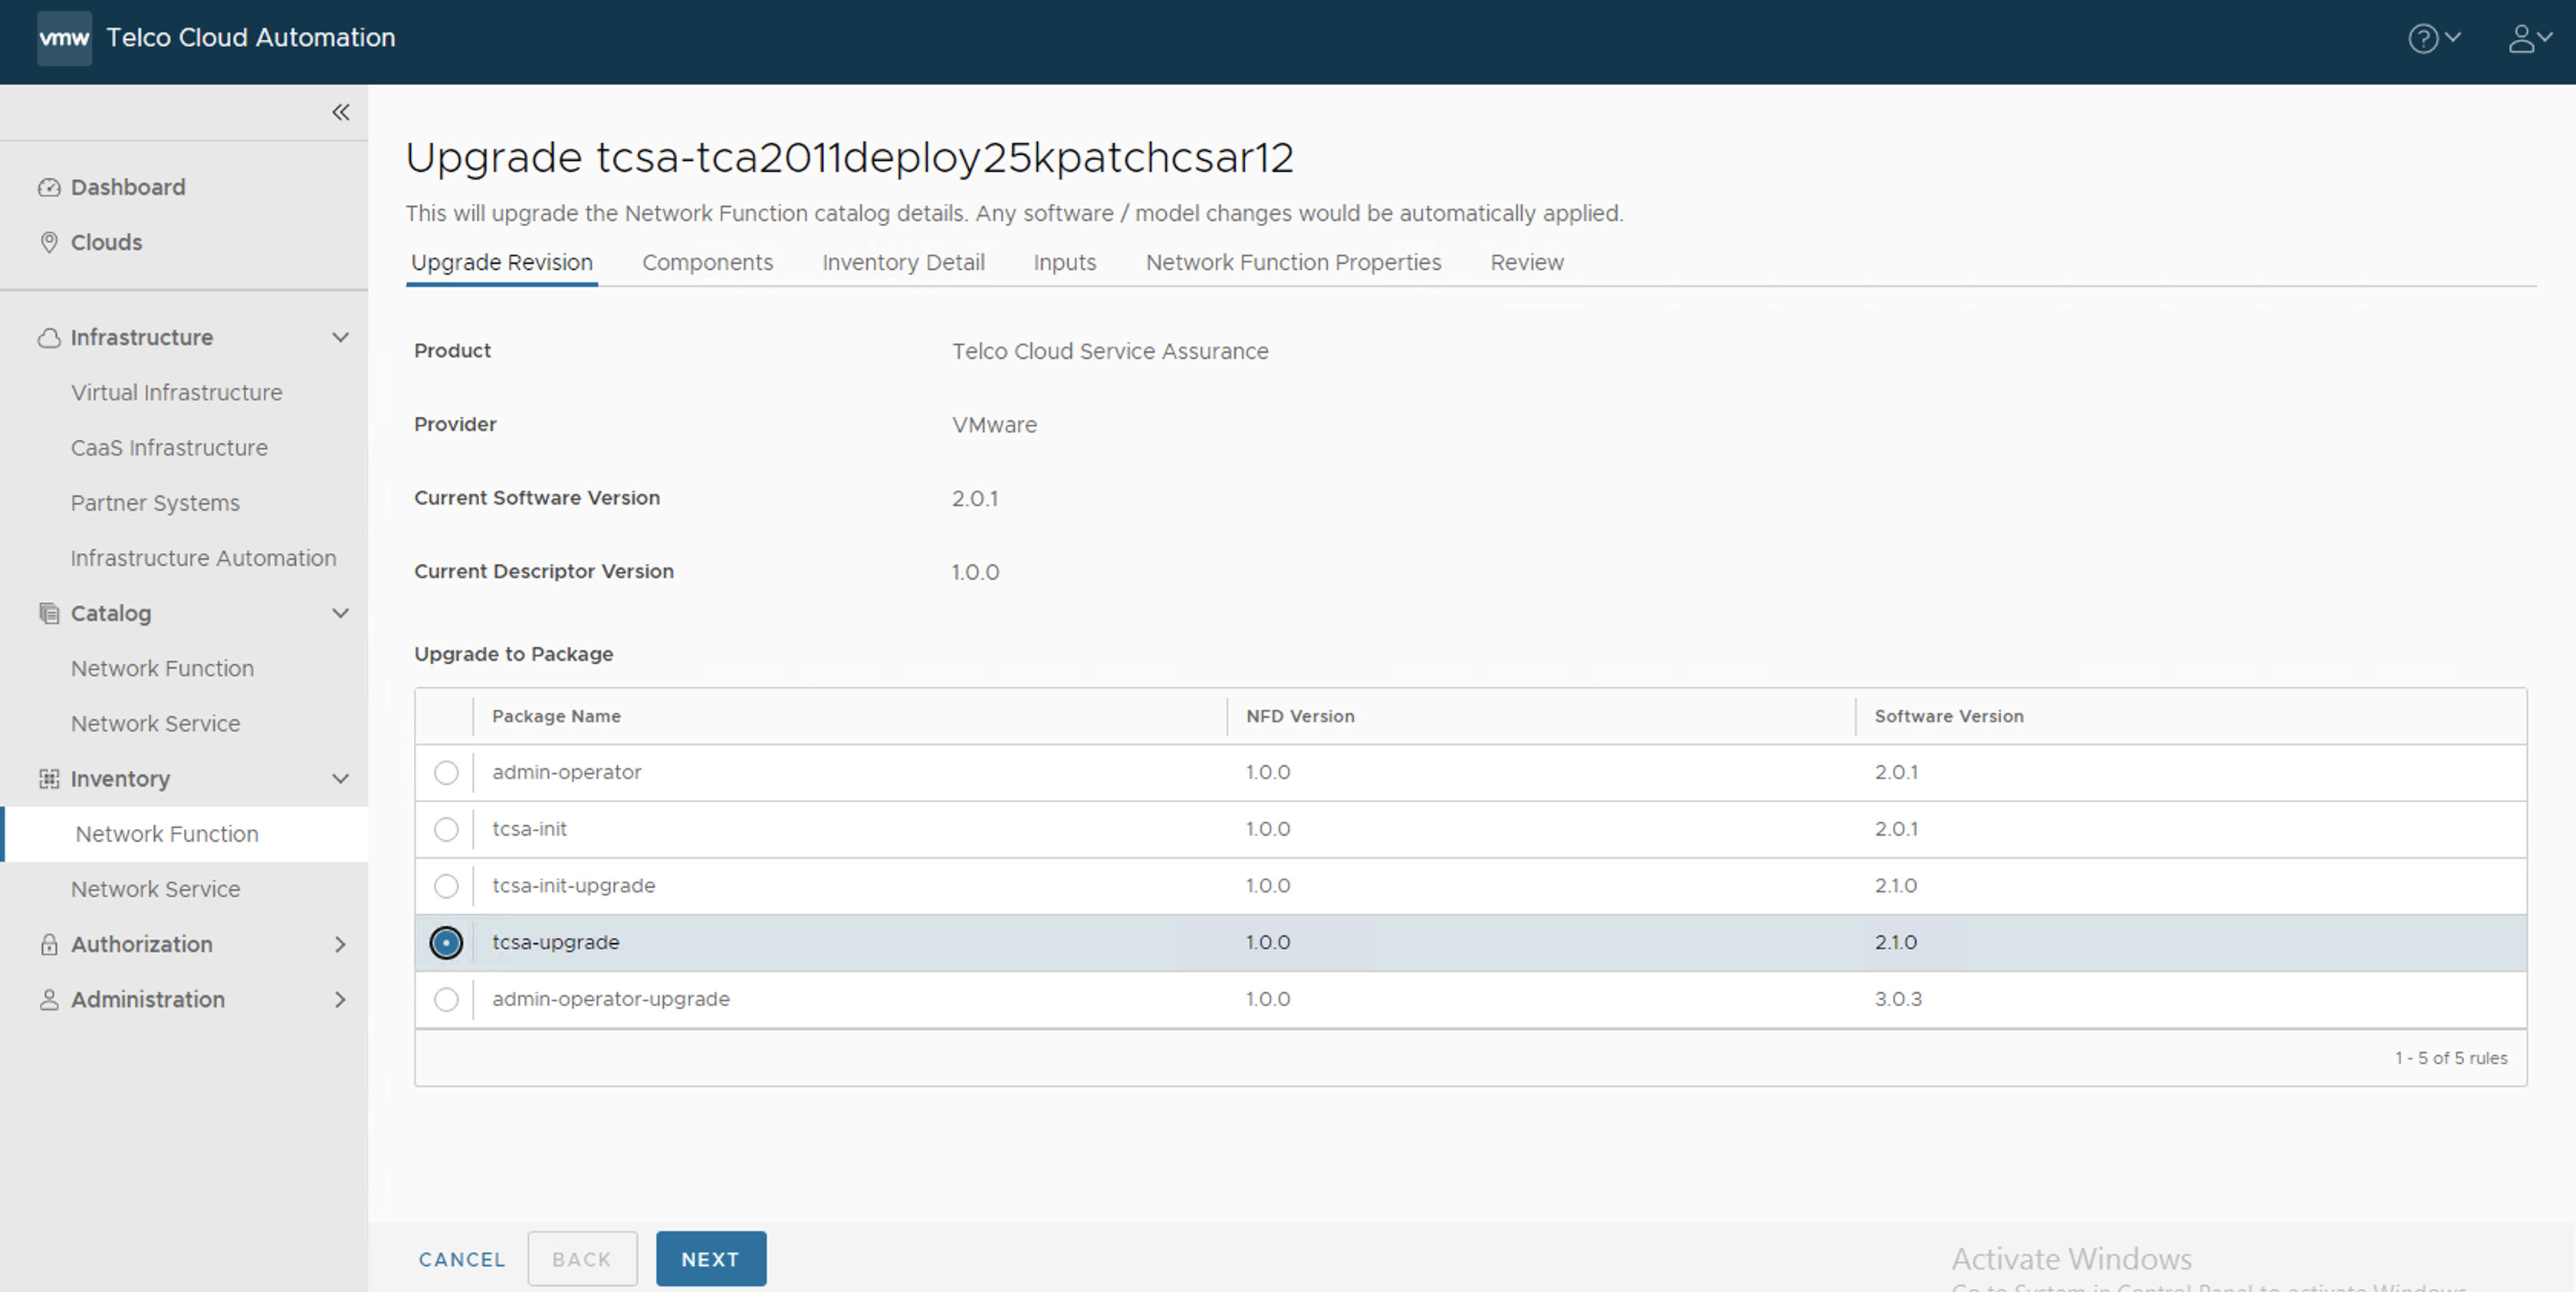
- In the Components section, click Next.
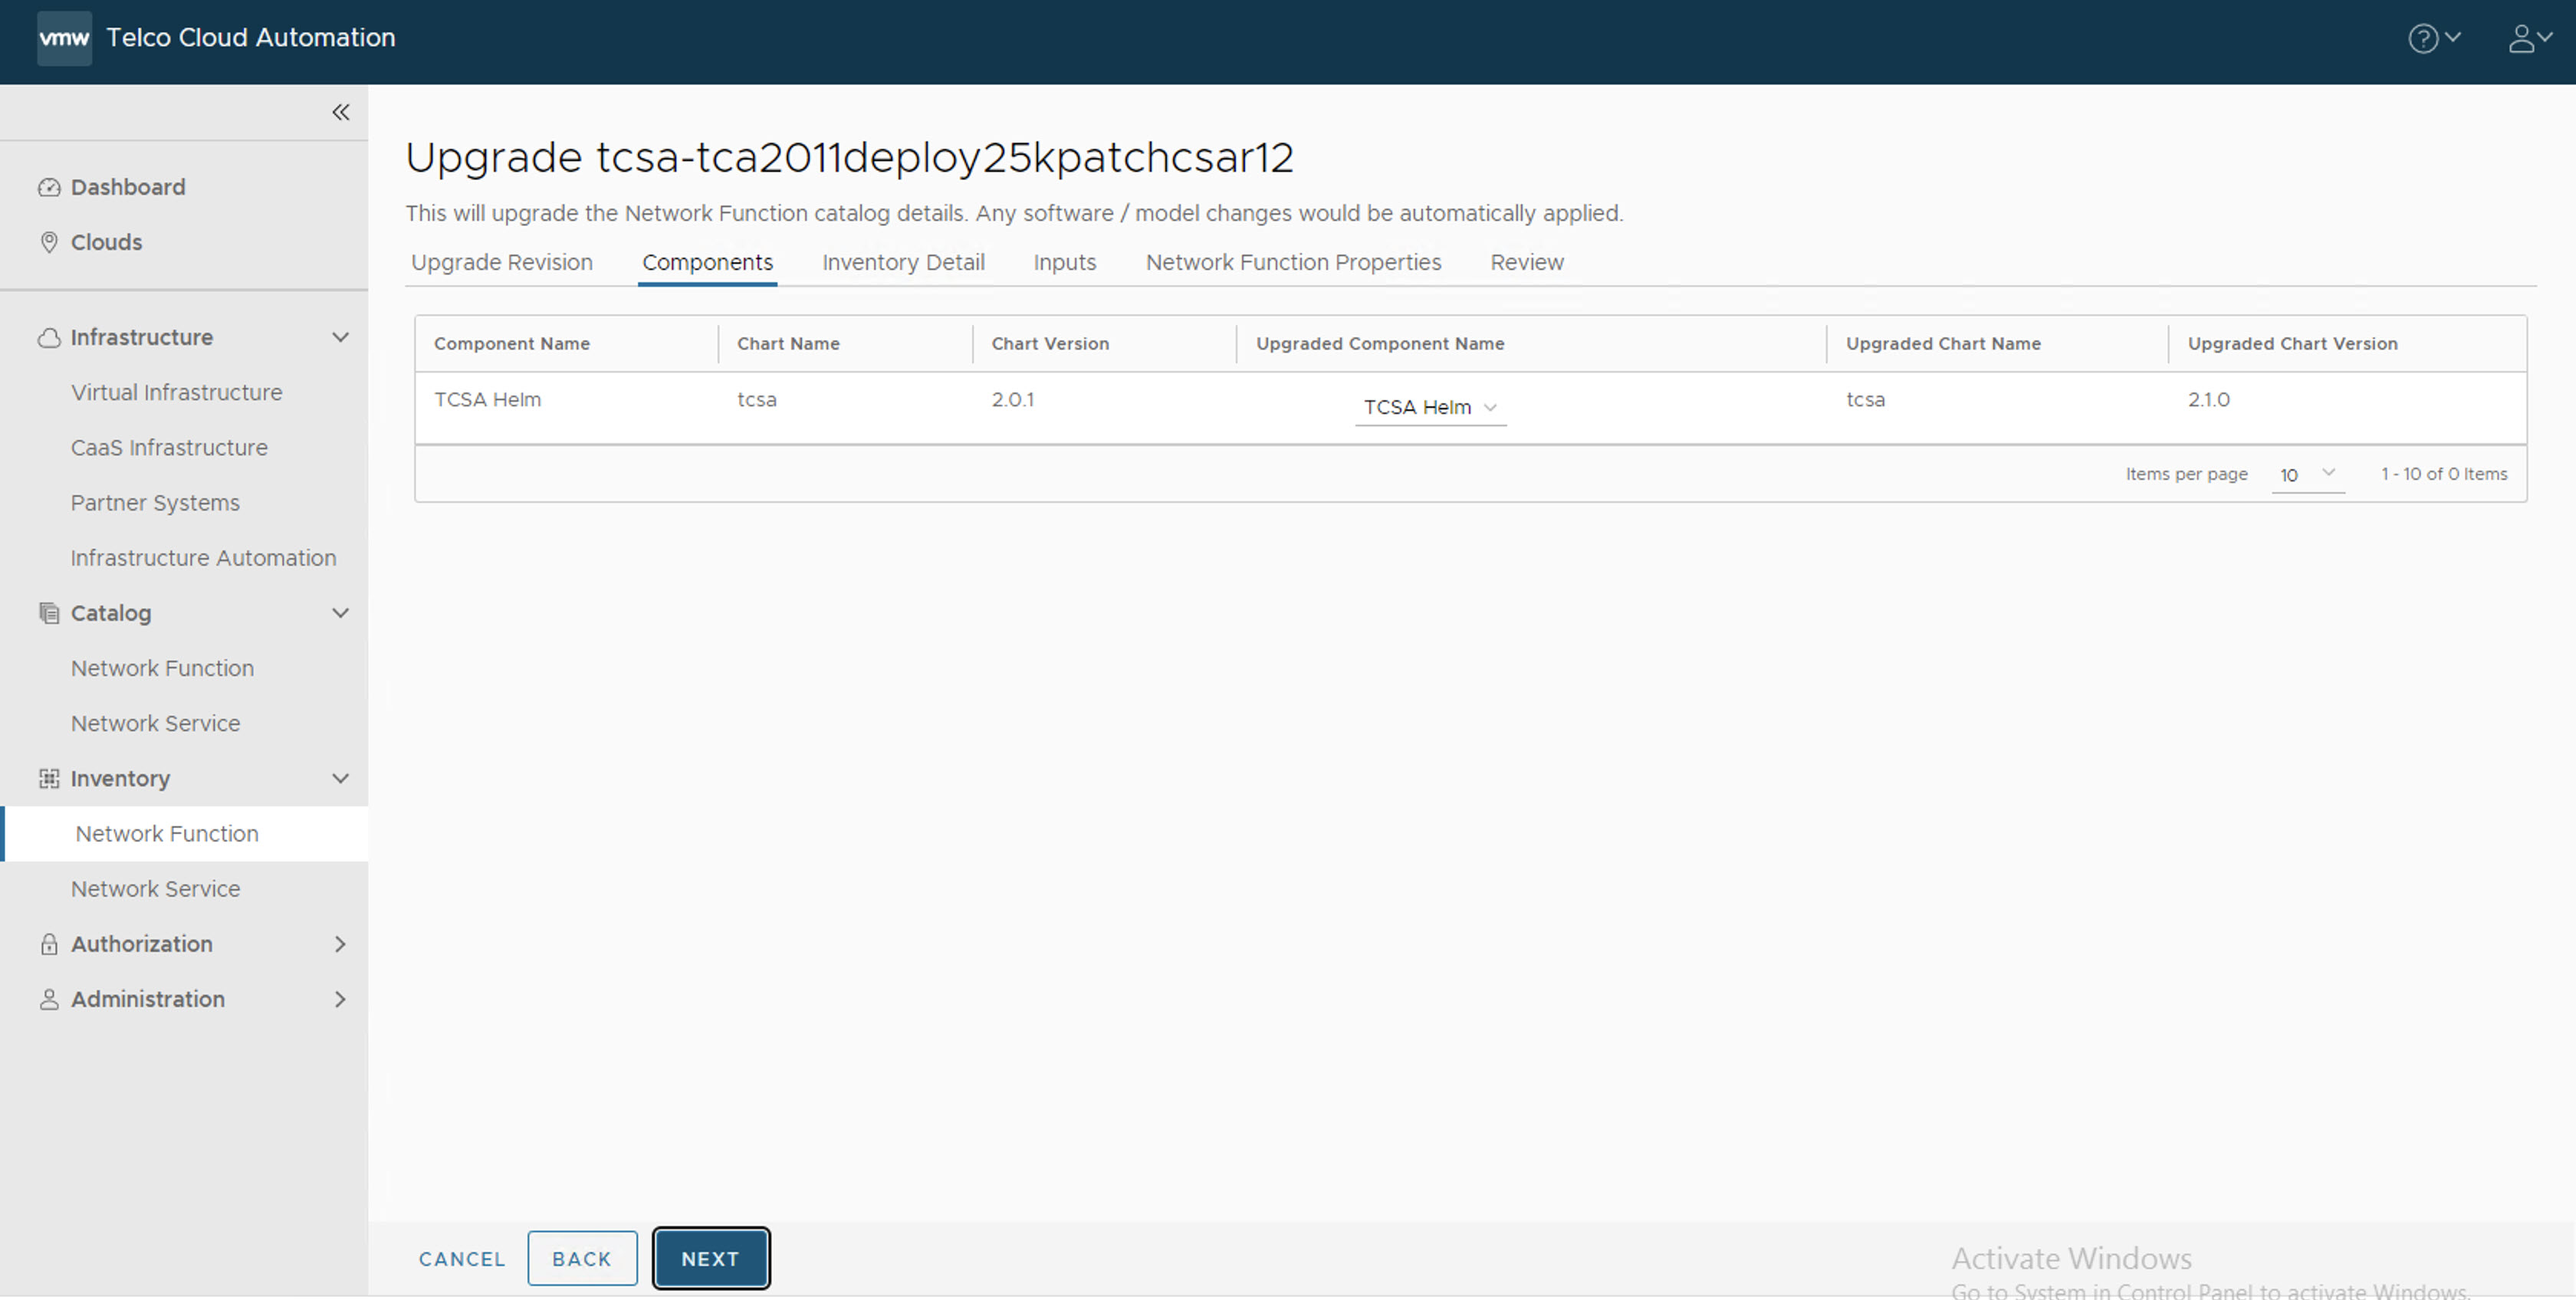
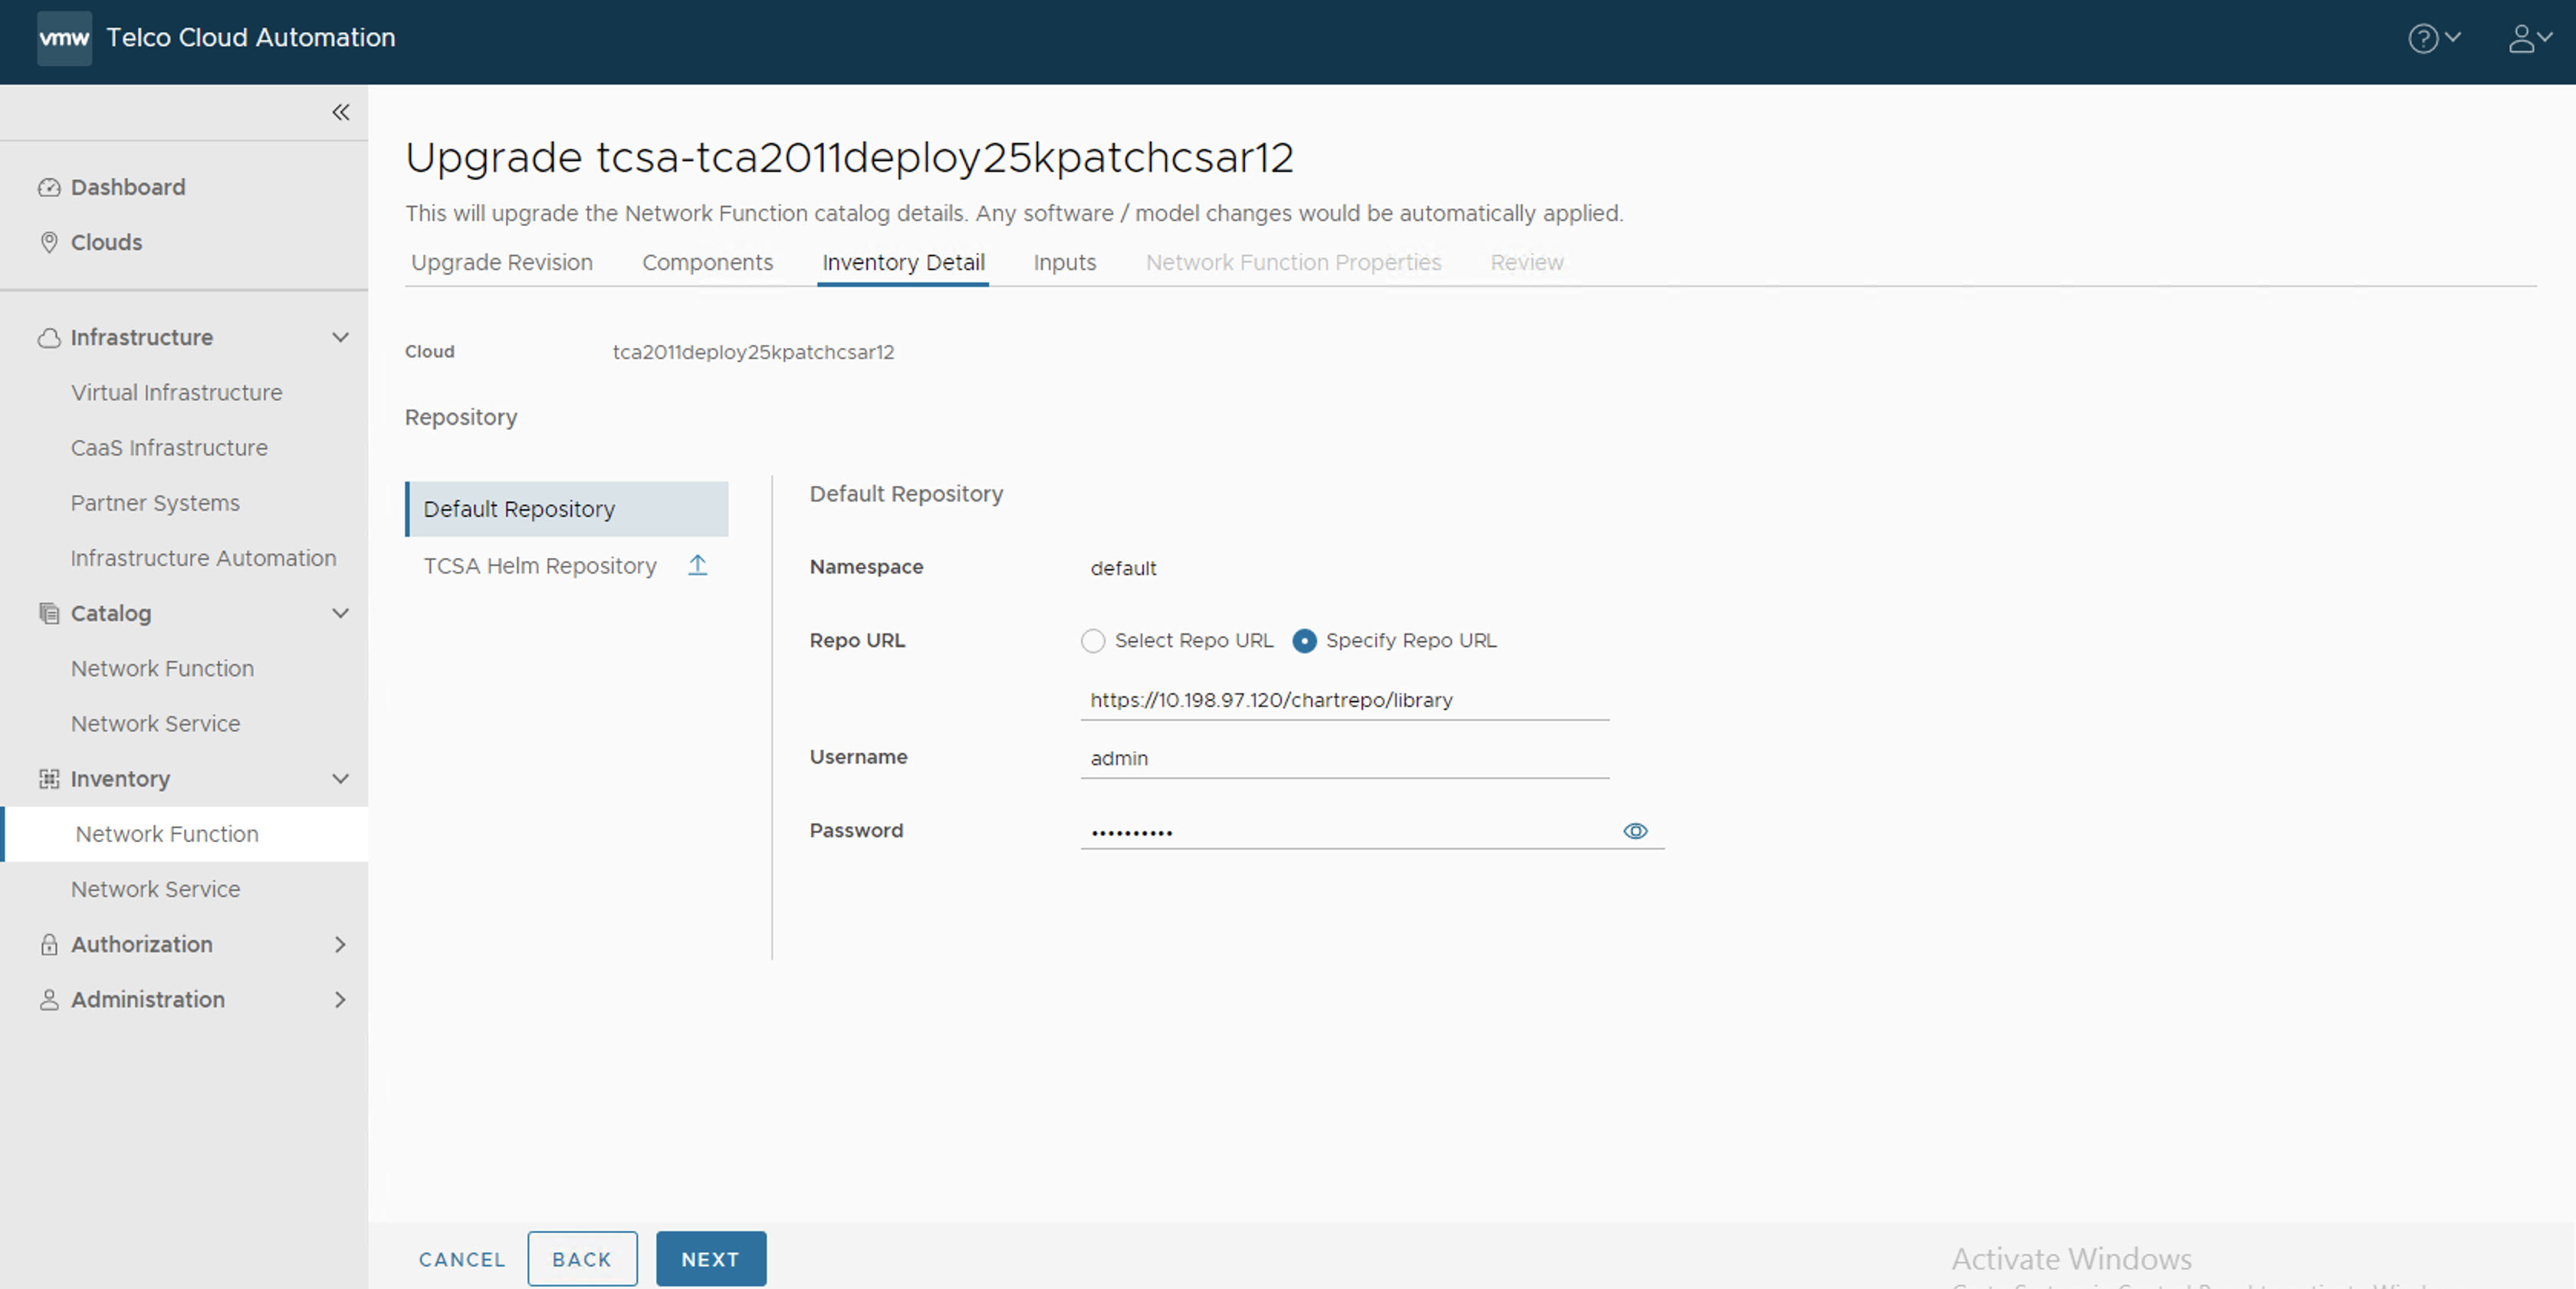
- In the Inventory Detail section, set the Namespace to default and select the default library chart repository, that is, the /chartrepo/library endpoint of the associated registry, and click Next.
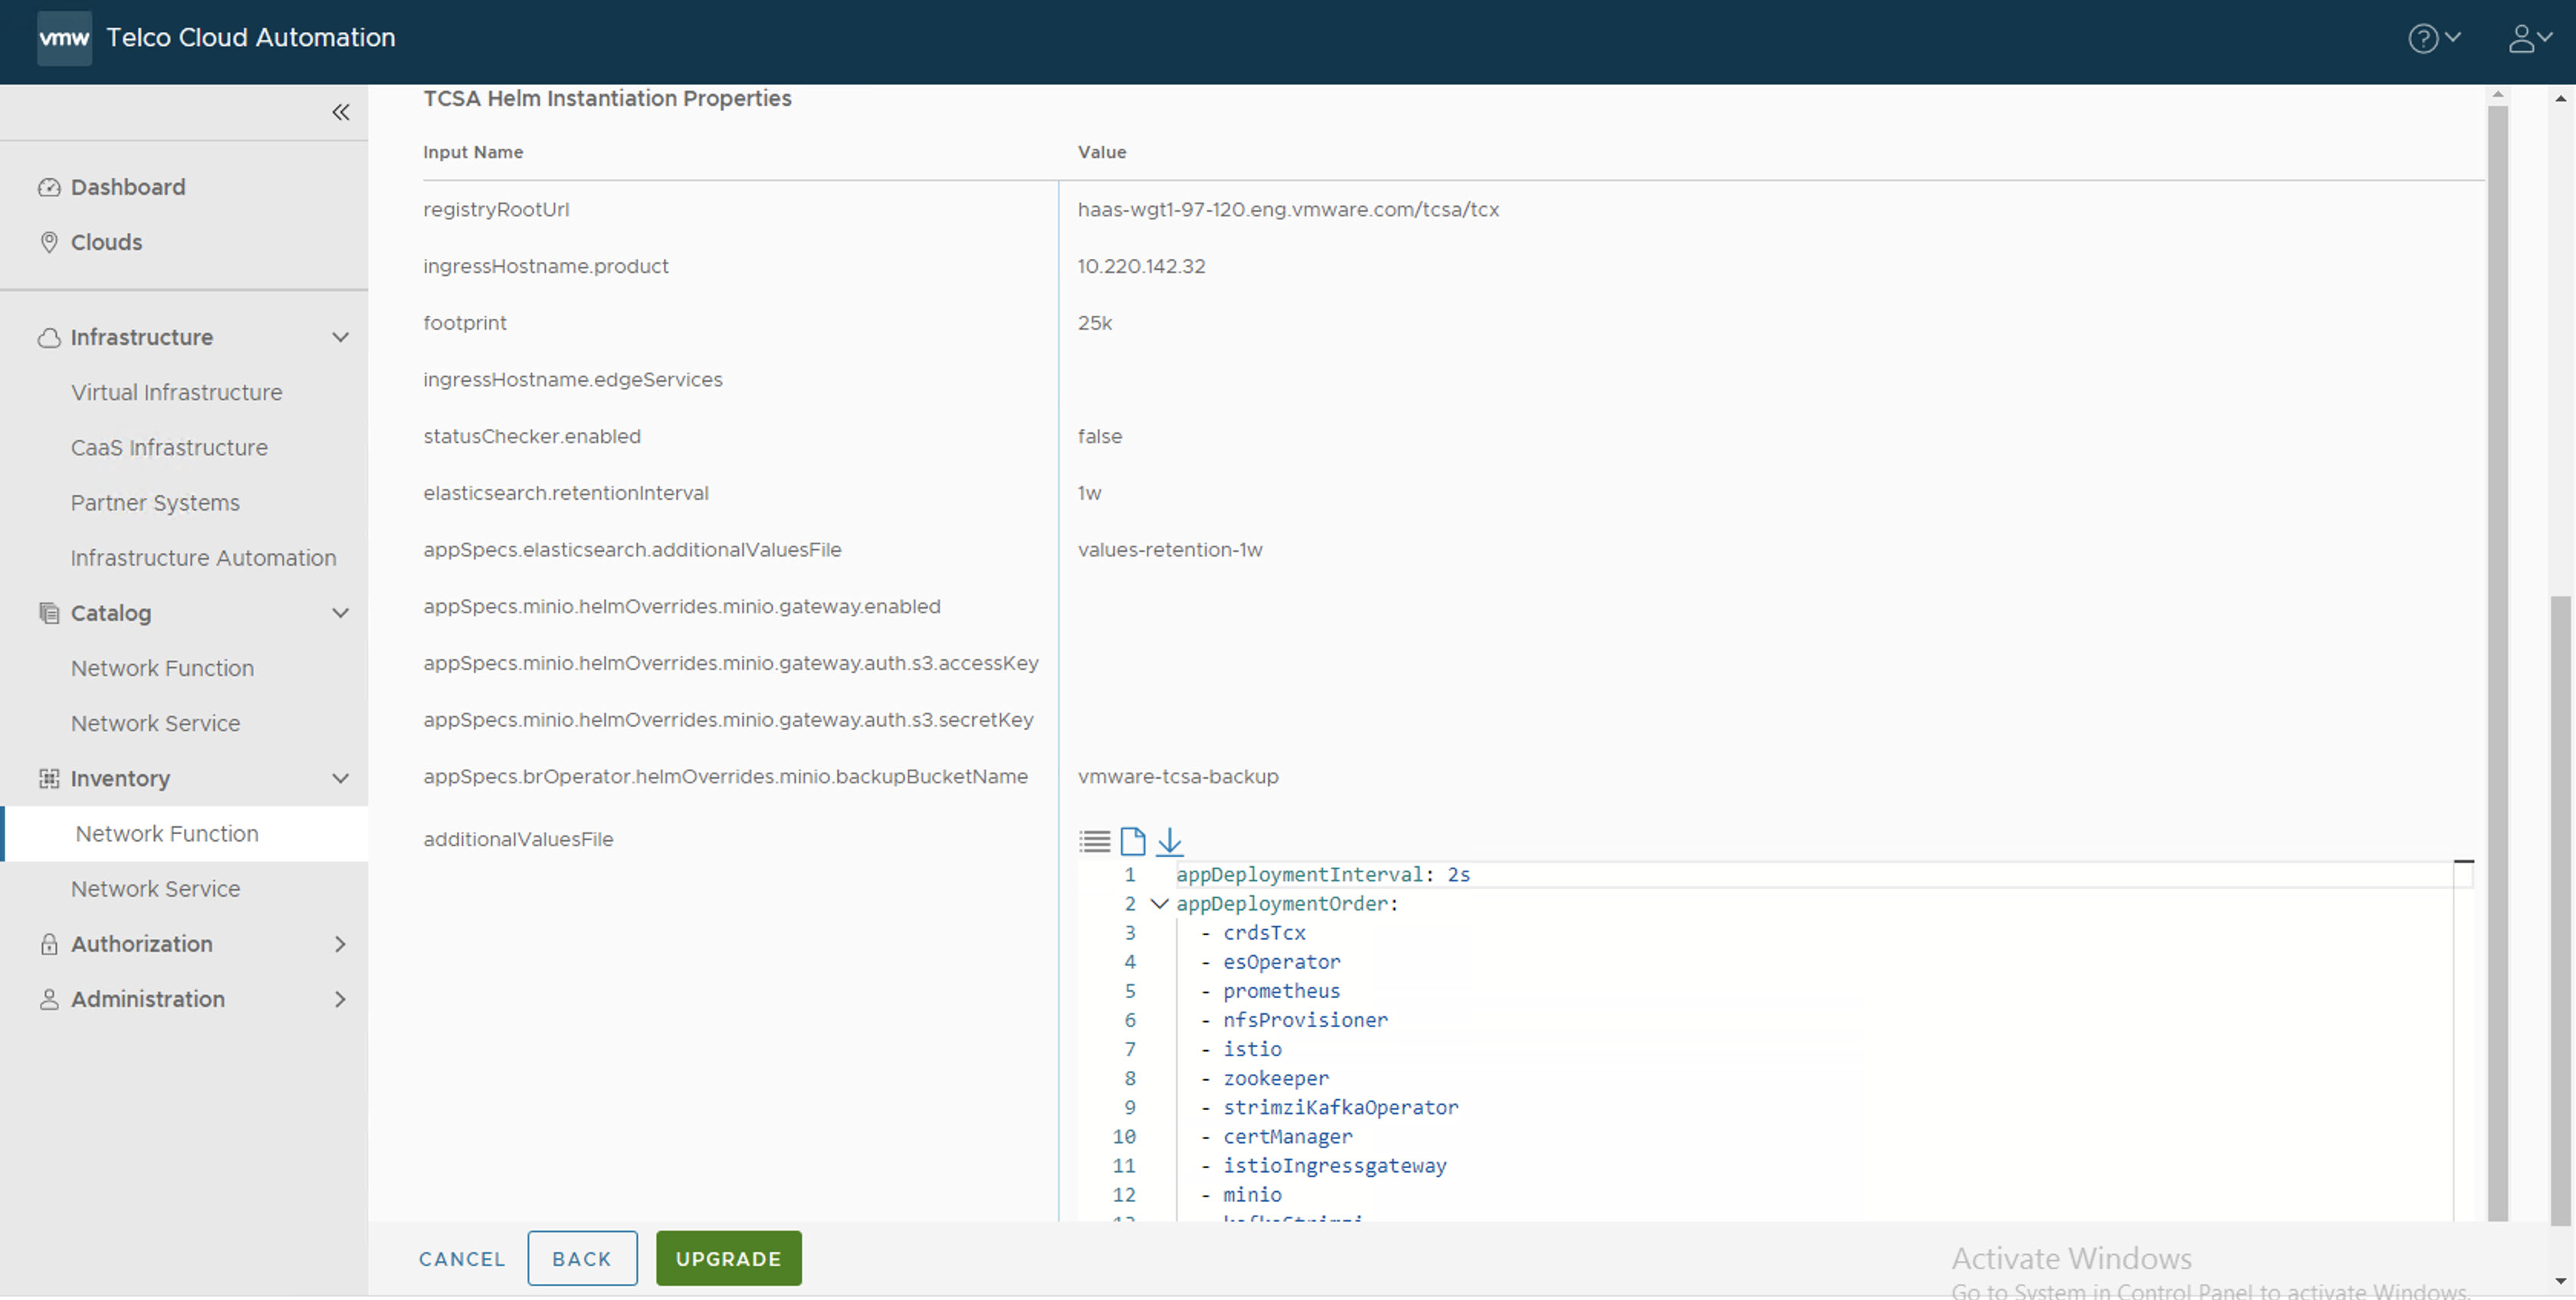
- In the Inputs section, update the following parameters:
- Set registryRootUrl to the same value as the base version.
- Set ingressHostname.product to the same value as the base version.
- Set footprint to the base footprint that you are deploying. For example, demo, 25 K, 50 K, 75 K, 100K, and so on.
- (Optional) Set ingressHostname.edgeServices to the IP address of the base version in case you want to access external Kafka.
- Set statusChecker.enabled to check the status of the
tcsaCNF. The default value istrue. Set the value asfalse.Note: The statusChecker.enabled parameter is disabled in VMware Telco Cloud Service Assurance 2.1 because VMware Telco Cloud Automation does not support CNF timeouts. - Set elasticsearch.retentionInterval to the desired retention period of metrics in Elasticsearch.
Note: By default, the retention interval is 1w. The retention interval values can be 1w, 2w, 3w, 4w, 5w, 4w, or 7w.
- Set appSpecs.elasticsearch.additionalValuesFile to one of the values like values-retention-1w, values-retention-2w, values-retention-3w, values-retention-4w, values-retention-5w, values-retention-6w, or values-retention-7w.
Select the same retention period as elasticsearch.retentioninterval. For example, values-retention-1w for 1 week. This is an additional configuration required to properly configure the retention of metrics in Elasticsearch.Note: Setting the Elasticsearch retention parameters is optional. By default, the retention interval is 1w for elasticsearch.retentioninterval and values-retention-1w for appSpecs.elasticsearch.additionalValuesFile.If you want to store the backup and restore in a AWS cloud, you must enable the following parameters in the VMware Telco Cloud Automation UI:
- appSpecs.minio.helmOverrides.minio.gateway.enabled
- appSpecs.minio.helmOverrides.minio.gateway.auth.s3.accessKey
- appSpecs.minio.helmOverrides.minio.gateway.auth.s3.secretKey
- appSpecs.brOperator.helmOverrides.minio.backupBucketName
- For additionalValuesFile, upload the merged_yamls.yaml file.
- The Network Function Properties page appears. Click Next.
- In the Review section, click Upgrade.
