In this topic, you can find steps to create an Escalation Rule.
Prerequisites
Procedure
- Select the Stop Criteria from the drop-down menu. The Stop Criteria defines the Escalation Rules termination condition. The criteria can be either clear (when the Event is inactive) or ack (when the Event is Acknowledged). The default value is clear.

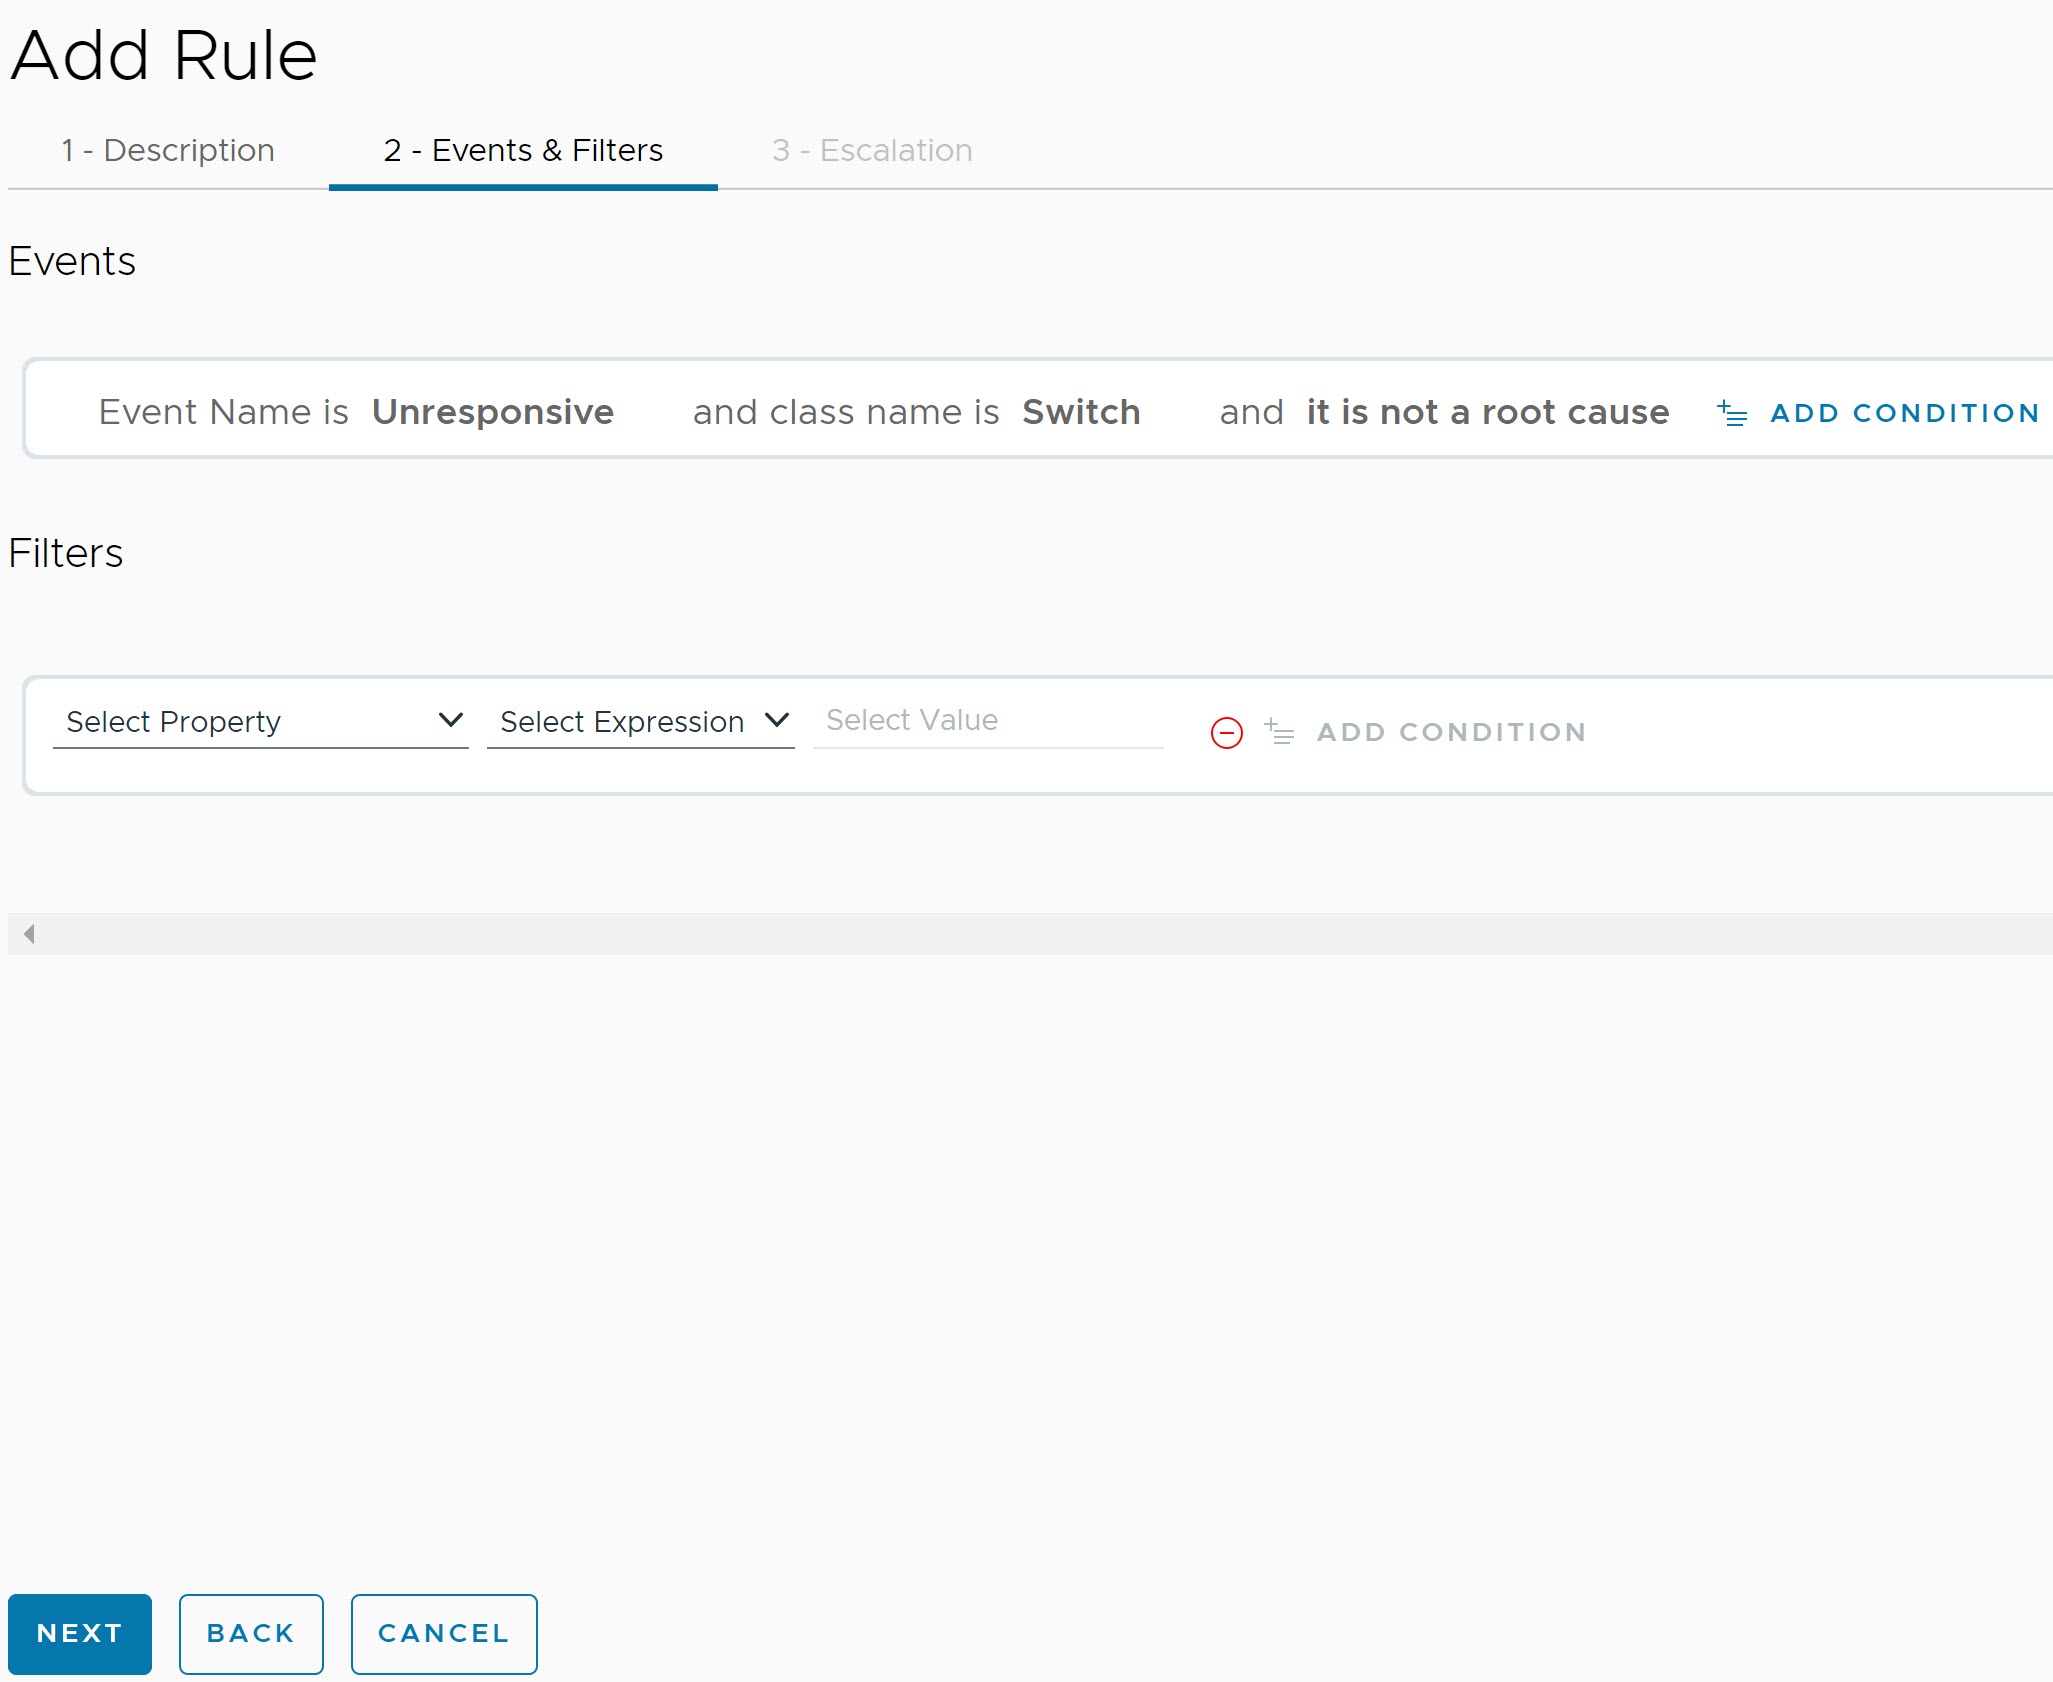
- Under Events & Filters, you have Events and Filters.
- For Events, select the Event Name, and class type is, and the root cause from the drop-down menu. For example, Unresponsive, Switch, and it is not a root cause.
- For Filters, select the Property and Expression from the drop-down menu, and enter the Value.
Note: The filter is an optional field.
- To add multiple filters, click Add Group. The ORcondition tag is used when you add filters from different groups.
- To add multiple properties for a given filter within the same group, click Add Condition. The AND condition tag is used when you add filters within the same group.
- Under Escalation, update the following parameters.
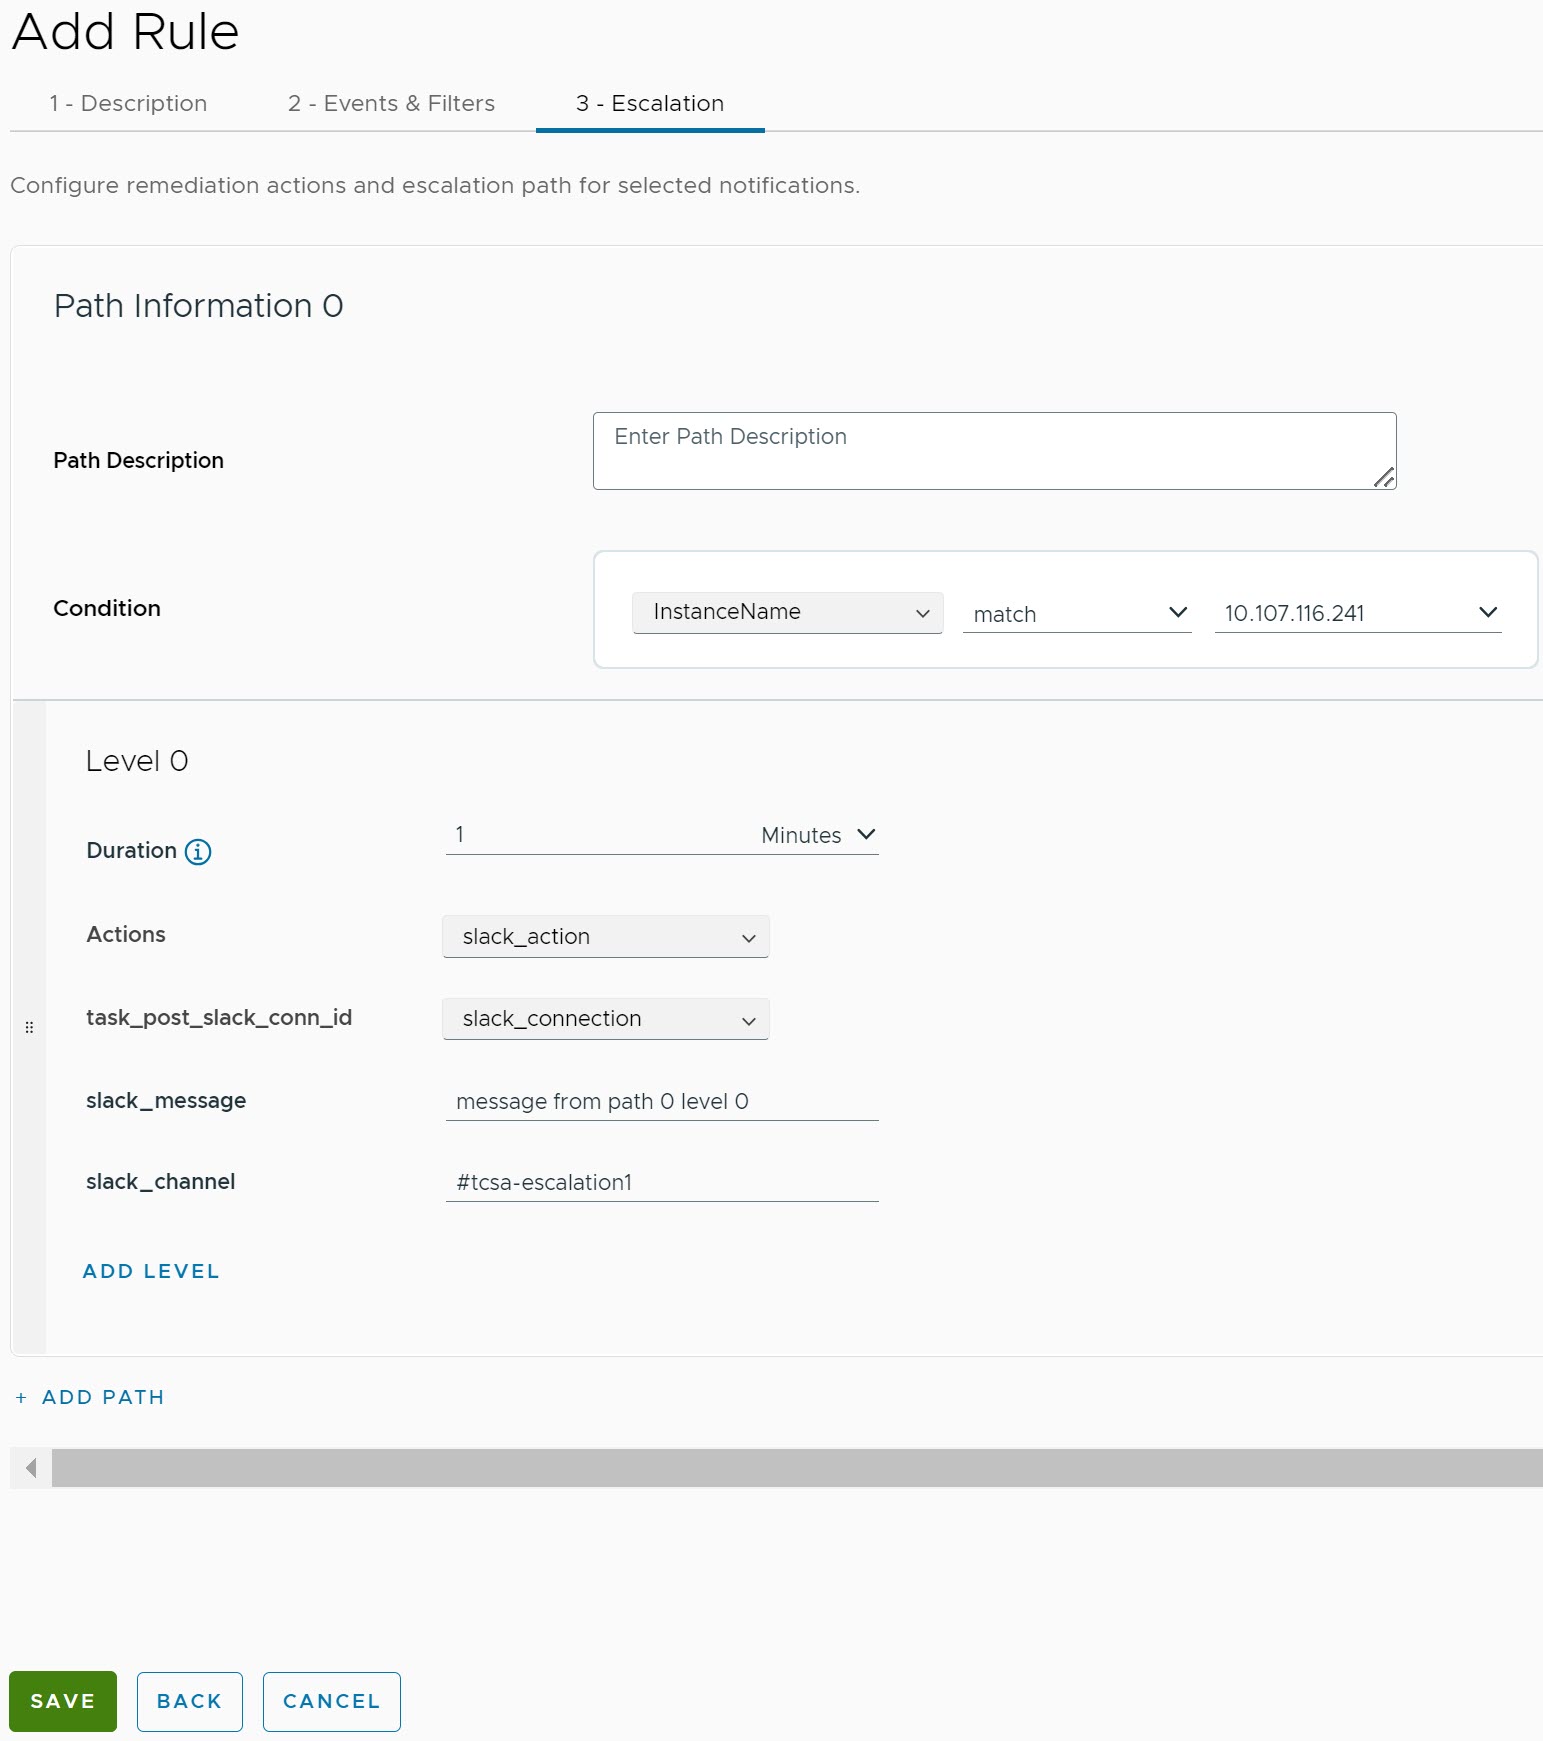
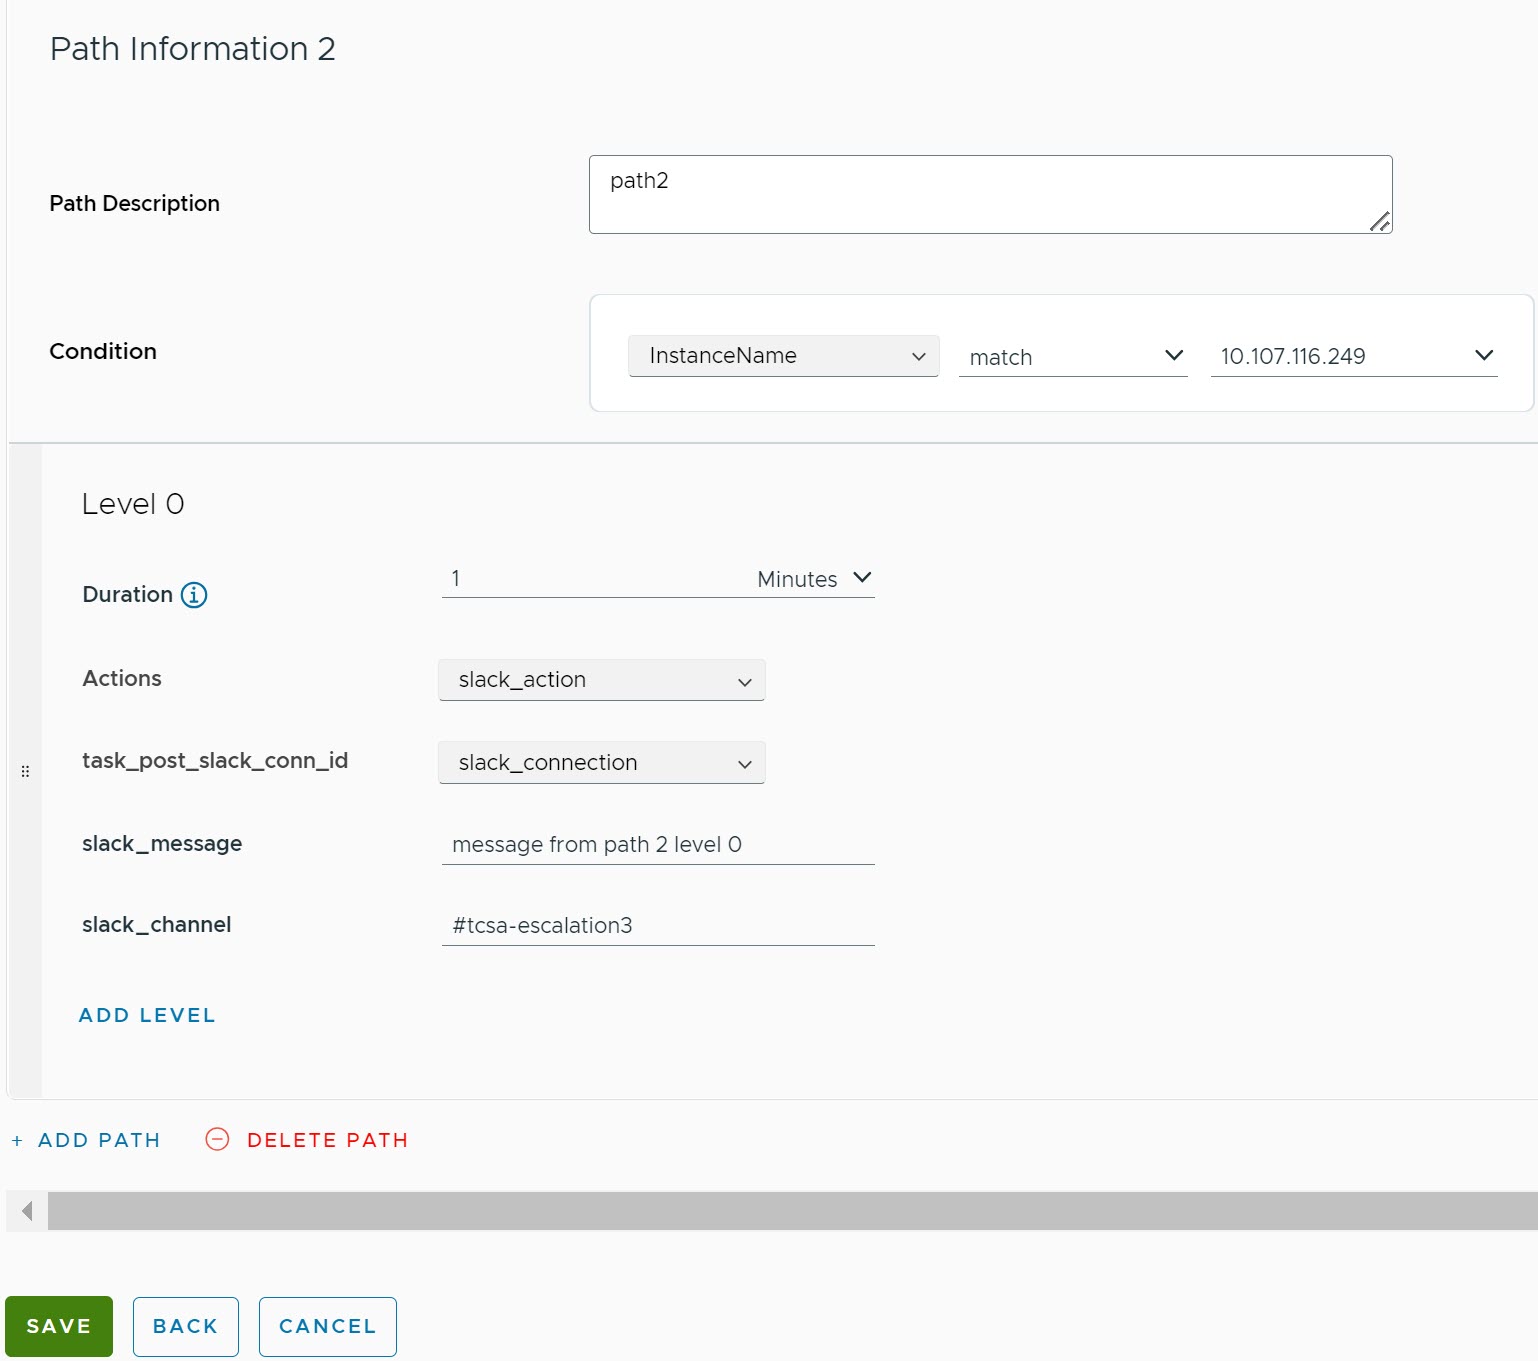
- For Path Information 0:
Note: You can have a maximum of 4 escalation paths for the notifications.
- Description: Enter the description for the path.
- Condition: Select the property and value for the condition.
- For Level 0:
Note: You can have a maximum of 4 levels for each path.
- Description: Enter the description for level 0.
- Duration: Enter the duration in minutes. This field represents the duration in minutes a notification spends at a particular level. Upon expiry of this duration, the selected action for the relevant escalation level is triggered. When an action is executed for a particular level, and the stop criteria is not met, the escalation flow continues to the next level.
- Actions: Select an action from the drop-down menu. Once you select an action from the drop-down menu, the relevant connections fields are populated.
To add an action, click the Add Action button from the Actions drop-down menu.
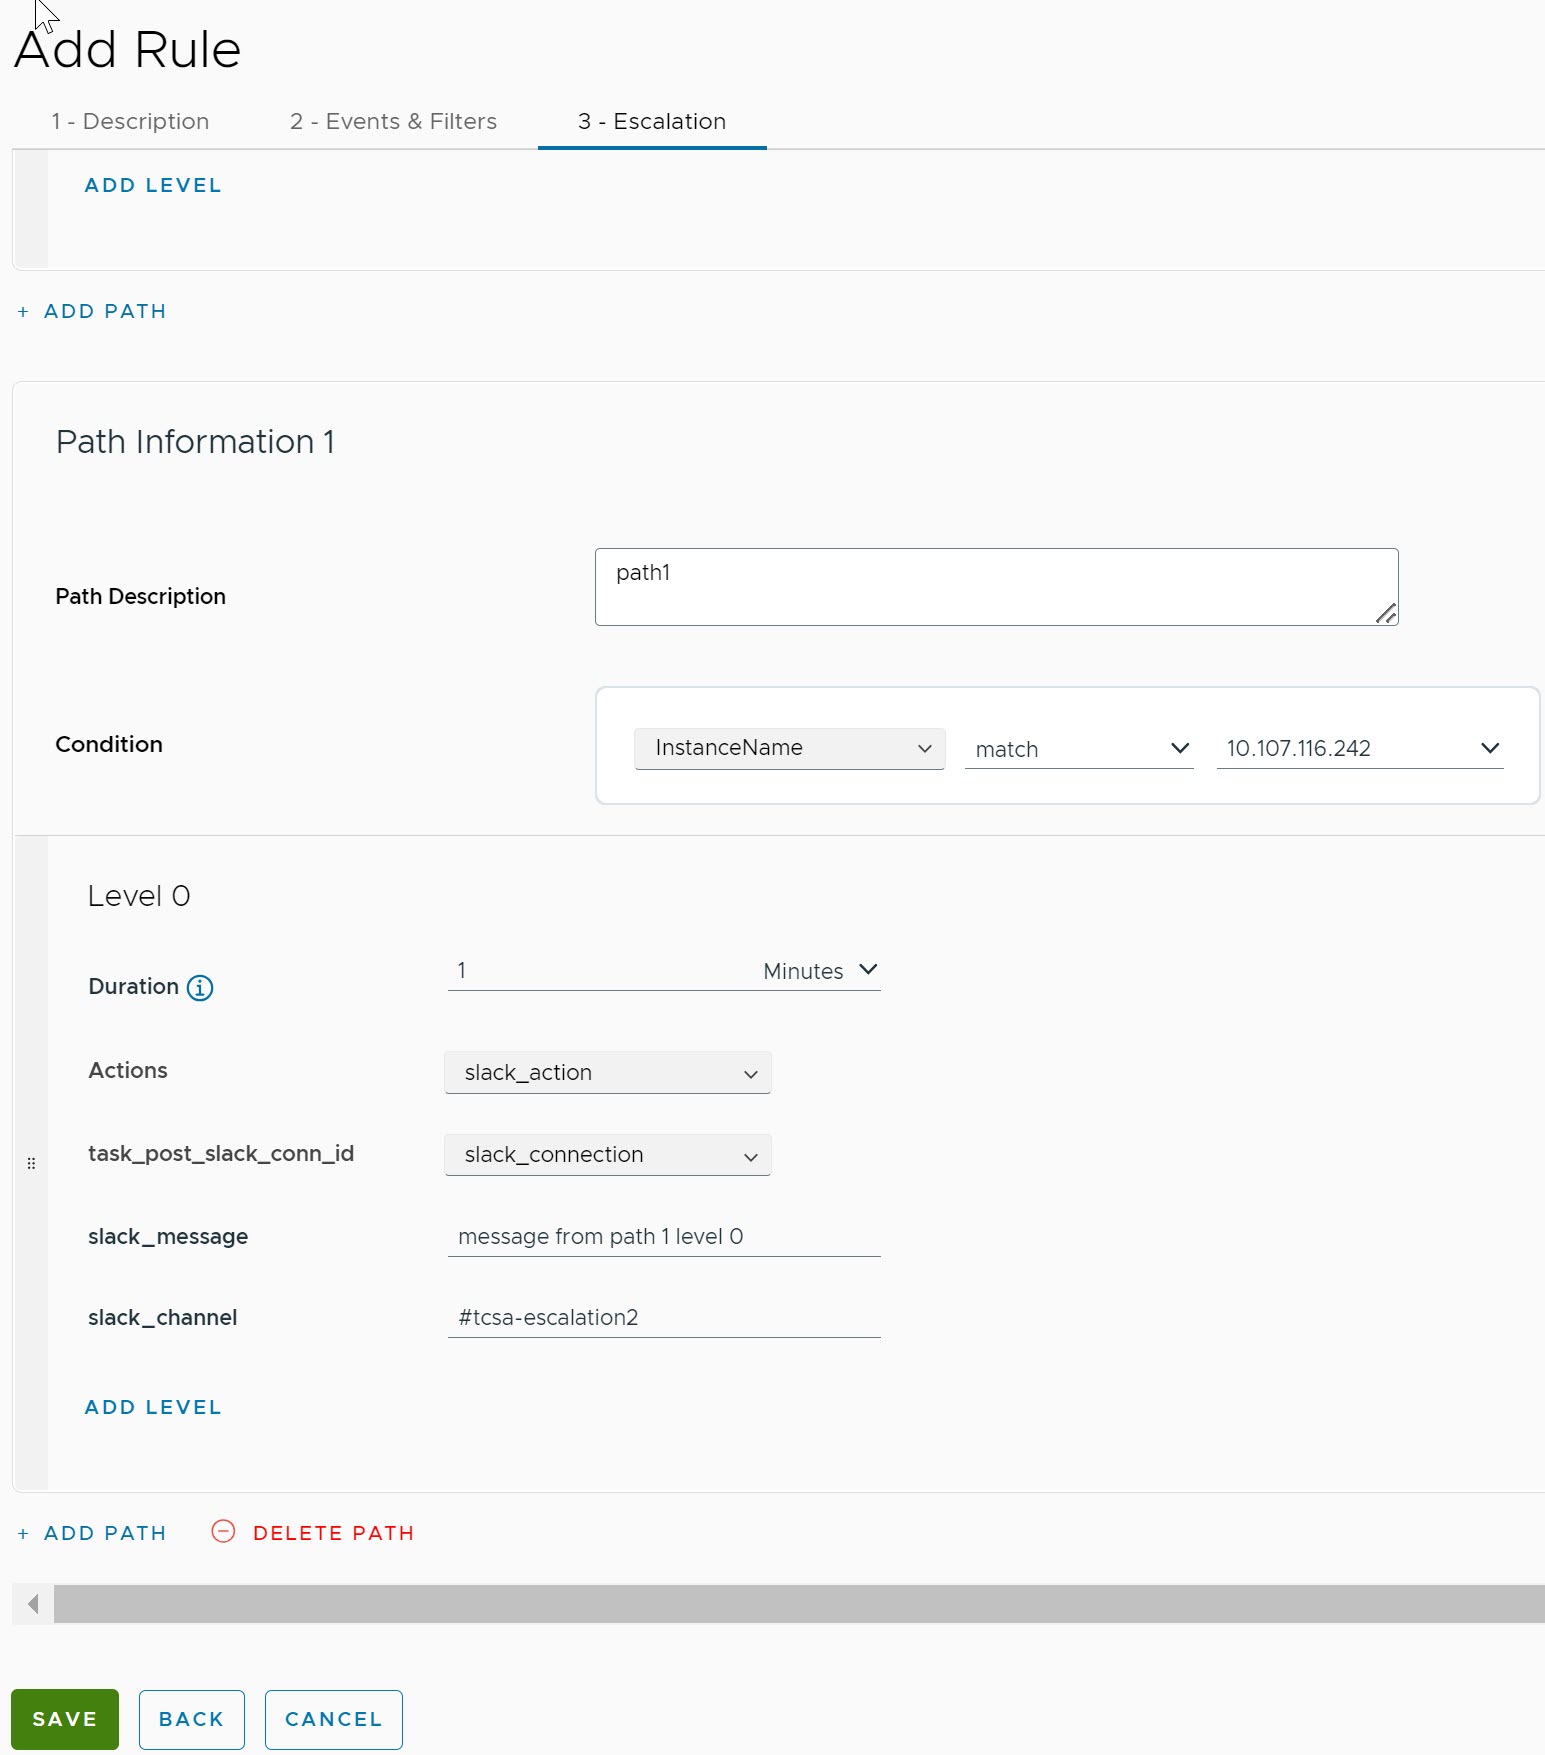
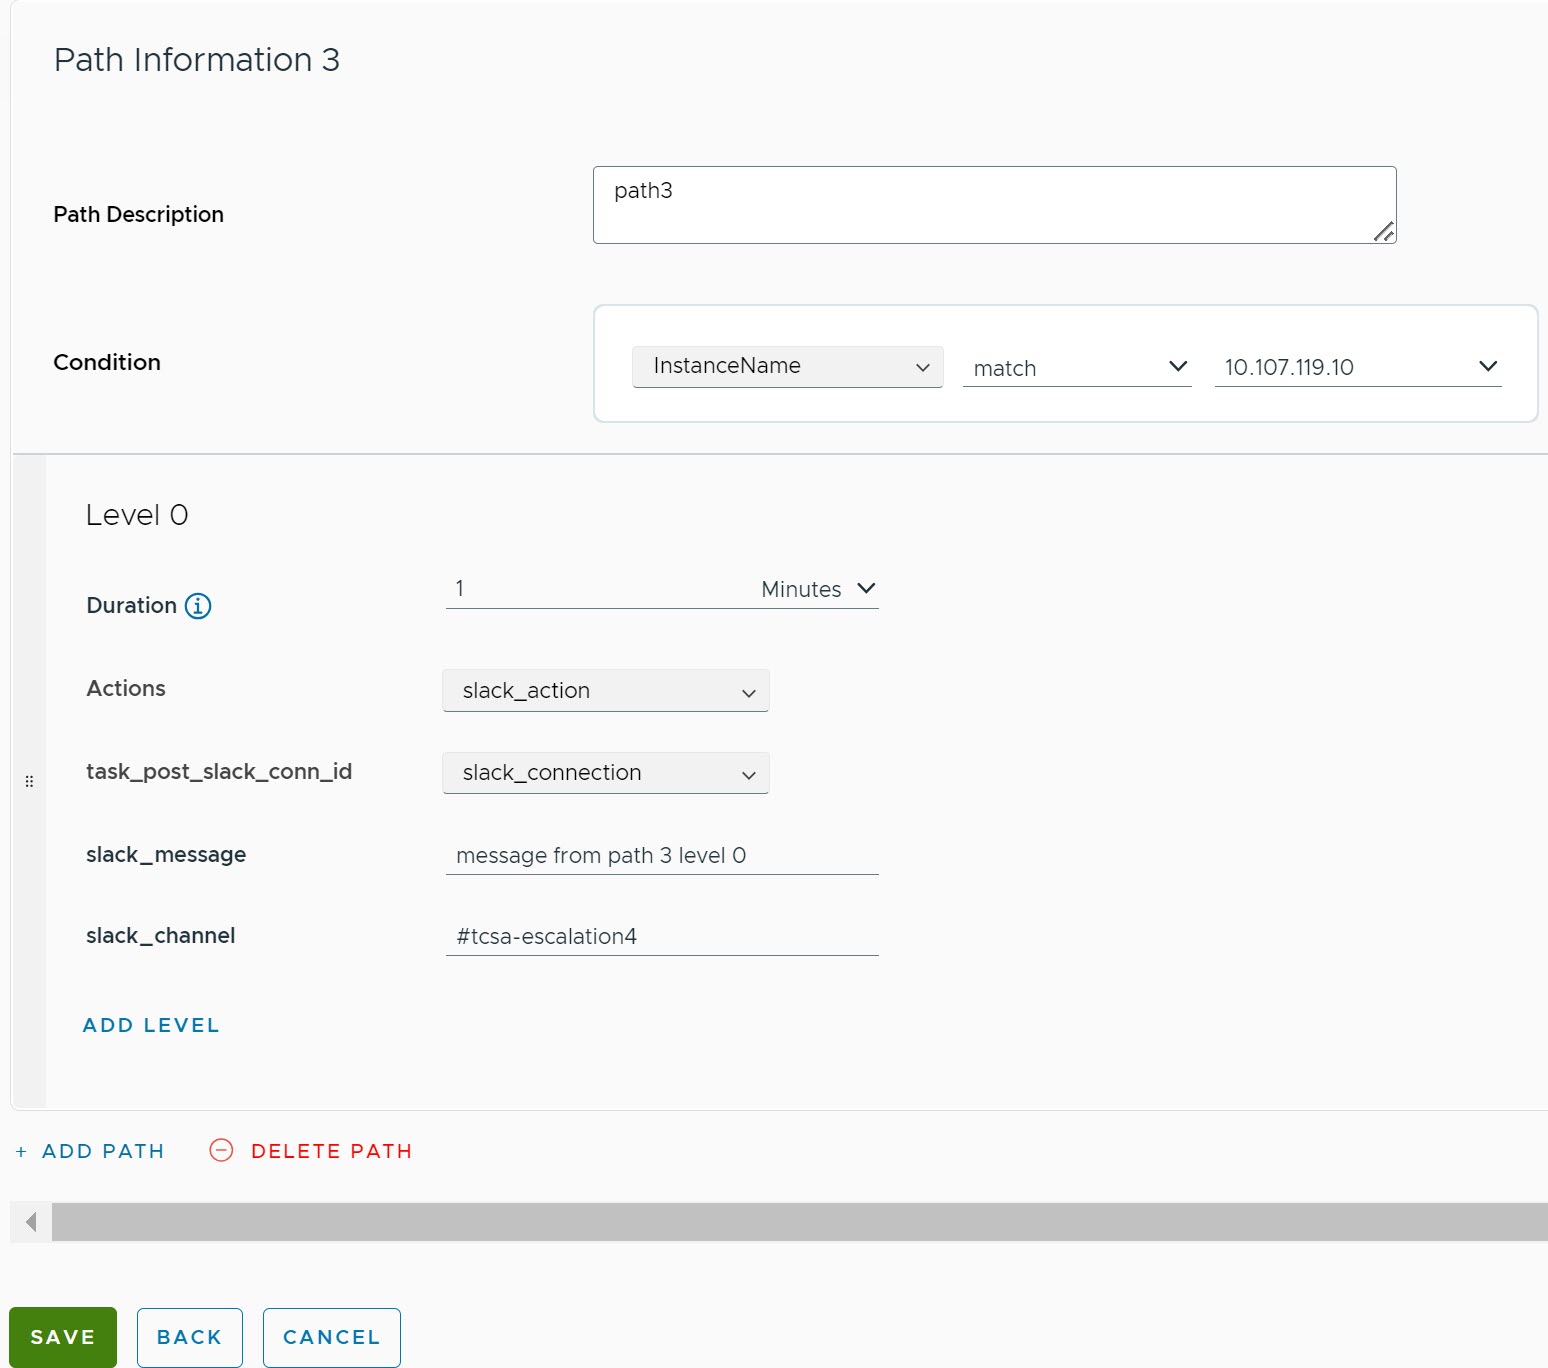
- For Path Information 0:
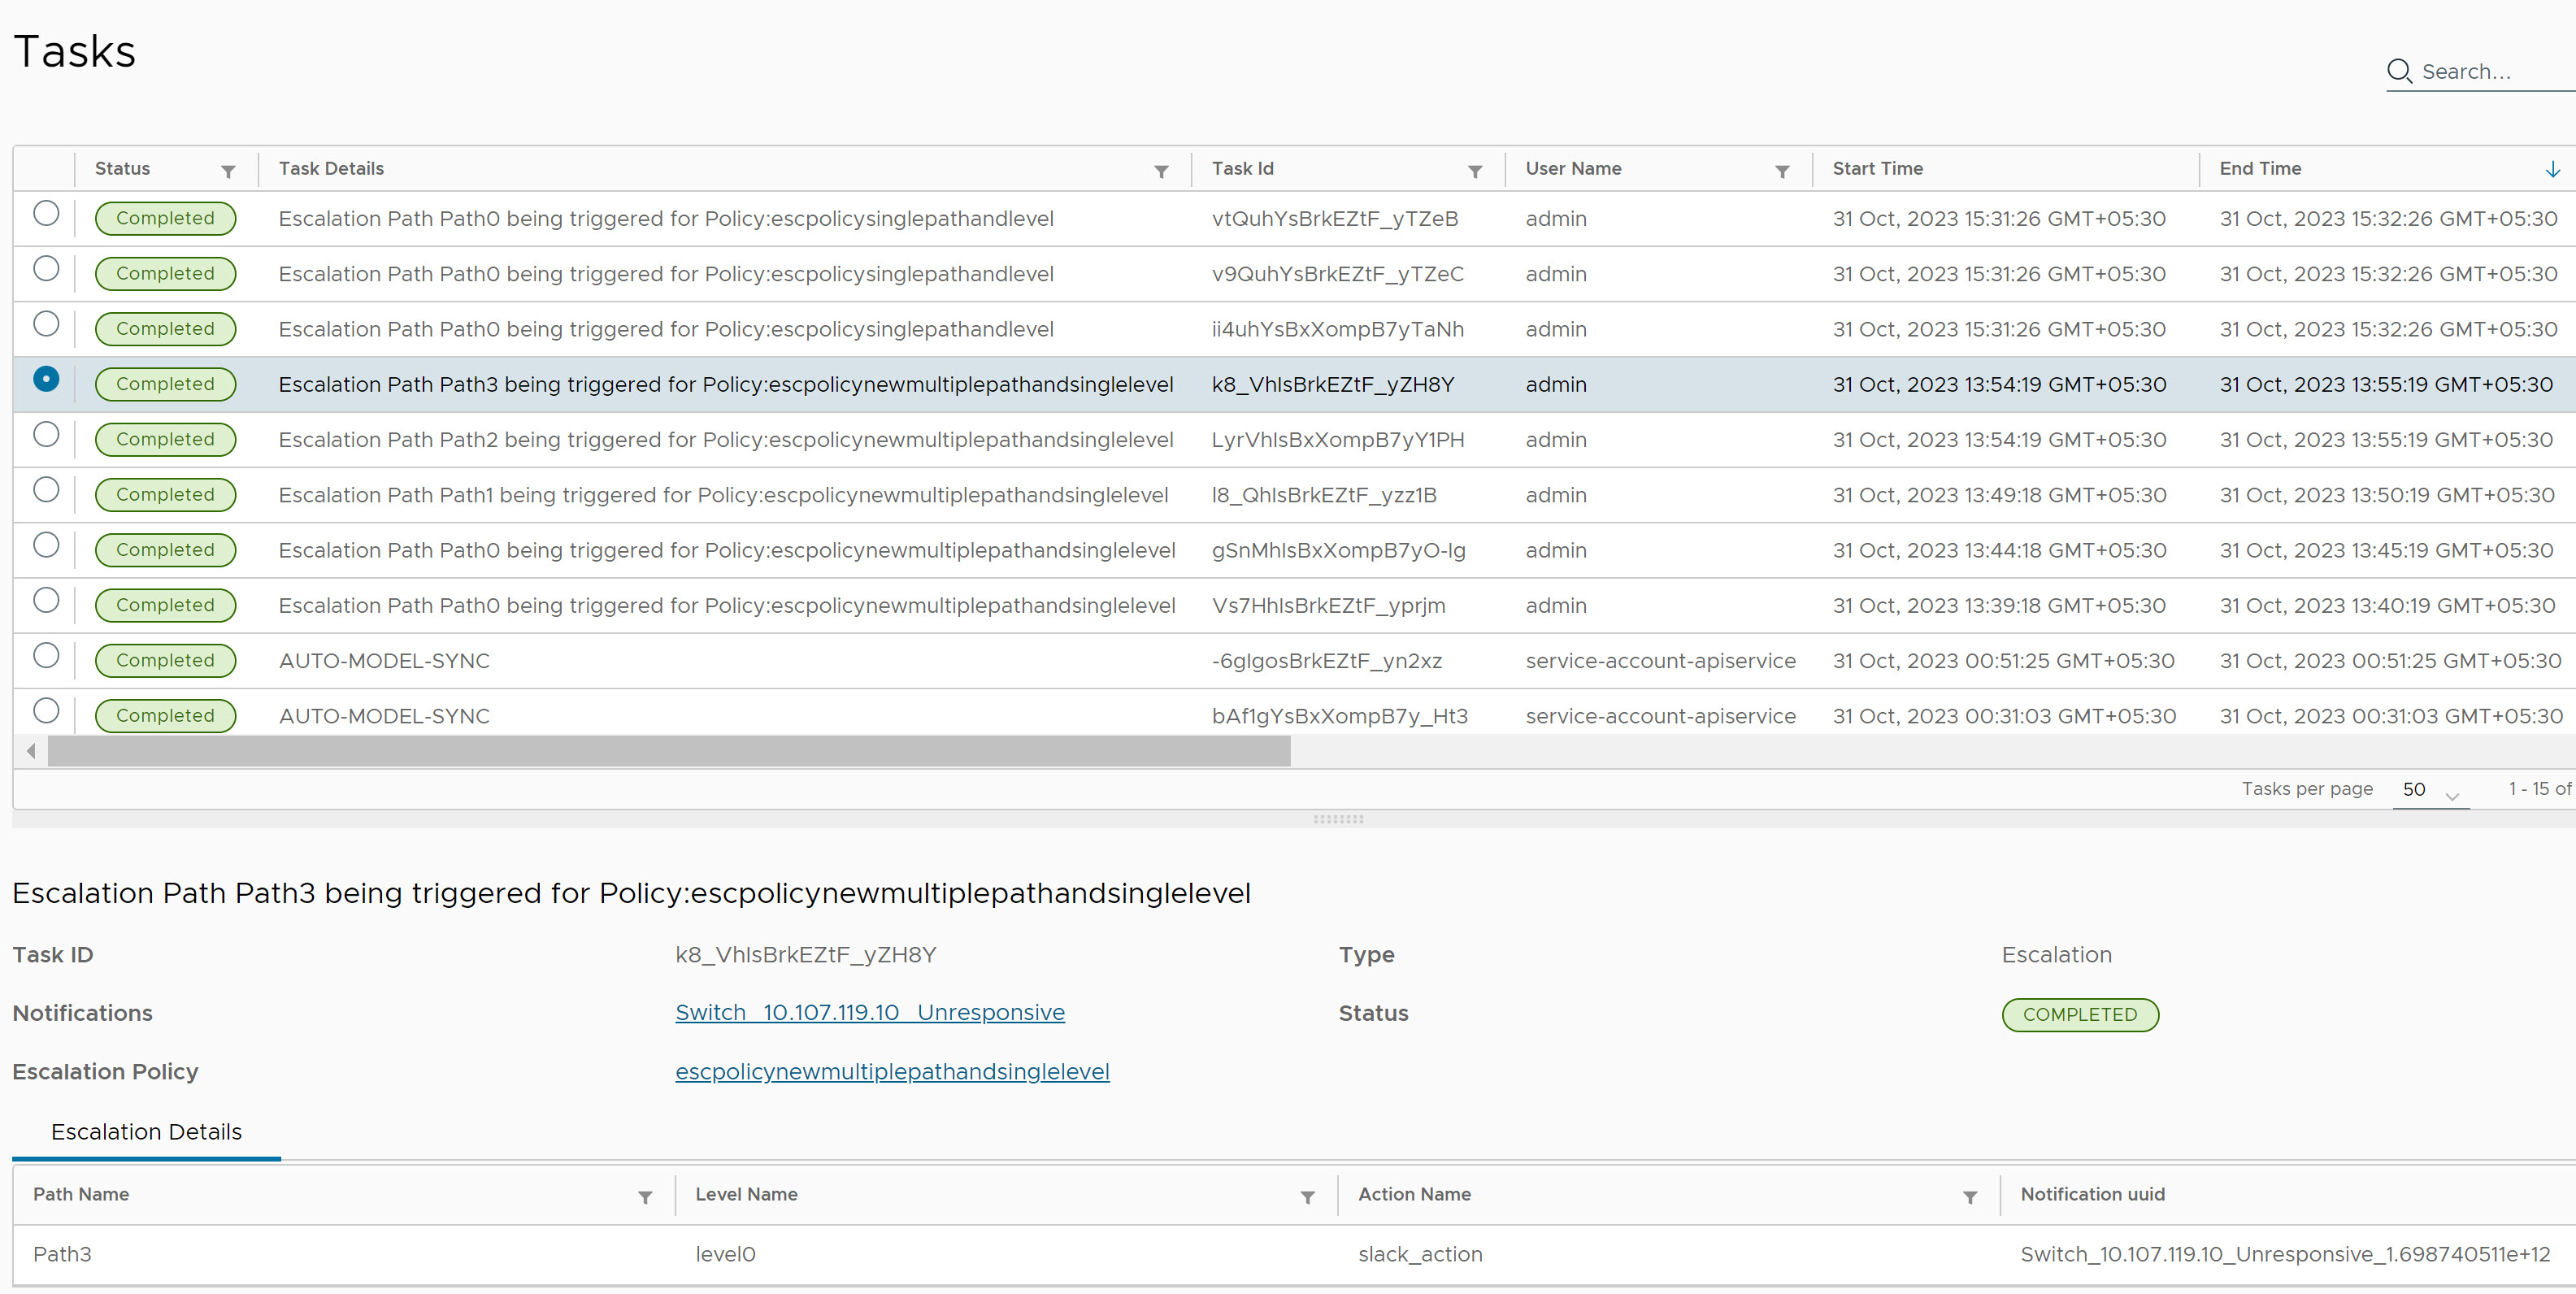
- Click Save. When an event matches the Escalation Rule, a policy is triggered in the backend and you can see the Escalation status in the Tasks UI.
The following screenshot is an example of Path 3 and Level 0 Escalation Rule.