In this topic, you can find steps to instantiate the VMware Telco Cloud Service Assurance CNF along with the flexible configuration parameters.
Instantiate tcsa CNF (VMware Telco Cloud Service Assurance CNF)
- Navigate to .
- Select
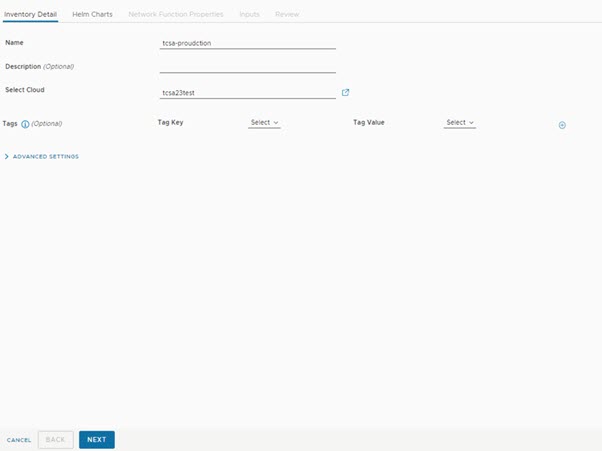
tcsa CNF. click against the vertical ellipsis (⋮) and click Instantiate. - Under Inventory Detail, enter Name and select the VMware Tanzu Kubernetes Grid workload cluster on which you want to deploy it.

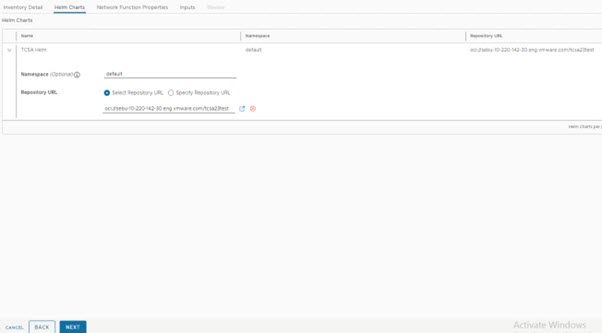
- Under Helm Charts, select the Namespace as default and Repository URL as <oci://<registryRootUrl>>, and click Next.
Note: Use the same value which was provided for --registry parameter during the Push artifacts command.

- Under Network Function Properties, click Next.

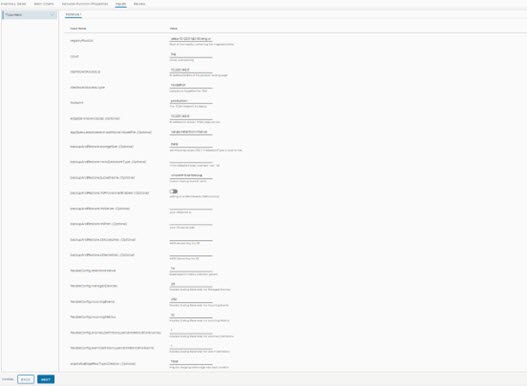
- In the Inputs section, update the following parameters:
- Set registryRootUrl to the same value as the
--registry-urlparameter of the installer script in the Push Artifacts to Registry topic. - Set dashboardAccess.ip to the virtual IP of VMware Telco Cloud Service Assurance workload cluster.
- Set dashboardAccess.type as NodePort.
- Set footprint as production.
- (Optional) Set edgeServicesStaticAccessIp to the IP address to use in case you want to access the VMware Telco Cloud Service Assurance UI or Edge Kafka.
- Set statusChecker.enabled to deactivate state if it is enabled. The default value is
disabled.Note: The statusChecker.enabled parameter is disabled in VMware Telco Cloud Service Assurance because VMware Telco Cloud Automation does not support CNF timeouts. - (Optional) Backup and Restore parameters are optional and must be configured only in-case if you are using external AWS or vSAN file services for Backup and Restore operations.
Note: By default there is a scheduled back which happens everyday and gets stored on the local storage. So its recommended to use AWS or VSAN File Service for Backup and Restore operations.If AWS is used for backup, then update the following parameters:
# (string) minioDatastoreType is the storage backend for minio. Valid options are “s3”, “nas” or “local”
backupAndRestore.minioDatastoreType: s3
backupAndRestore.bucketName:          (Userdefined name, where the backup will be stored in AWS environment)
backupAndRestore.s3AccessKey:         (accesskey and secretkey are specific to the individual AWS account)
backupAndRestore.s3SecretKey:          (accesskey and secretkey are specific to the individual AWS account)
If VMware vSAN file service is used for backup, then update the following parameters:# (string) minioDatastoreType is the storage backend for minio. Valid options are “s3”, “nas” or “local” backupAndRestore.minioDatastoreType: nas # (bool) Set to true if the storage backed is on NFS. Set ONLY if datastoreType is local or nas backupAndRestore.nfsProvisionerEnabled: Enable the option # (string) Userdefined name, where the backup will be stored in VSAN File Service) backupAndRestore.bucketName: # (string) The IP address/hostname of the NFS server. Set only if minioDatastoreType is set to nas backupAndRestore.nfsServer: # (string) The NFS server path. Set only if minioDatastoreType is set to nas backupAndRestore.nfsPath:
For information on configuring VMware vSAN file services, see Enabling VMware vSAN File Services topic.
- Set flexibleConfig.managedDevices parameter to the number of Devices in thousands that you want to scale. For example, if you want to mention 7500 devices, you can mention it as flexibleConfig.managedDevices = 7.5.
Note: For maximum supported flexible scaling values, see System Requirements for Flexible Scaling topic.
- Set flexibleConfig.incomingEvents parameter to the number of Events in thousands that you want to scale. For example, if you want to mention 75000 events, you can mention it as flexibleConfig.incomingEvents = 75.
- Set flexibleConfig.incomingMetrics parameter to the number of Metrics in millions that you want to scale. For example, if you want to mention 4 million metrics, you can mention it as flexibleConfig.incomingMetrics = 4.
- Set flexibleConfig.percentMetricsForAnomaly parameter to the percentage of unique metrics for Anomaly definitions.
- Set flexibleConfig.percentMetricsForAlarms parameter to the percentage of unique metrics for alarm definitions.
- Set flexibleConfig.retentionInterval parameter to the desired retention interval period.
Note: By default, the retention interval is 1w. The retention interval values can be 1w, 2w, and so on.
- Click Next.

- Set registryRootUrl to the same value as the
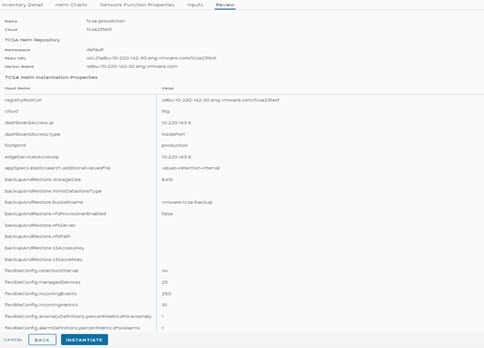
- Under Review, click Next.
- Click Instantiate.

- Once the Instantiation is successful, check the VMware Telco Cloud Service Assurance deployment status by running the following command from deployment VM:
root [ ~/upgrade/tcx-deployer/scripts ]# kubectl get tcxproduct
ORroot [ ~/upgrade/tcx-deployer/scripts ]# kubectl get apps
For all the apps, the reconciliation status must be successful.root [ ~/upgrade/tcx-deployer/scripts ]# kubectl get tcxproduct NAME STATUS READY MESSAGE AGE tcsa updateCompleted True All App CRs reconciled successfully 30h
Note: After successful deployment, you can launch the VMware Telco Cloud Service Assurance UI. For more information, see Accessing VMware Telco Cloud Service Assurance UI topic.