


You can edit the registry of Windows CE devices remotely using the Workspace ONE Assist client tool.
Much like the Registry Editor that includes Windows desktop PCs, the Workspace ONE Assist client tool includes a Registry Editor for Windows CE devices. Using this editor, you can add, rename, and delete registry keys and values on the Windows CE devices in your fleet.
This functionality requires the Registry Editor permission to be part of your assigned administrator roles. For more information, see Role-Based Access to Workspace ONE Assist.
Before you begin any of the following registry procedures, you must start a remote management session. For details, see Start an Assist Session and select Registry Editor when prompted.
The registry editor is arranged with Keys listed on the left side panel and Values listed on the right side panel.
Add a Key
- Once a connection has been established to the remote device, you can add a key by selecting the hive you want to add a key to. Select a hive folder on the left and the entire hive folder opens up, revealing all the existing keys.
- Select the 'Hamburger menu' icon to the right of the hive folder. A menu displays showing options for making new keys and values, renaming keys and values, and deleting keys and values.
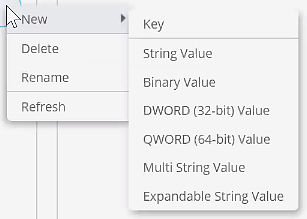
- Select New followed by Key. A new key (or folder) appears in the left side panel, labeled New Key, selected, and ready for editing.
- Give the New Key a new label and press the Enter key.
Add a Value
- With the correct key selected in the left side panel, select the 'Hamburger menu.' A menu displays showing options for making new keys and values, renaming keys and values, and deleting keys and values.
- Alternately, you can select the Plus Sign circled in red to create a Value.
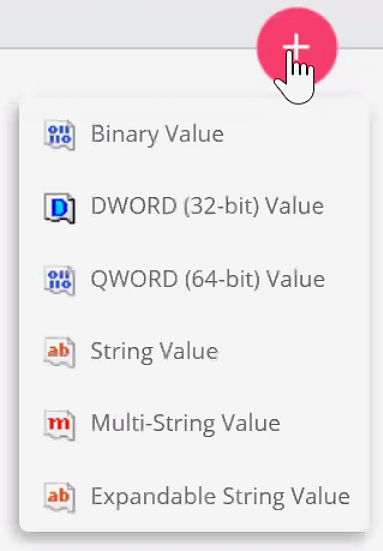
- Select the type of Value you want to add. The right side panel displays, featuring the options you must complete to create the value you selected.
- Binary Value
- DWORD (32-bit) Value
- QWORD (64-bit) Value
- String Value
- Multi String Value
- Expandable String Value
- Complete the Value Name and Value Data options then select Save.
Rename a Key or Value
- Identify the key or value you want to rename.
- To rename a key or value, select from among the following.
- Key – In the left side panel, select the 'Hamburger menu' icon to the right of the key name and select Rename.
- Value – With the key selected in the left side menu, identify the value in the key you want to rename. Select the pencil icon to the far right side of the Value listing.
- Enter the new Key Name or Value Name.
Delete a Key or Value
- Identify the key or value you want to delete.
- To delete a key or value, select from among the following.
- Key – In the left side panel, select the 'Hamburger menu' icon to the right of the key name and select Delete.
- Value – With the key selected in the left side menu, identify the value in the key you want to delete. Select the trash bin icon to the far right side of the Value listing.
- Confirm that you want to delete the Key Name or Value Name or you can cancel the deletion.
