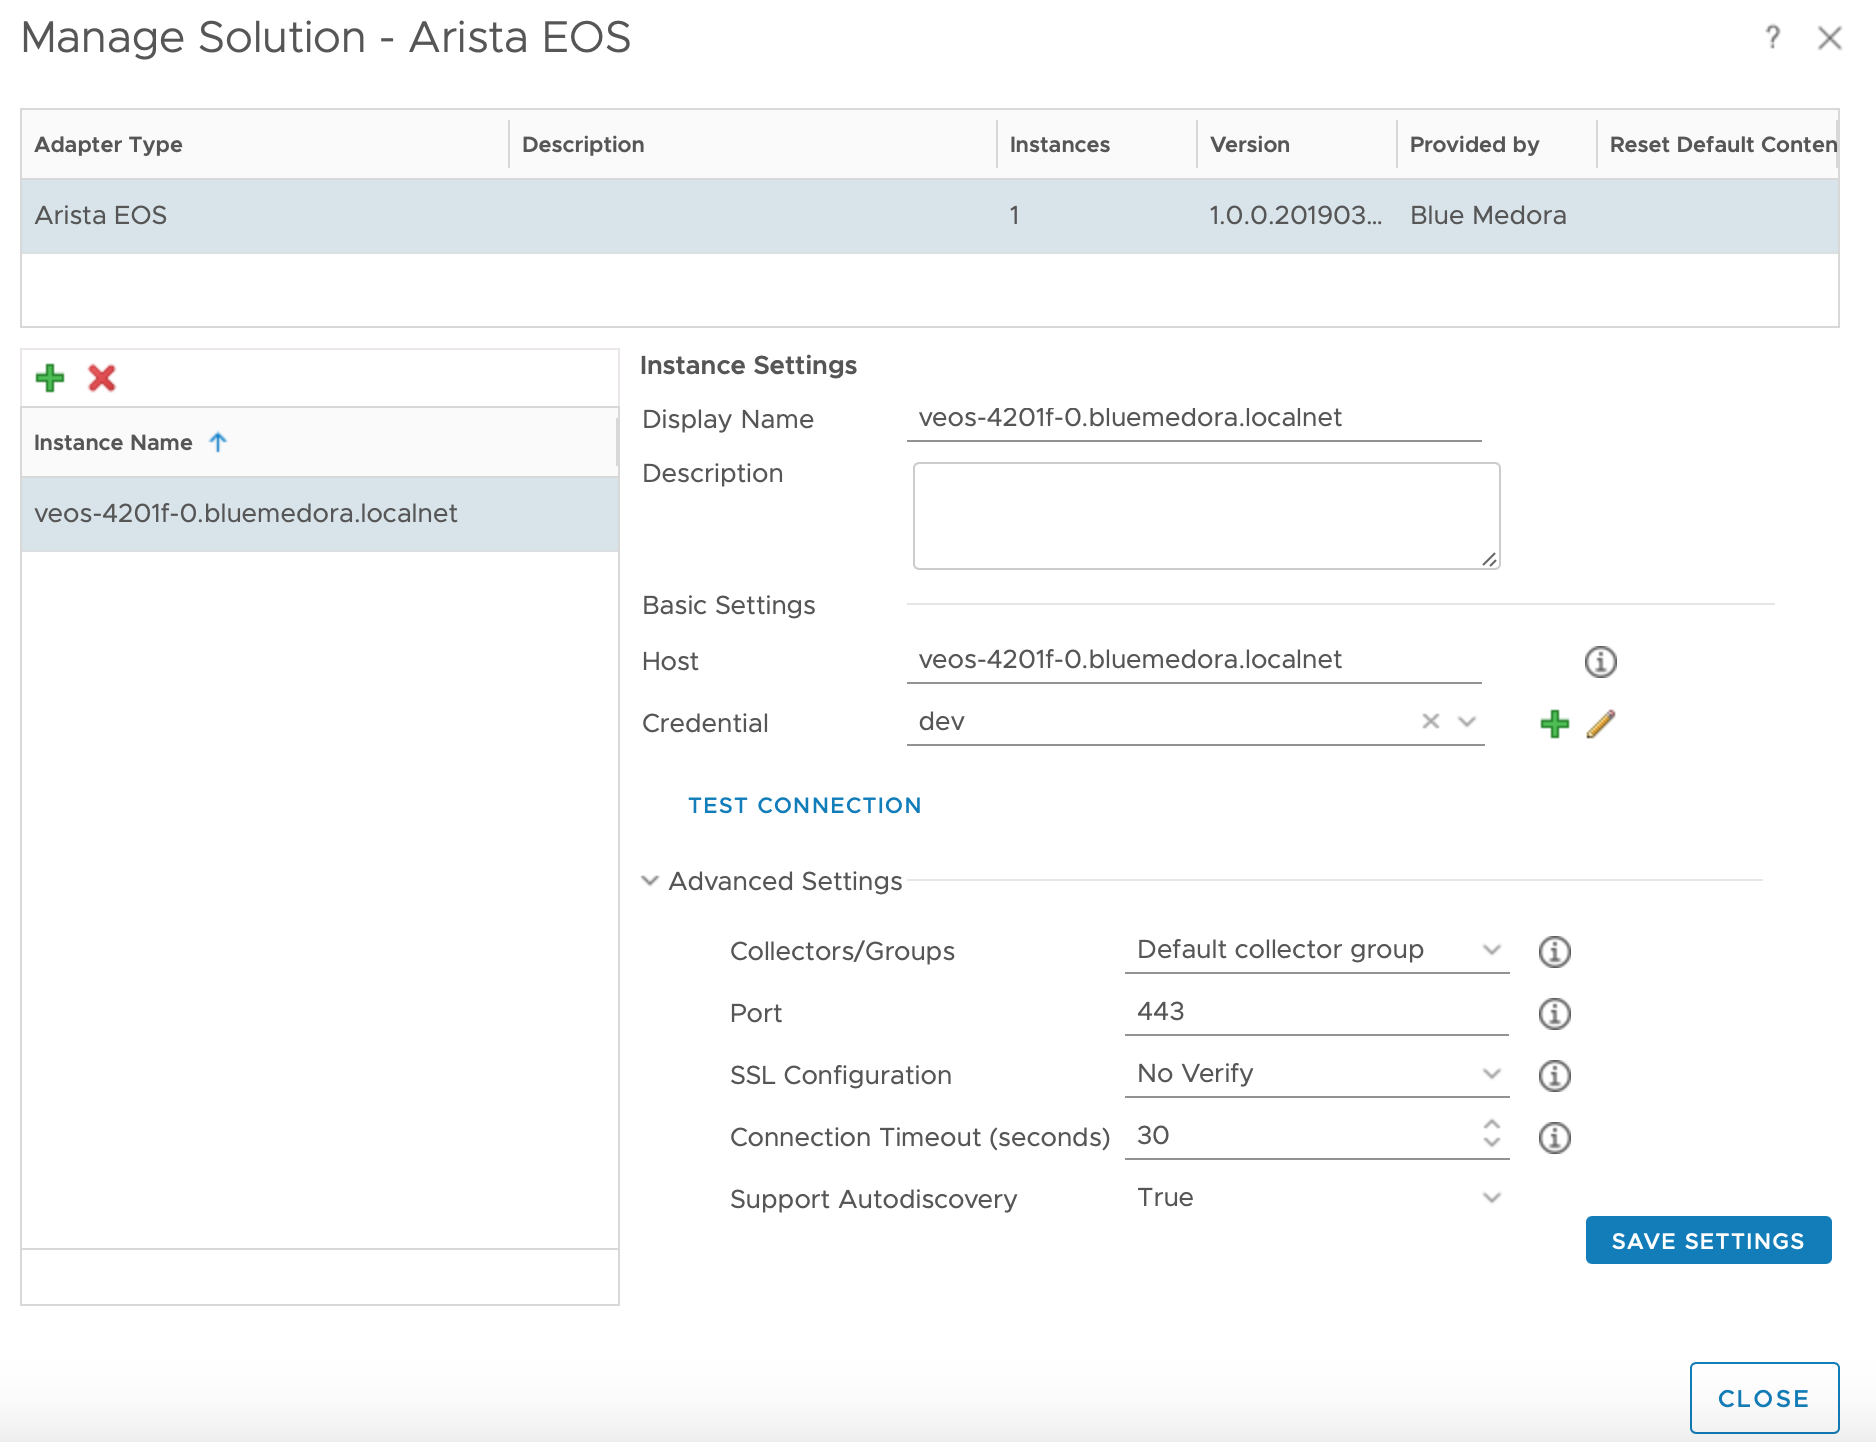
Before you can begin using the Management Pack, you must create an adapter instance to identify the host from which the Management Pack will retrieve data.
Procedure
- From the top navigation bar, select Administration. In the right panel, the Solutions view will be displayed.
- Select Arista EOS from the Solutions list on the right.

- Click the Configure
 icon. The Manage Solution window will appear.
Note: Click the
Add

icon above the Instance Name list on the left to create multiple adapter instances.
- In the Manage Solution window, enter the following information:
- Instance Settings:
- Display Name: A name for this particular instance of the Management Pack
- Description: Optional, but it can be helpful to describe multiple instances of the Management Pack
- Basic Settings:
- Advanced Settings:
-
Collectors/Groups: Default Collector/Group is automatically selected. Click the drop-down menu to select a different collector, if you want to run the collection on a different node.
-
Port: The port for communication to the Arista Switch. The default port is 443.
-
SSL Configuration: Options are No Verify (default value; SSL enabled/certificate not verified), andVerify(SSL enabled/certificate verified). For more information, see: Adding an SSL Certificate to the vROps Truststore (Arista EOS)
-
Connection Timeout (seconds): The amount of time to allow the remote execution of each command to take on the target system. The default value is 30.
- Support Autodiscovery: By default this is True, which allows the Management Pack to create resources and relationships in vROps, then collects data for the discovered resources after the main collection query runs. This should not be set toFalse.
- Click Test Connection to ensure the Management Pack can connect to the specified host. Click Save Settings and Close to save your configuration.
What to do next
To validate data collection, see: Validating Data Collection (Arista EOS)

 icon. The
  icon above the Instance Name list on the left to create multiple adapter instances.
